IMPORTANT! Please make sure to design your card template and add the fields you want to be displayed on your cards BEFORE you upload your CSV file.
What to Include in your CSV file:
Card Fields: (Name, Title, Major, etc.). Create columns in your file for each card field that you added to the card template. You can have one column for Full Name or two separate columns for First Name and Last Name. If you’d like to import photos via a zip file, create a column with image file names as they appear in the zip folder (must include file extension). You can also import ID photos via URL by creating a separate column with image URLs.
Recipient Email Address: If you are planning to issue cards via email, include email addresses for each cardholder in your file.
Unique Identifier: Unique Identifier is used to verify cardholder identity before they can install an ID card for your institution in the app. It can be an email address or ID number (whichever you selected while designing your card template). This won’t be displayed on the card itself.
Security Question(s): Security Questions are used to verify cardholder identity before they can install an ID card for your institution in the app. At least one security question is required. Although you can use anything you’d like as your security questions, some of the examples include the date of birth, phone number or the last 4 digits of a social security number. This won’t be displayed on the card itself.
Card ID: This is a unique card ID used to identify each card in the system. This won’t be shown to your cardholders or displayed on the card itself.
Barcode Value (Optional): This is the value displayed in the barcode. You can either import your barcode values (typically it is a cardholder ID number) or you can skip this field if you selected the option to auto-generate barcode values while designing your card template.
Expiration Date (Optional): Expiration dates can be added to your ID cards through a CSV import once you enable this feature in the Card Template Builder. Make sure all dates are written in the same format under the Expiration Date column.
Note: You can use the same value for multiple fields. For example, you can use a cardholder ID number as a Card ID, Unique Identifier, and Barcode Value. You don’t have to have separate columns for each.
Start Importing
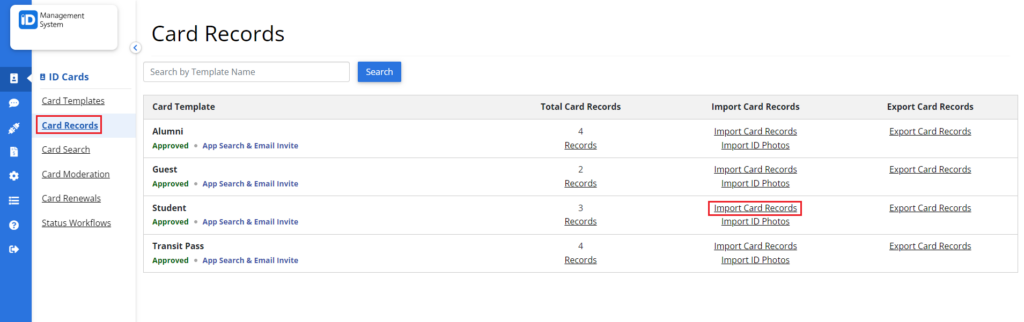
Step 1: Log in to your IDMS account and from the Card Templates page click on “Card Records”. Once you are on the Card Records page, click on “Import Card Records” for your chosen template.
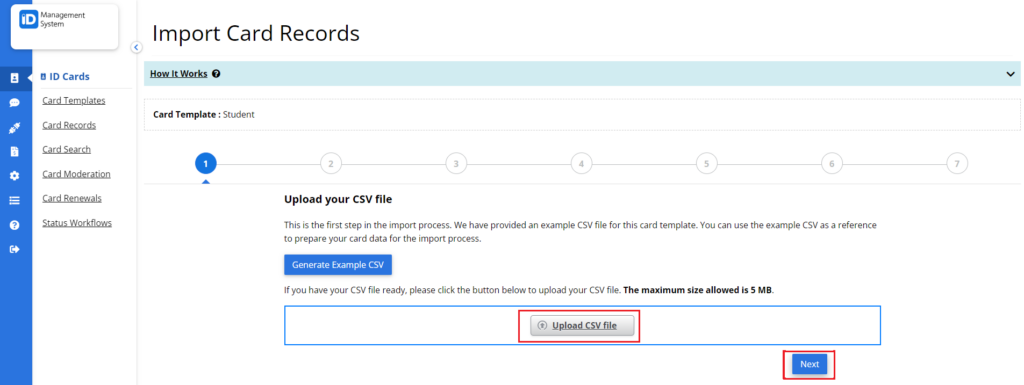
Step 2: Upload your CSV file. If you need help preparing your file for import, you can download the example CSV. It will show exactly what data needs to be added to your spreadsheet based on how you customized your card template.
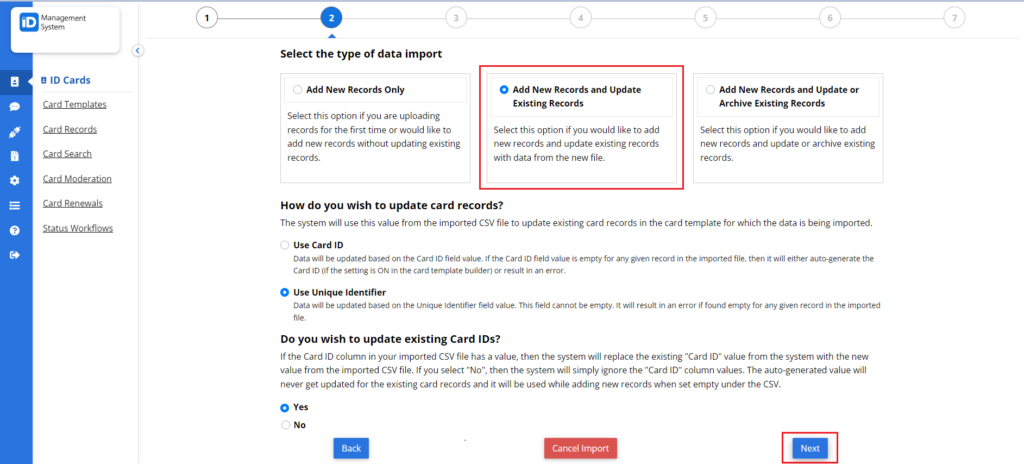
Step 3: Select the type of data import out of the following three options.
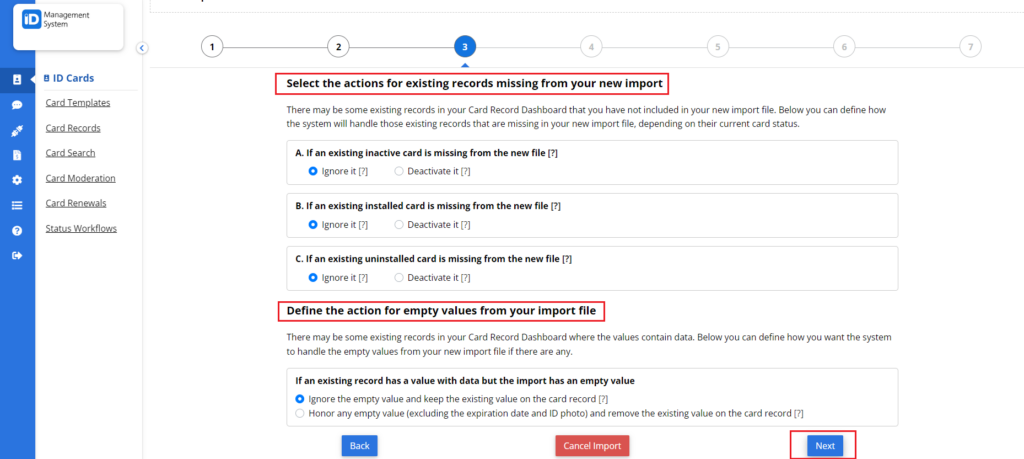
Step 4: Select the actions you want to take place for the existing records missing from your new import if there are any.
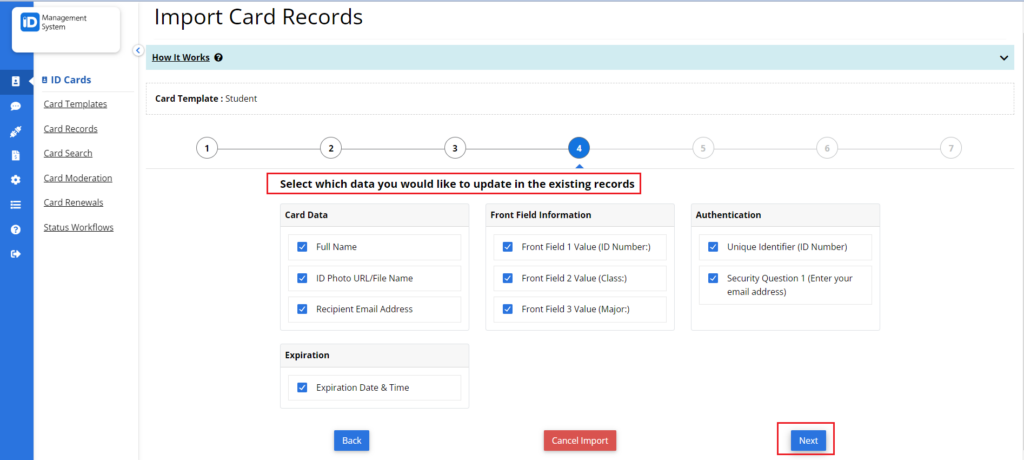
Step 5: Select the fields that you would like to update for the existing card records or deselect them if you don’t want them updated. Once you have selected the fields, click ‘Next’.
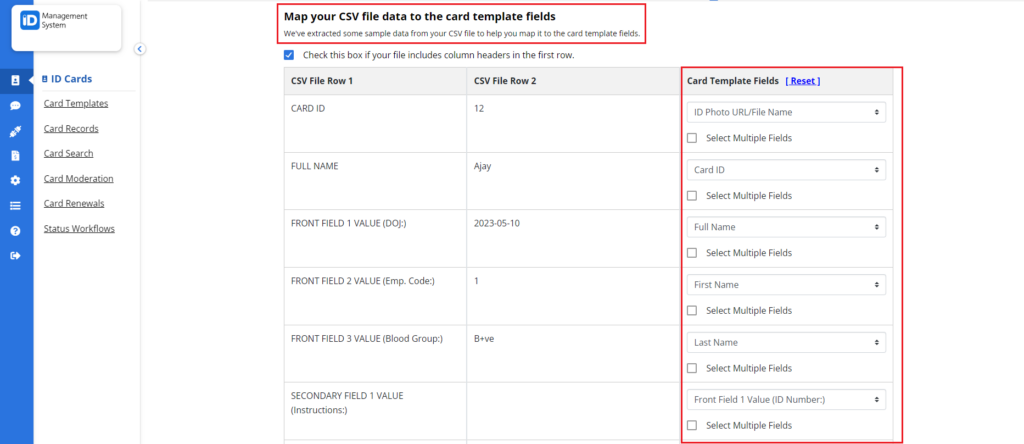
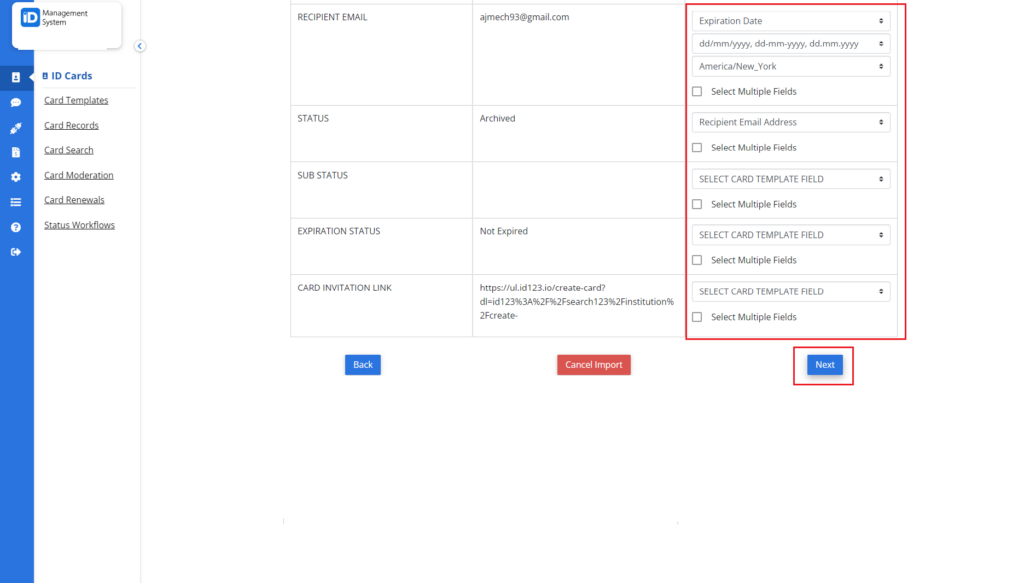
Step 6: Match the columns from your CSV file to the fields in your card template. Click on ‘Import Card Records’ to finalize your data import.
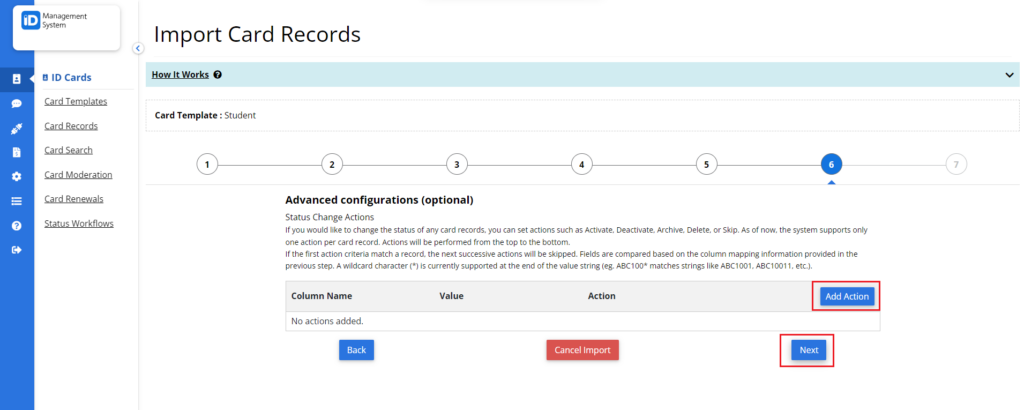
Step 7: Add advanced configurations (Optional).
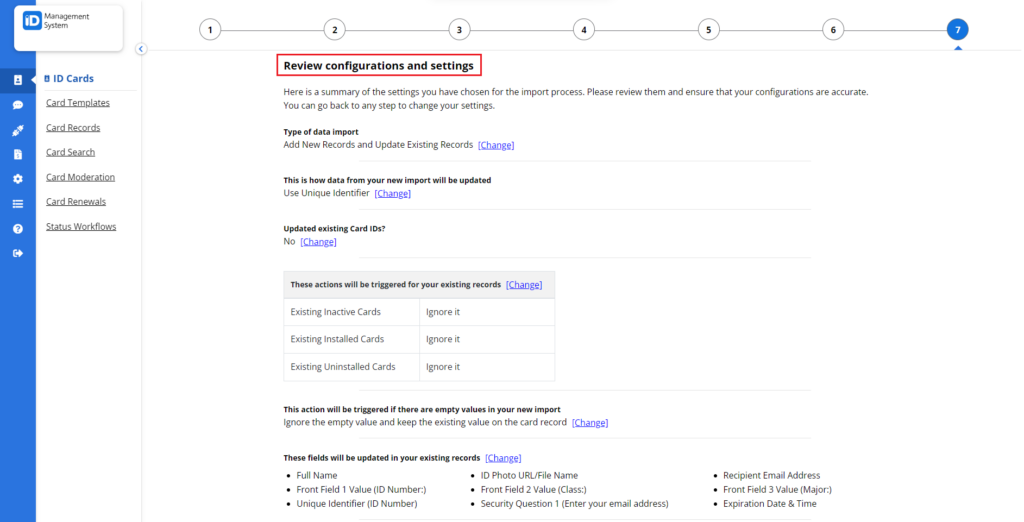
Step 8: Review your configurations and settings. When finished, click on “Start Importing Data”.

Note: CSV imports can take from 3 to 30 minutes to process depending on the size of the CSV file. Once processed, your card records will be available to view on the “Card Record Dashboard” page.
All set! If you’re having any issues or have questions about importing card records to your IDMS account, do not hesitate to chat with us!
.
.