- Step 1: Navigate to the Cloud Printing Menu
- Step 2: Click the ‘Settings’ button next to ‘HID Fargo Connect’
- Step 3: Configure your Connection
- Step 4: Enable the Integration
- Step 5: Navigate to the ‘Print Templates’ Page
- Step 6: Select ‘HID Fargo Connect’
- Step 7: HFC Configuration
- Step 8: ID123 Configuration
- Step 9: Field Mapping
- Step 10: Set Print Template
- Step 11: Select Print Template
- Step 12: From the Card Records page Select ‘View Records’
- Step 13 (Optional): Add Card Records
- Step 14: Request Print
- Step 15: Print Queue
Step 1: Navigate to the Cloud Printing Menu
When you are ready to configure your HFC integration, navigate to the “Cloud Printing” page under the “Integrations” menu.

Step 2: Click the ‘Settings’ button next to ‘HID Fargo Connect’
Select the “HID Fargo Connection” integration and click the “Settings” button to configure the connection setting to HFC.

Step 3: Configure your Connection
Configure your connection settings to HFC by entering your API key, selecting your default card printer to use with HFC, and choosing whether to always use the default print or select a printer each time you print a card. When you are done, click the ‘Save Settings’ button.

Step 4: Enable the Integration
Enable the HFC integration by clicking the toggle next to the ‘Settings’ button.

Step 5: Navigate to the ‘Print Templates’ Page
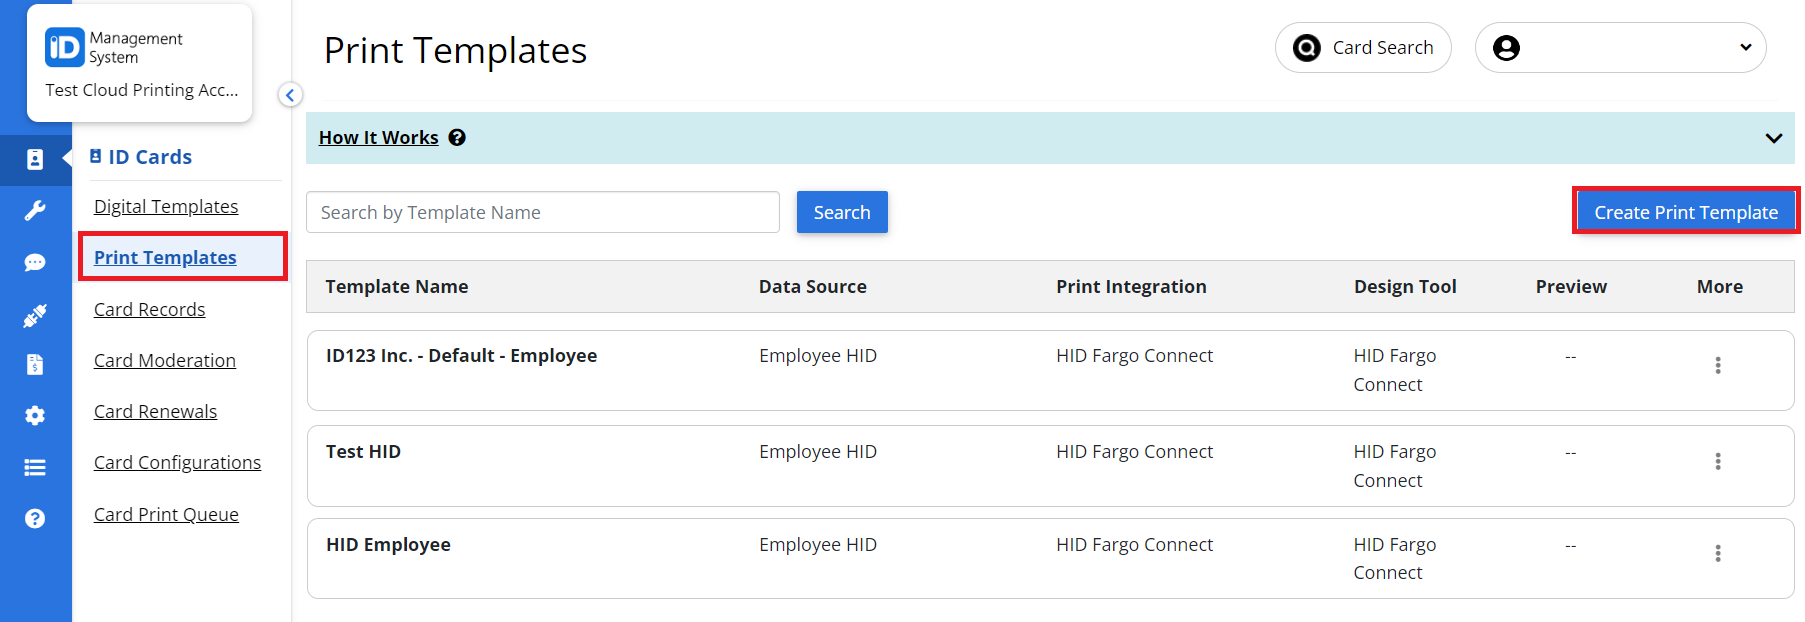
Navigate to the “Print Templates” page under the ID Cards left menu and click the “Create Print Template” button in the top right corner of your page.

Step 6: Select ‘HID Fargo Connect’
Select the ‘HID Fargo Connect’ design tool and integration.

Step 7: HFC Configuration
Under the ‘HFC Configuration’ step, select the ‘HFC Organization Name’, ‘HFC Production Profile’, and ‘HFC Card Template’. When you are done, click the ‘Next’ button to continue.

Step 8: ID123 Configuration
Under the ‘ID123 Configuration’ step, enter a name for your ID123 print template and select a data source to use with your print template. The data source will determine which ID123 digital card template fields are used as the basis for designing your print template and can not be changed after being selected. When you are done, click the ‘Next’ button to continue.

Step 9: Field Mapping
Under the ‘Field Mapping’ step, map all required HFC cloud print variables to the corresponding ID123 variables. When you are done mapping the variables click the ‘Save’ button to save your configuration.

Step 10: Set Print Template
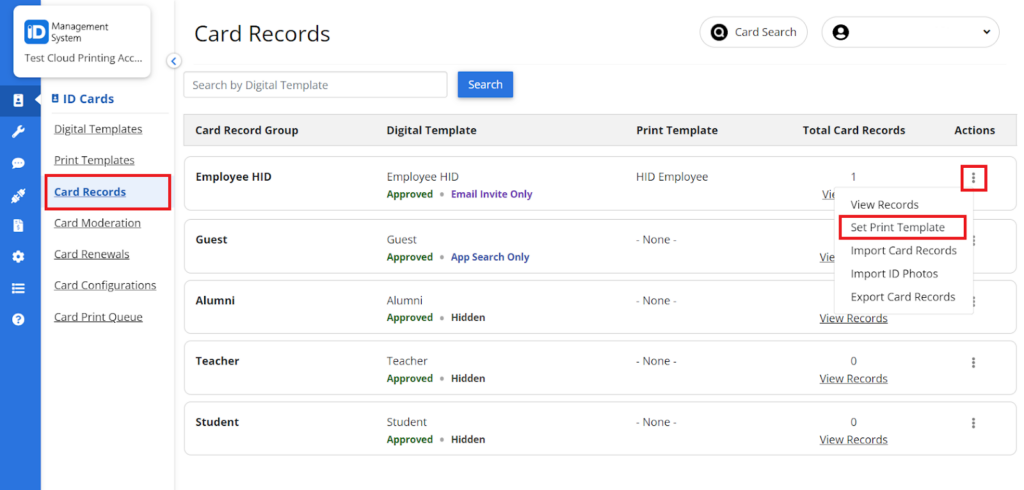
Navigate to the ‘Card Records’ page under the ‘ID Cards’ menu and next to the card record group you want to use the print template, select the ‘Set Print Template’ option.

Step 11: Select Print Template
In the ‘Set Active Print Template’ popup select the print template you wish to use with your card record group. You can only have one print template active with a card record group at a time. When you are finished, click the ‘Save Changes’ button.

Step 12: From the Card Records page Select ‘View Records’
Navigate back to the ‘Card Records’ page under the ‘ID Card’ menu and click the ‘View Records’ link in the card record group you just assigned the print template.

Step 13 (Optional): Add Card Records
If needed you can add card records to your card record group one-by-one or in bulk. If you need assistance adding card records to your card record group, you can reference the Importing New Card Records in Bulk via CSV or Adding Card Records One by One knowledge base articles.
Step 14: Request Print
Once you are on the ‘Card Record Dashboard’, click the ‘Request Print’ button next to the desired card record you want to print.

Step 15: Print Queue
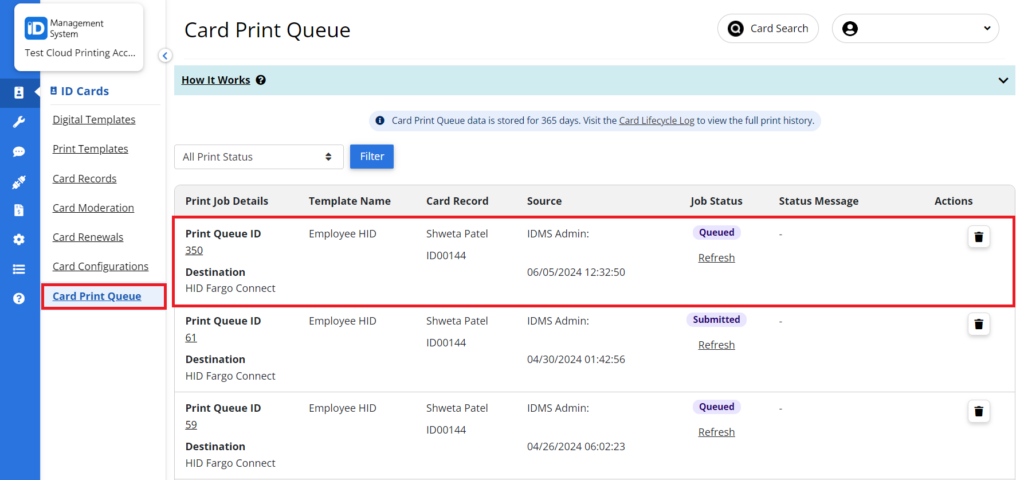
If needed you can navigate to the ‘Card Print Queue’ page under the ‘ID Card’ menu to manage and view the status of a requested print job.


