Step 1: Log in to the ID Management System
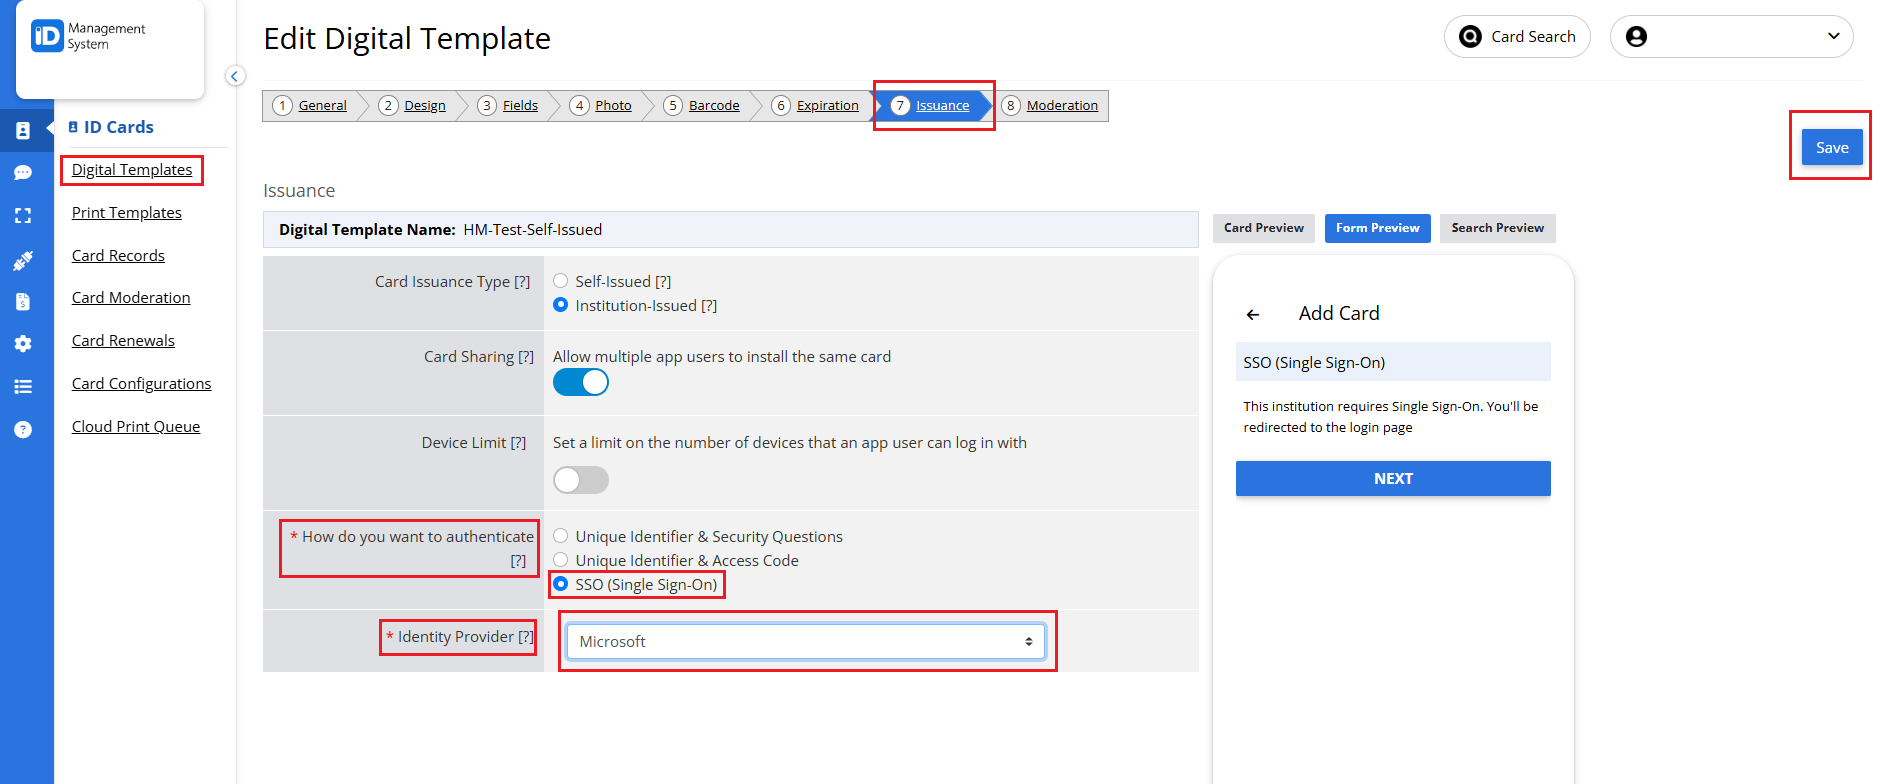
Log in to the IDMS, navigate to the left panel, and click ‘Digital Templates’.

Step 2: Select your Card Template
Under the ‘More’ column, click the three dots on the desired template, then click ‘Edit Template’.

Step 3: Enable Microsoft Single Sign On
Go to the ‘Issuance’ tab, and in the ‘How do you want to authenticate?’ section, choose the ‘SSO (Single Sign-On)’ option. Once SSO has been selected as the authentication option, choose ‘Microsoft’ as the identity provider, and click the ‘Save’ button to finish.
Note: Before saving, ensure you have completed any other required fields in your card template builder.

That’s it! SSO is now configured with Microsoft as the identity provider for this card template. App users can now install their card using SSO in the digital ID card app.
