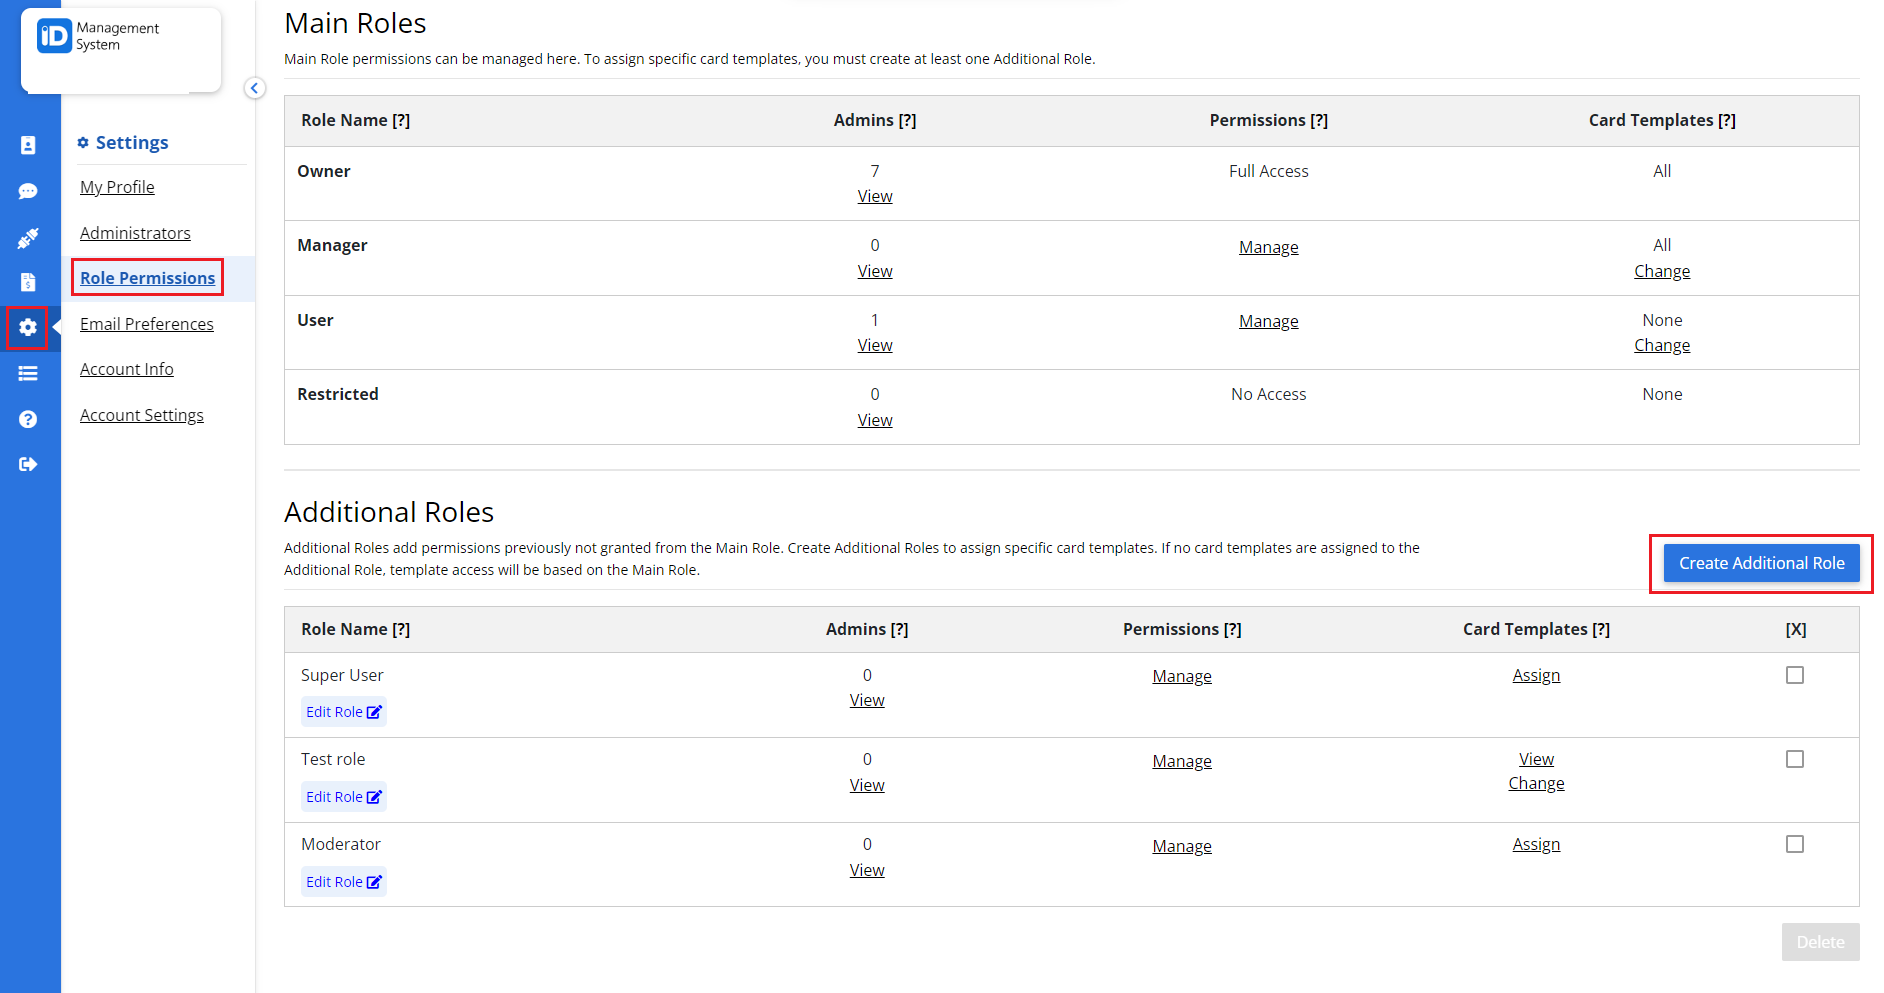
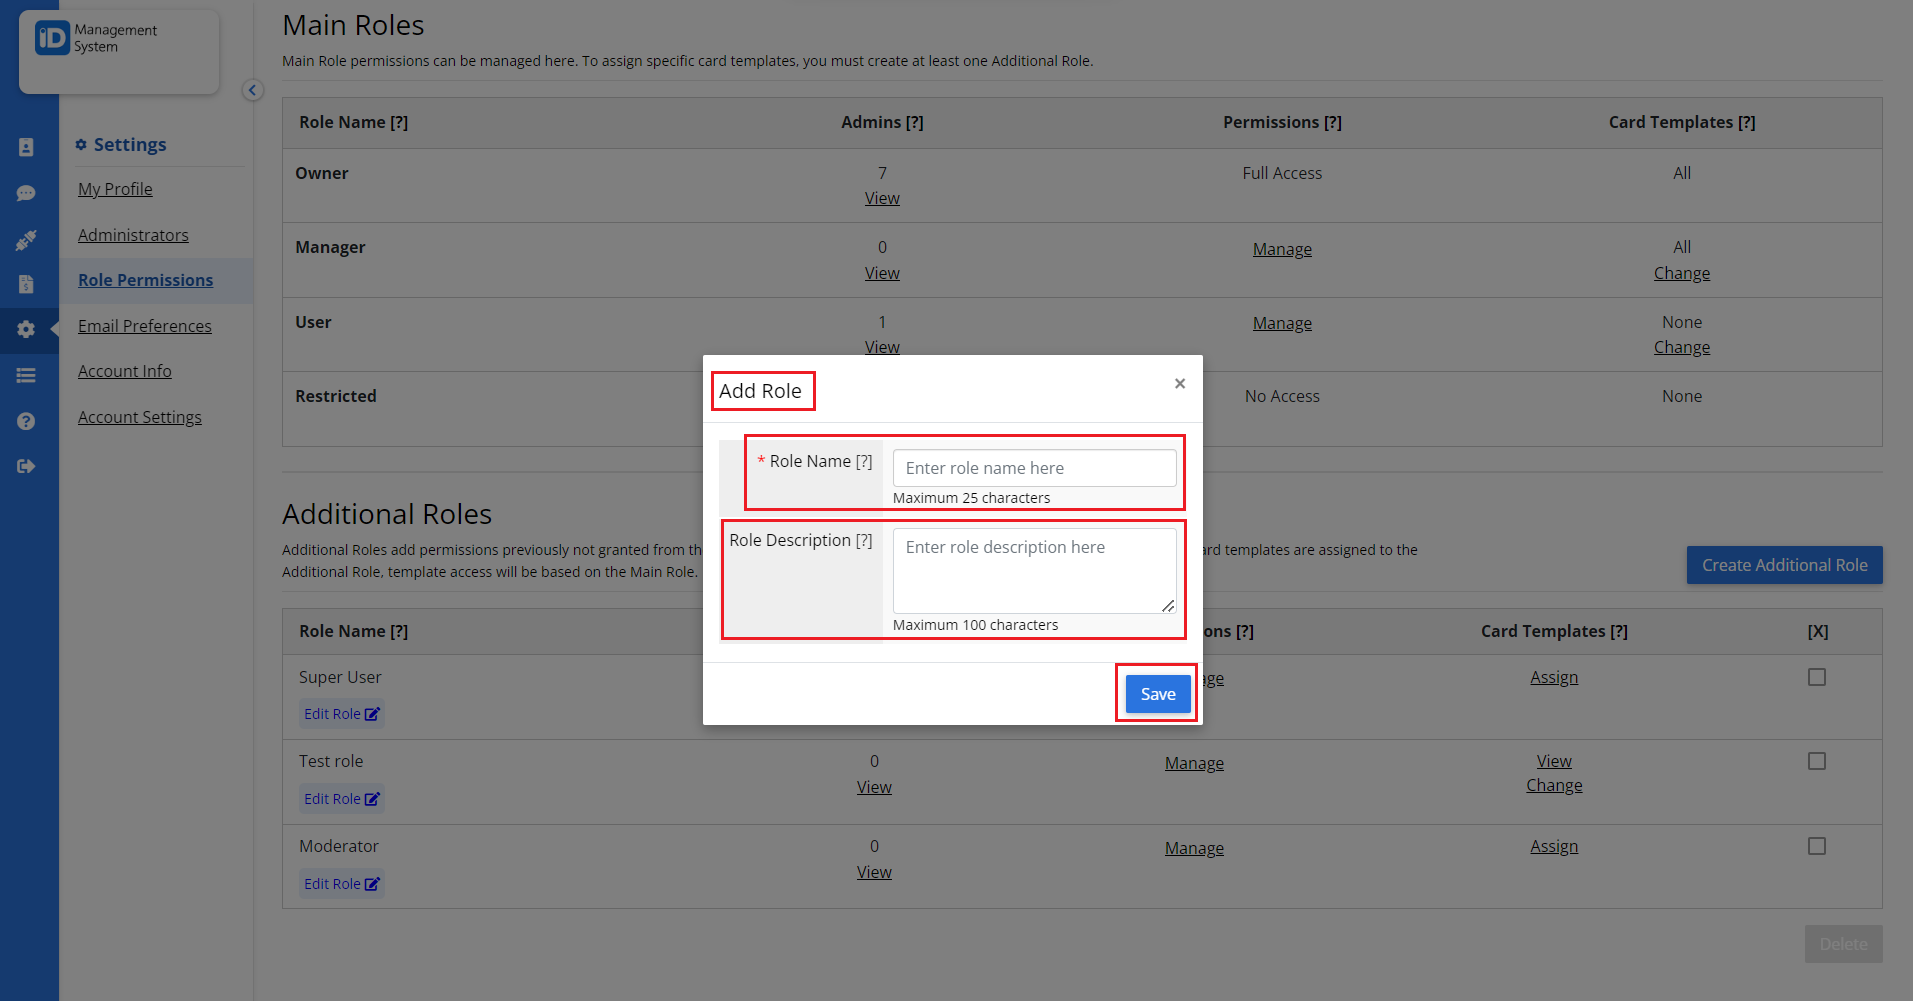
Step 1: Create Additional Role
Go to your Role Permissions page and click the ‘Create Additional Role’ button. Then name the role to your liking, add a description about the role, and hit ‘Save’ when you’re finished.
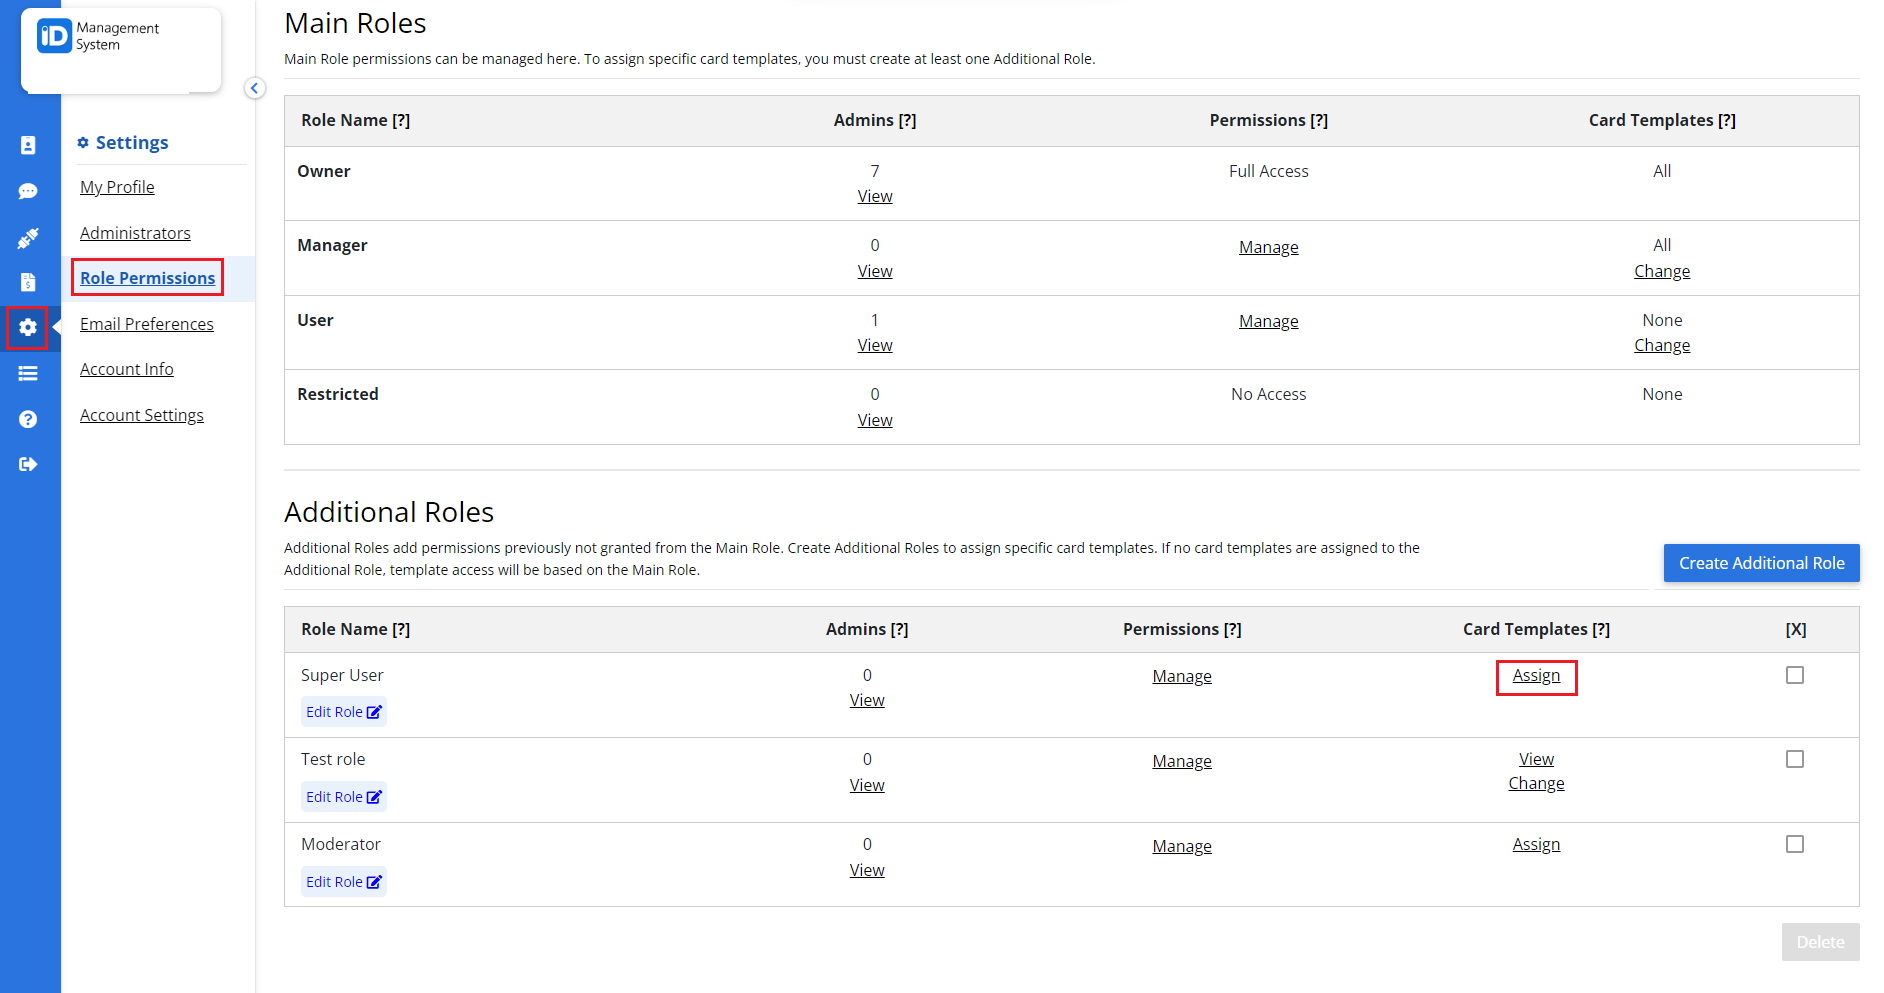
Step 2: Assign Card Templates
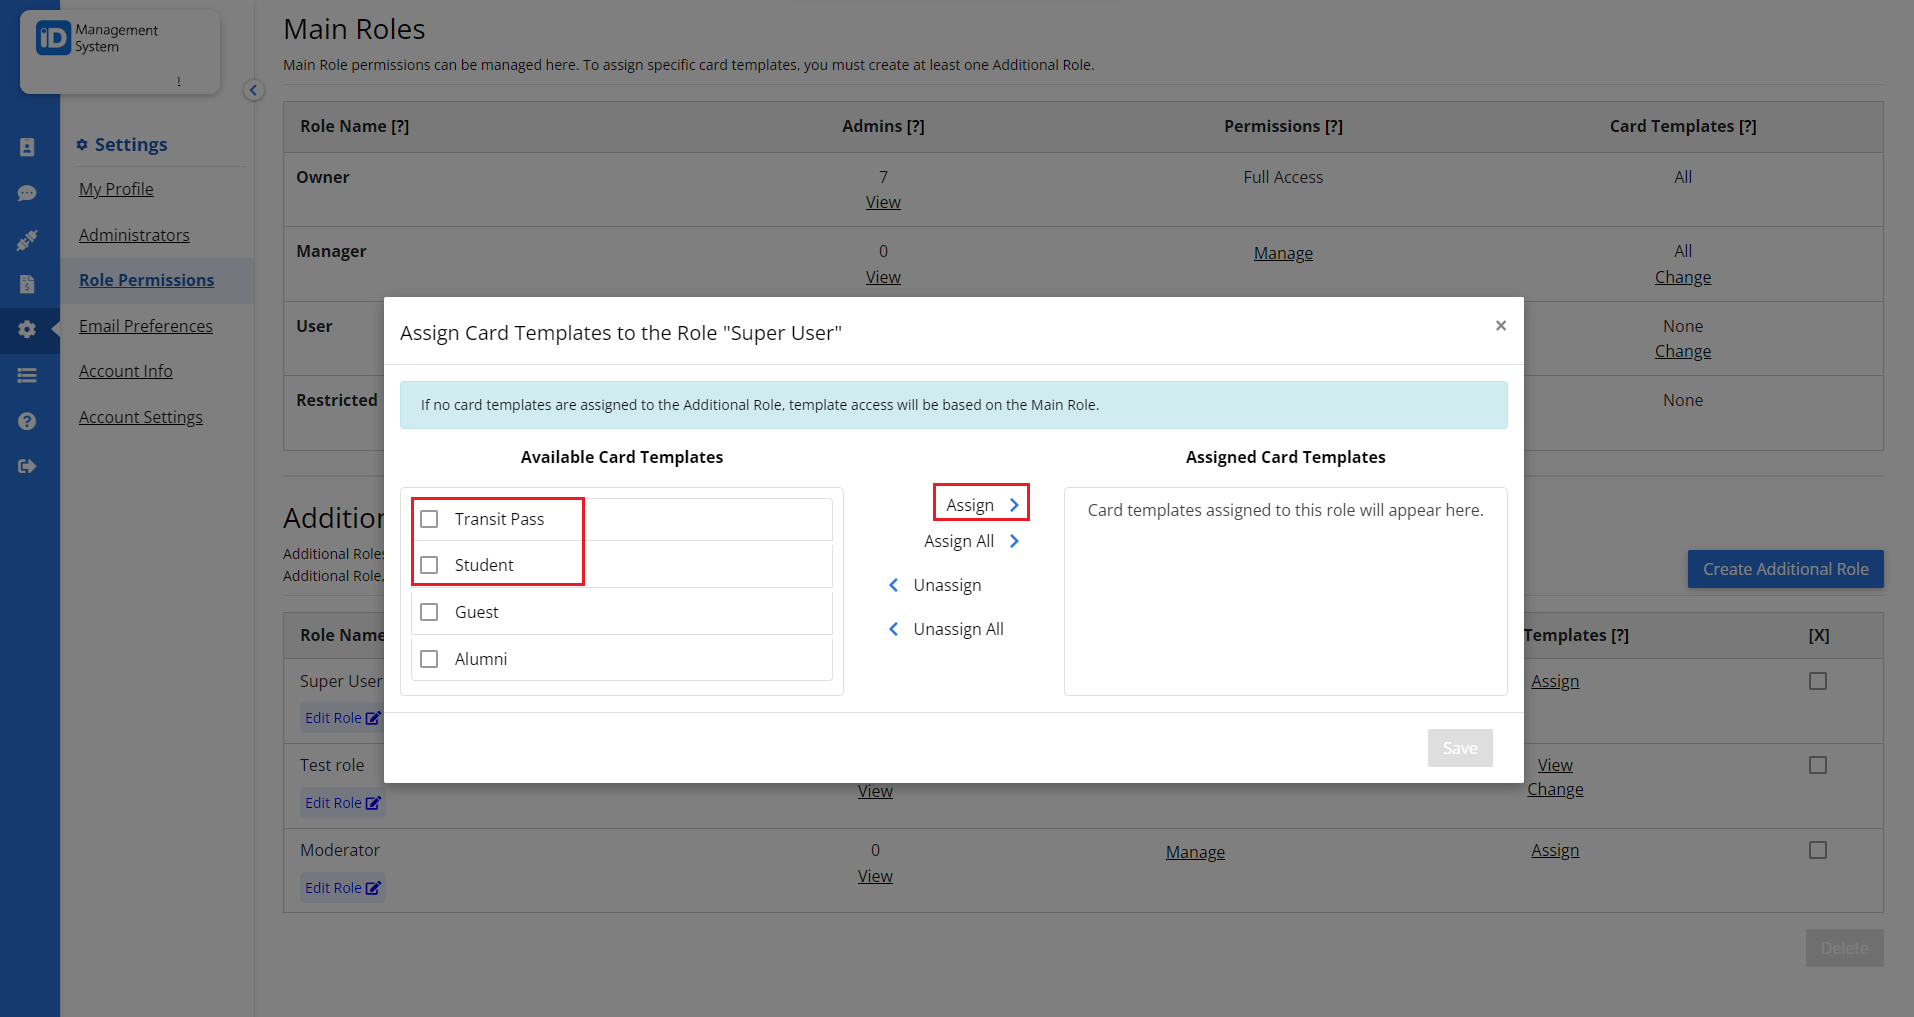
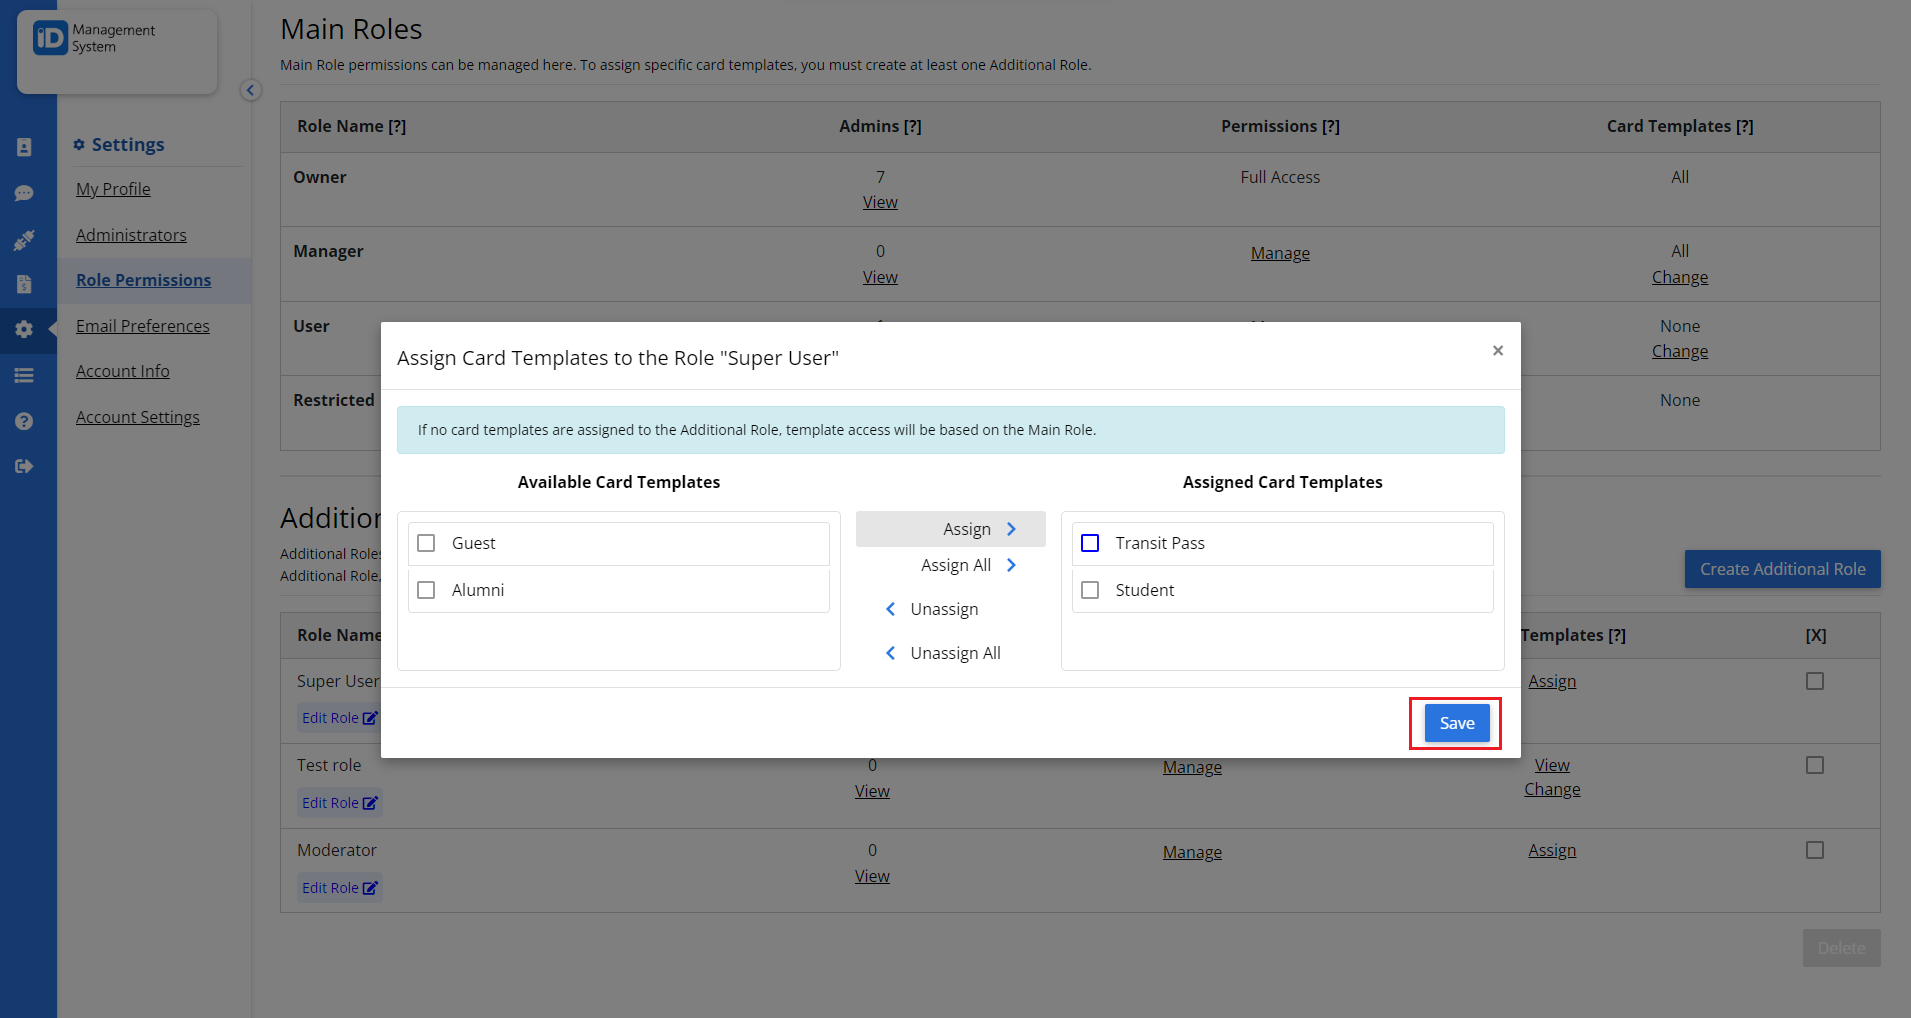
Click the ‘Assign’ button on the newly created role. Then choose the template(s) that you’d like the admin to have access to and then click the ‘Assign’ button. Click ‘Save’ when finished.
Note: You can also edit the permissions for the newly created role by clicking on ‘Manage’.
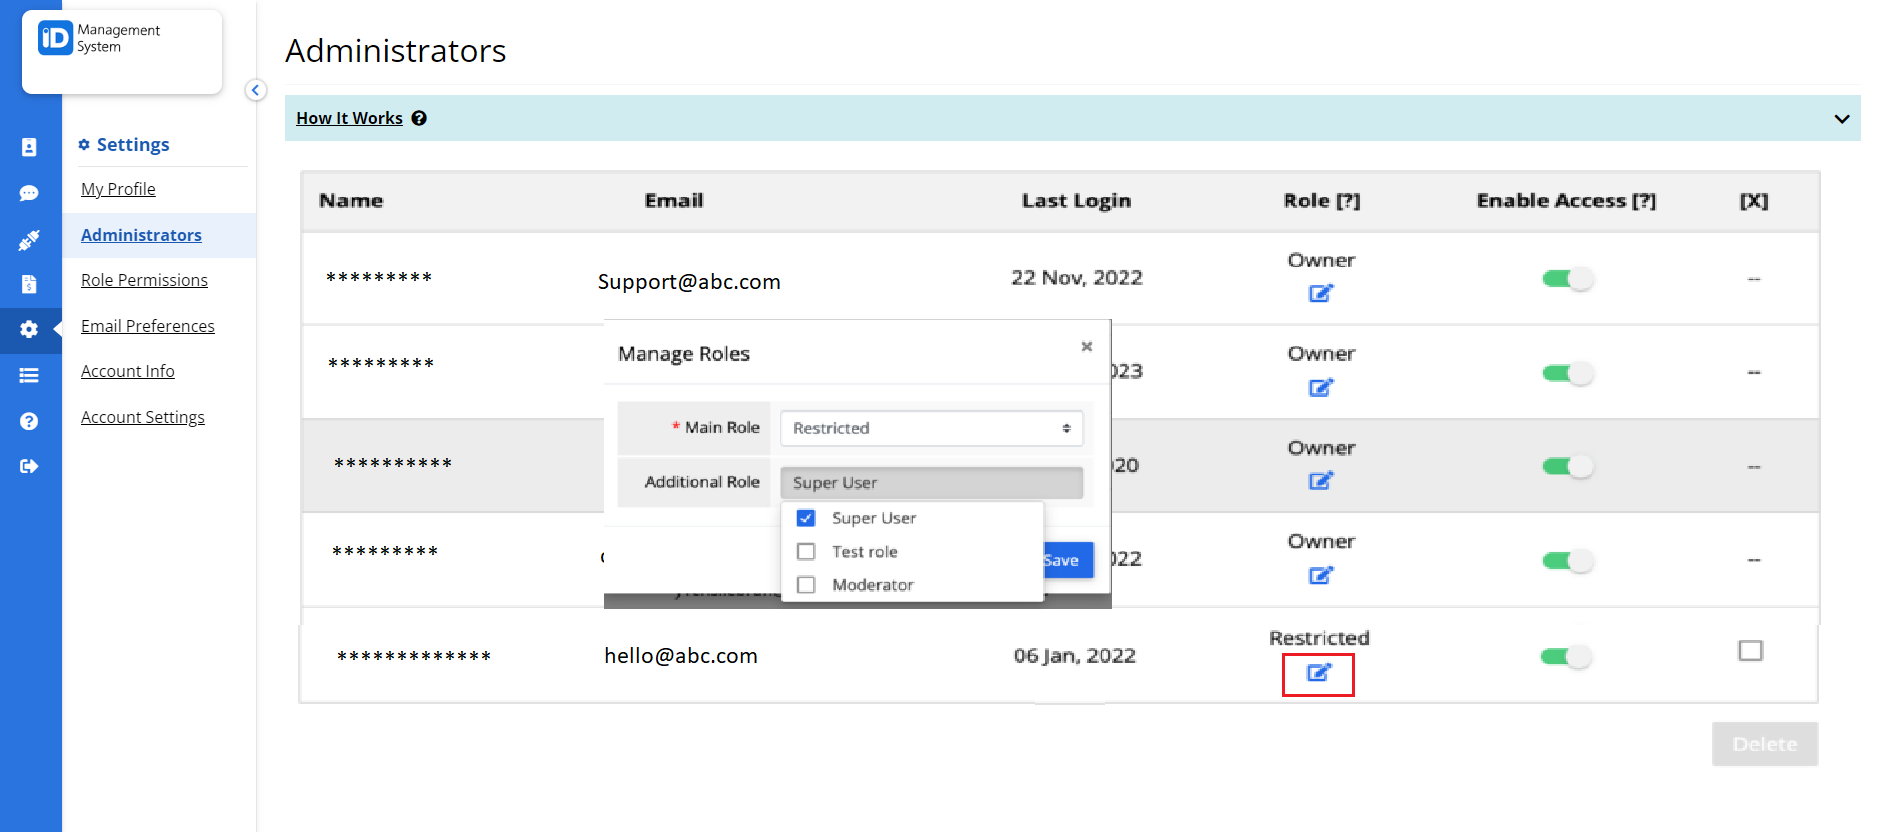
Step 3: Navigate to Administrators
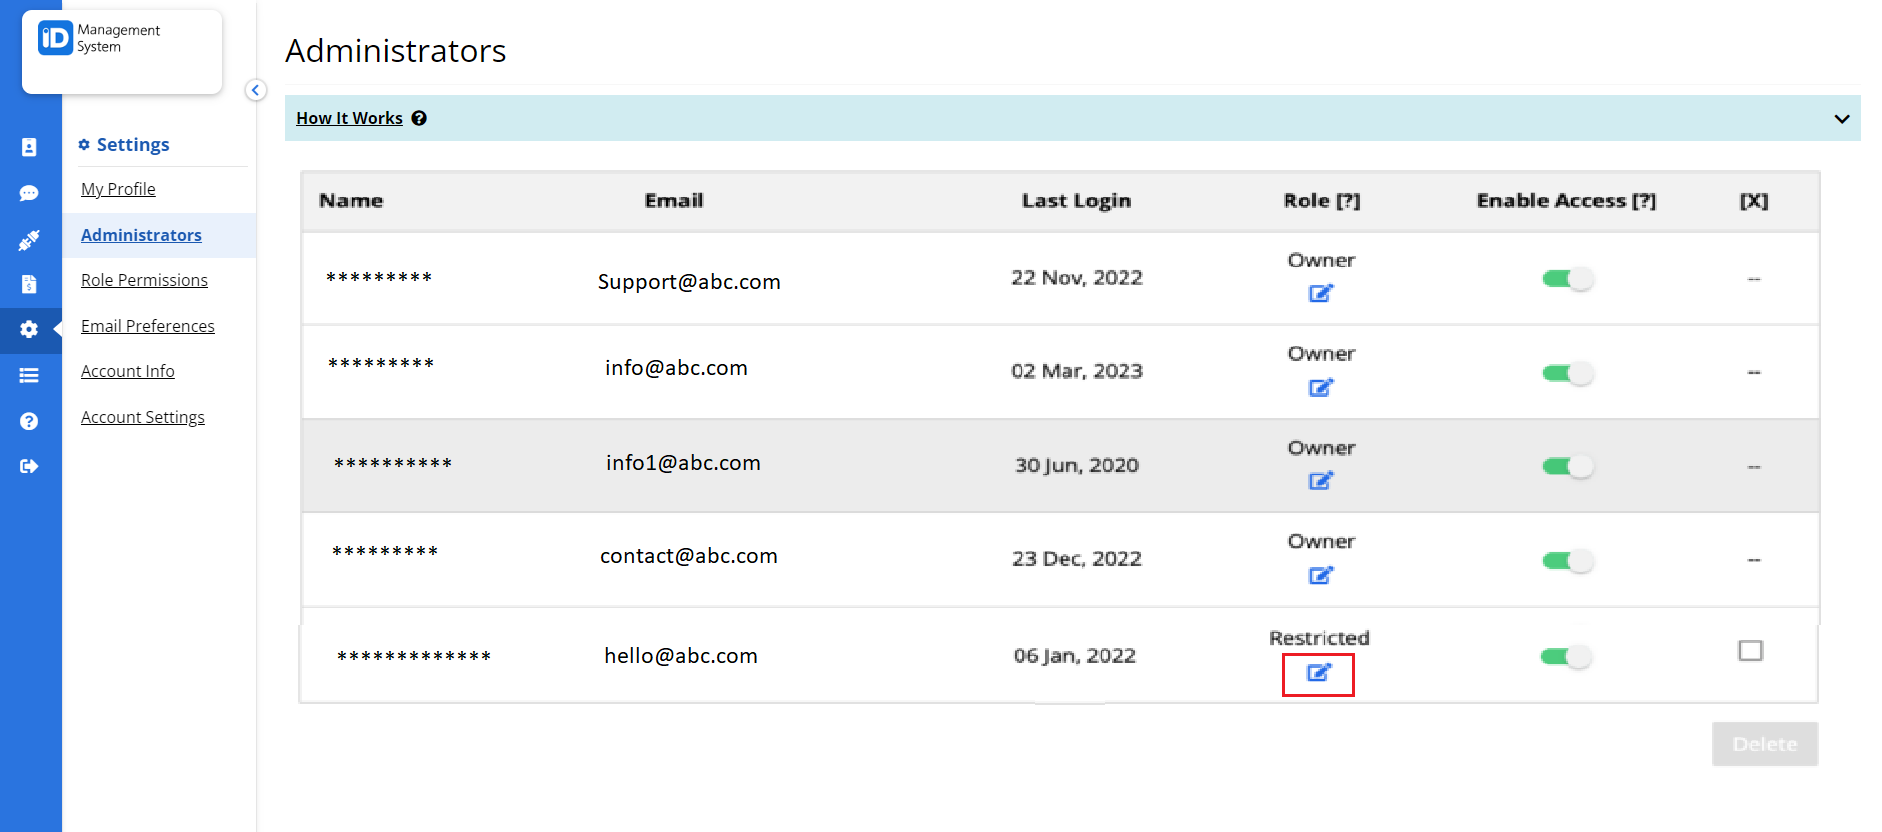
Next, go to your ‘Administrators’ page and click on the ‘edit’ icon for the preferred admin under the ‘Role’ column.
Step 4: Assign Admin Role
Select the newly created role(s) then hit ‘Save’ when you’re done. You’re all set! The admin will only now see the template(s) that you assigned to that role.
Note: You can also assign multiple admins to that role as well.
