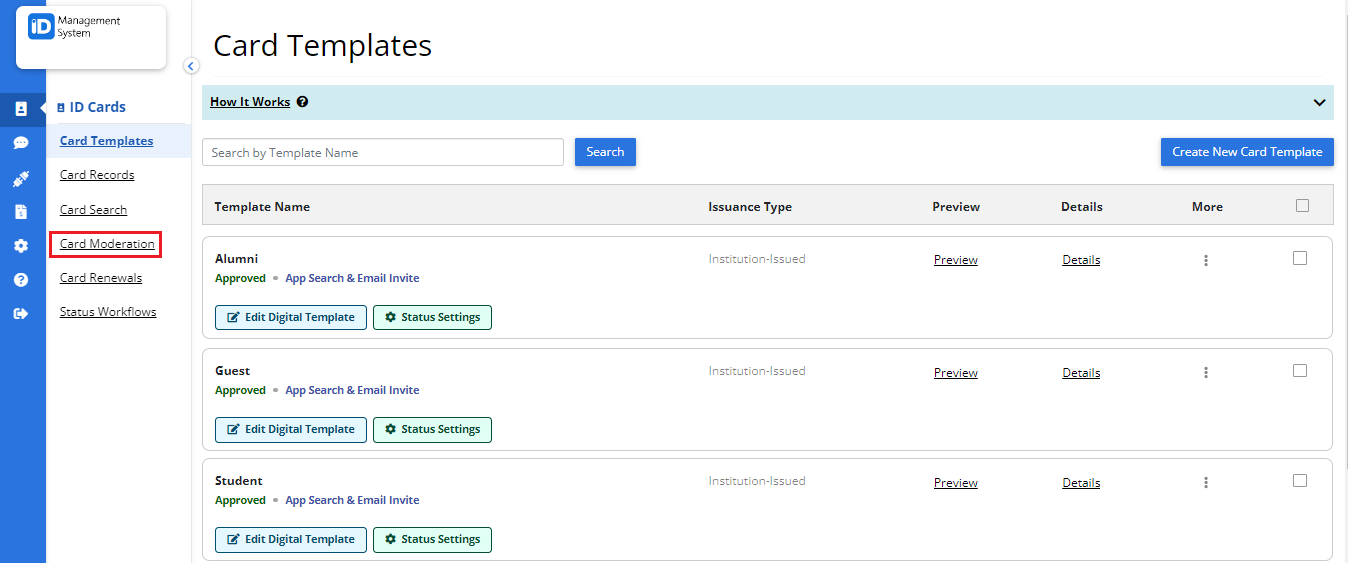
Step 1: Click “Card Moderation”
Click on the “Card Moderation” tab shown on the left navigation menu.
Step 2: Choose the Card Template to Moderate
Choose the card template you would like to moderate data within by clicking “Moderate”.

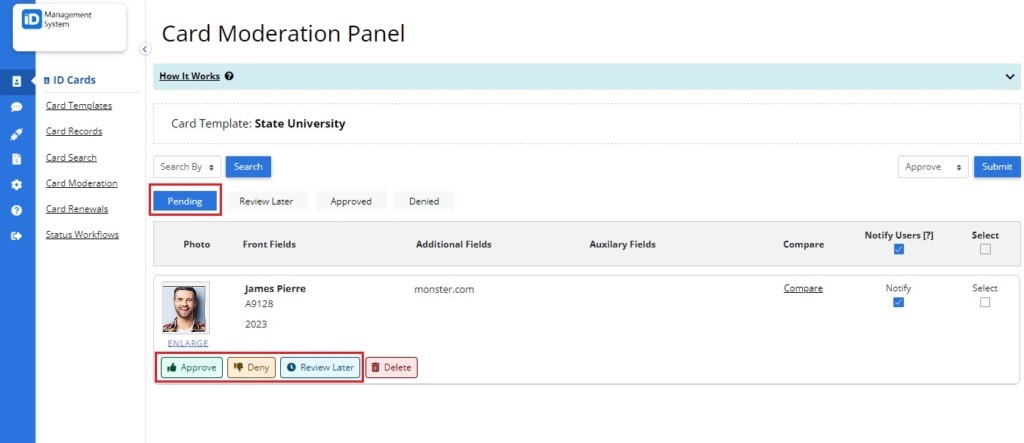
Step 3: Review Photos or Card Data
You can start approving/denying photos or card data (depending on the moderation options you chose in your card template builder) by clicking “Approve” or “Deny” or you can mark it as “Review Later” to review it a later time.
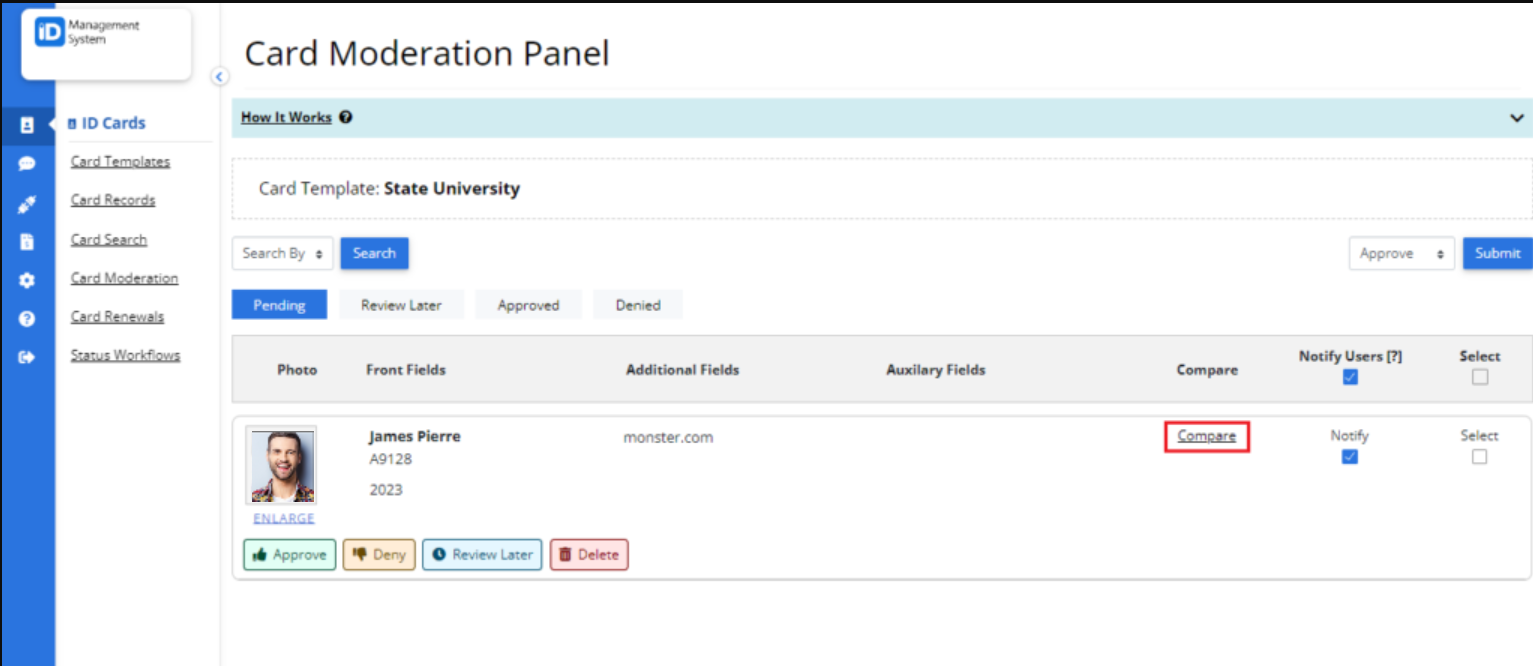
Optional: Compare Card Data
Compare old card data with newly submitted card data by clicking “Compare” before approving.
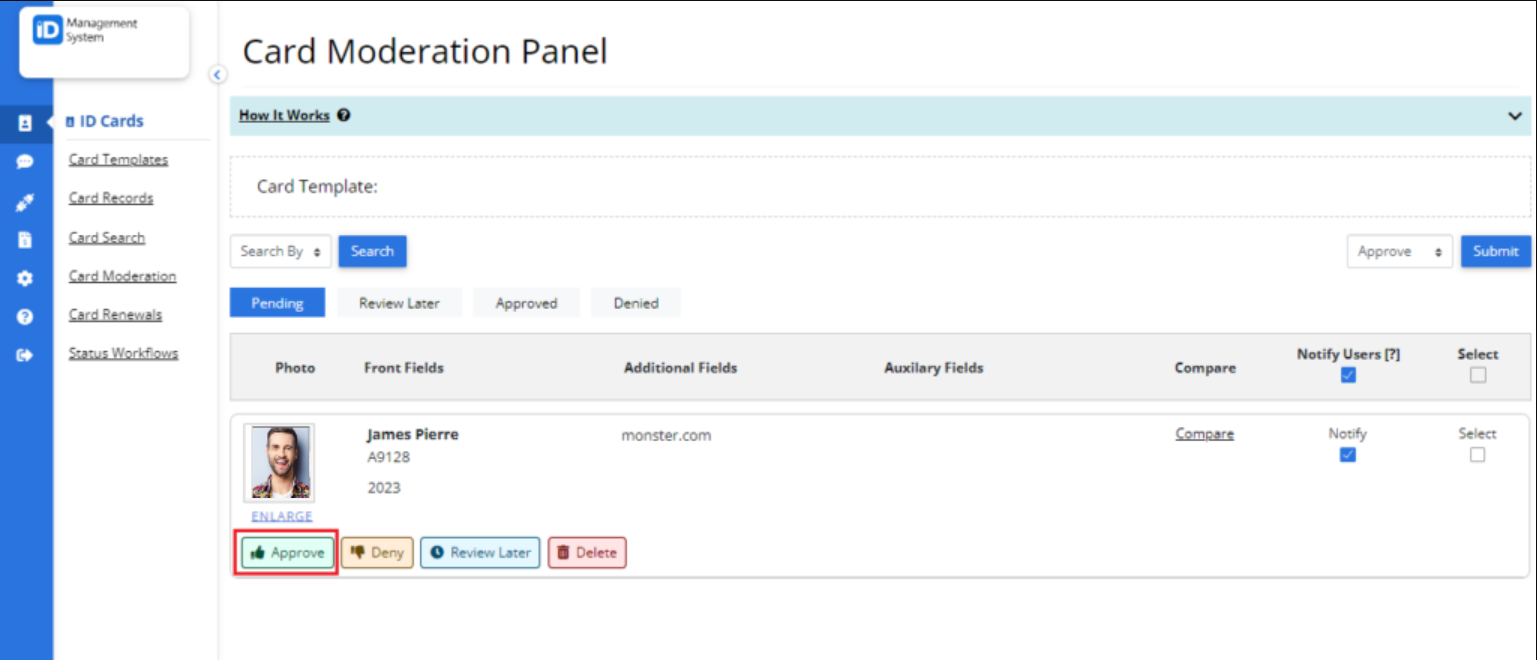
Step 4: Approve/Deny Moderation
If the new card data meets all of your requirements, you can approve the card by clicking “Approve”. When denying card data, you can include a message for the app user to know why you rejected it.
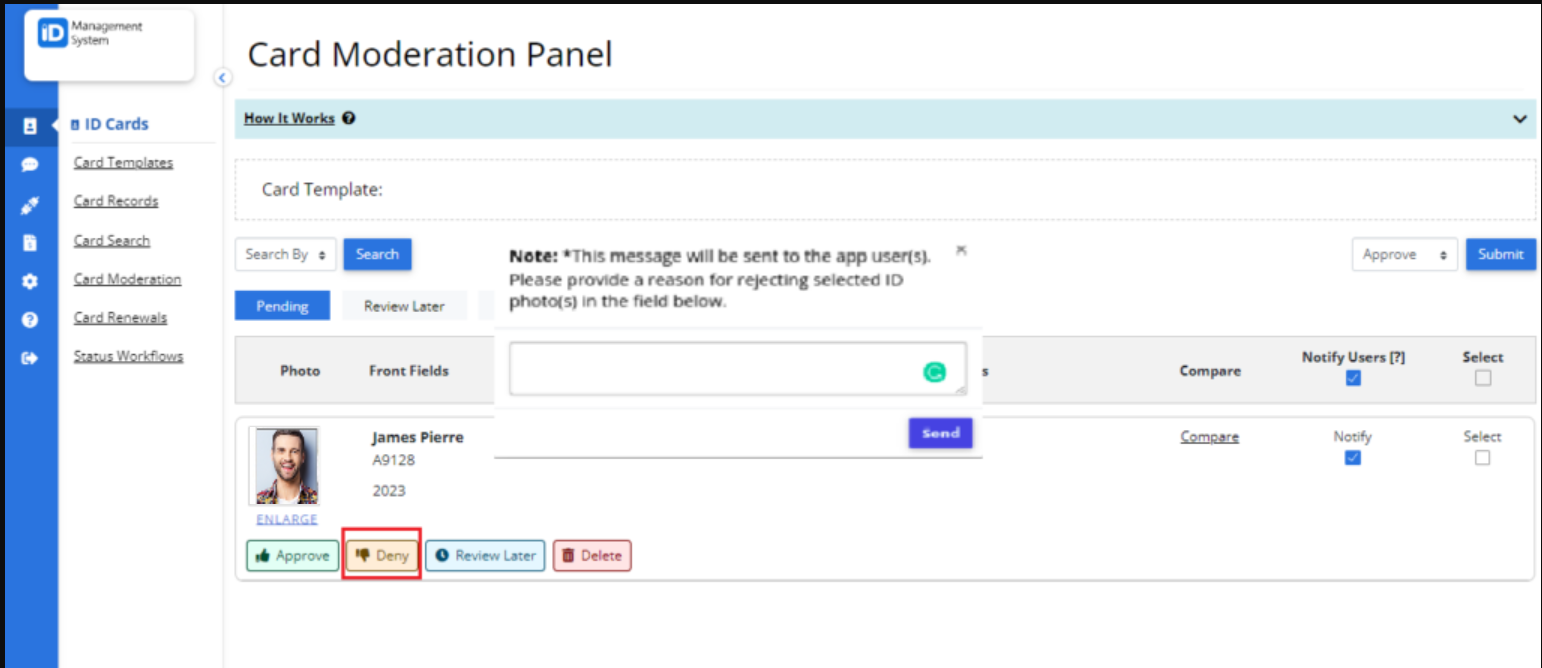
Step 5: Notify Users
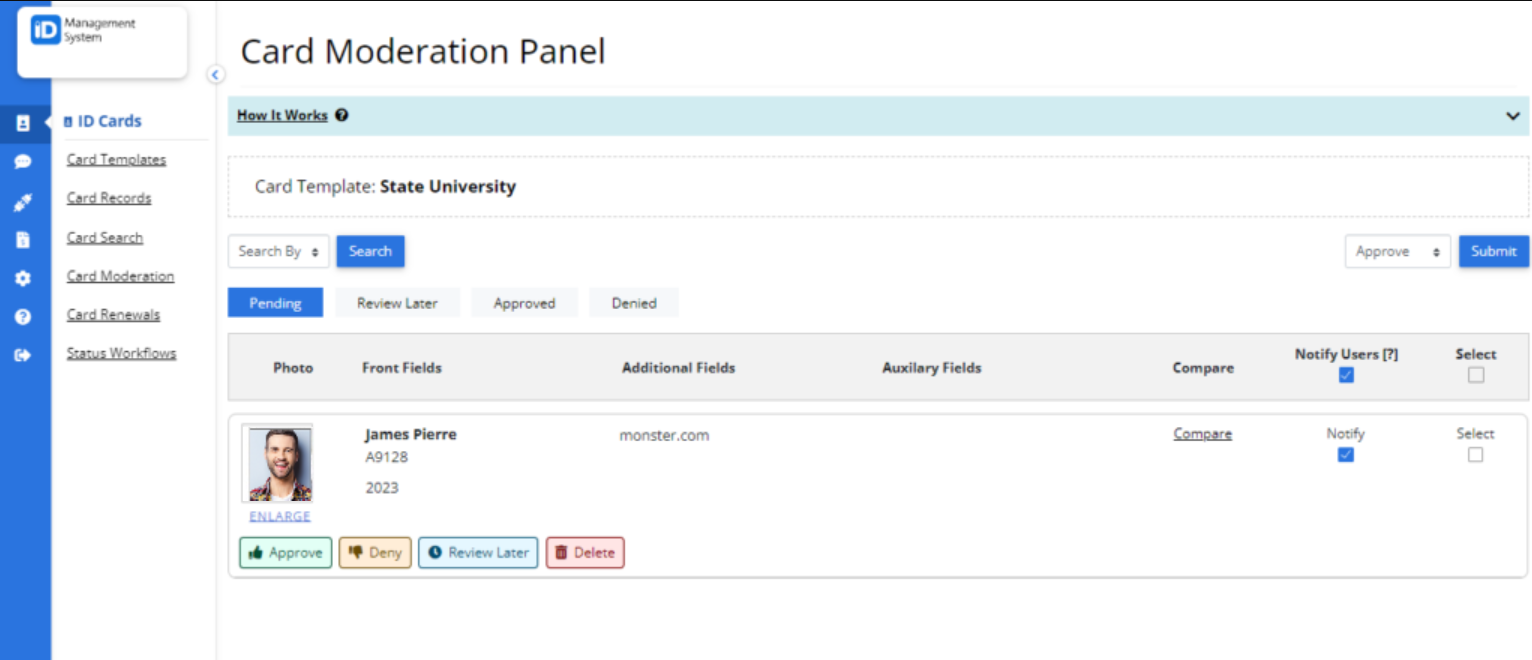
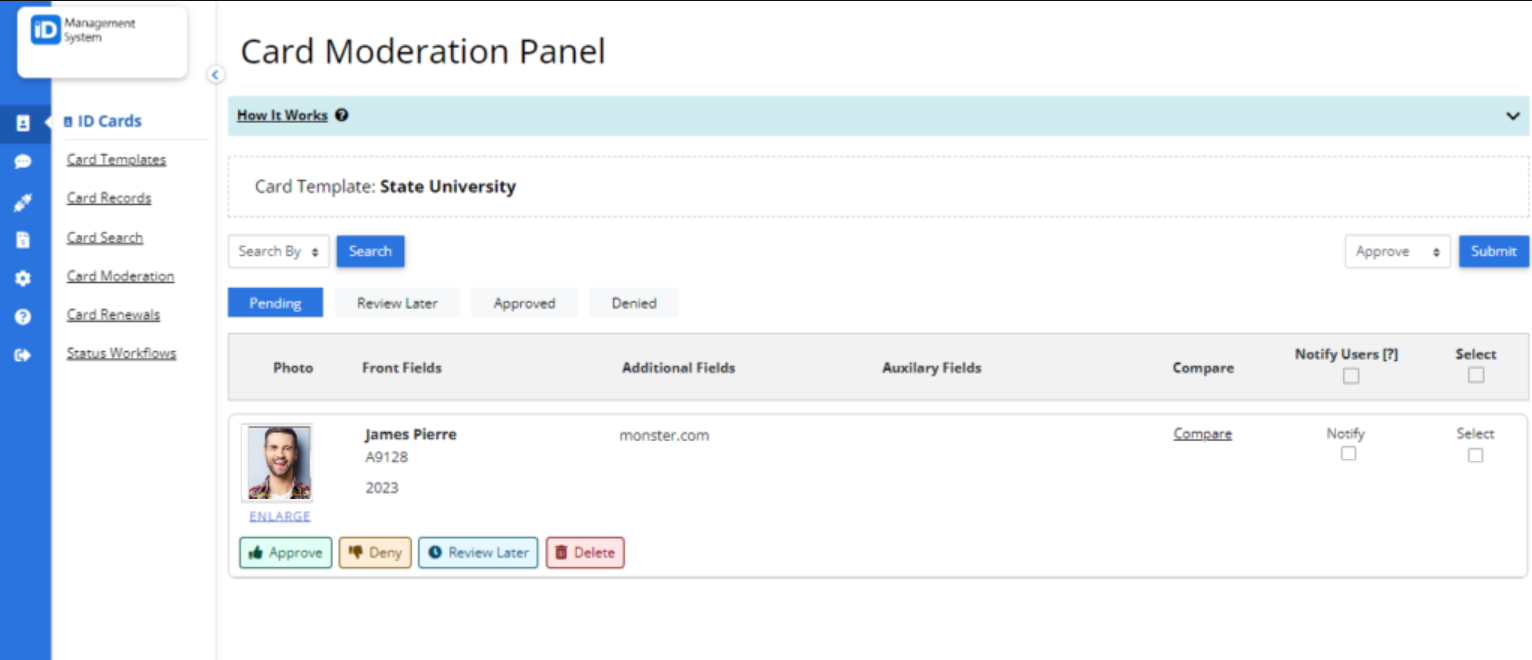
If you select the “Notify Users” box, the app user will receive an email notification that their submitted card data was either approved or denied. You can deselect the “Notify Users” button if you don’t want them to be notified.
All set! If you have any questions or concerns about moderating card data please reach out to us.
