Step 1: Create a Print Template
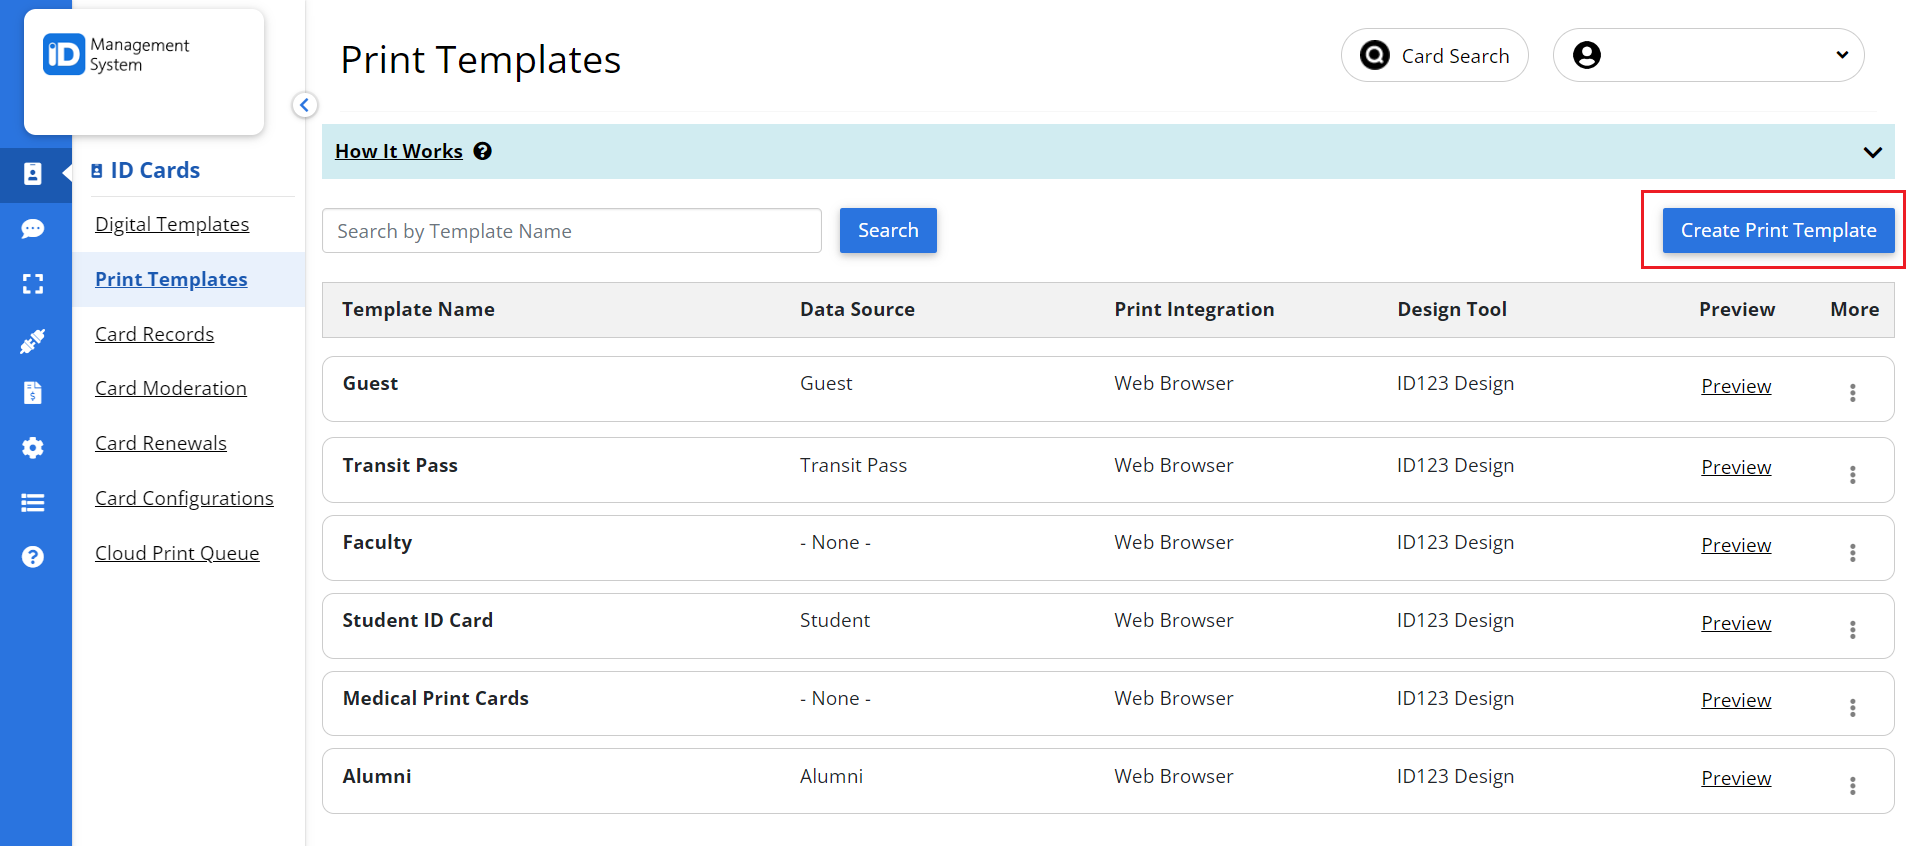
Navigate to the Print Card Templates page, and click on the “Create Print Template” button.

Step 2: Select Print Template Tool and Integration
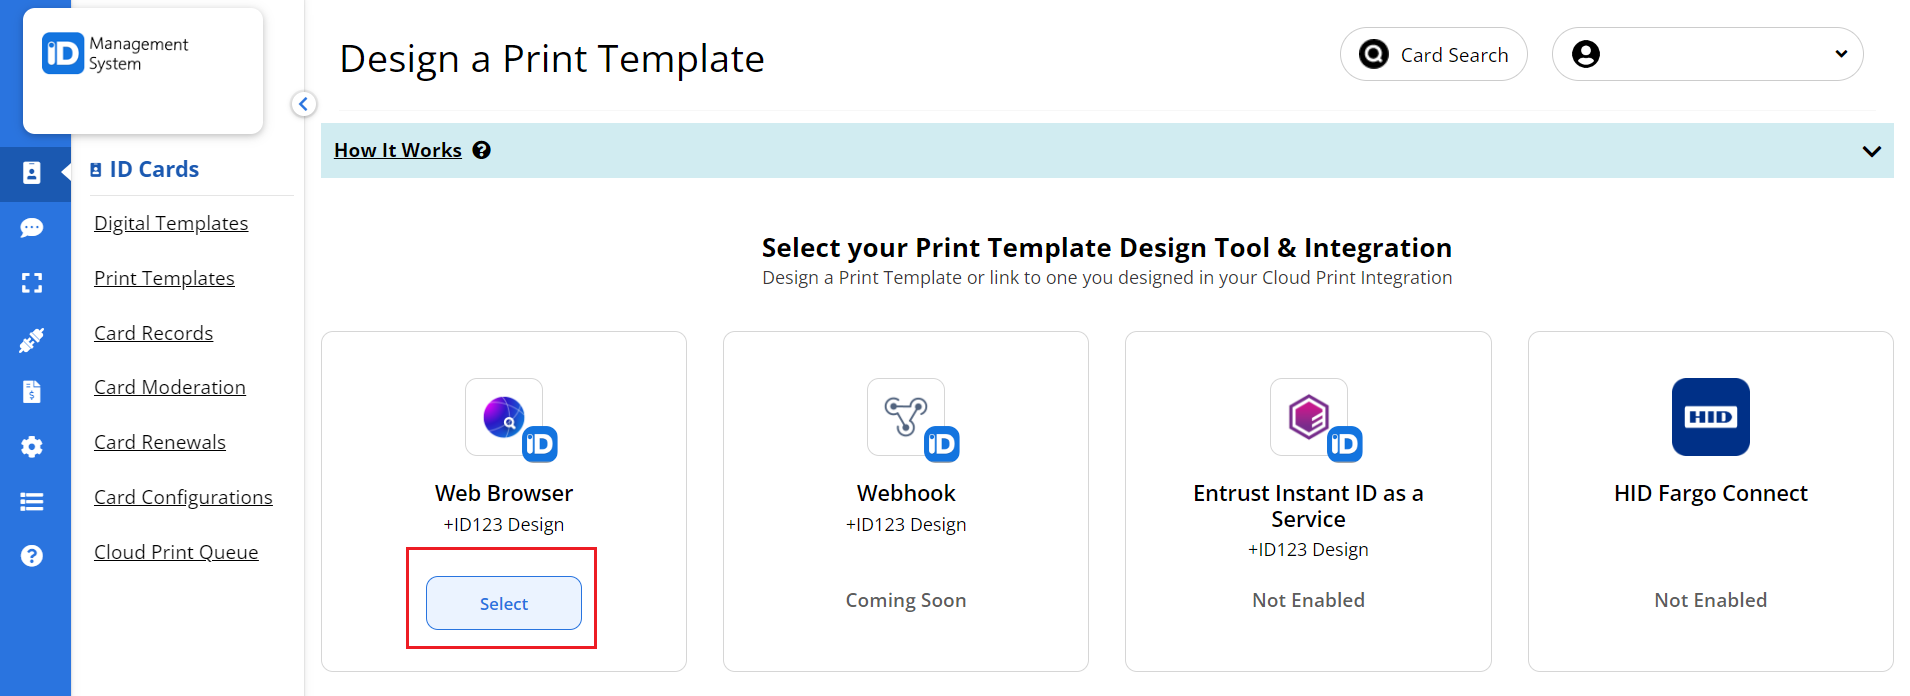
Choose the Print template tool design and integration option, by clicking on the “Select” button under the Web Browser option.

Step 3: Start Designing the Print Template
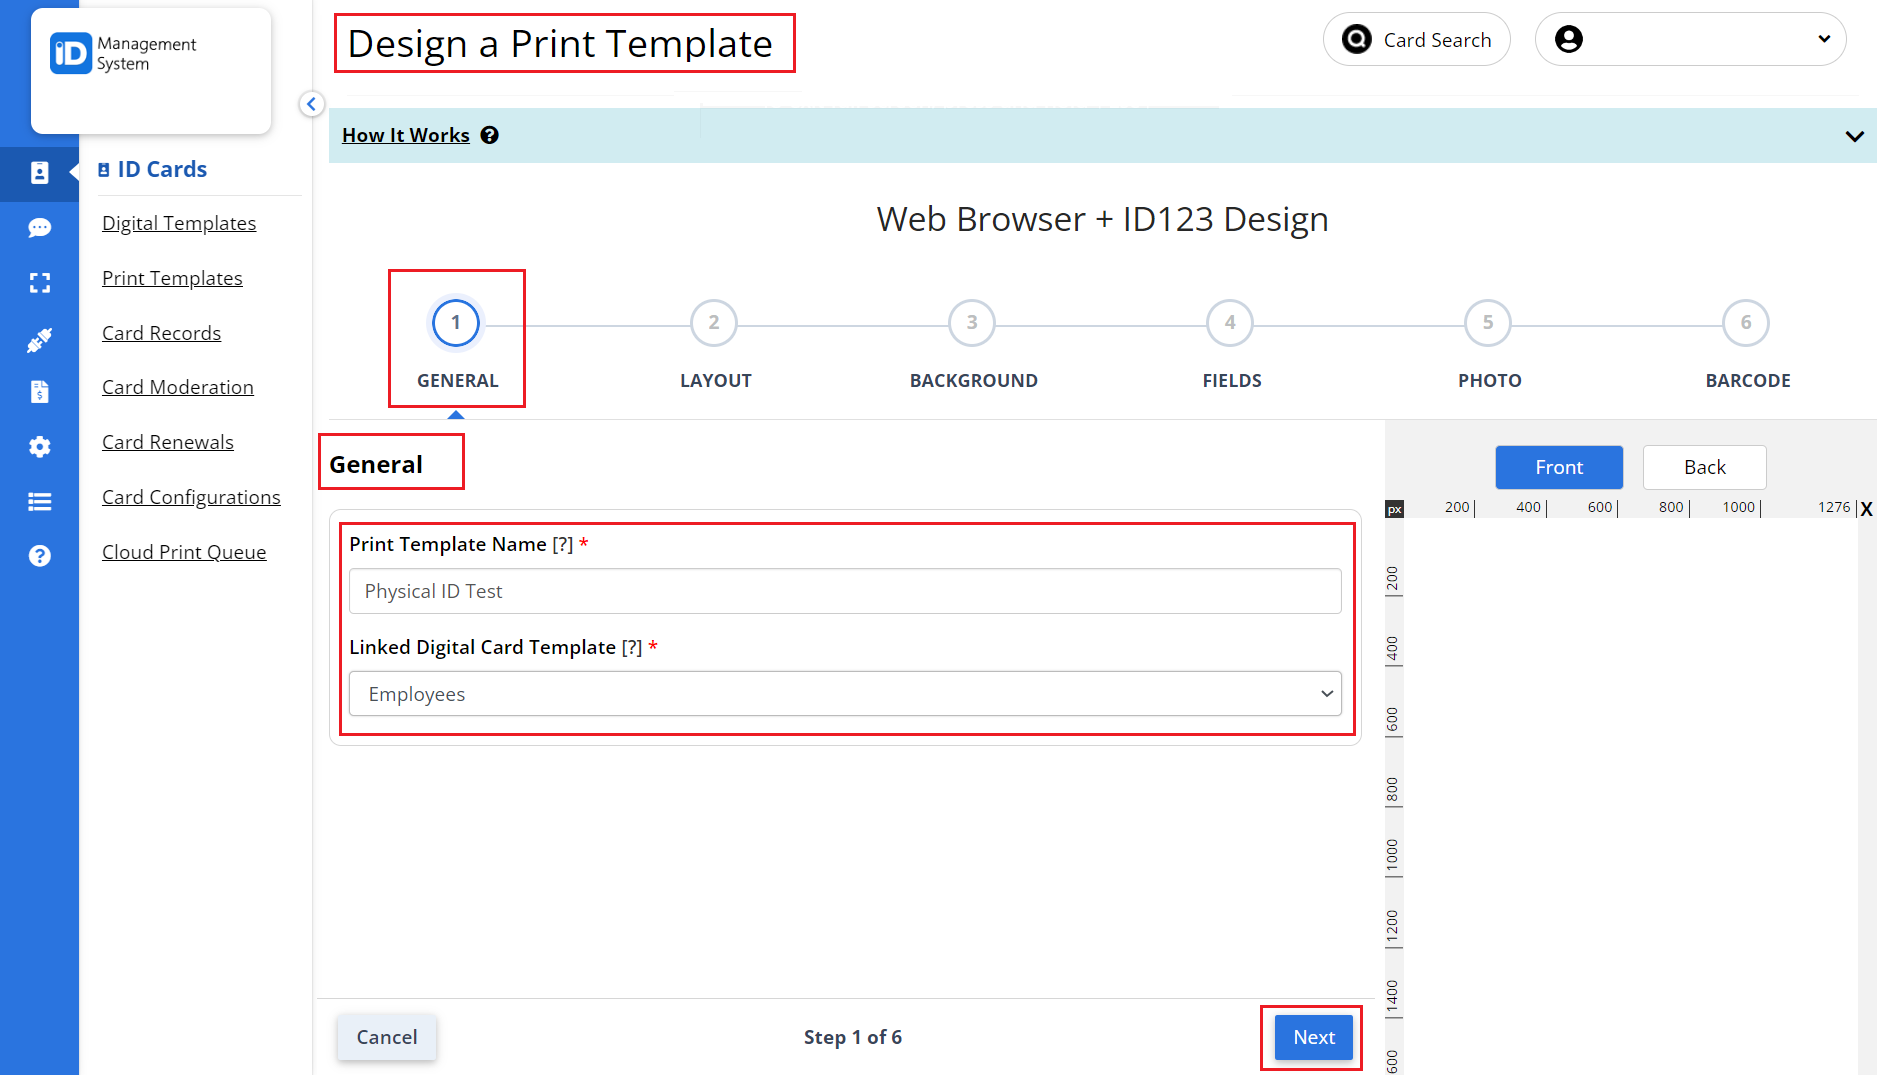
Start designing the print template, enter the print template name, select the linked digital card template, and click the next button.

Step 4: Set the Layout
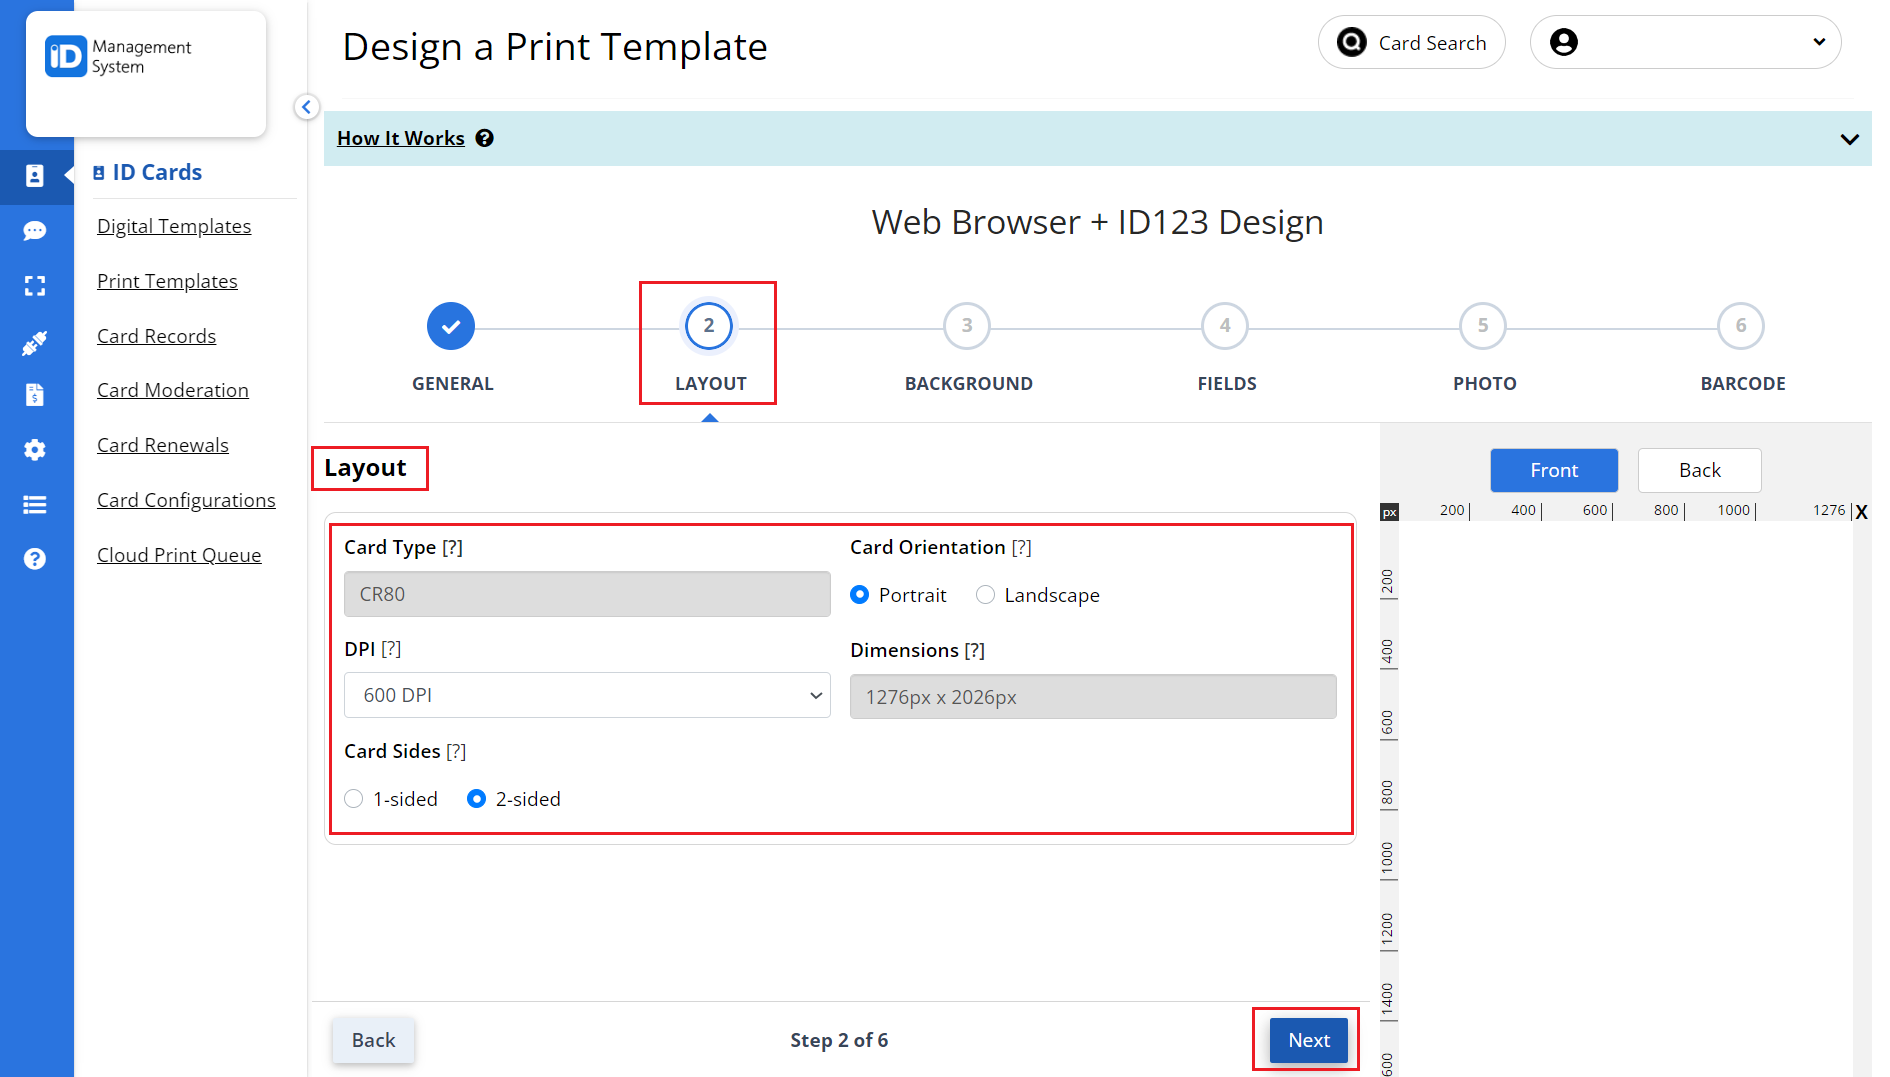
You can choose the card orientation, select the DPI, and opt for the card to be 1-sided or 2-sided then click the next button.

Step 5: Set Background Image/Colour
You have the option to choose an image or choose a color to set as the background type for your physical ID card. Click on the next button.

Step 6: Add Text Fields
You can add the text fields by selecting the source, the label text, the label font, and others that need to be displayed on the physical ID card.

Step 7: Add ID Photo
You can enable the ID photo option and select the position and the size of the ID Photo to be displayed on the physical ID card.

Step 8: Add the Barcode (Optional)
You can optionally add and customize the barcode to be displayed on the card. Click on the “Save & Finish” button to complete the physical print template.


