- Step 1: Navigate to “Integrations”
- Step 2: Navigate to “Sync Connections”
- Step 3: Click “Add New Connections”
- Step 4: Set Up the Connection and Save it
- Step 5: Set Up the Data Sync
- Step 6: Test the Connection
- Step 7: Enter the Name of the “Person Filter”
- Step 8: Schedule Data Sync
- Step 9: Set up Advanced Configurations
Step 1: Navigate to “Integrations”
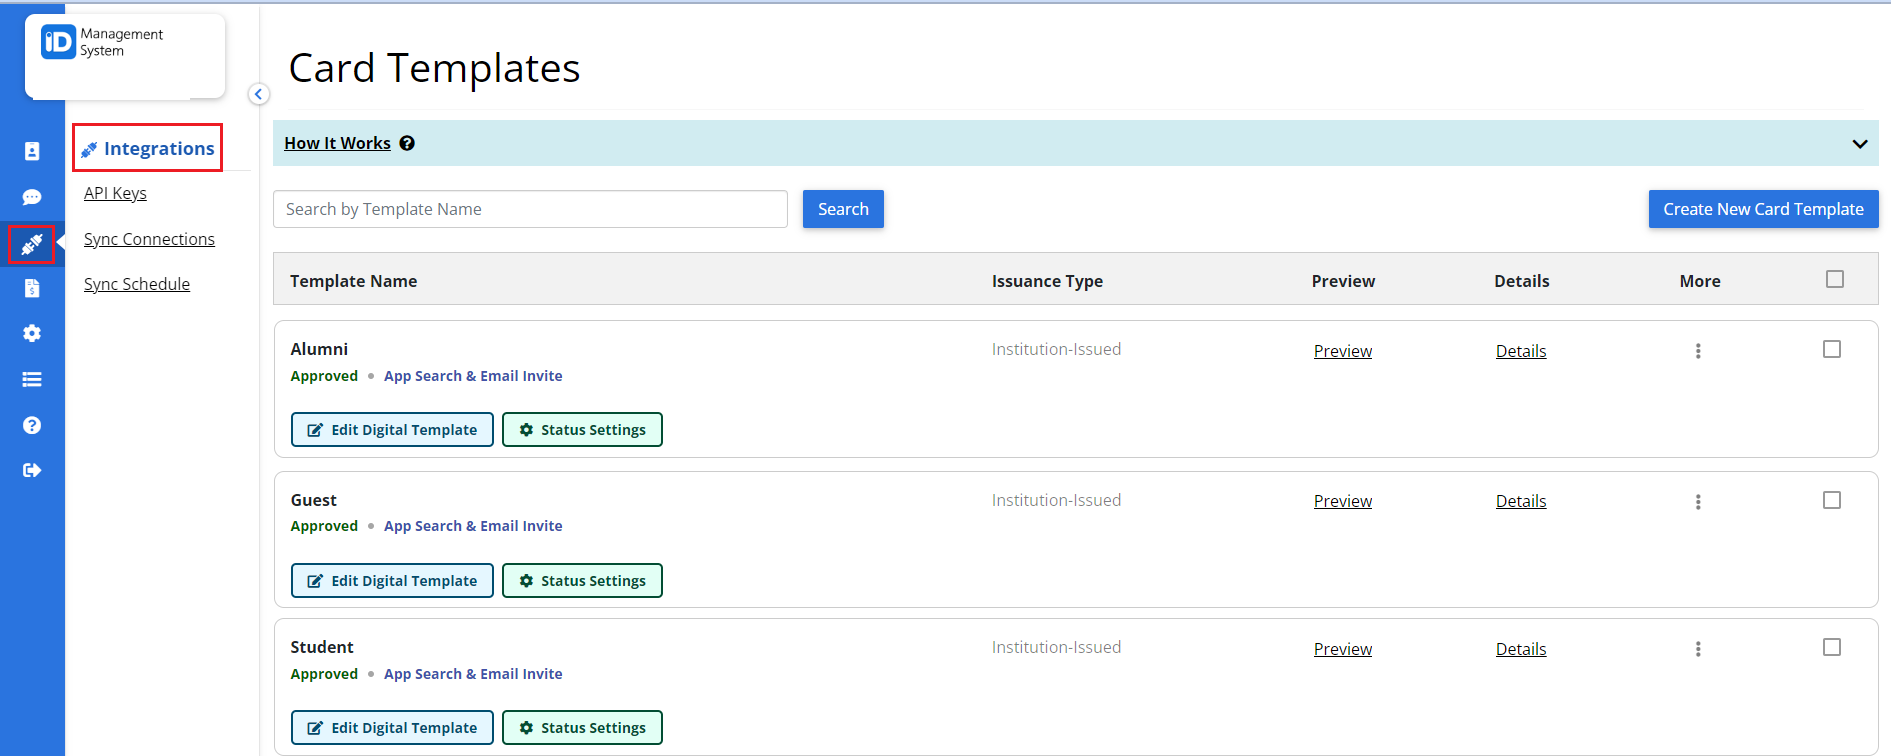
Log in to your account and click on “Integrations” from the navigation panel on the left.
Step 2: Navigate to “Sync Connections”
If this is your first attempt at setting up the integration, click on “Sync Connections”.

Step 3: Click “Add New Connections”
Once you are on the Sync Connections page, click the “Add New Connection” button on the top right.

Step 4: Set Up the Connection and Save it
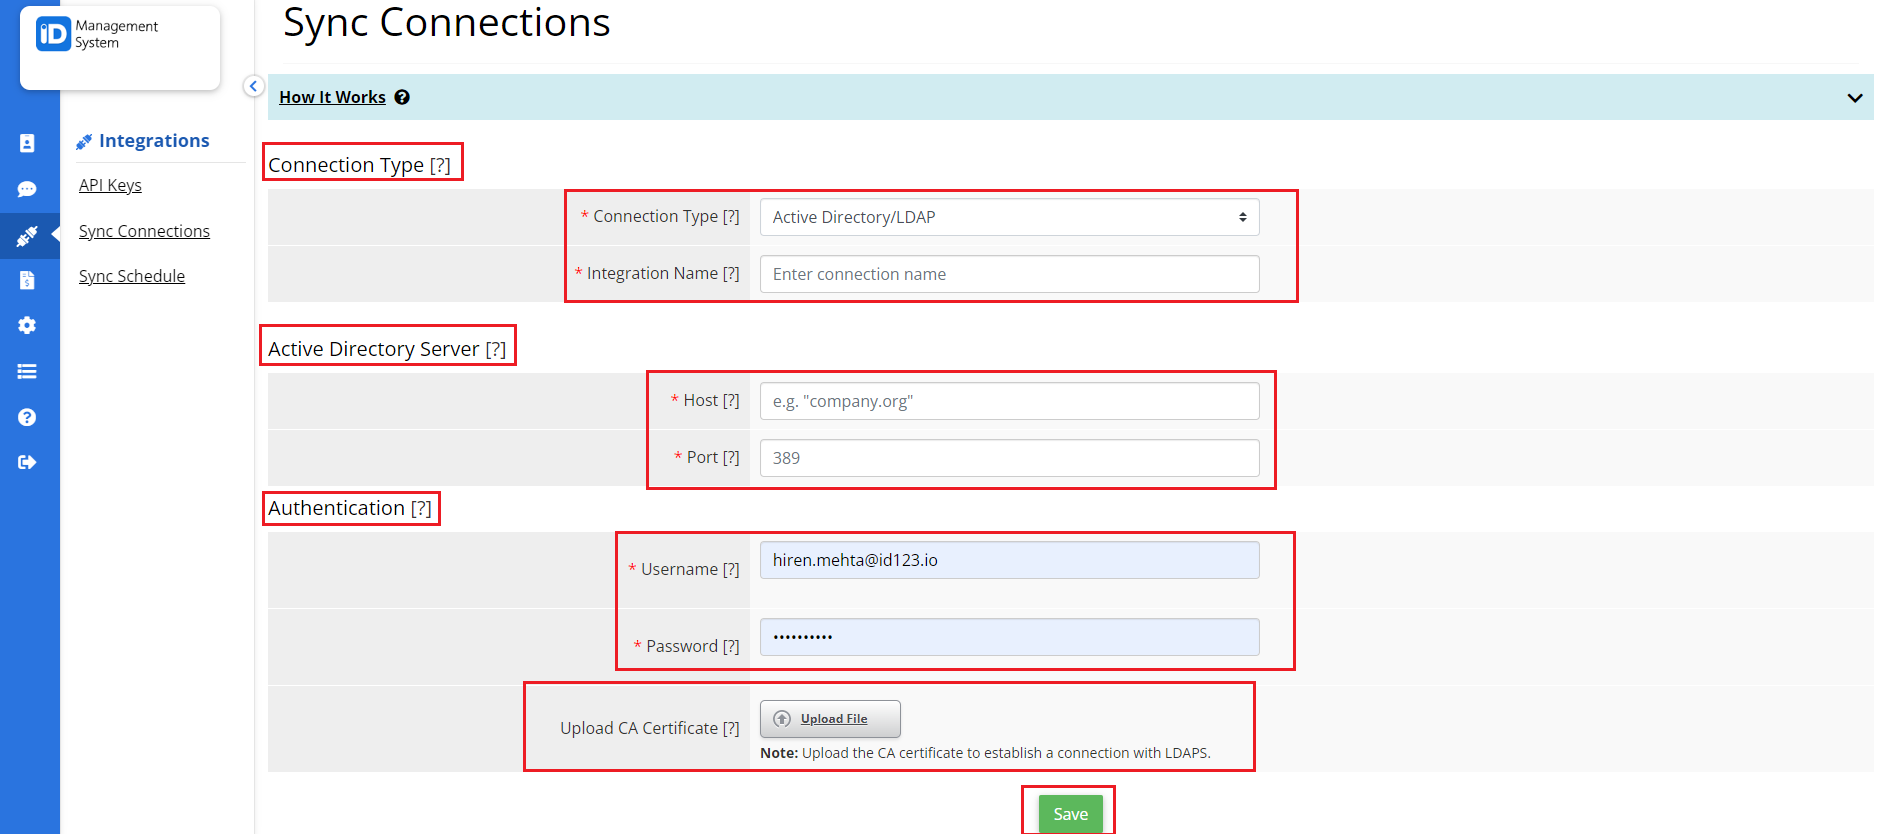
Select ‘Active Directory/LDAP’ from the “Connection Type” dropdown and then create your own name of the connection in the “Integration Name” field. Then, fill out the required fields in the Active Directory Server and Authentication section. Once all the information is entered, click the “Save” button to ensure that a successful connection has been established.
Note: To establish a connection with LDAPS, you can upload the CA certificate in the ‘Authentication’ section with the extension of .crt or .pem. The CA certificate will be used to authenticate the CA signature on the server certificate as part of the authorizations before launching a secure connection. Hit ‘Save’ after it’s uploaded.
Step 5: Set Up the Data Sync
Go back to the “Integrations” menu on the left side of your screen and select “Sync Schedule”. Click on the “Schedule New Data Sync” button located on the top right.
Note: Setting up the data sync allows you to choose the type of data you want to sync while also allowing you to set up a schedule for the sync.

Step 6: Test the Connection
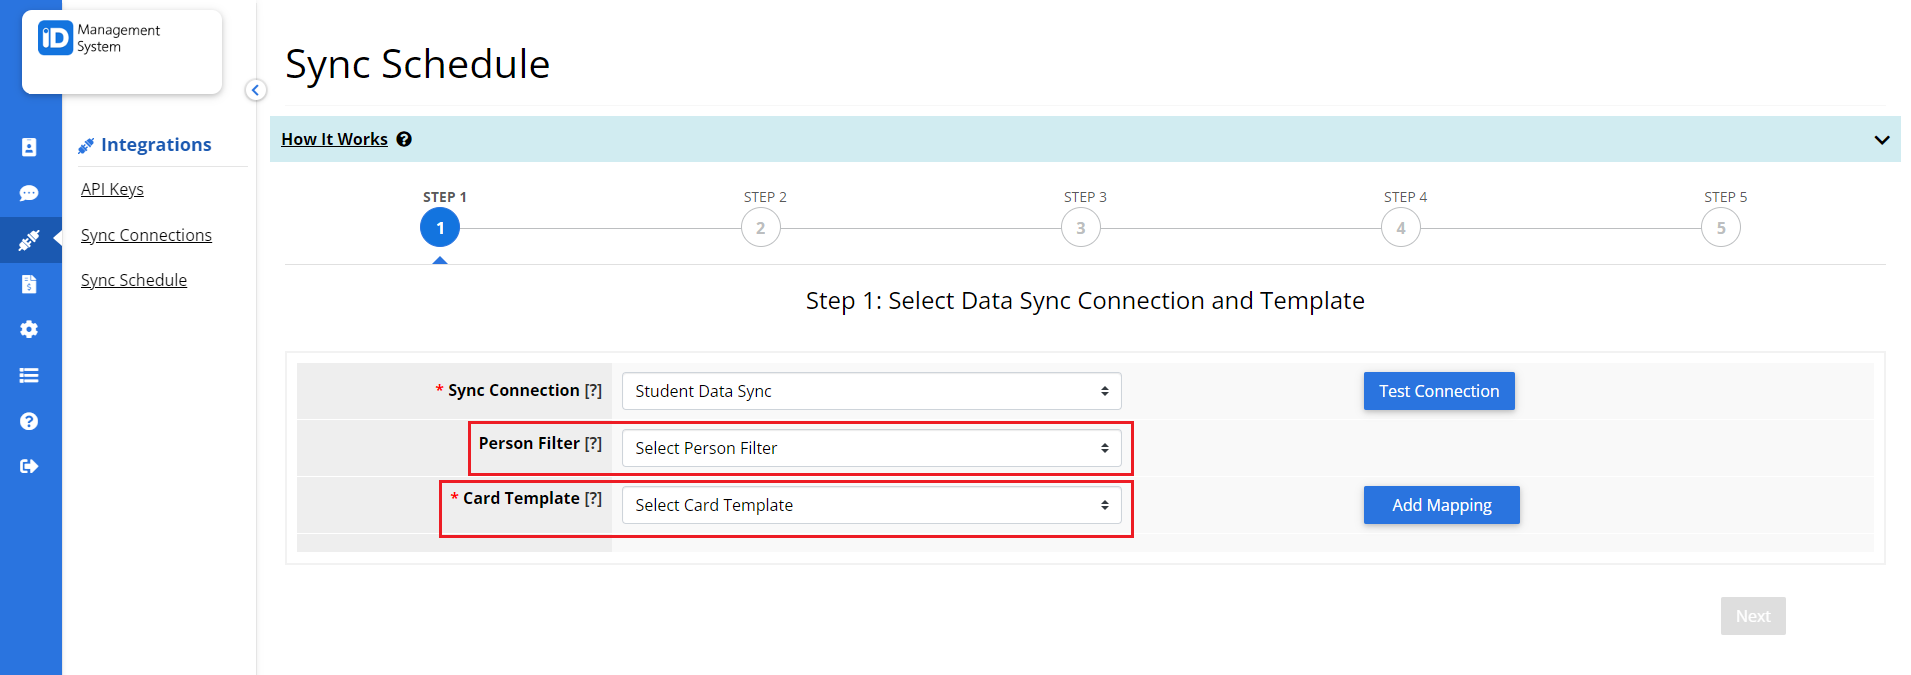
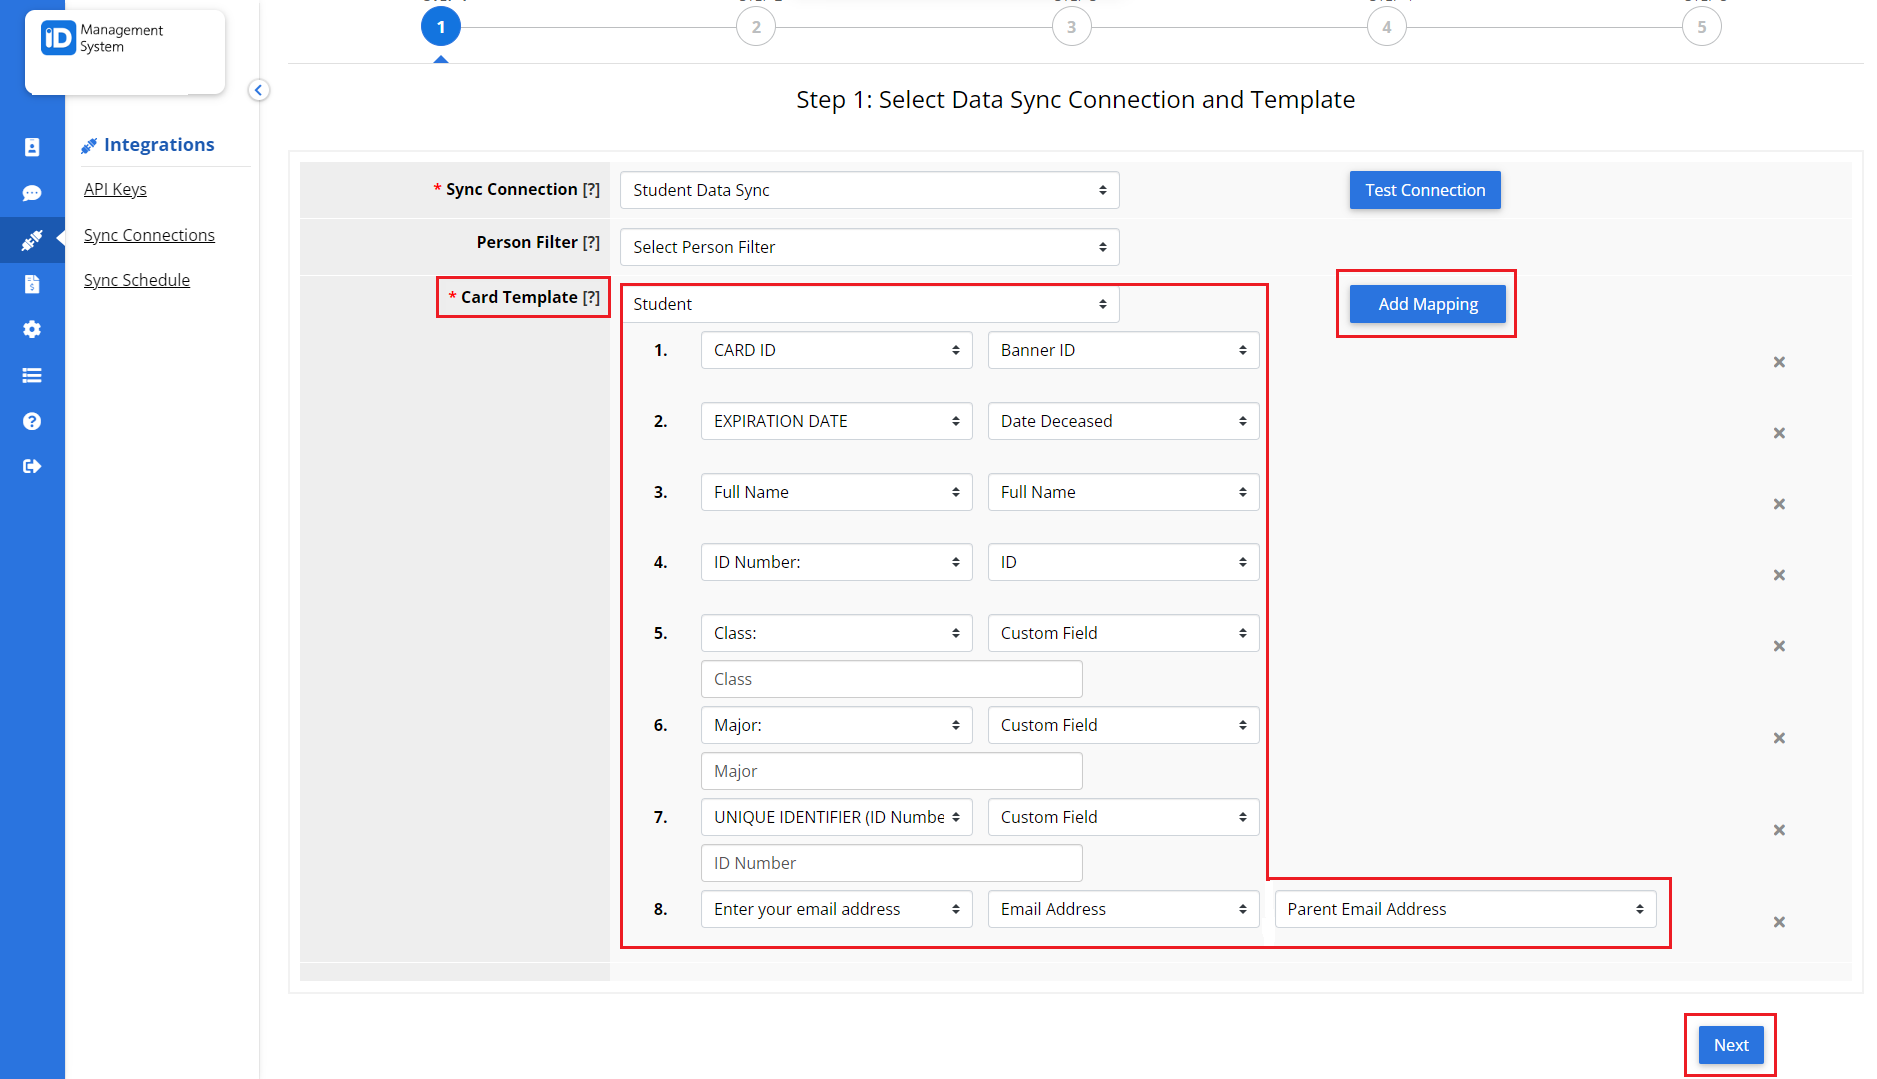
Select your Sync Connection from the dropdown and click on “Test Connection”. Once the connection is successful, you can map your fields. When you’re done mapping the fields hit “Next”.


Step 7: Enter the Name of the “Person Filter”
Select the “Person Filter” from the drop-down menu or select custom and enter the name. Also, select the “Card Template” from the drop-down menu and map the field accordingly, then click on the “Next” button at the bottom right of the page.
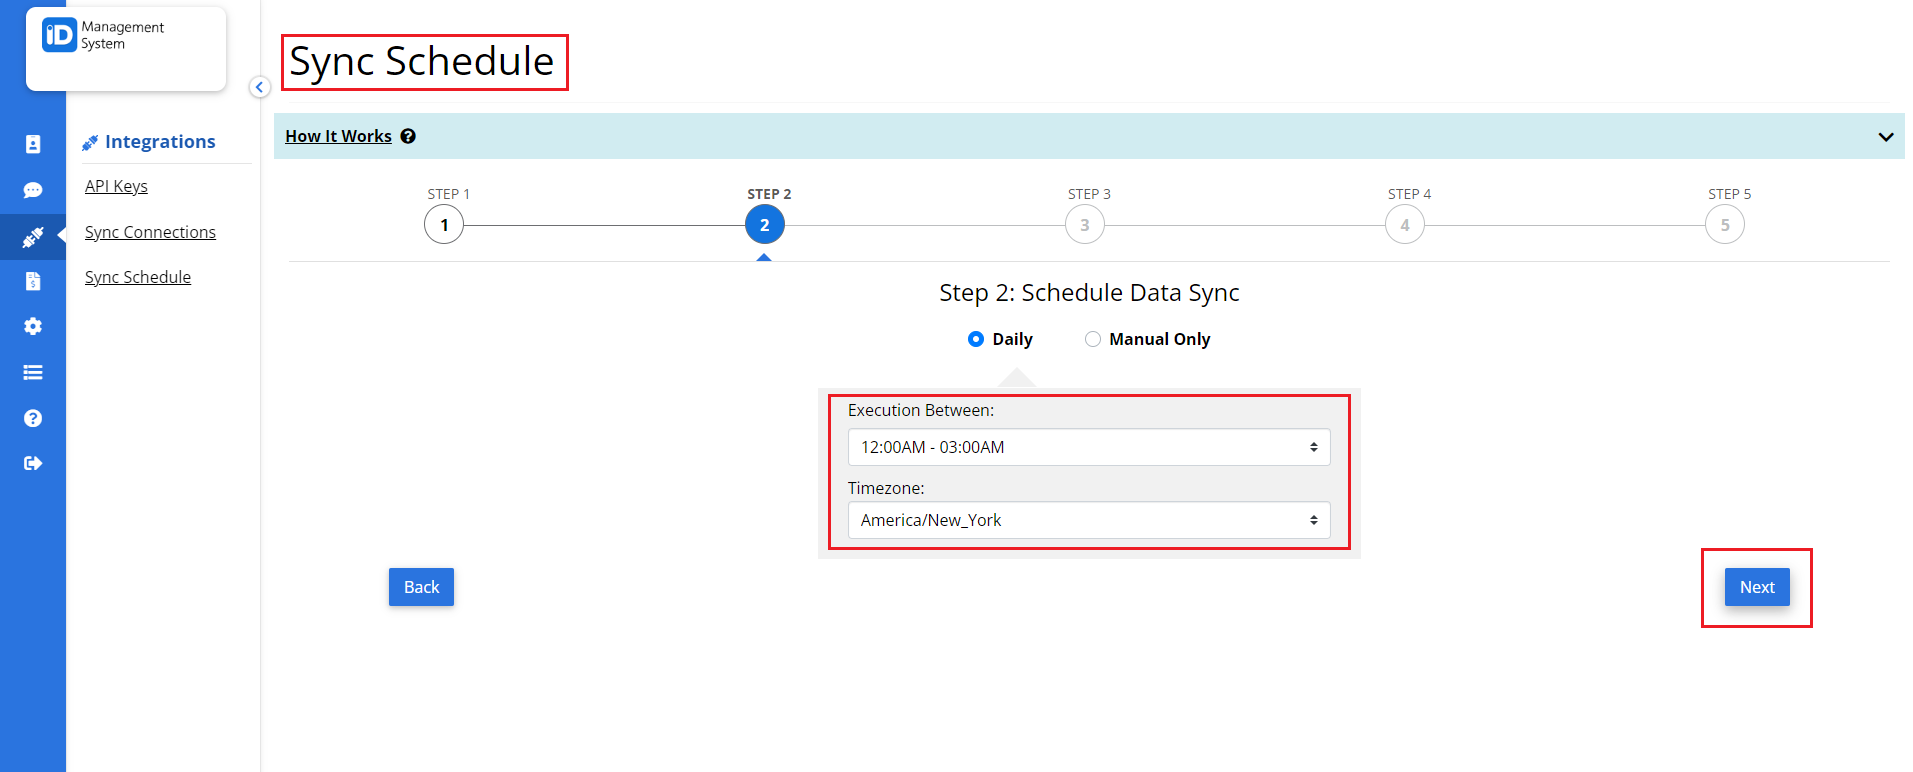
Step 8: Schedule Data Sync
Select whether you want to sync data “Daily” or “Manual Only”. If you select the Daily option, you can choose the time of the daily sync execution. If you select the Manual Only data sync, you will be able to use the “Sync Now” option on the dashboard page.
Step 9: Set up Advanced Configurations
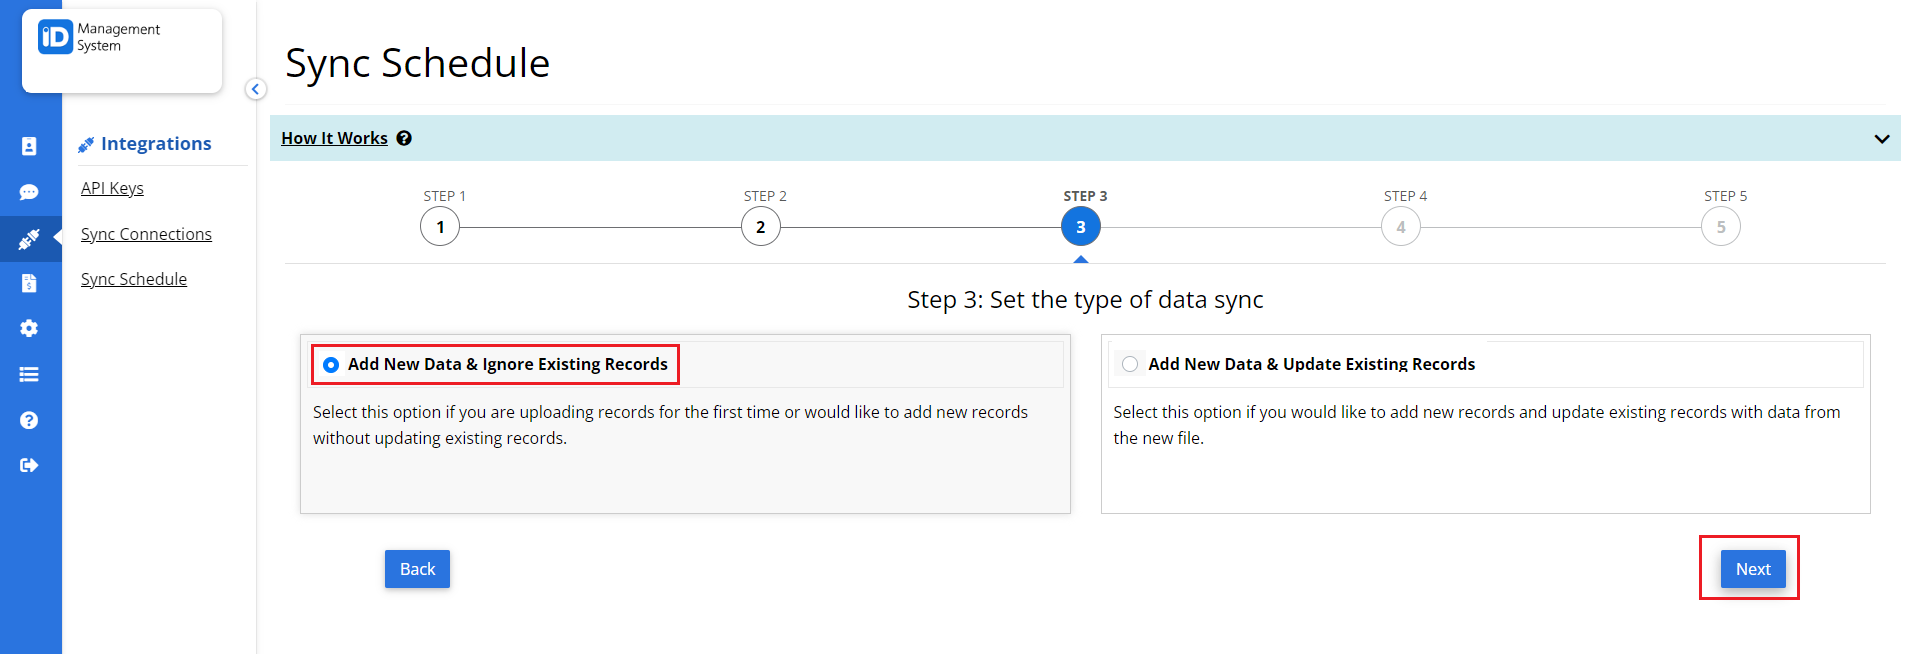
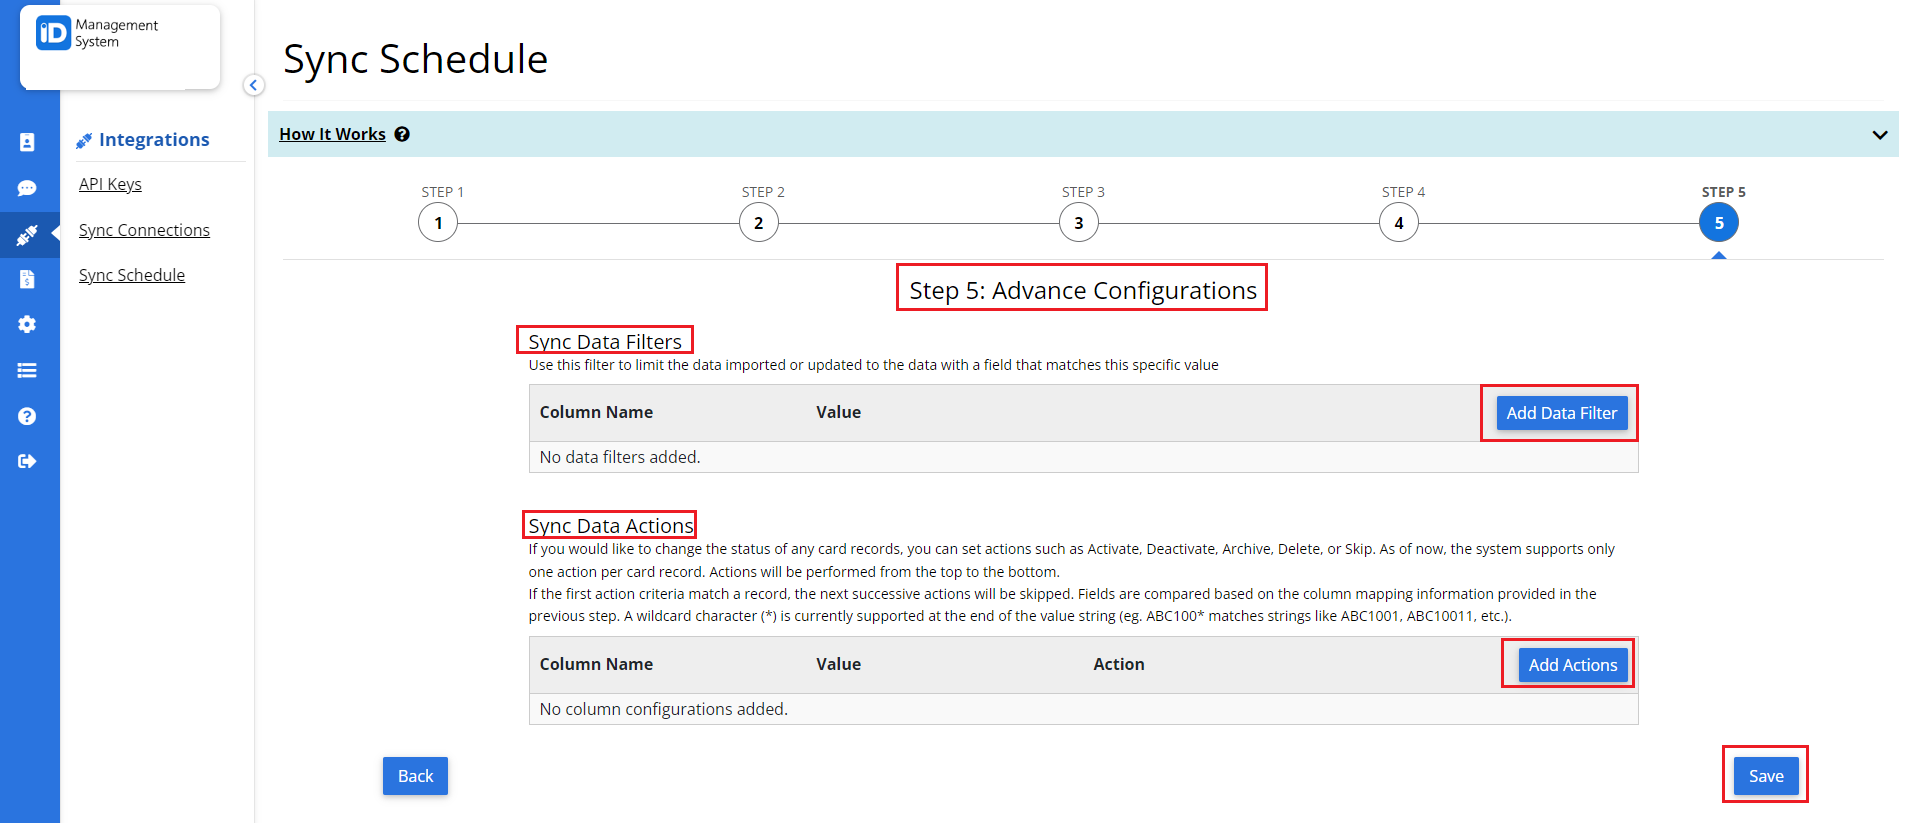
Option 1: Add New Data & Ignore Existing Records. Select this option if you are uploading records for the first time or would like to add new records without updating existing records. Select and add the options for advanced configurations if required, then click ‘Save’.
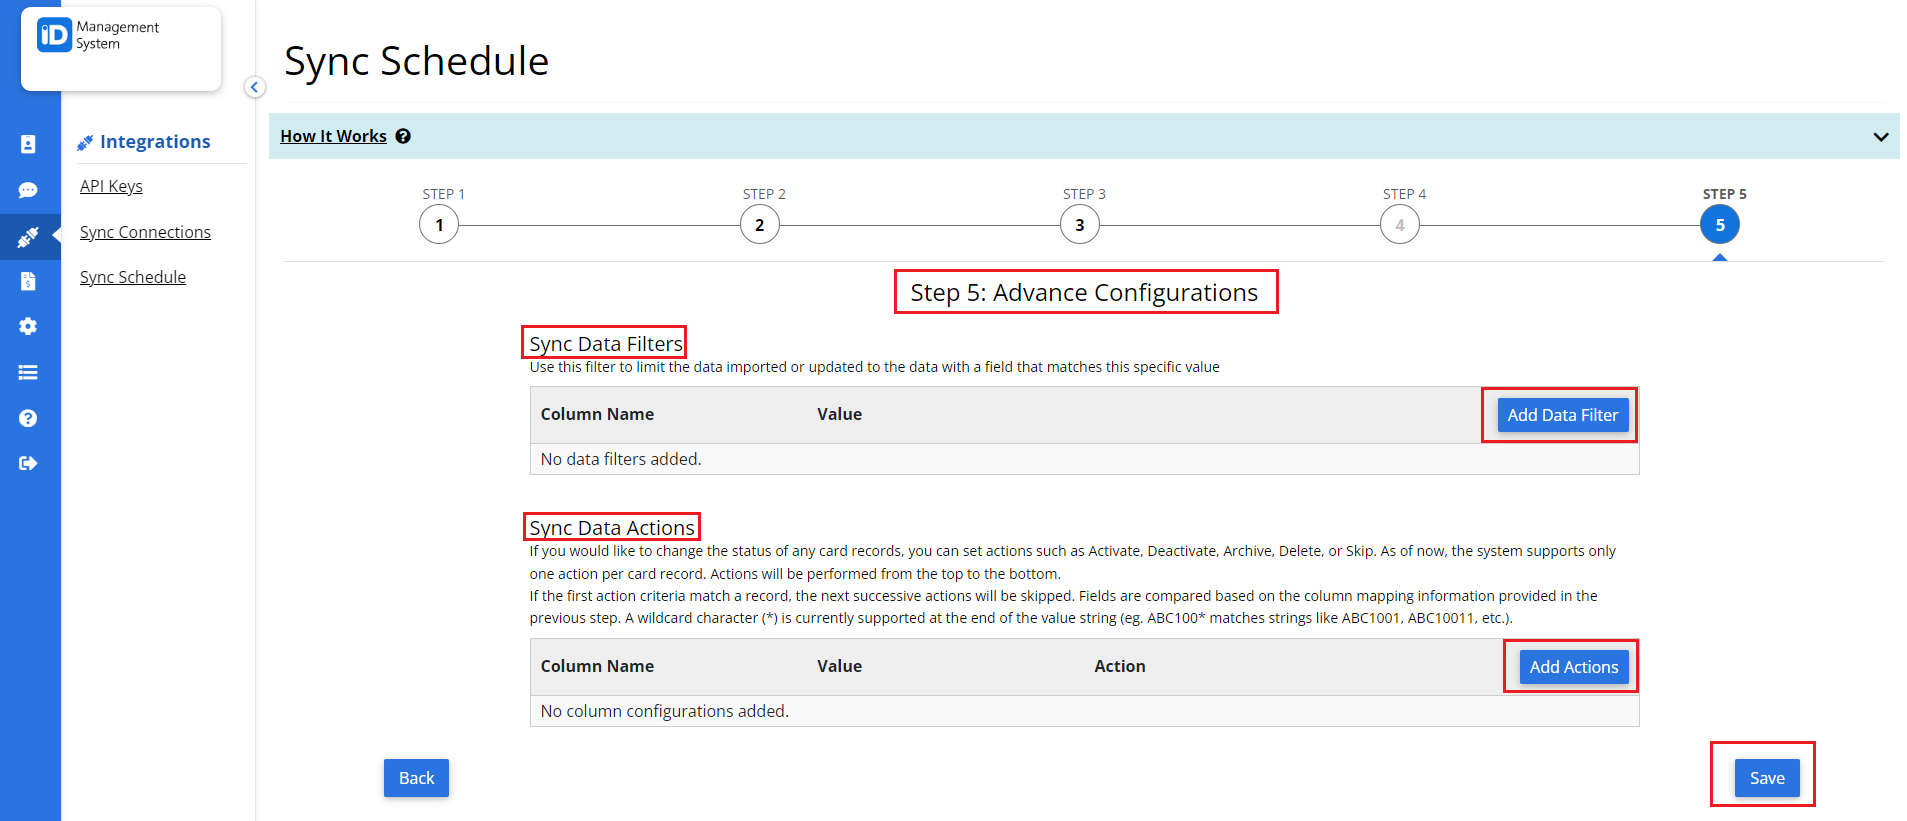
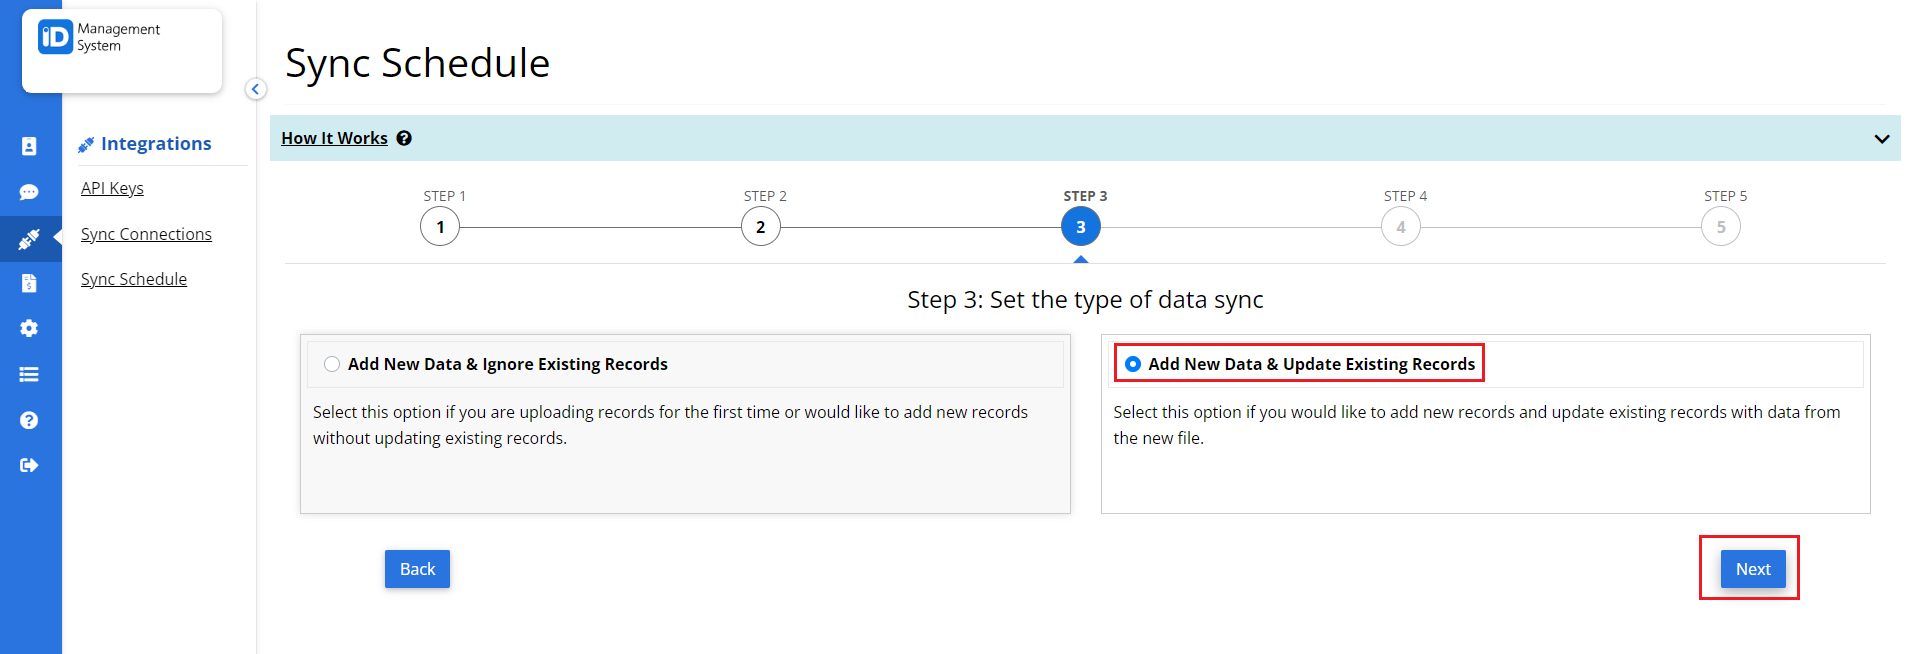
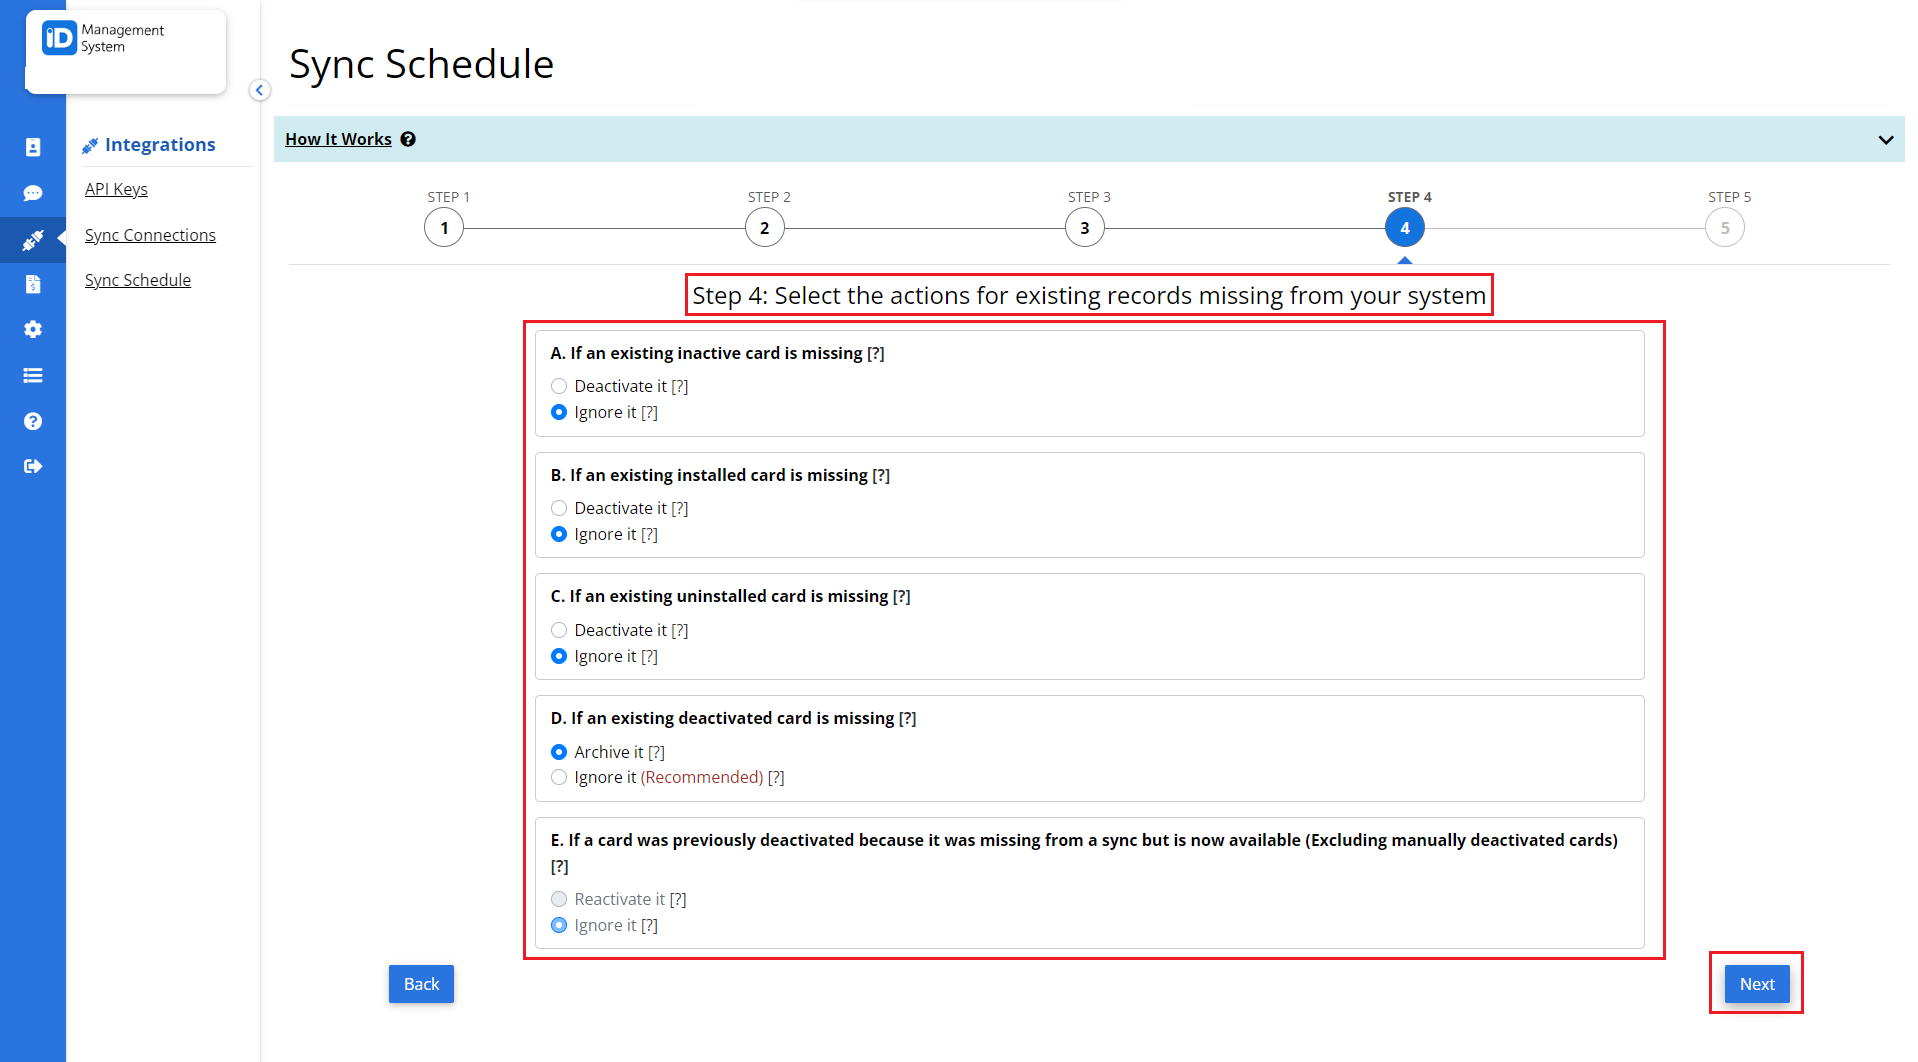
Option 2: Add New Data & Update Existing Records. Select the actions for existing records missing from your system and then add the options for advanced configurations if required, and then click “Save”.
All set!
