Step 2: Register Your Account
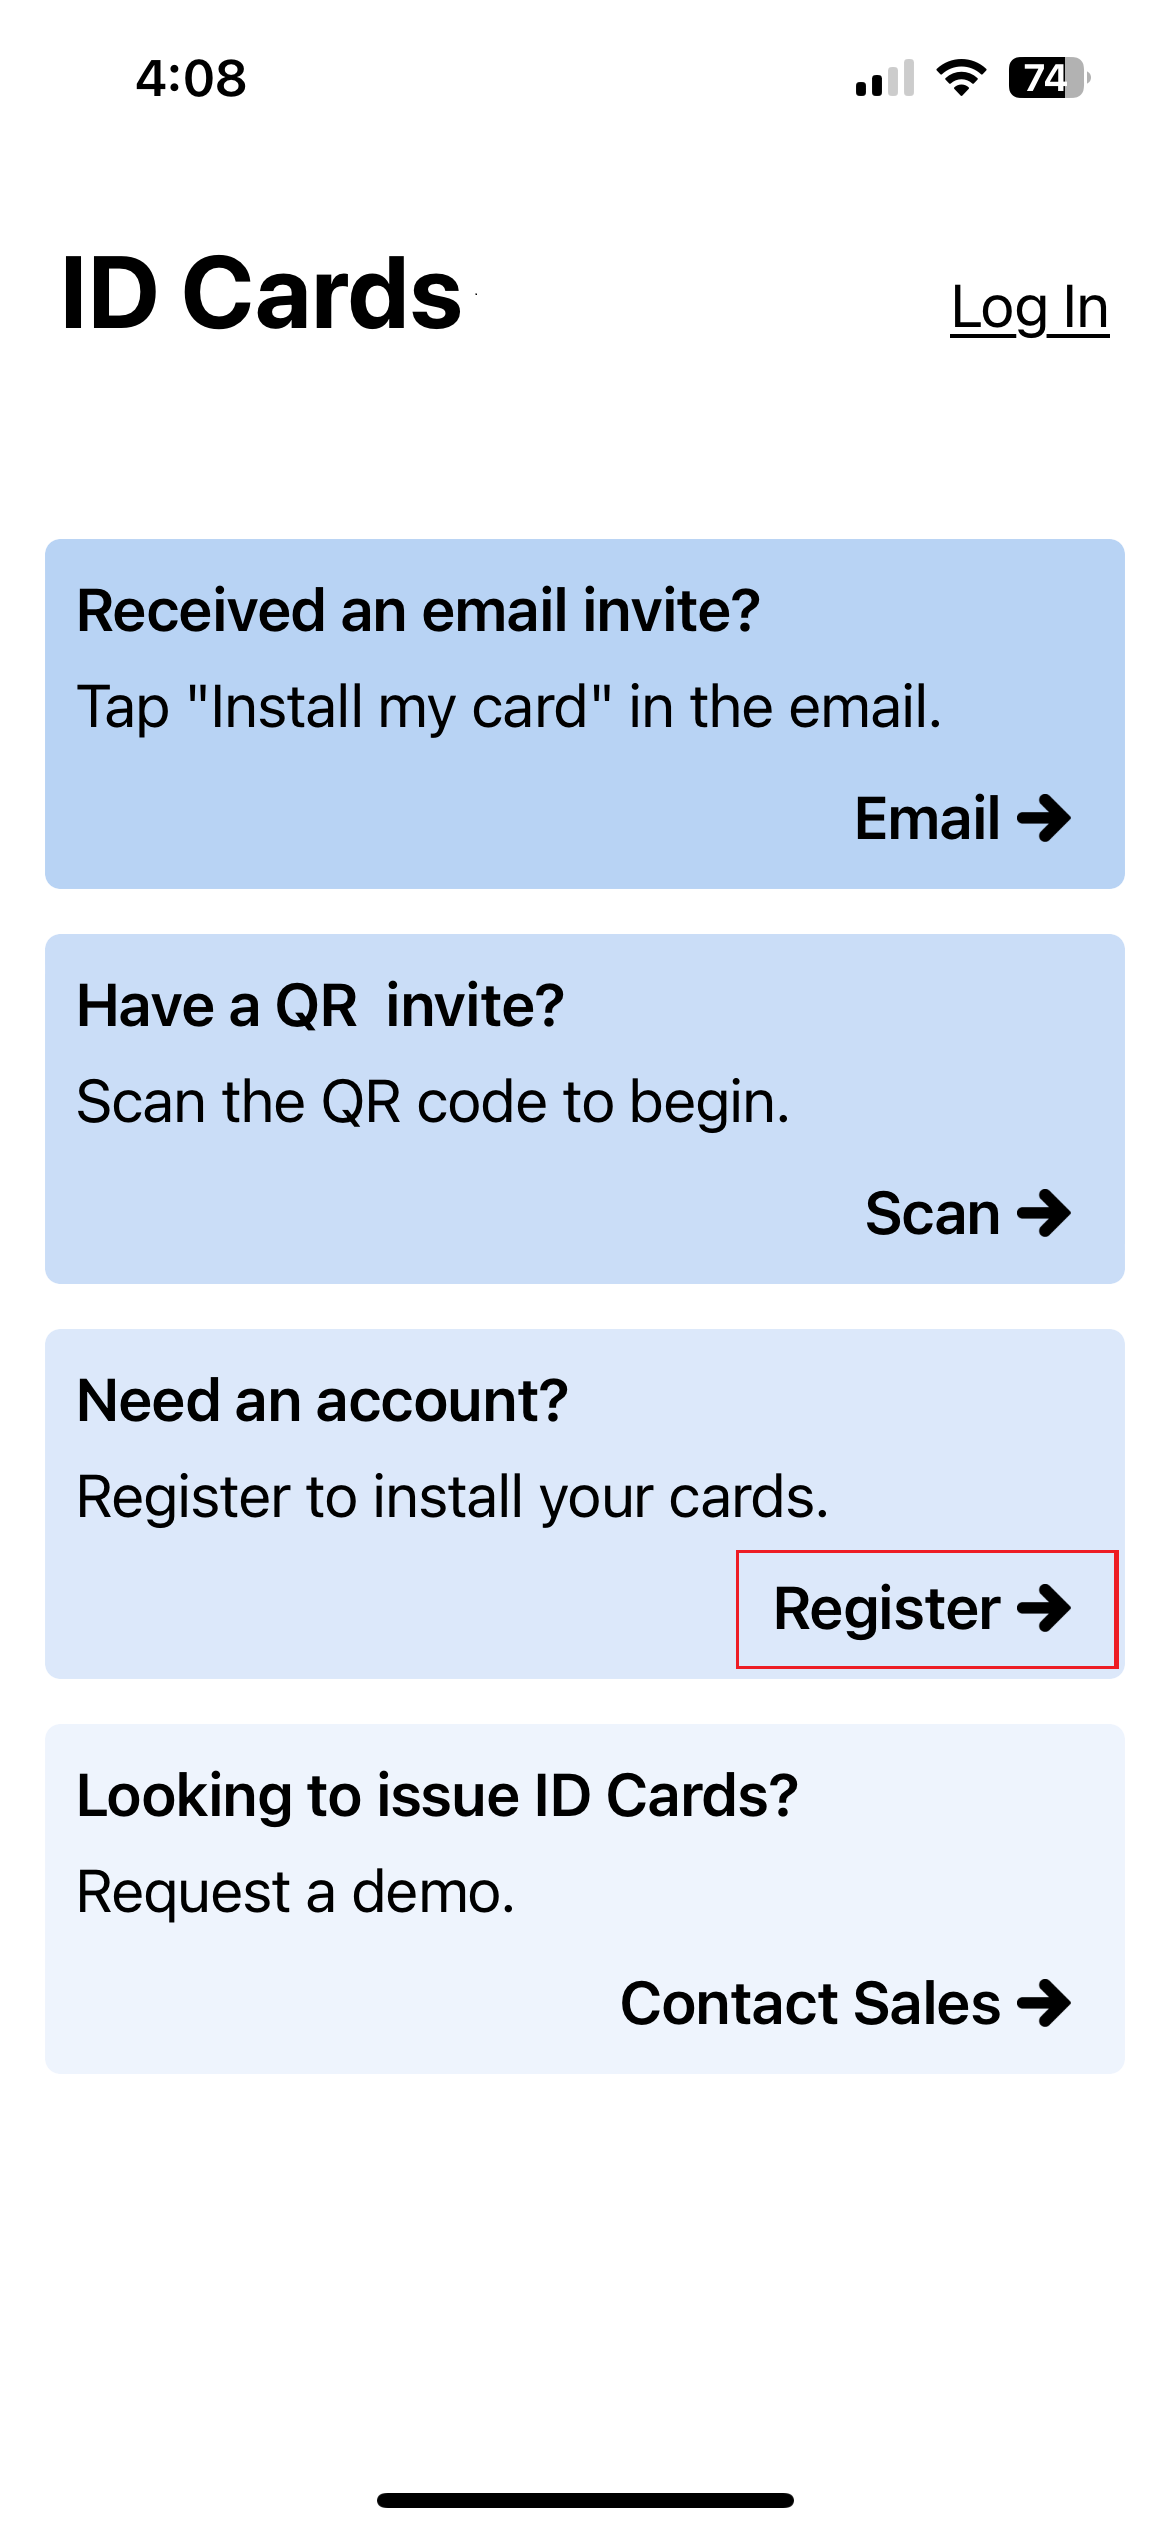
Open the ID123 app and tap Register.
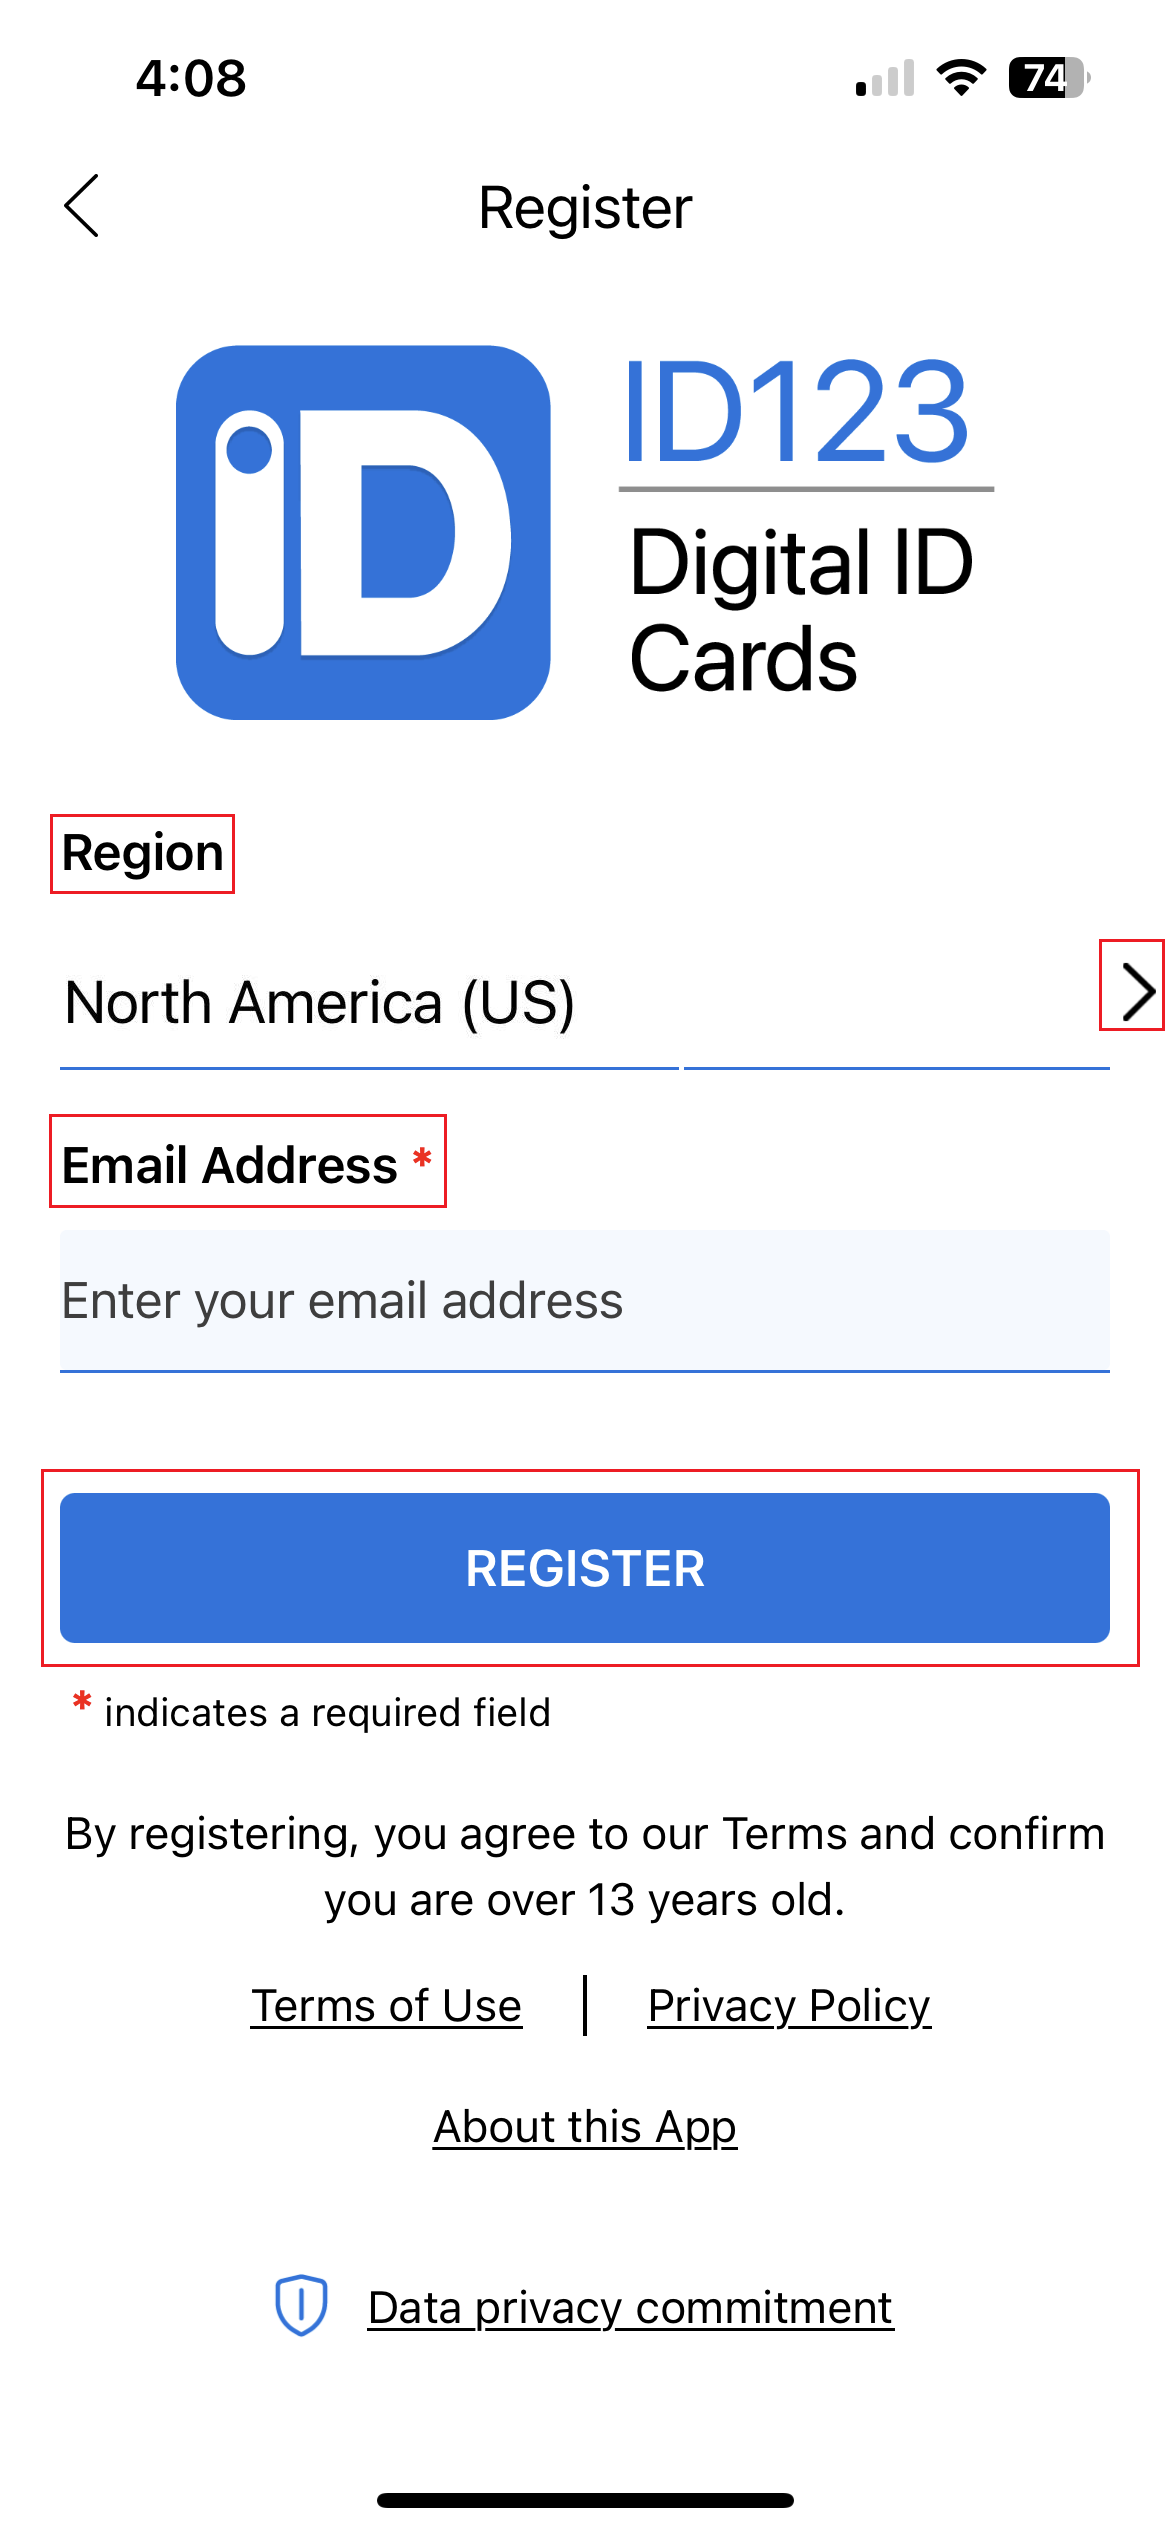
Enter the email address you want to use for your account.
Important: Use the email address that your institution has on file.
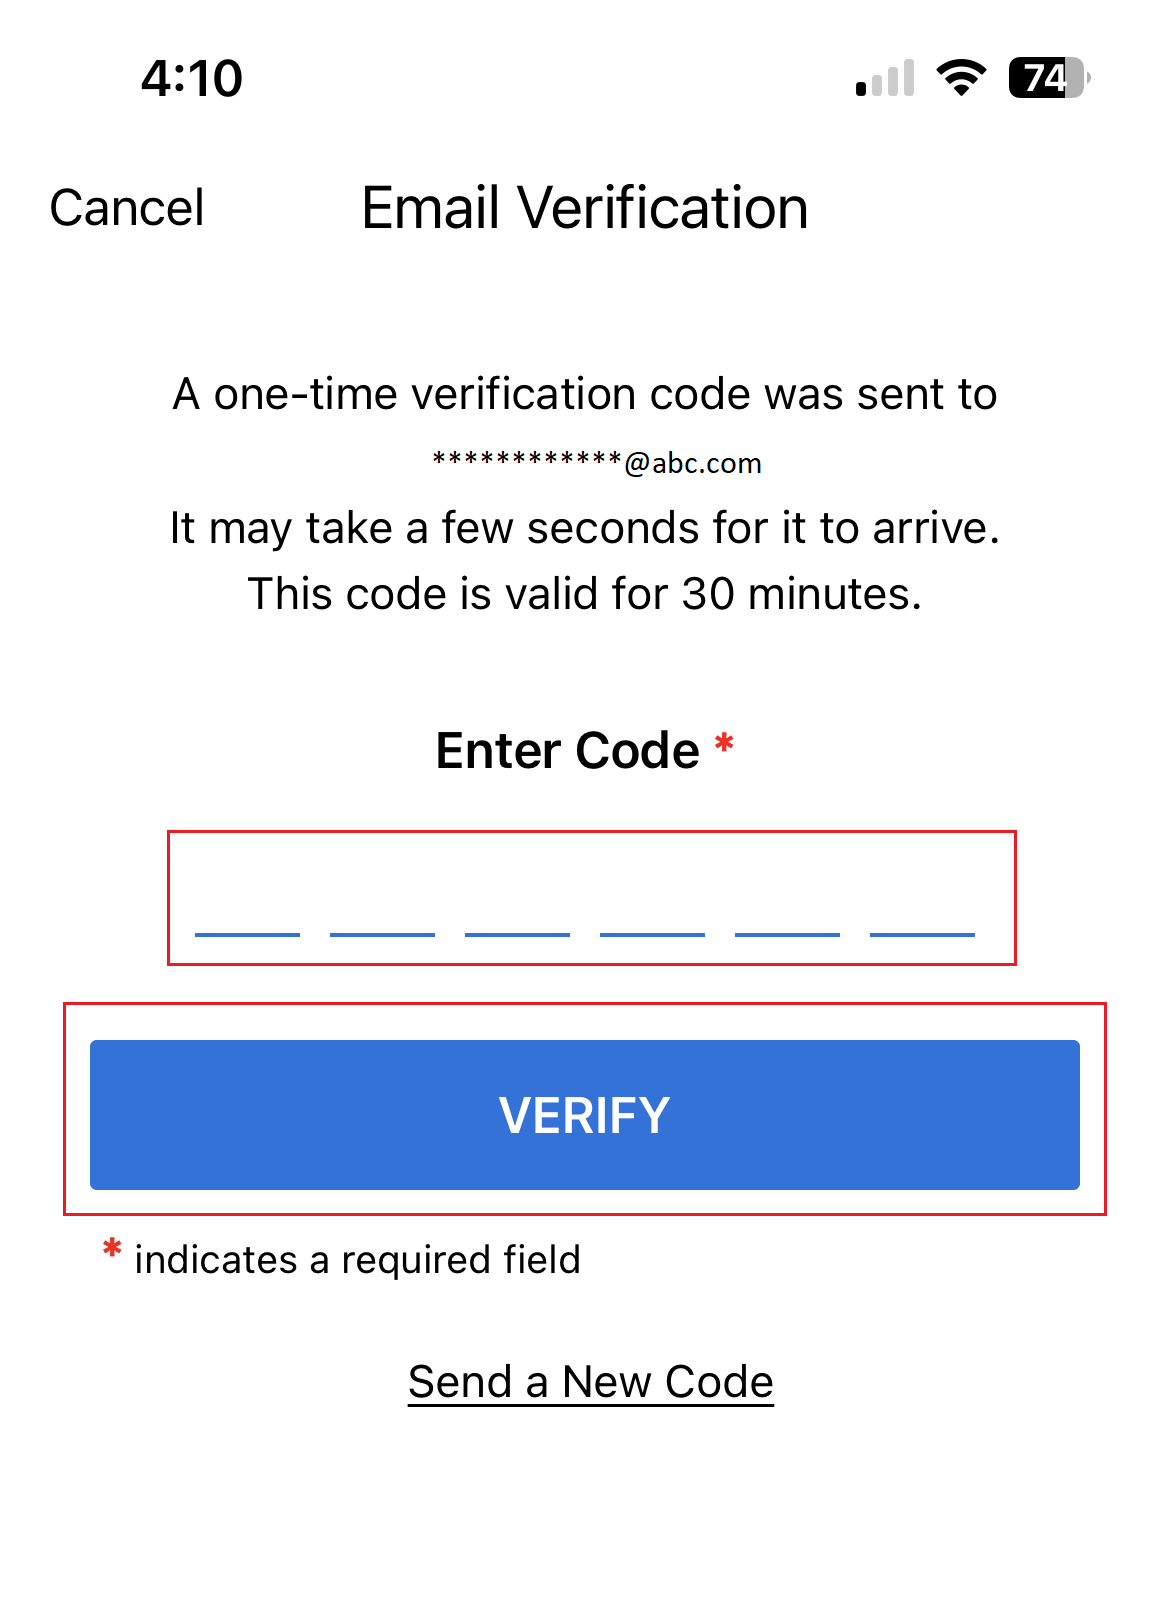
Check your inbox for a verification code.
Enter the code in the app and tap Verify to complete your registration.
Step 3: Search for Your Institution
Once registered, you’ll need to locate your institution in the app to access your digital ID card.
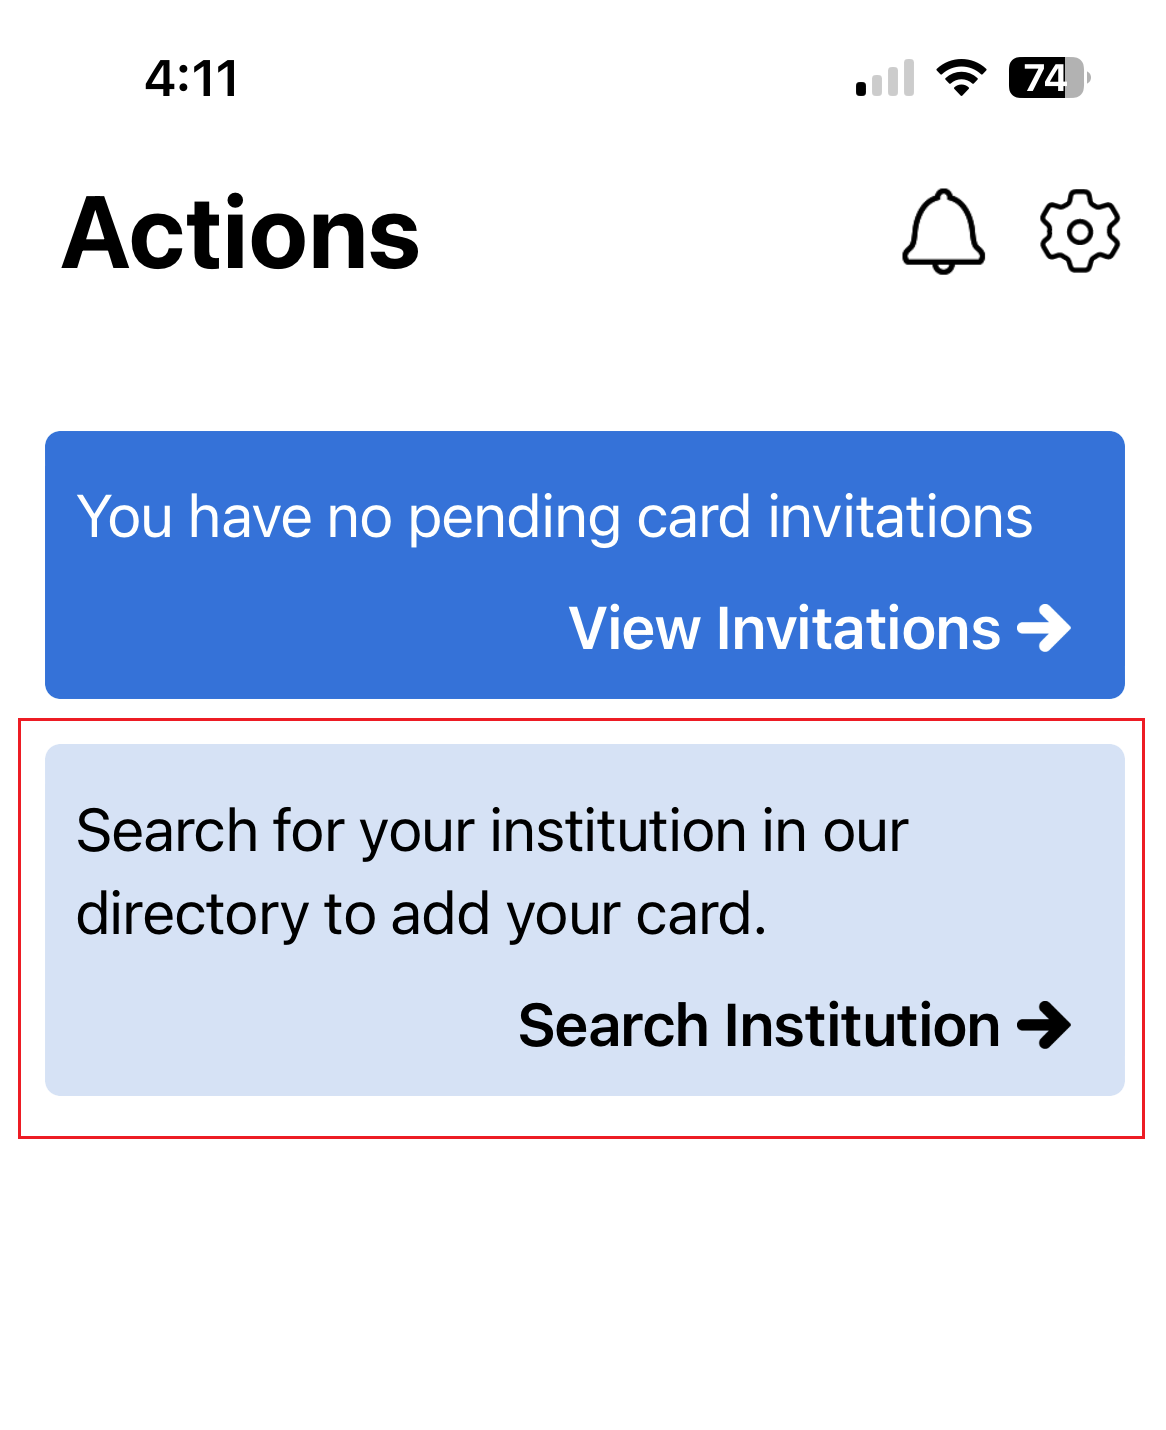
Tap on Search Institution.
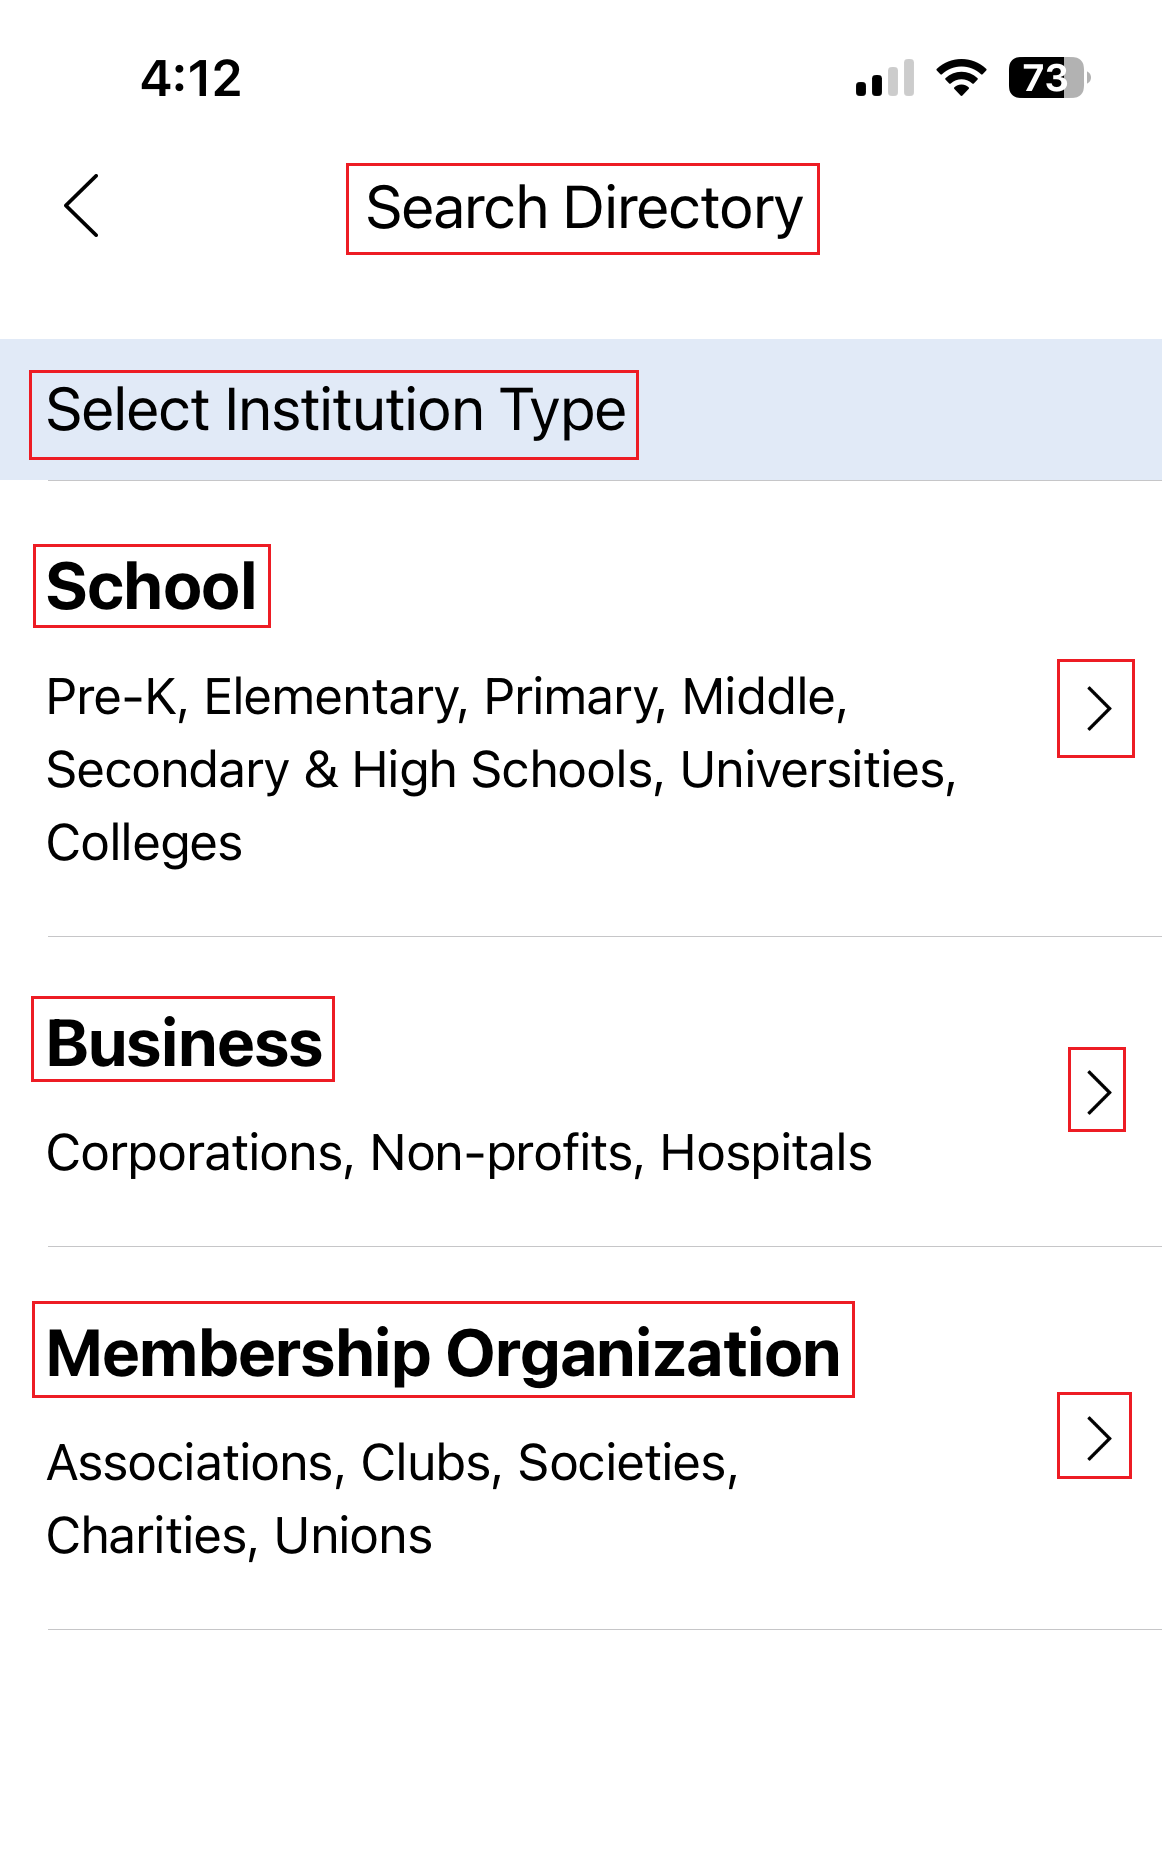
Select your Institution Type (e.g., school, company, association).
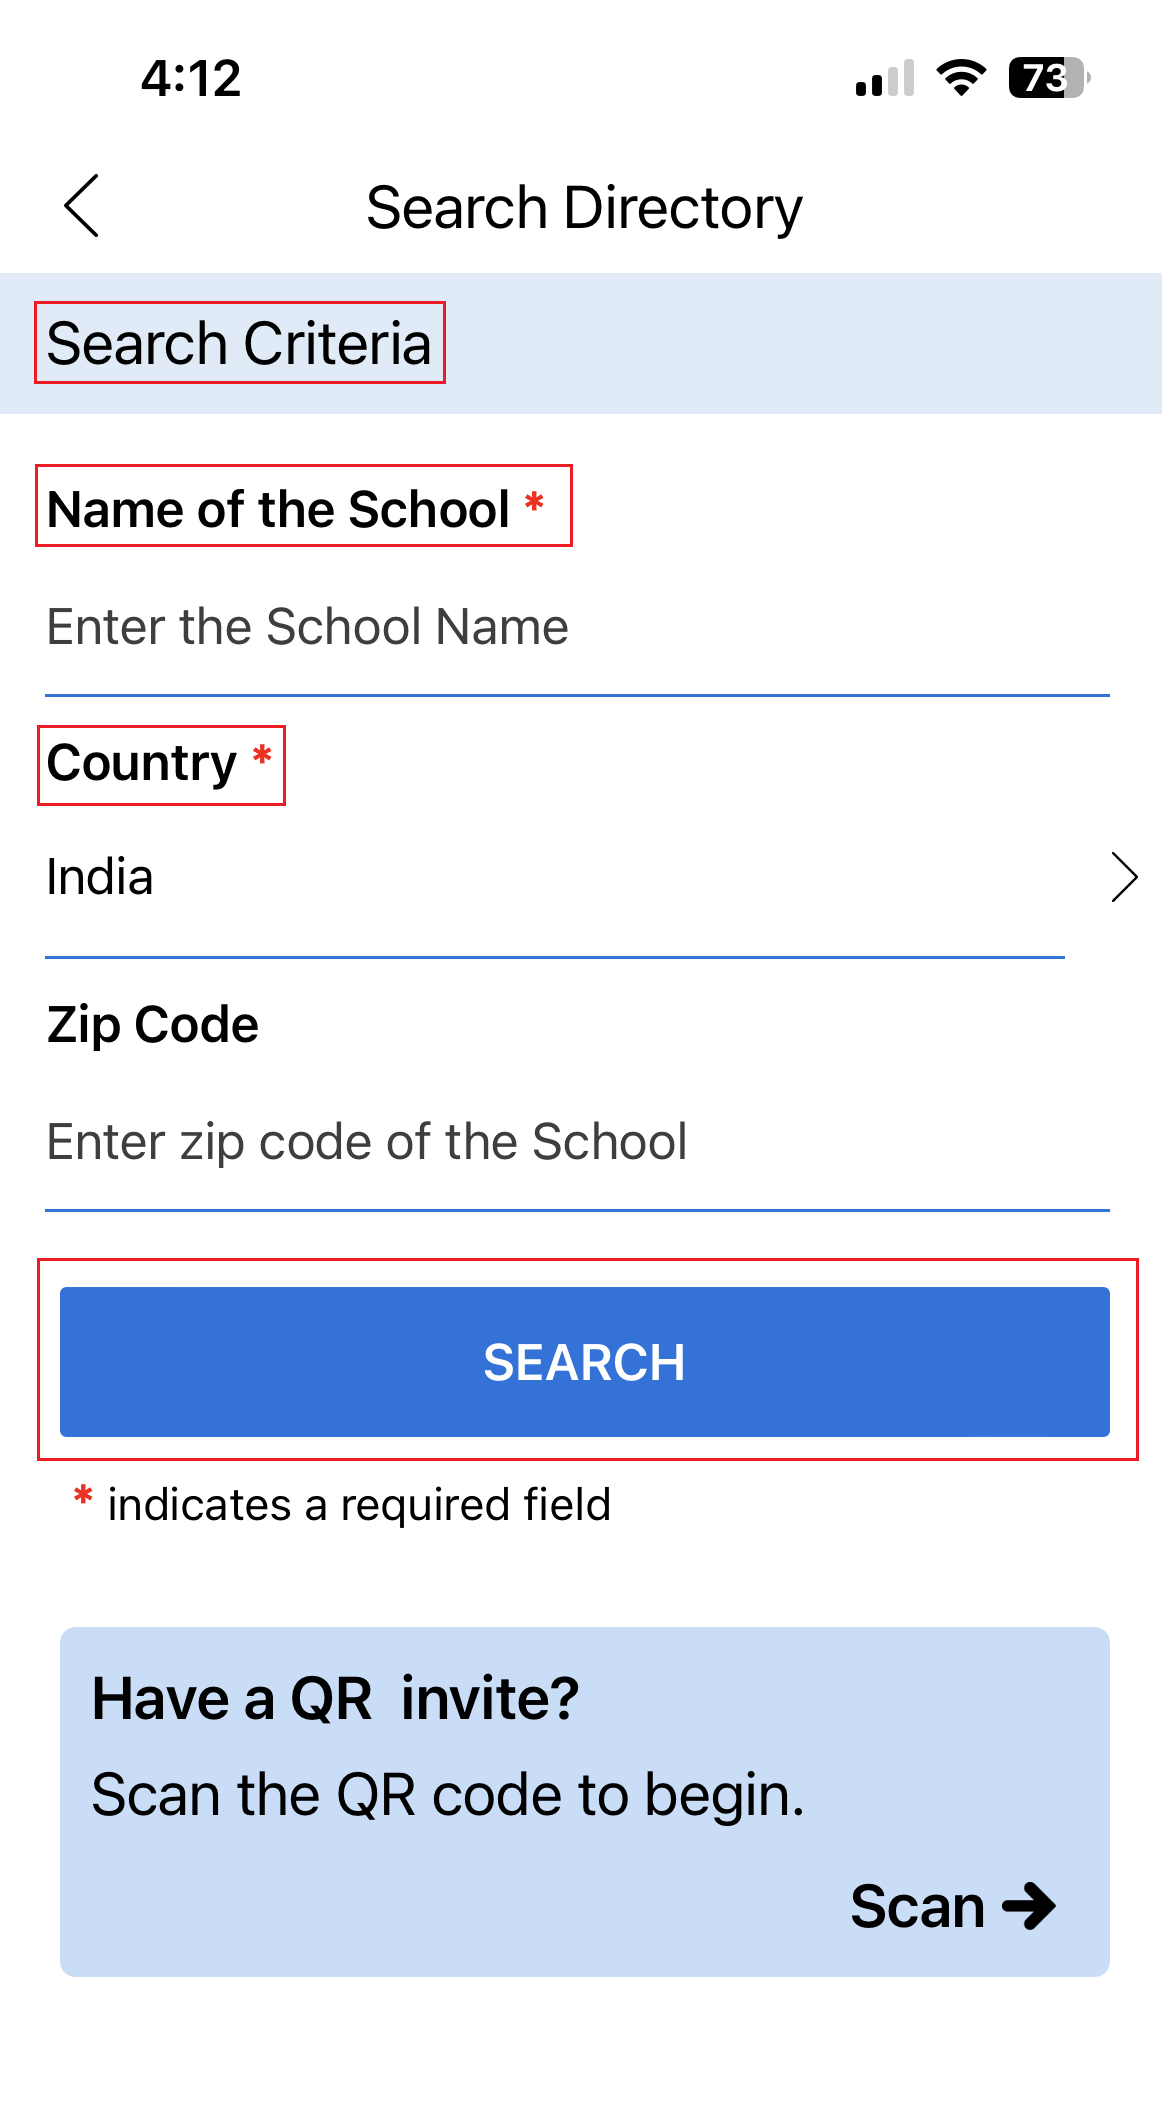
Enter your institution’s name and tap Search.
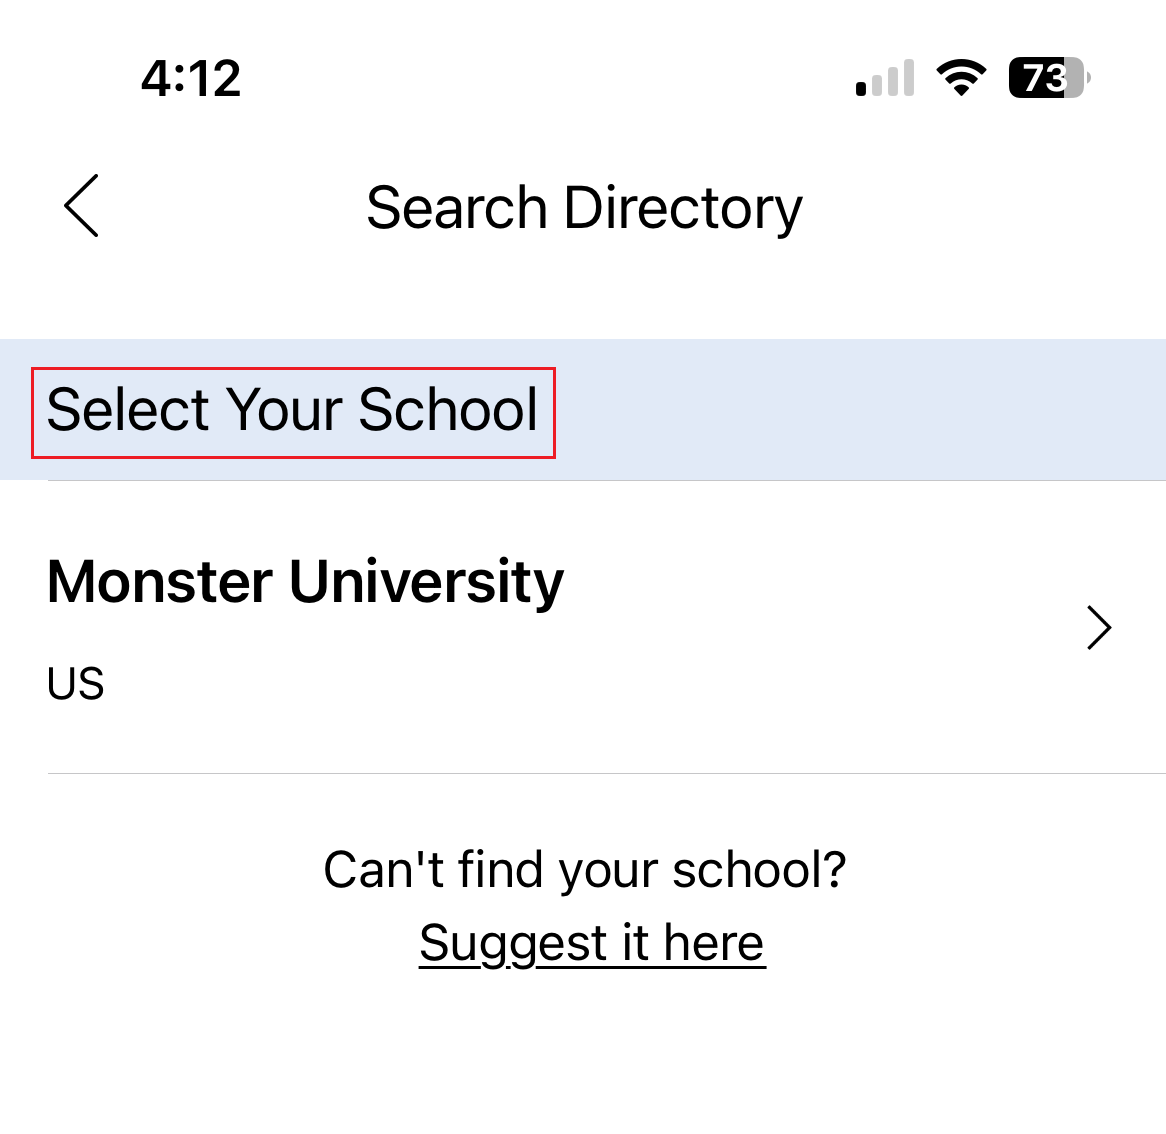
Choose your institution from the list of search results.
Step 4: Verify Your Identity
To ensure secure access to your digital ID card, you must complete identity verification. Follow the on-screen prompts to verify your identity using the method your institution has chosen (e.g., answering security questions or entering a unique code).
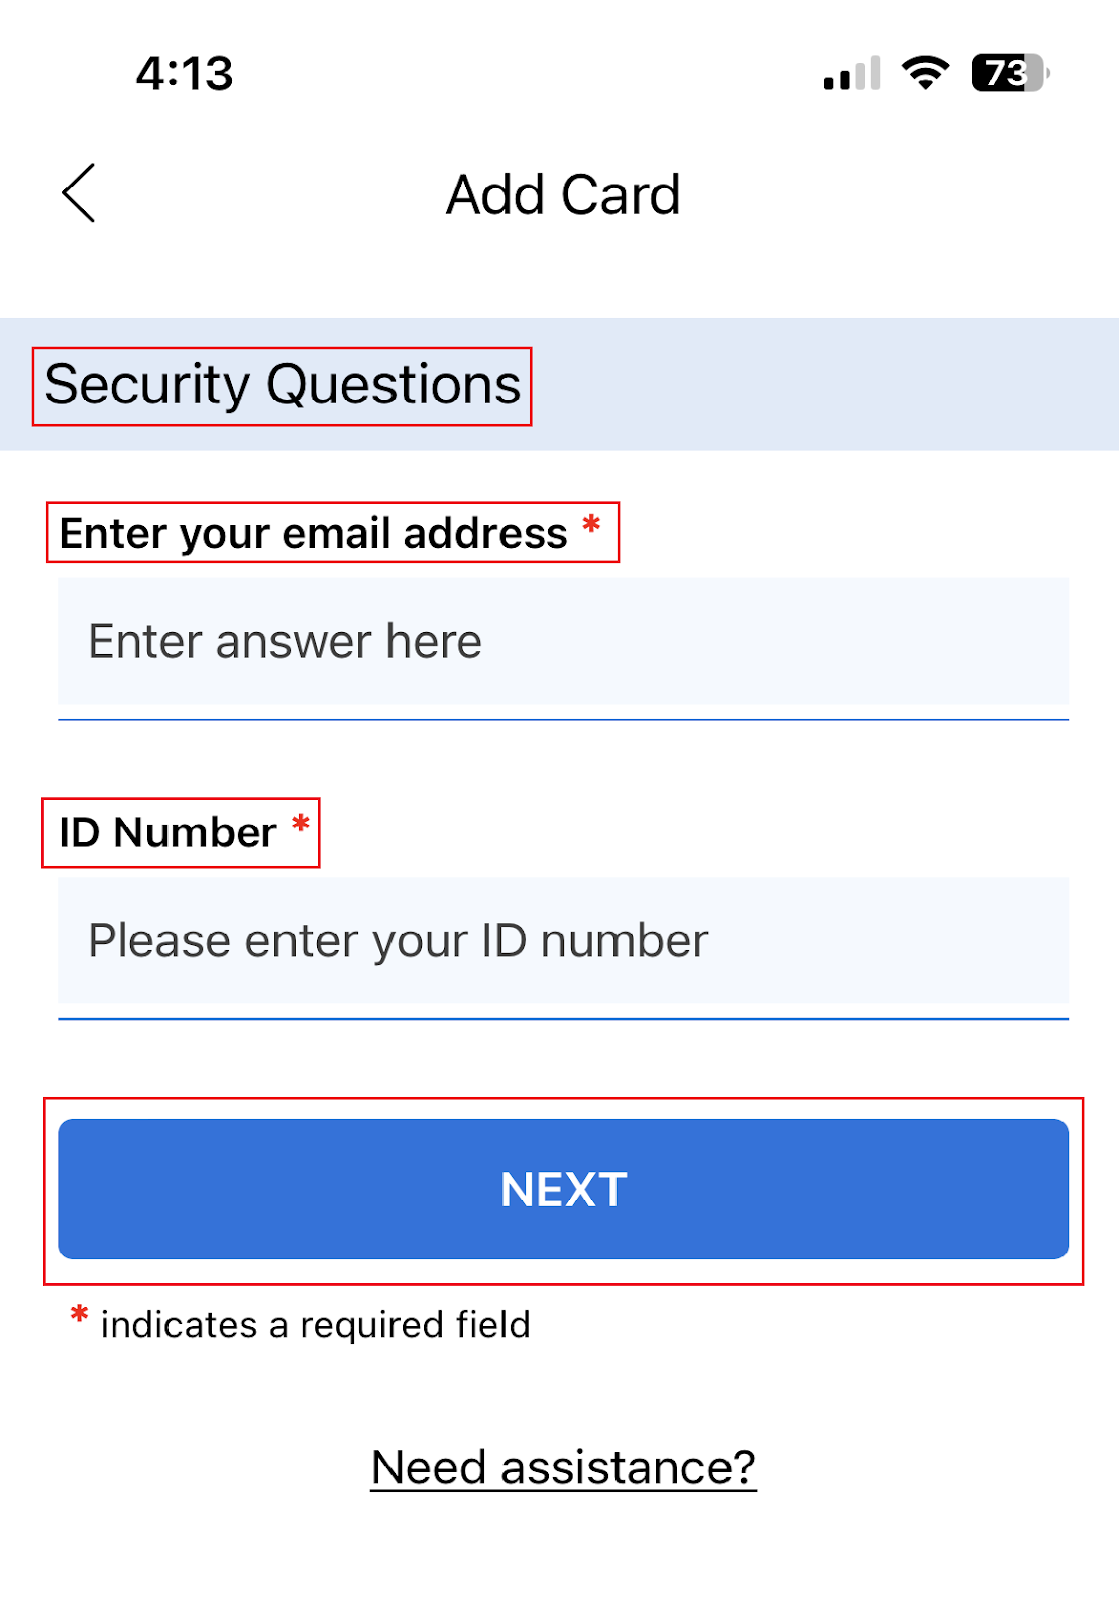
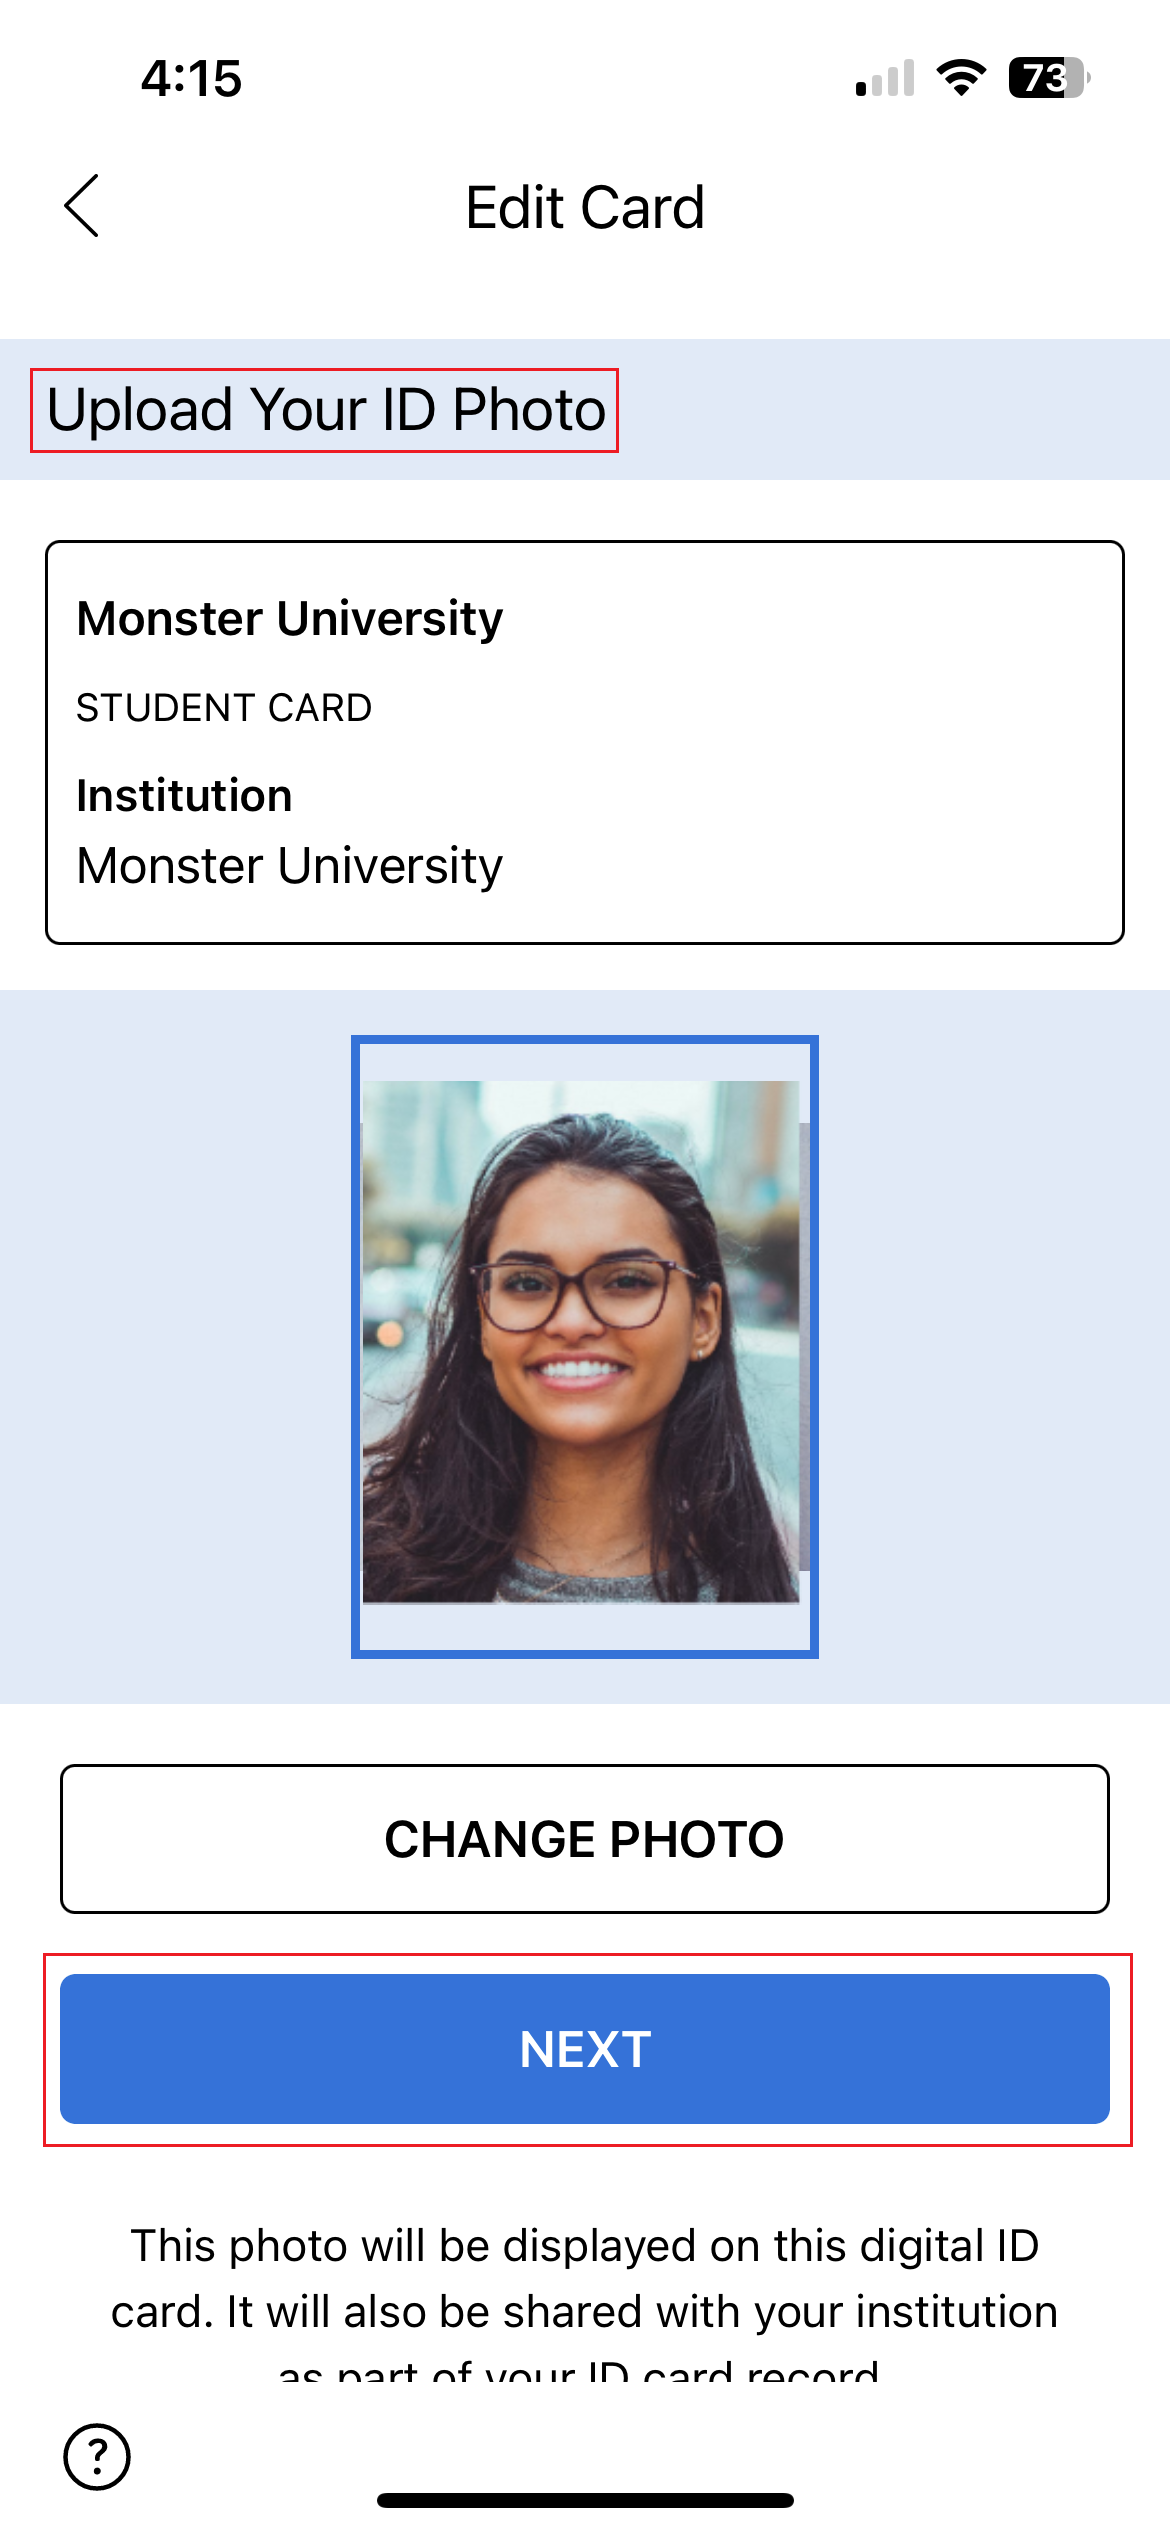
Step 5 (Optional): Submit Additional Information
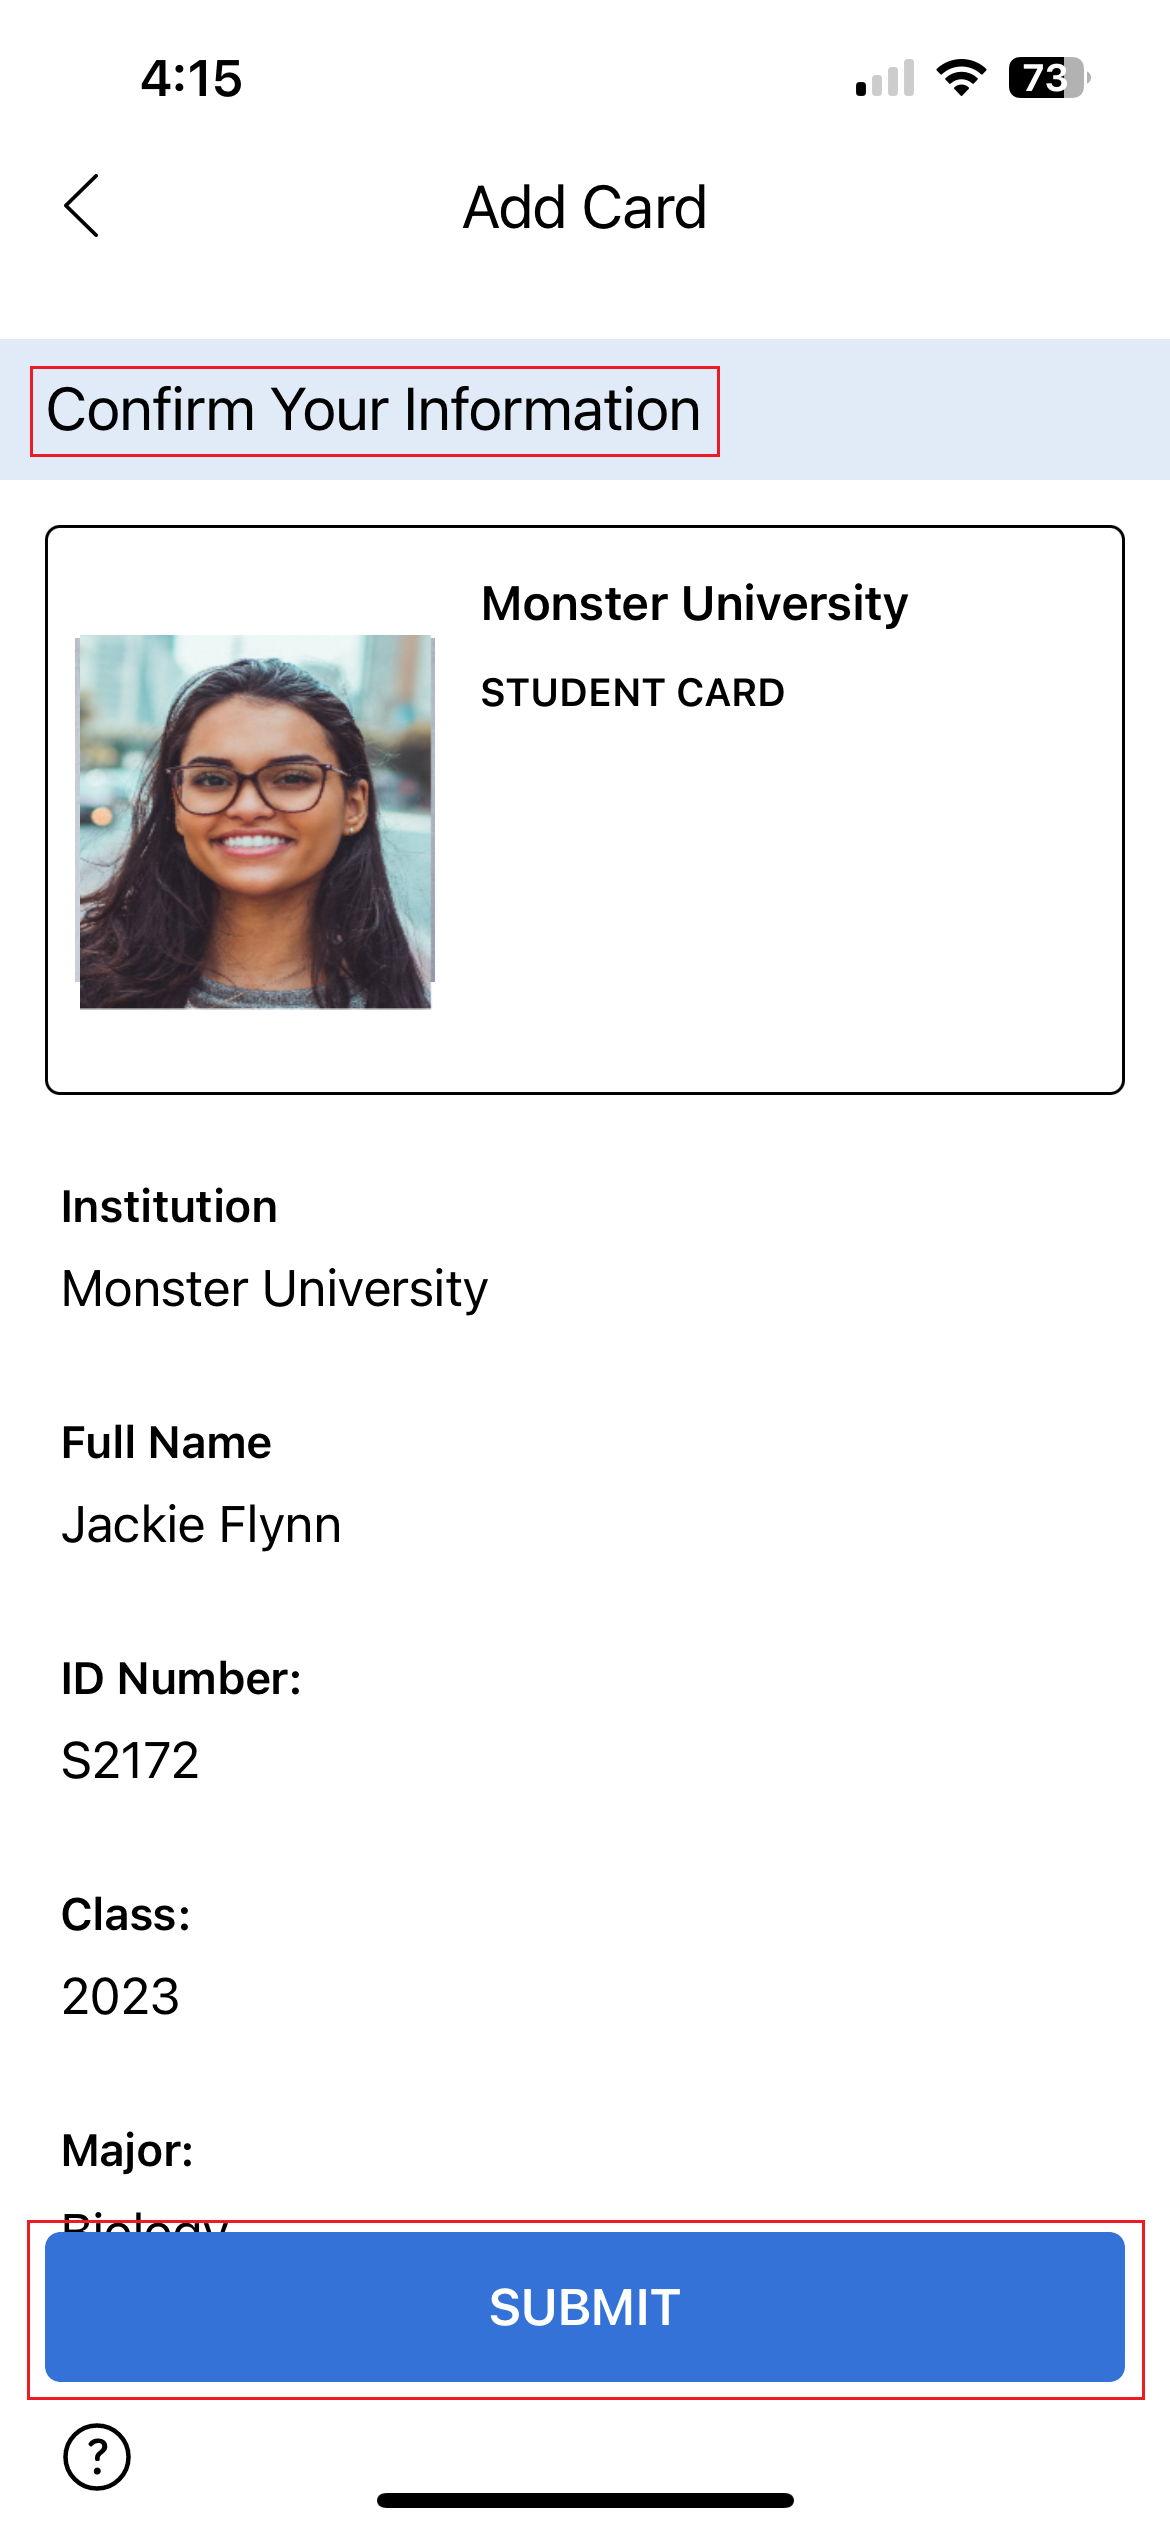
Some institutions may require extra details to complete your digital ID card setup.
- Provide any additional information requested.
- Once finished, tap Submit to complete the card installation process.
Need Help?
If you’re having trouble installing your digital ID card or can’t find your institution, please contact your institution’s ID card administrator for assistance.


