Table of Contents
Step 1: Navigate to “Digital Templates”
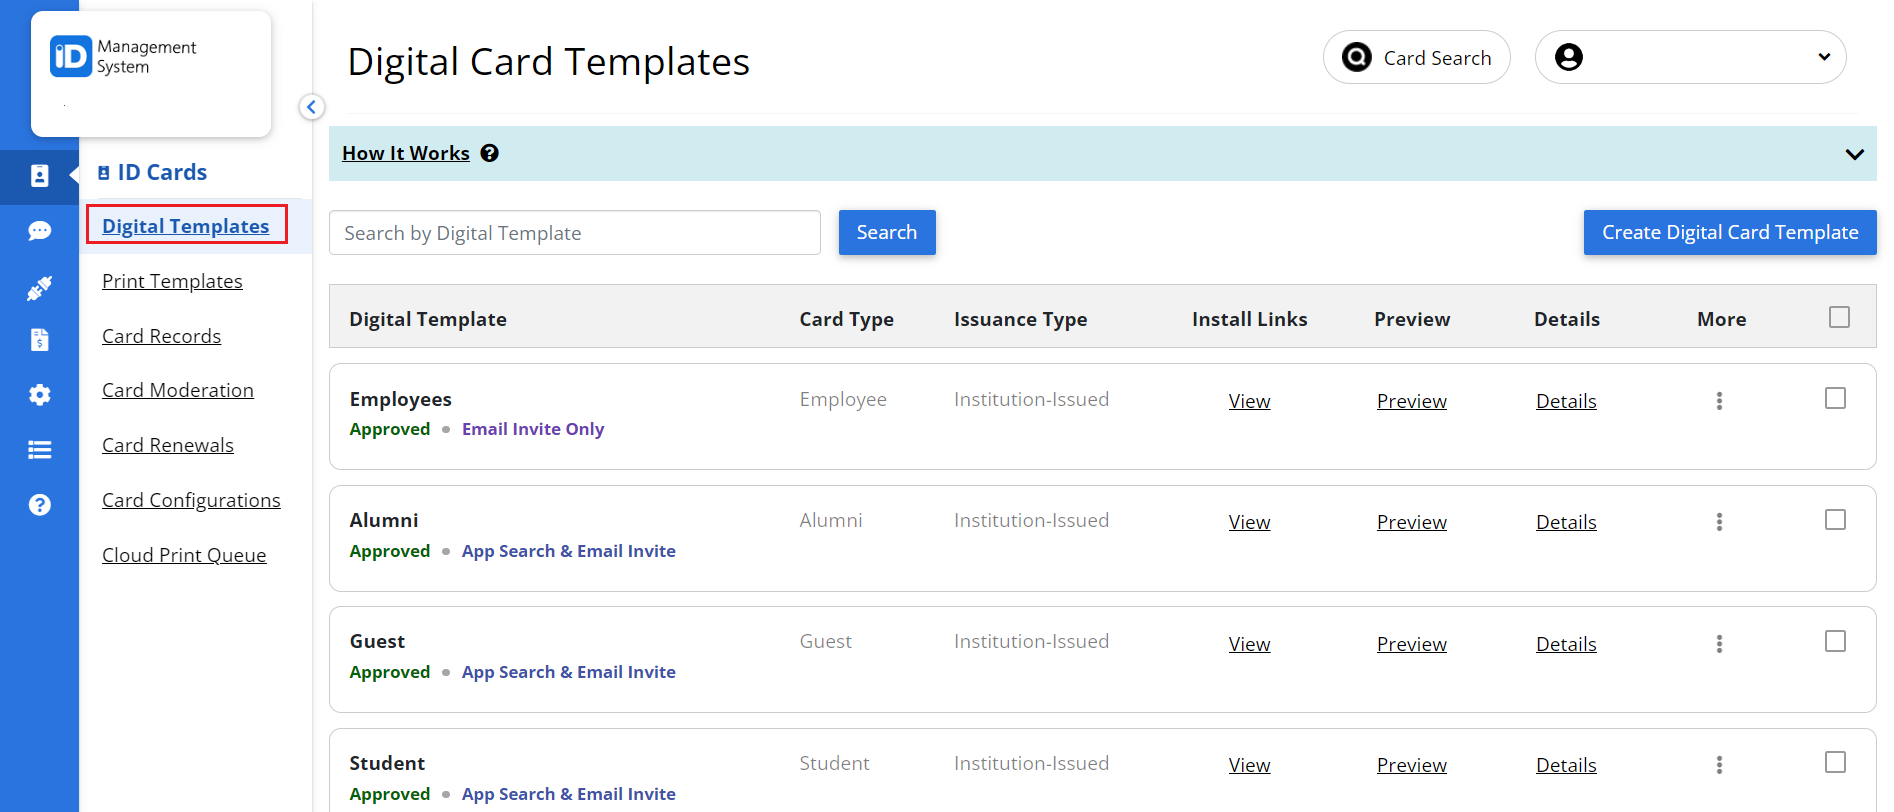
Log in to your IDMS account and click “Digital Templates” on the left panel.
Step 2: Create New or Edit an Existing Template
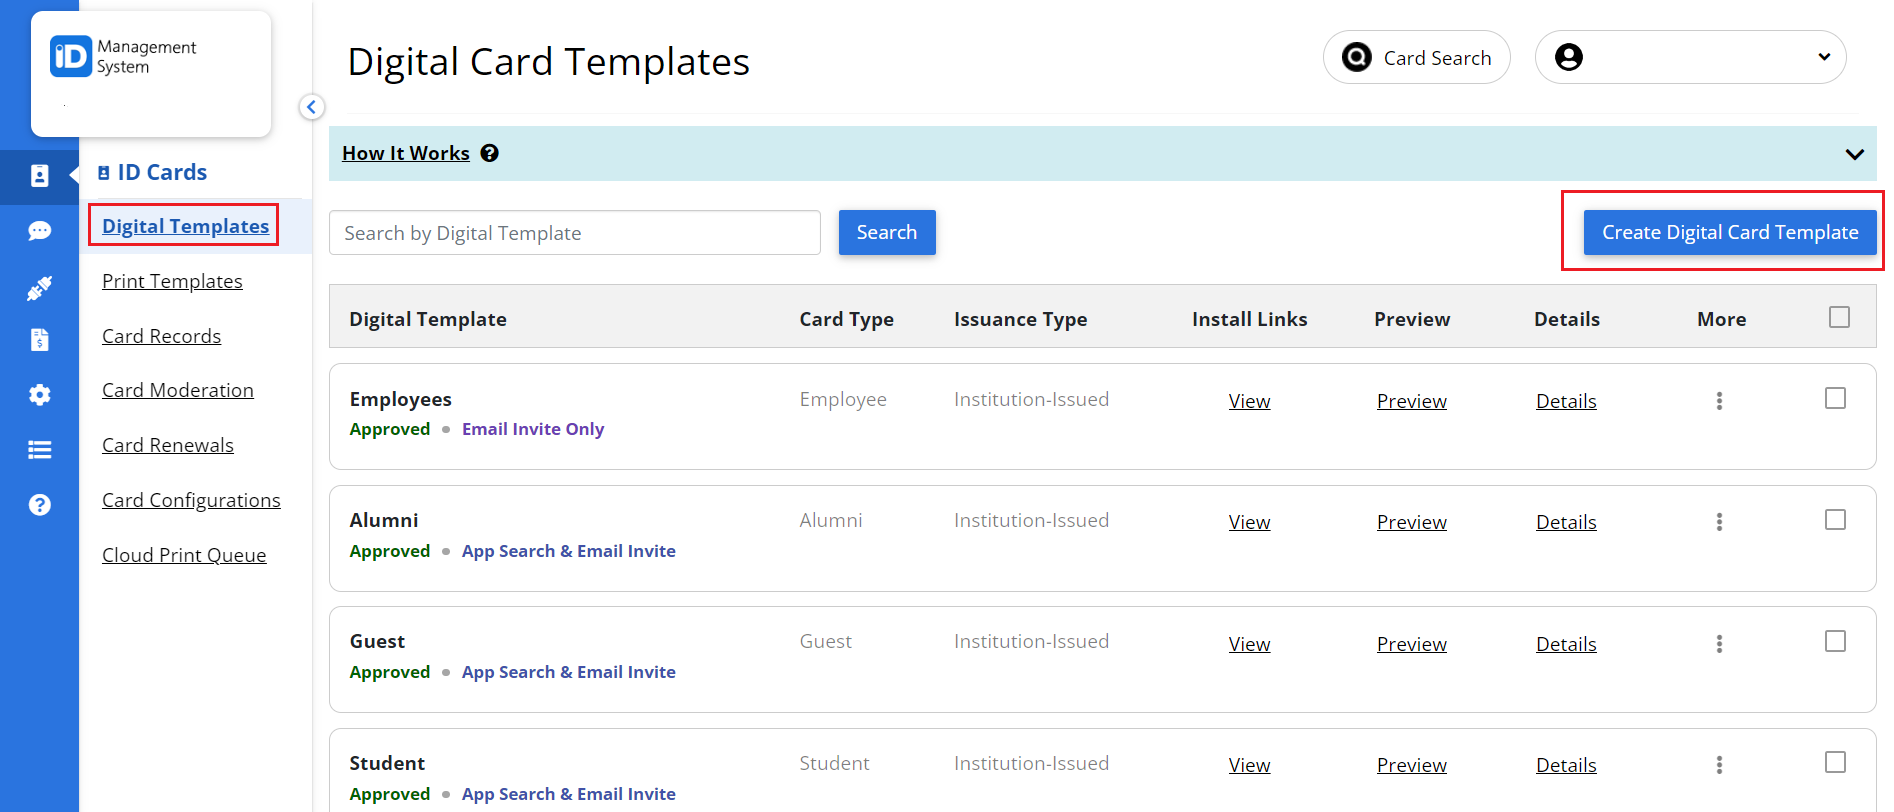
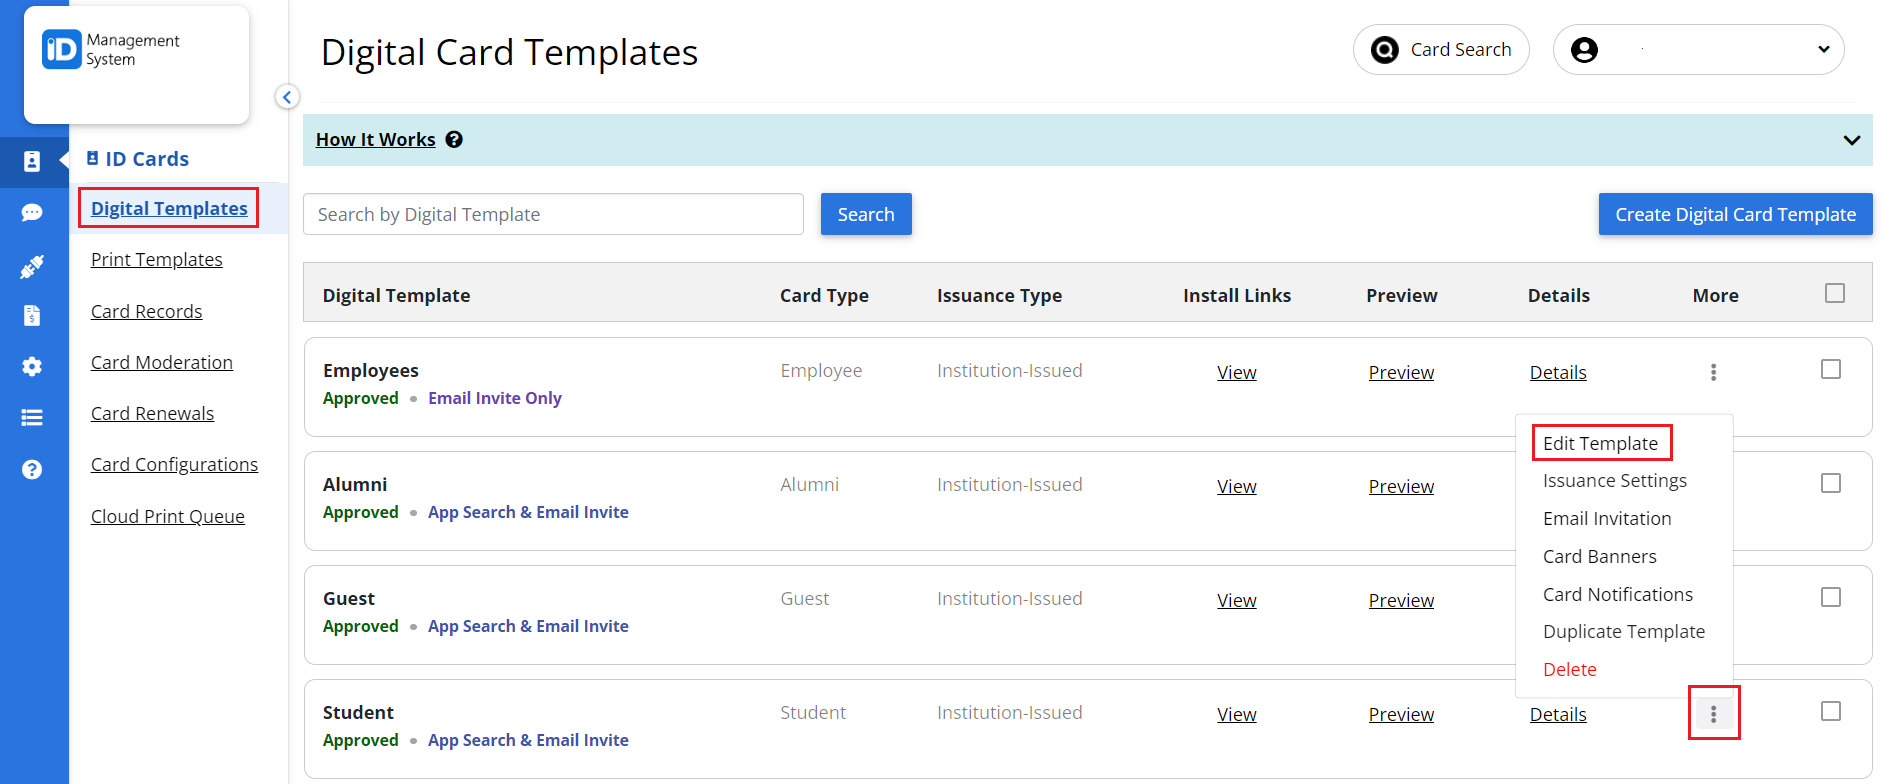
You can create a new template by clicking on “Create Digital Card Template” or edit an existing custom template.
Step 3: Navigate to the “Design” Tab
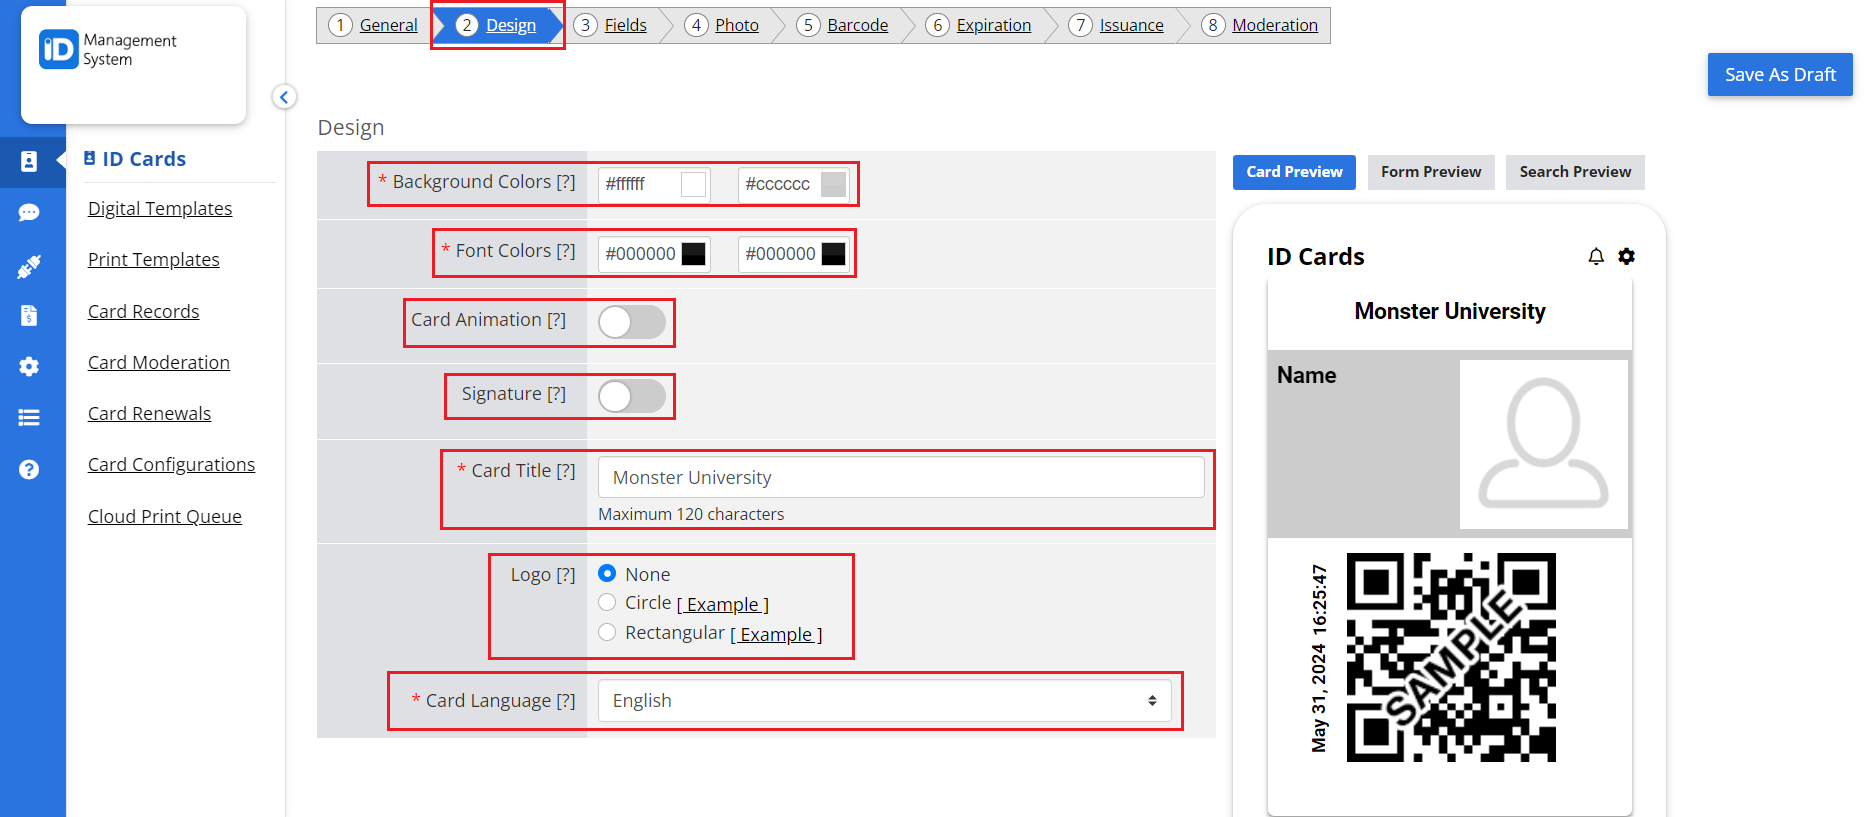
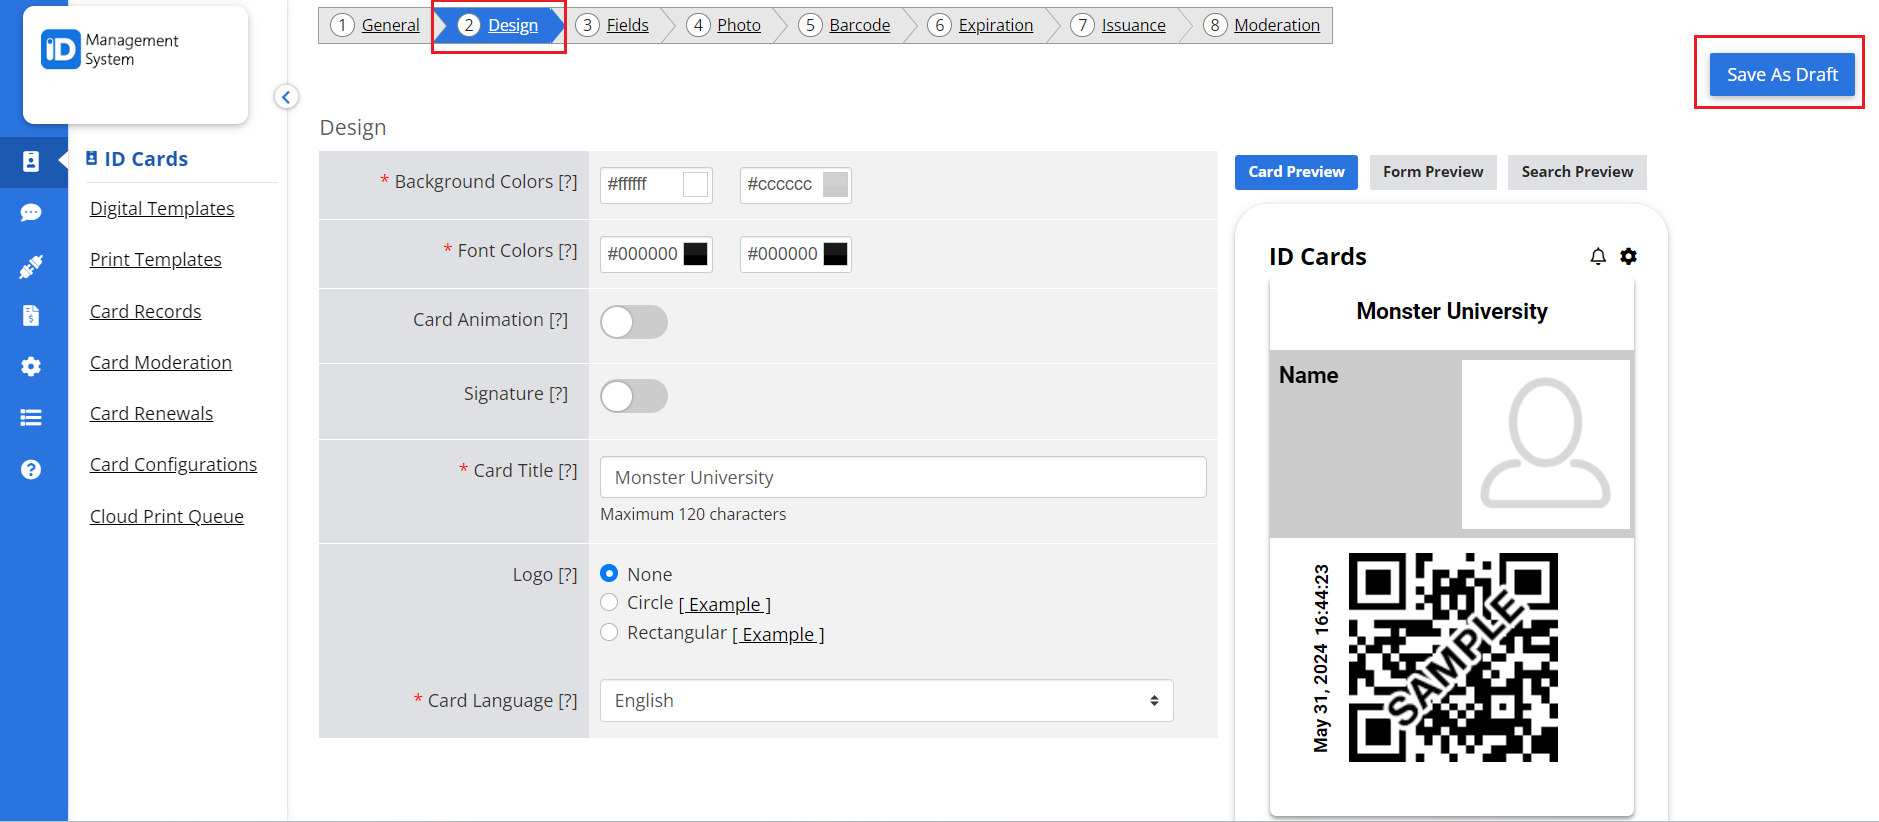
Click on the “Design” tab at the top of the page. Below are some details about the main features in this tab:
- Colors – Choose the preferred background/Font colors for your card template.
- Card animation (optional)– A moving image will rotate around the card. A hologram will also appear on the bottom of the card.
- Signature (Optional) – Require app users to digitally sign their card.
- Title – Enter your Card Title.
- Logo – You can upload a logo for your cards, choosing either a circular or rectangular format. A circular logo will appear as a small circle in the top right corner of the ID card, while a rectangular logo will replace the Card Title.
- Language – You can choose your preferred language from the drop-down menu, with English set as the default.
Step 4: Save the Card Template
When you are done designing your card template, click “Save.”
All set!
