IMPORTANT! Please make sure to design your card template and add the fields you want to be displayed on your cards BEFORE you add card data.
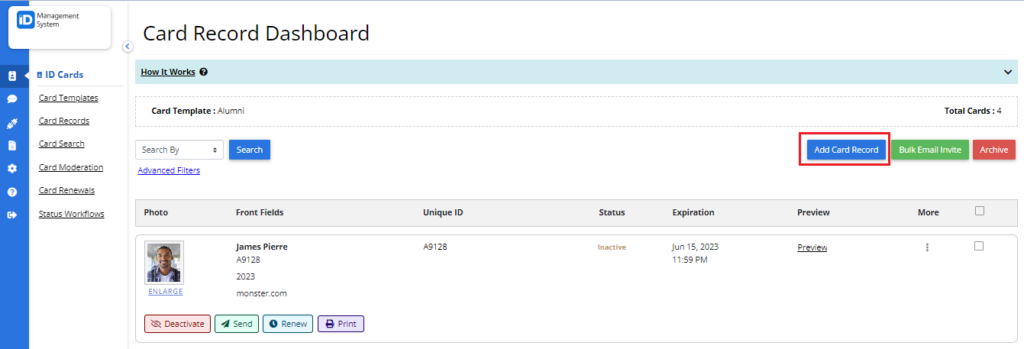
Step 1: Log in to your IDMS account and from the Card Templates page click on “Card Records”.

Step 2: From the Card Records page, click on “Record(s)” for the template you’d like to add data one by one.

Step 3: Once on the Card Record Dashboard page, click on “Add Card Record”.

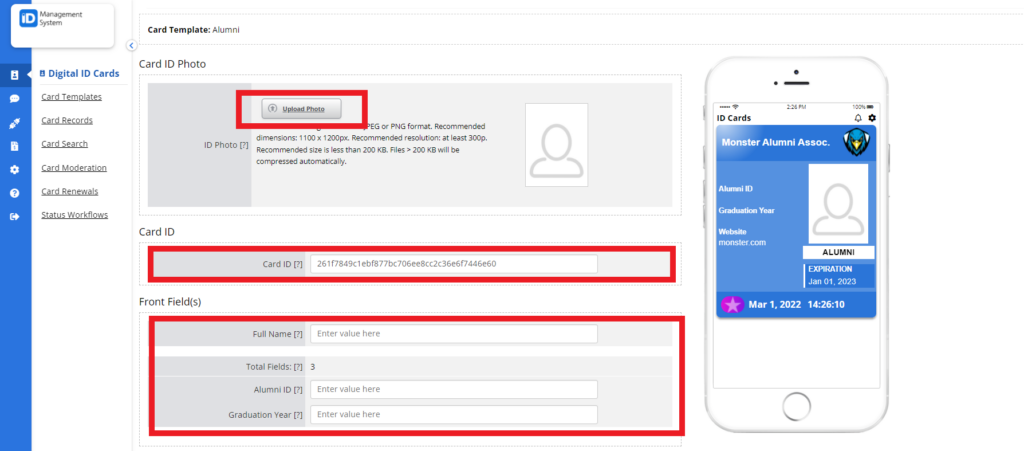
Step 4: Fill out the form fields.
- Upload a photo for this card (optional). You can also let your cardholder upload their own photo in the app.
- Enter a Card ID for this card. Card ID is used to internally identify each card in the system. This won’t be displayed on the card itself.
- Enter the Full Name of this cardholder (and/or any other card fields that you’d like to be displayed on the card – please refer to the card template).
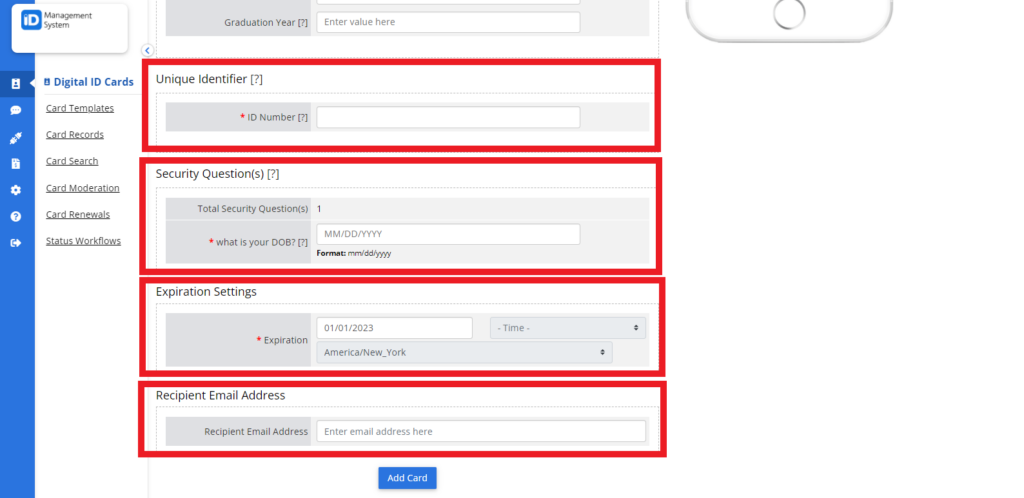
- Enter a Unique Identifier for this card. Unique Identifier is used to verify cardholder identity before they can install an ID card for your institution in the app. It can be an email address or ID number (whichever you selected while designing your card template). This won’t be displayed on the card itself.
- Enter the answer to the Security Question for this card (if you created one in your card template builder).
- If there is an Expiration set for this card, select the date and time this card will expire.
- If you are planning to issue this card via email, enter the Recipient Email Address.


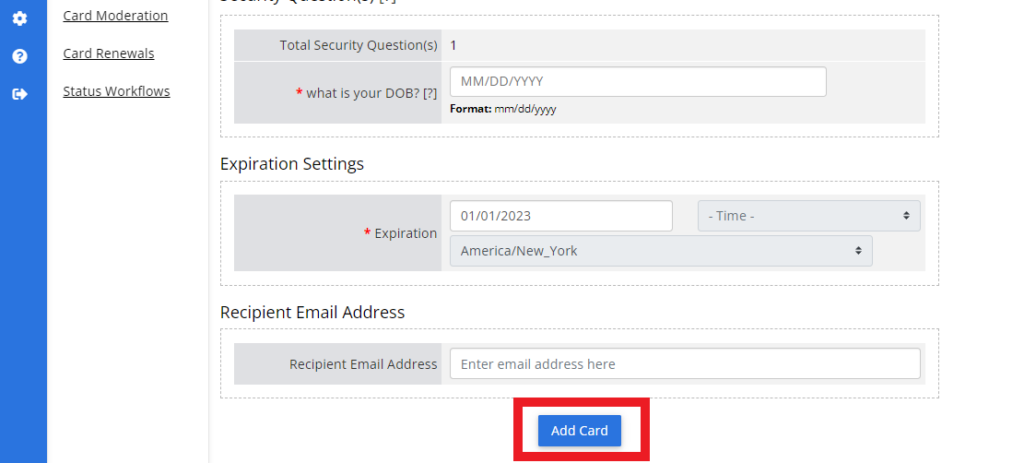
Step 5: When finished, click on “Add Card”.

That’s all it takes to add card data one by one! If you still have questions regarding adding data to your ID Management System, do not hesitate to chat with us!
.
.
