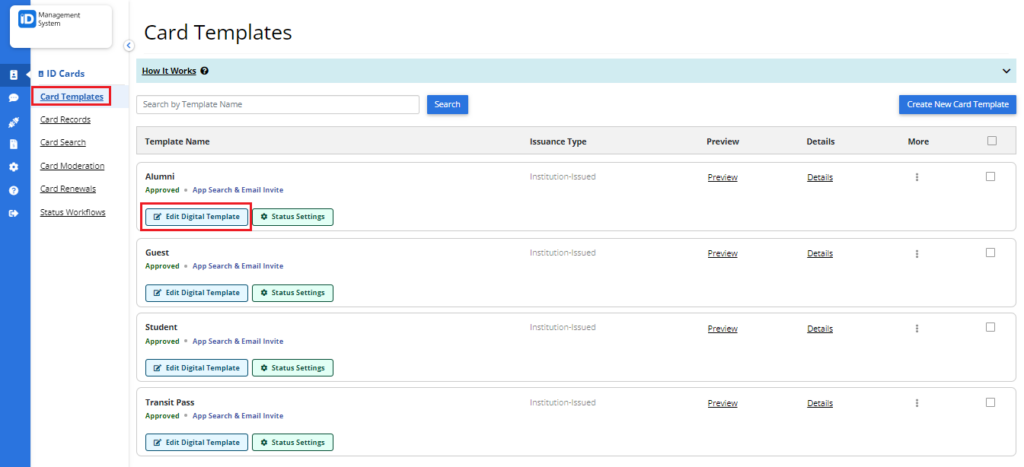
Step 1: Log in to your IDMS account and click “Edit” on the card template you’d like to add card fields to.
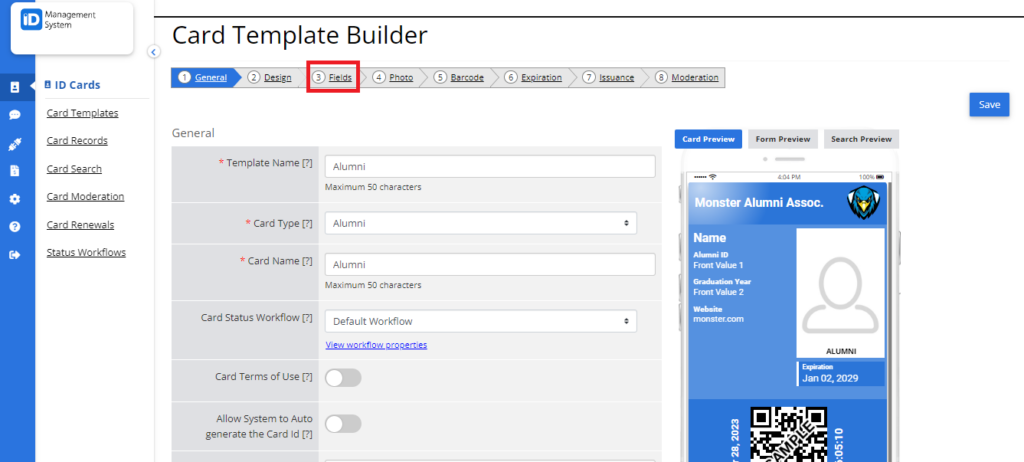
Step 2: Once on the Card Template Builder page, click on the “Fields” tab at the top of the page.
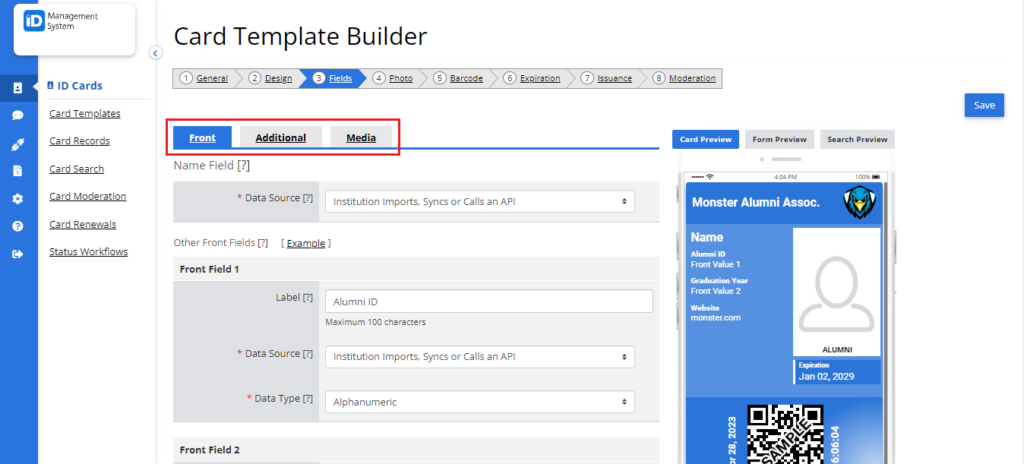
Step 3: On this page, you can add card fields to the ‘Front’, ‘Additional’, and ‘Media’ tabs.
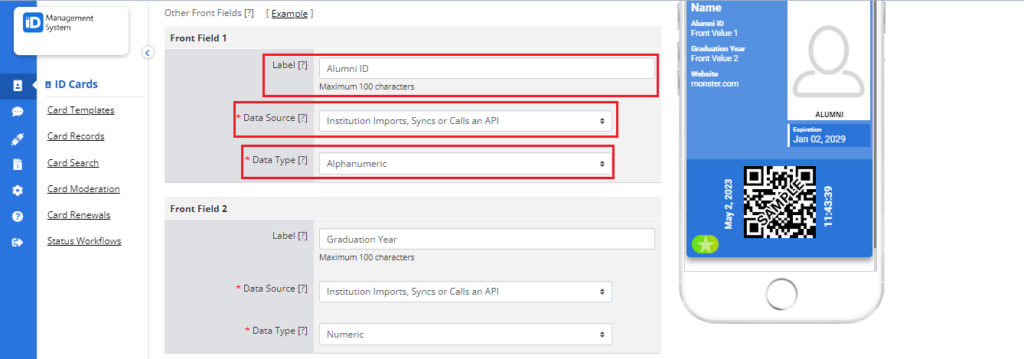
Step 4: When you click on the “Front” tab, you can add card fields to the front of your card that will be displayed below the cardholder’s name. The card template builder provides a “Name” field by default, but you first need to select the data source for this field. The “Data Source” allows you to choose where you want the data from this field to be coming from.

Step 5: You can also optionally add up to three more card fields on the front of the card.
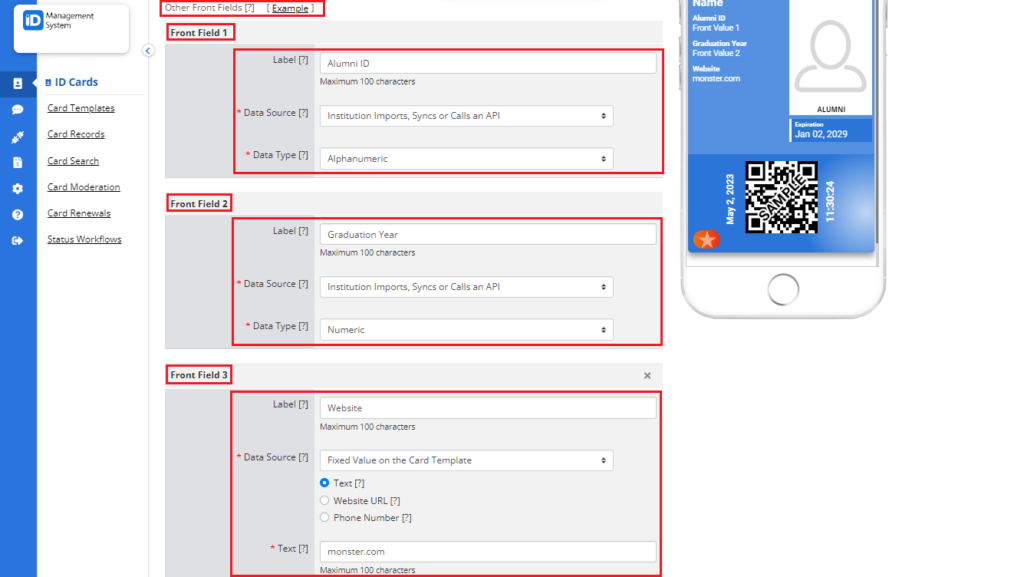
Step 6: For each card field, you need to enter the “Label,” select the “Data Type,” and choose the “Data Source.” The “Label” is the name of the field shown above the value of the field, for example, Label: Major, Value: Psychology. The “Data Type” corresponds to the keyboard that will show in the app. Based on what data type you choose, the app will present users with either an alphanumeric, numeric, or date selector keyboard. Lastly, the “Data Source” allows you to choose where you want the data from this field to be coming from.
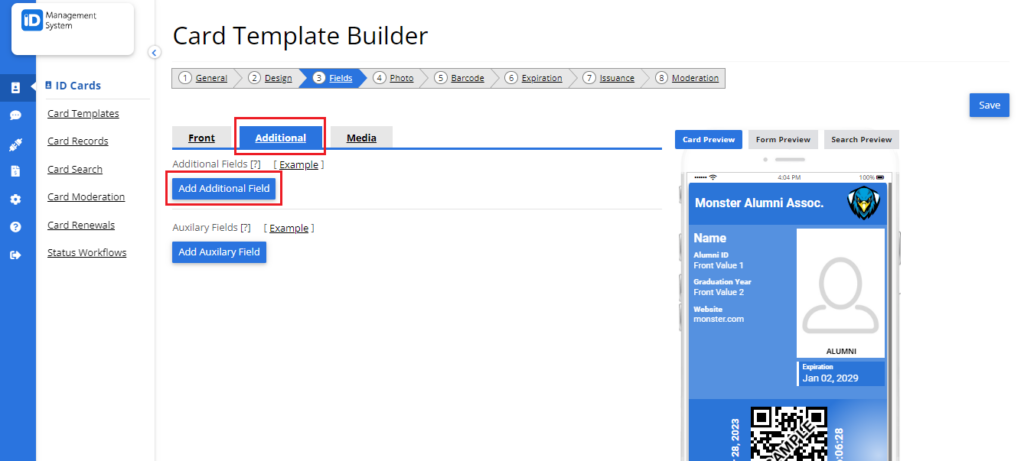
Step 7: If you’d like to add more card fields, you can use the “Additional” tab. To do so, click on the “Additional” tab, and then add the additional number of fields you’d like to have on the card. Be sure to also choose the data type and data source for each field added.

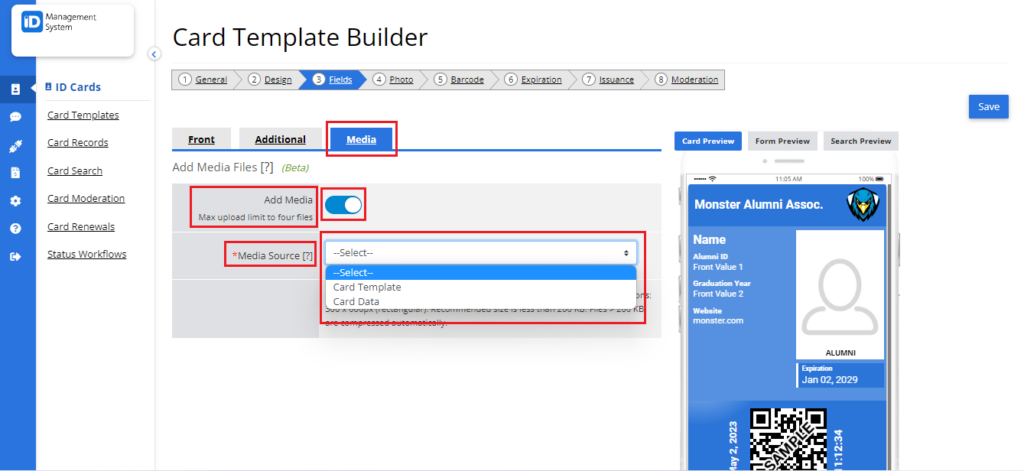
Step 8: Additionally, you have the option to upload media files to the ID cards. This can be done by enabling the “Add Media” feature under the “Media” tab. Once this feature is enabled, select the “Media Source.” If you’d like to have the same media files on all the ID cards, select the “Card Template” option and upload the media files from there. If you’d like different media files on each or some of the ID cards, select the “Card Data” option and go to the Card Data page to upload your files one by one.
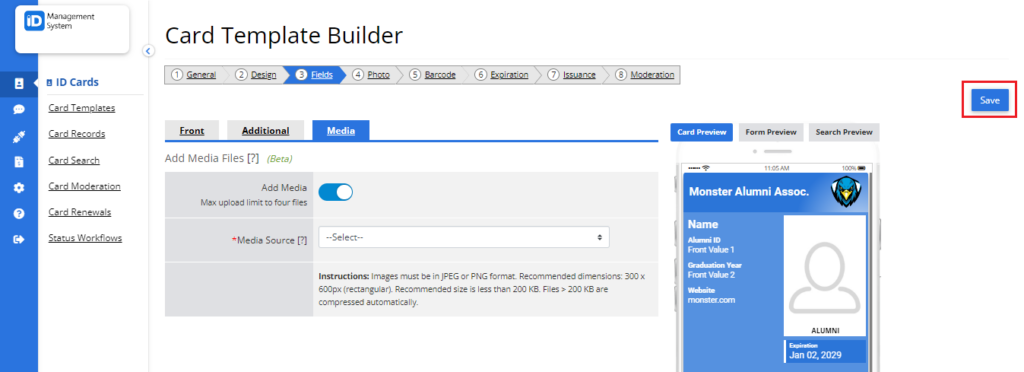
Step 9: After adding your card fields, click “Save.”
.
.
.
