What is a Webhook?
A webhook is a way for one web application to send real-time data to another application whenever a specific event happens, using an HTTP request to a pre-defined URL.
What is a Trigger Webhook?
A trigger webhook is an event or condition within a system that initiates a webhook response in another system.
Step 1: Create a Webhook
Navigate to the Integration tab on the left panel and select Webhooks. Then click the ‘Create a Webhook’ button to create a new webhook.

Step 2: Configure Webhook Type
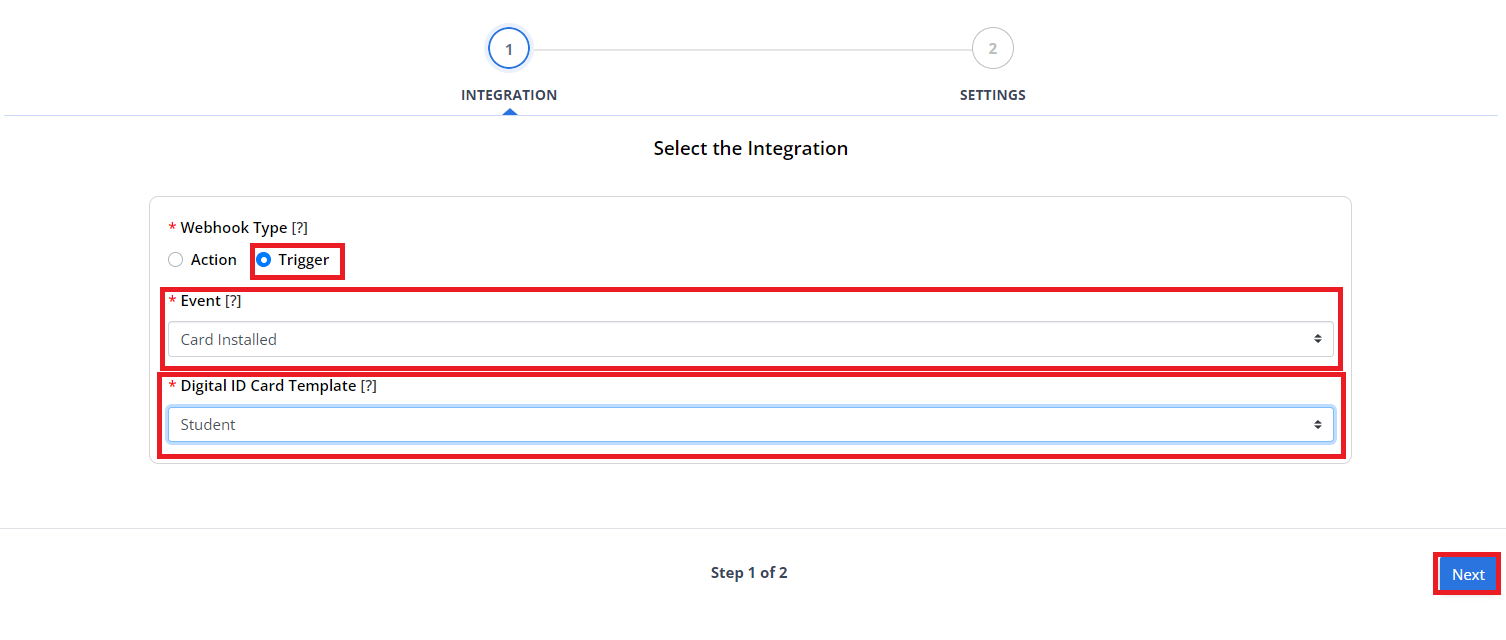
Under the ‘Integration’ step, select Trigger’ as the webhook type by selecting the ‘Trigger’ radio button. Then select a triggering event in the ID Management System (IDMS) from the options provided in the dropdown to initiate the webhook. Once you select an event, select the card record group for which you want the webhook set. When you are done configuring your webhook click the ‘Next’ button to continue.
If you need assistance knowing which event to select, you can reference the Action/Trigger Webhook Event Definitions knowledge base article.

Step 3: Set Webhook Action Settings
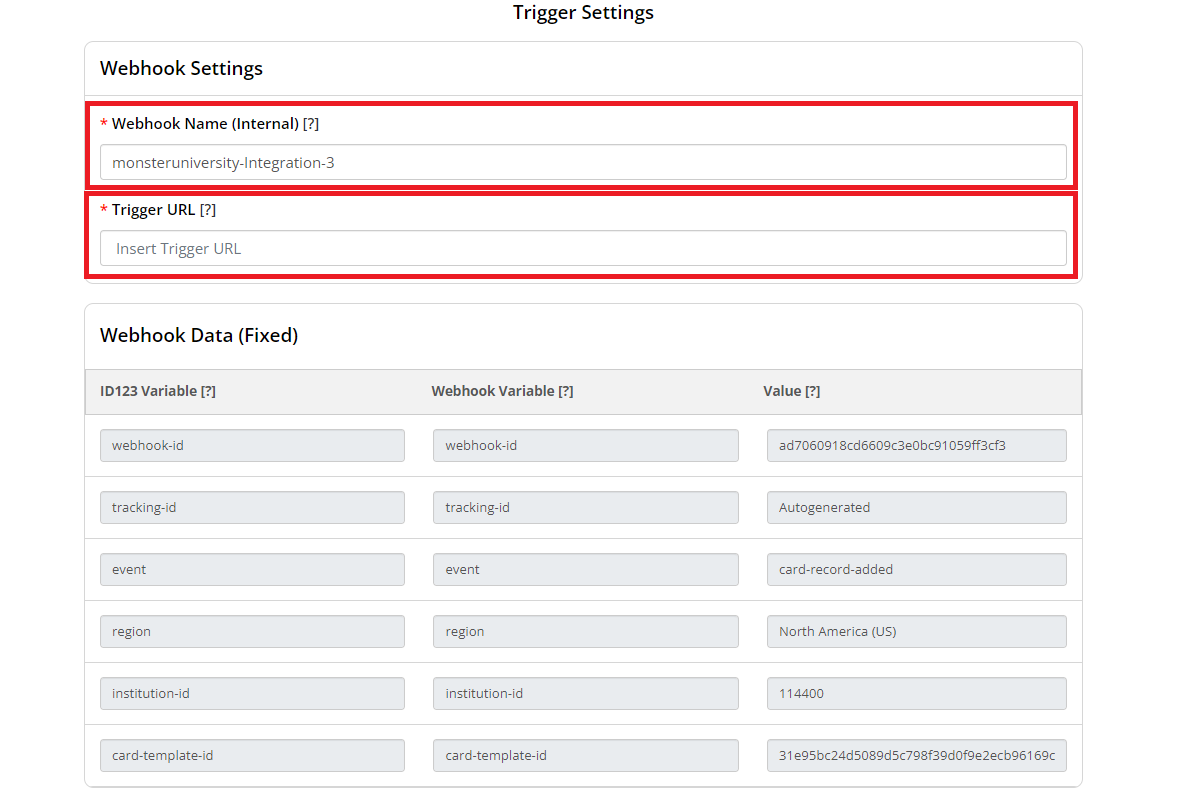
In the ‘Settings’ step, enter an internal name to identify the webhook in the IDMS. The webhook name will automatically be pre-populated by default, however you can edit it as needed. After entering the name for your webhook, enter the ‘Trigger URL’ from your external service. This is the URL endpoint provided by your receiving system where it expects to receive webhook requests.

Step 4. Review Fixed Webhook Data
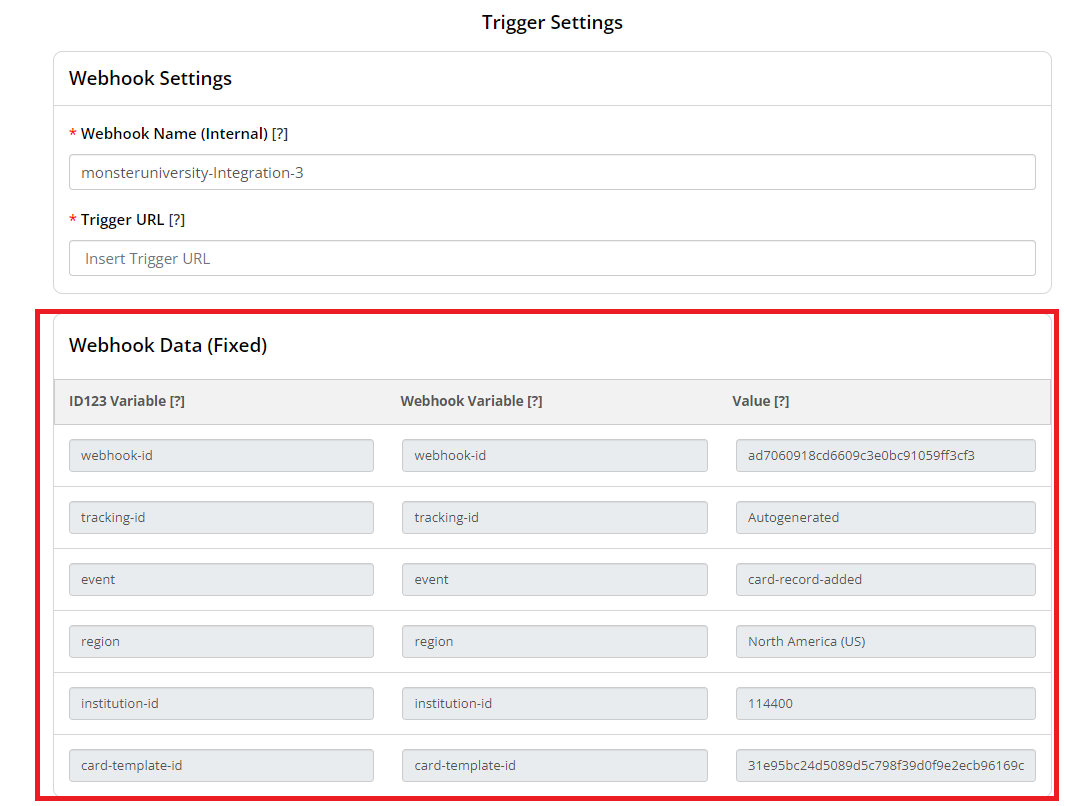
Review the fixed webhook data. The fixed webhook data is prepopulated based on your account information, triggering event, and card record group previously selected for the webhook. If you need to make changes, go back to the ‘Integration’ step and change your event or card record group.

Step 5. Map Webhook Data
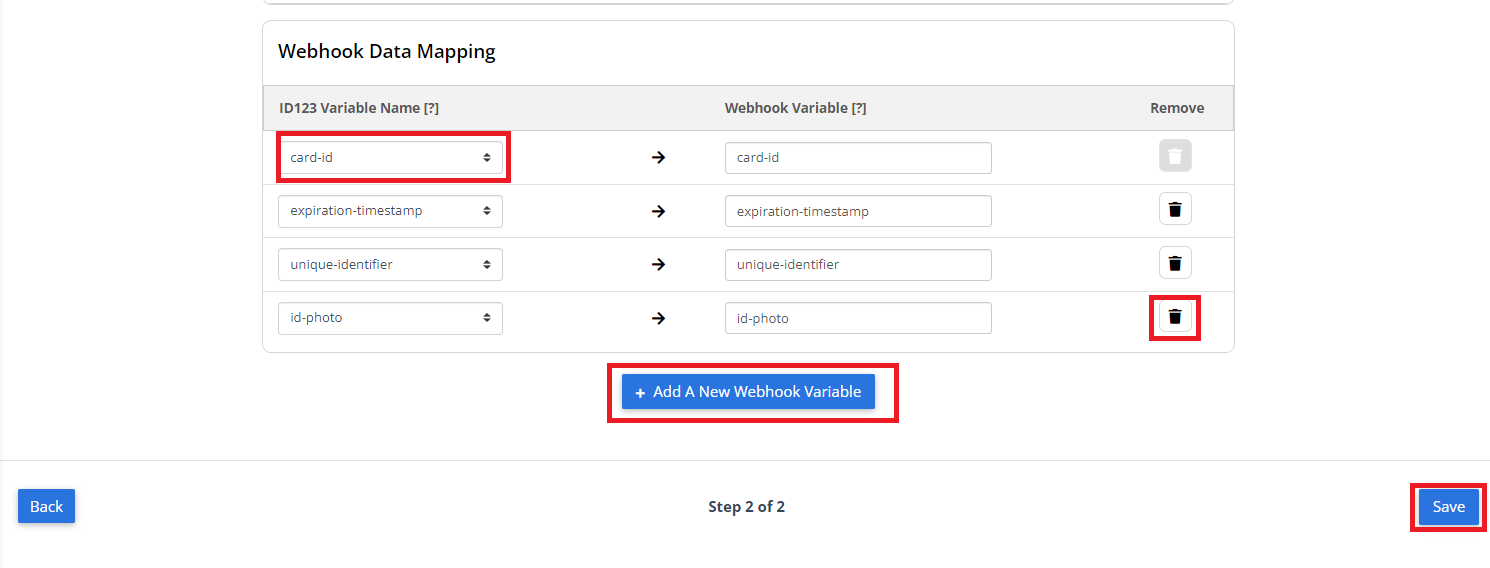
Map the webhook variables to the corresponding ID123 variables. ID123 variables are based on the card record group selected previously in Step 1. You can add additional webhook variables to the map by clicking the ‘Add a New Webhook Variable’ button. You can also remove webhook variables by clicking the ‘Remove’ icon next to the desired variable in the Remove column. When you are finished making changes click the ‘Save’ button to save the changes made to your created webhook.

