Customizing your card email invitation ensures your digital ID cards are delivered with clear branding and messaging. You can add your organization’s logo, edit the subject line, and include personalized instructions for cardholders. Follow the steps below to easily customize the email invite template in the ID123 ID Management System (IDMS).
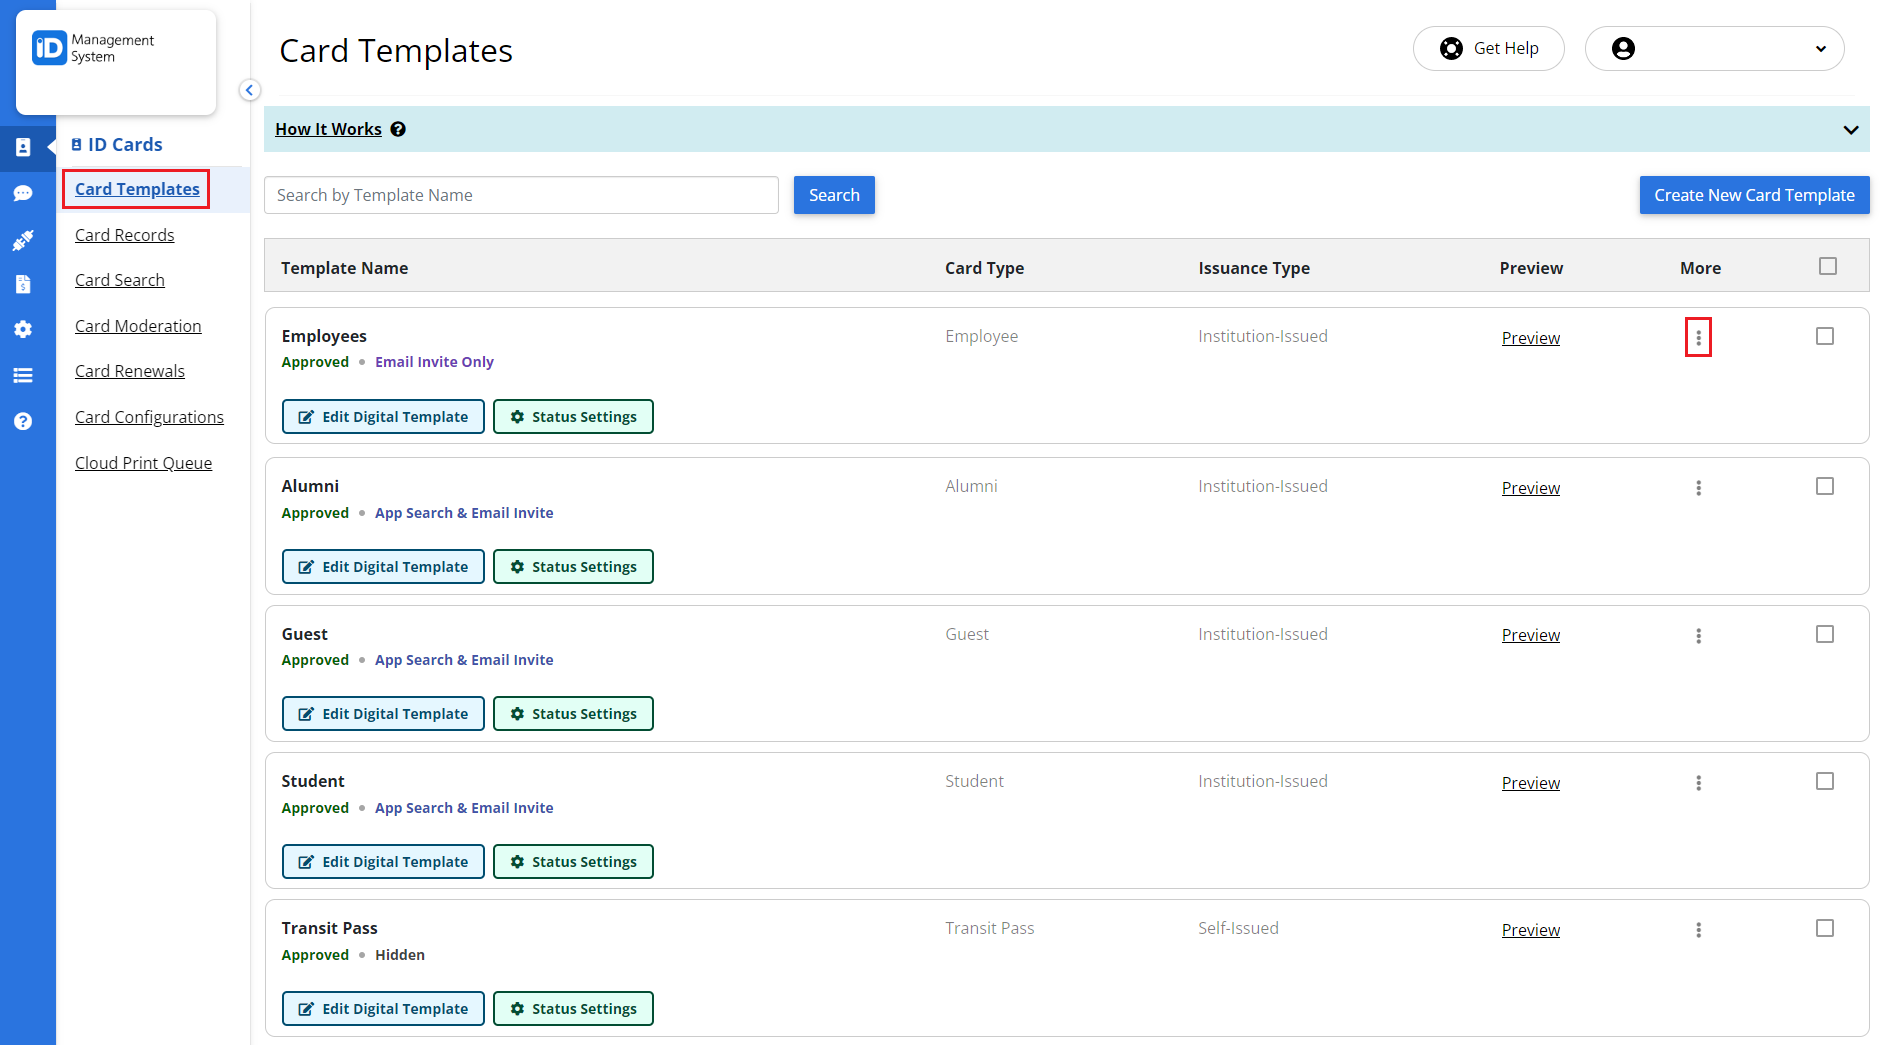
Step 1: Go to the Card Templates Page
Log in to your IDMS account and navigate to the Card Templates section from the left-hand menu. Find the card template you want to customize and click the three dots (•••) under the “More” column.

Step 2: Open the Email Invitation Editor
From the dropdown menu, click on “Email Invitation” or “Customize Email” to open the email editor for that specific card template.

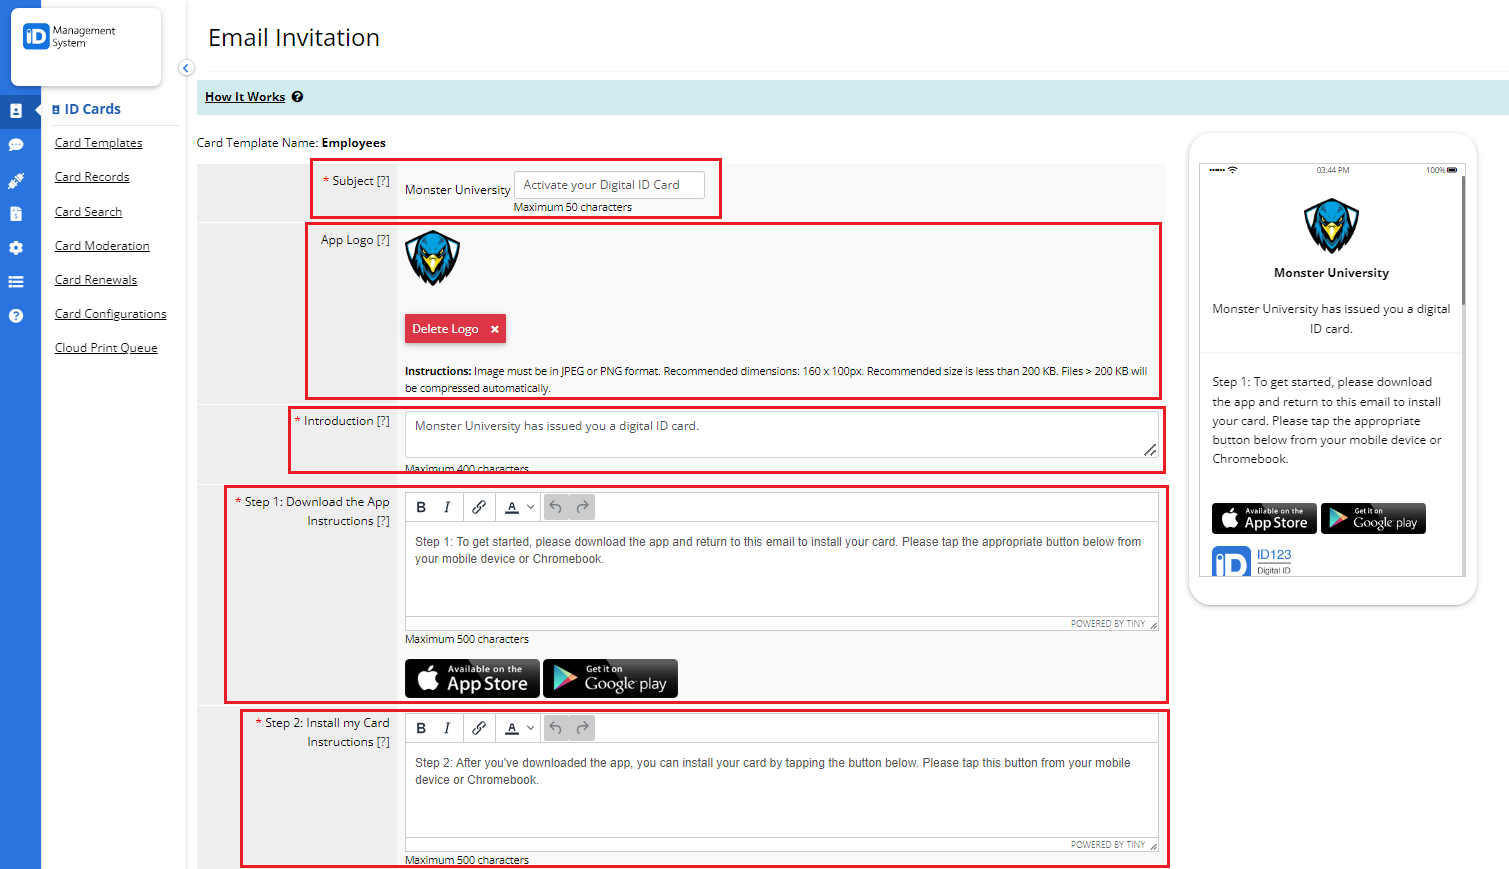
Step 3: Customize Email Invitation Details
On the Email Invitation customization page, you can edit the following:
- Email Subject Line: Add a subject that clearly tells the recipient what the email is about (e.g., “Your New Digital ID Card is Ready!”).
- Upload Your Logo: Click the “Upload Logo” button to add your organization’s logo for a branded appearance.
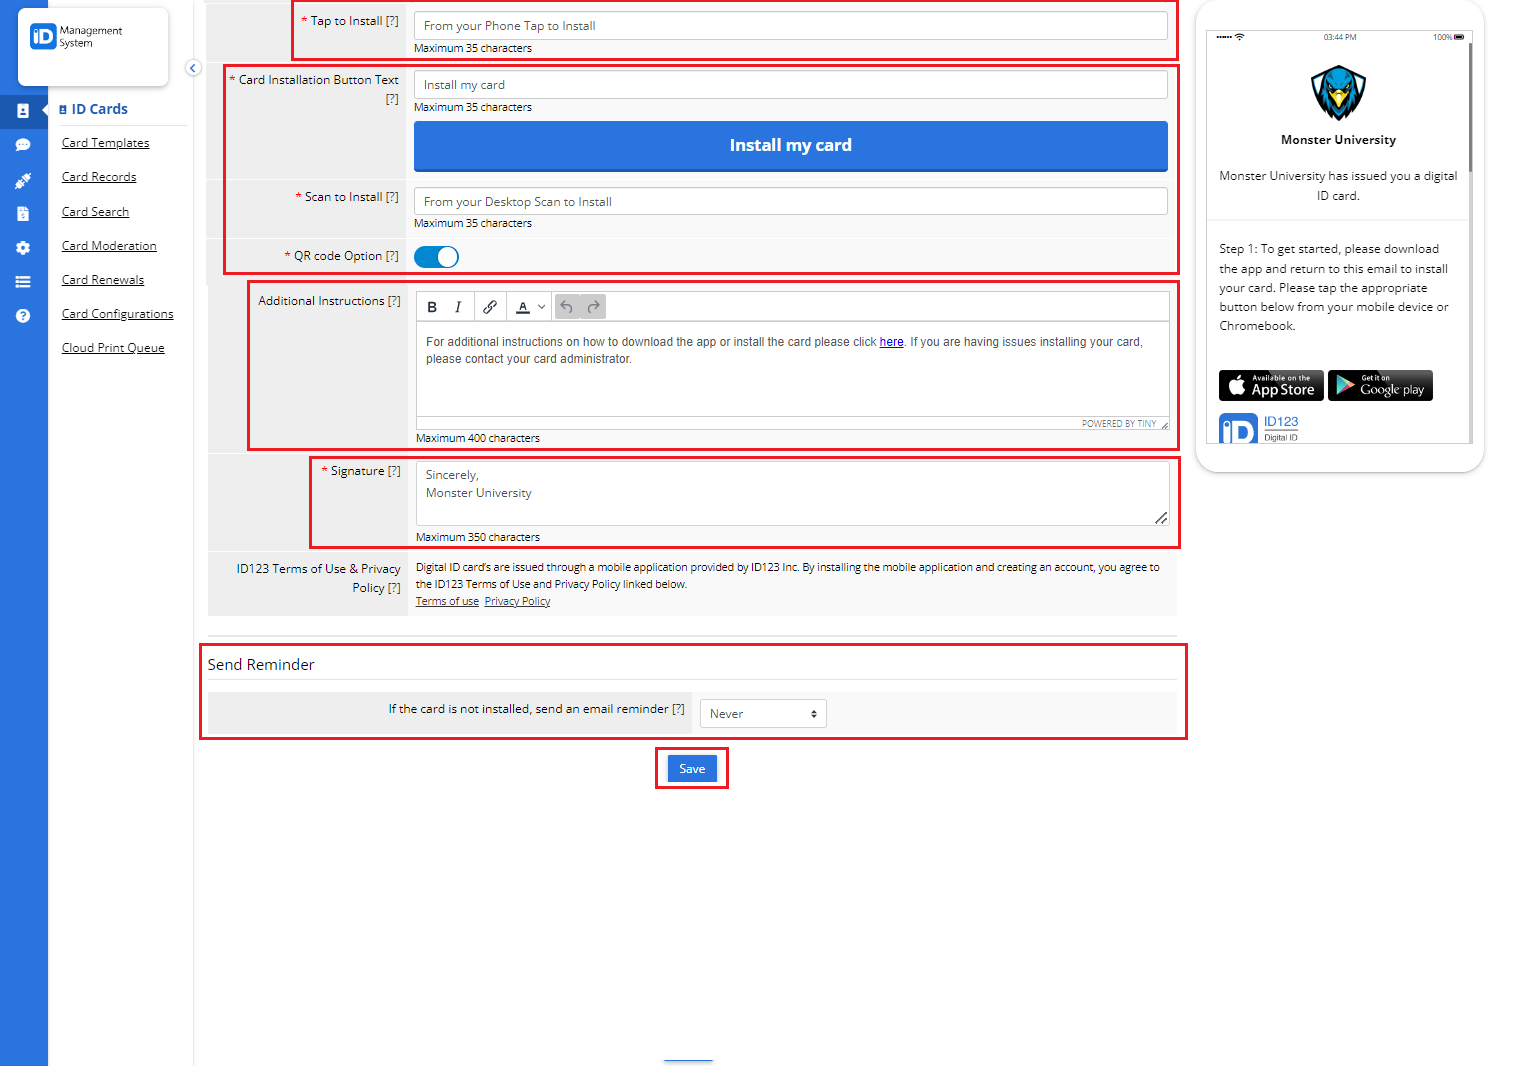
- Edit Email Content: Customize the body text to include a personalized message, card installation instructions, or additional contact information.
These edits help ensure the email is aligned with your organization’s communication style and branding.


Step 4: Preview Your Email Invitation Template
As you make changes, a live preview of the email will appear on the right side of the screen within a mobile phone mockup. This allows you to see exactly how your digital ID card invitation will appear on a mobile device before sending it.

Final Step: Save and Send
Once you are satisfied with your edits, click the “Save” button to apply the changes. Your customized email invitation is now ready to be sent to cardholders.
Need Help?
If you have any questions or need assistance customizing your email template, feel free contact our support team.
