Keeping expiration dates current is essential for maintaining secure and accurate digital ID cards. Follow the steps below to easily update the expiration date for individual or multiple ID cards using the ID123 ID Management System (IDMS).
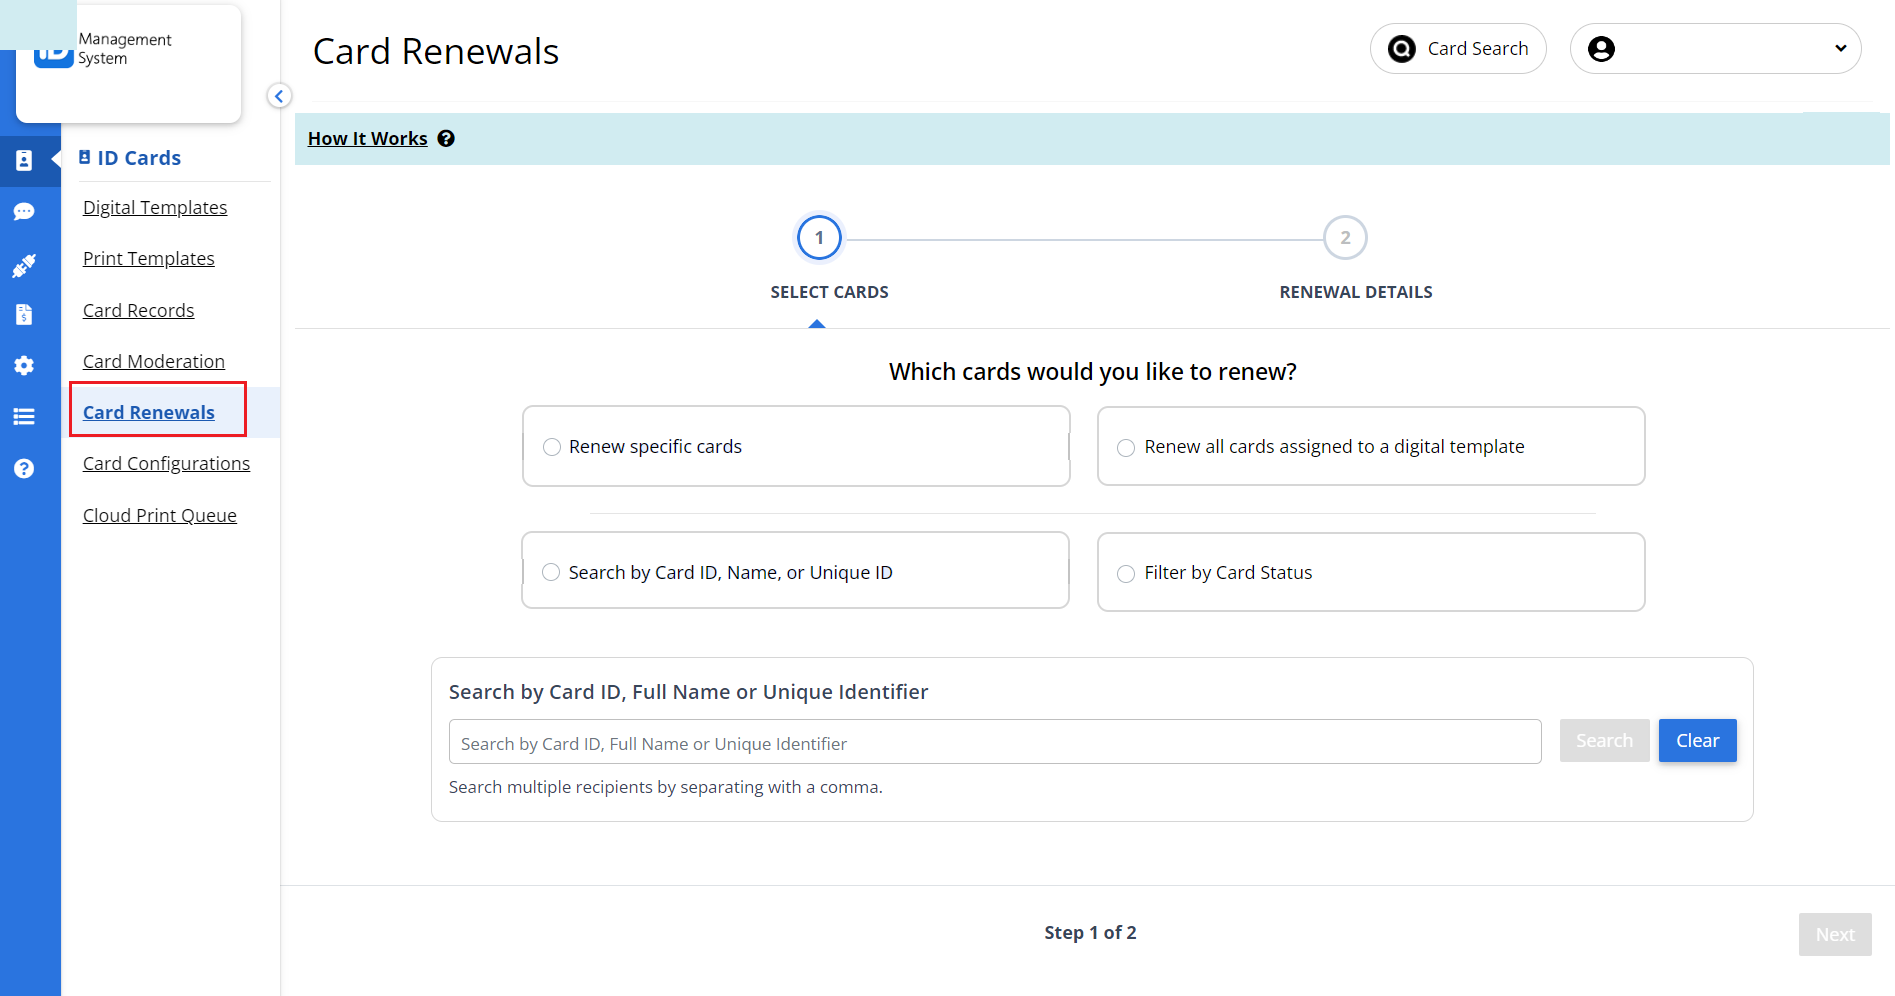
Step 1: Log In and Access the “Card Renewals” Section
- First, log in to your IDMS (ID Management System) account.
- From the left-hand navigation menu, click on “Card Renewals”. This section allows you to manage and update expiration dates for any digital ID cards issued under your account.

Step 2: Choose the ID Cards to Renew
You have two options when selecting ID cards:
- Individually select specific cards that need a new expiration date
- Select all ID cards associated with a particular digital ID card template
This flexible selection process helps administrators update expiration dates in bulk or one at a time as needed.

Step 3: Update the Expiration Date
Once you’ve selected the appropriate cards:
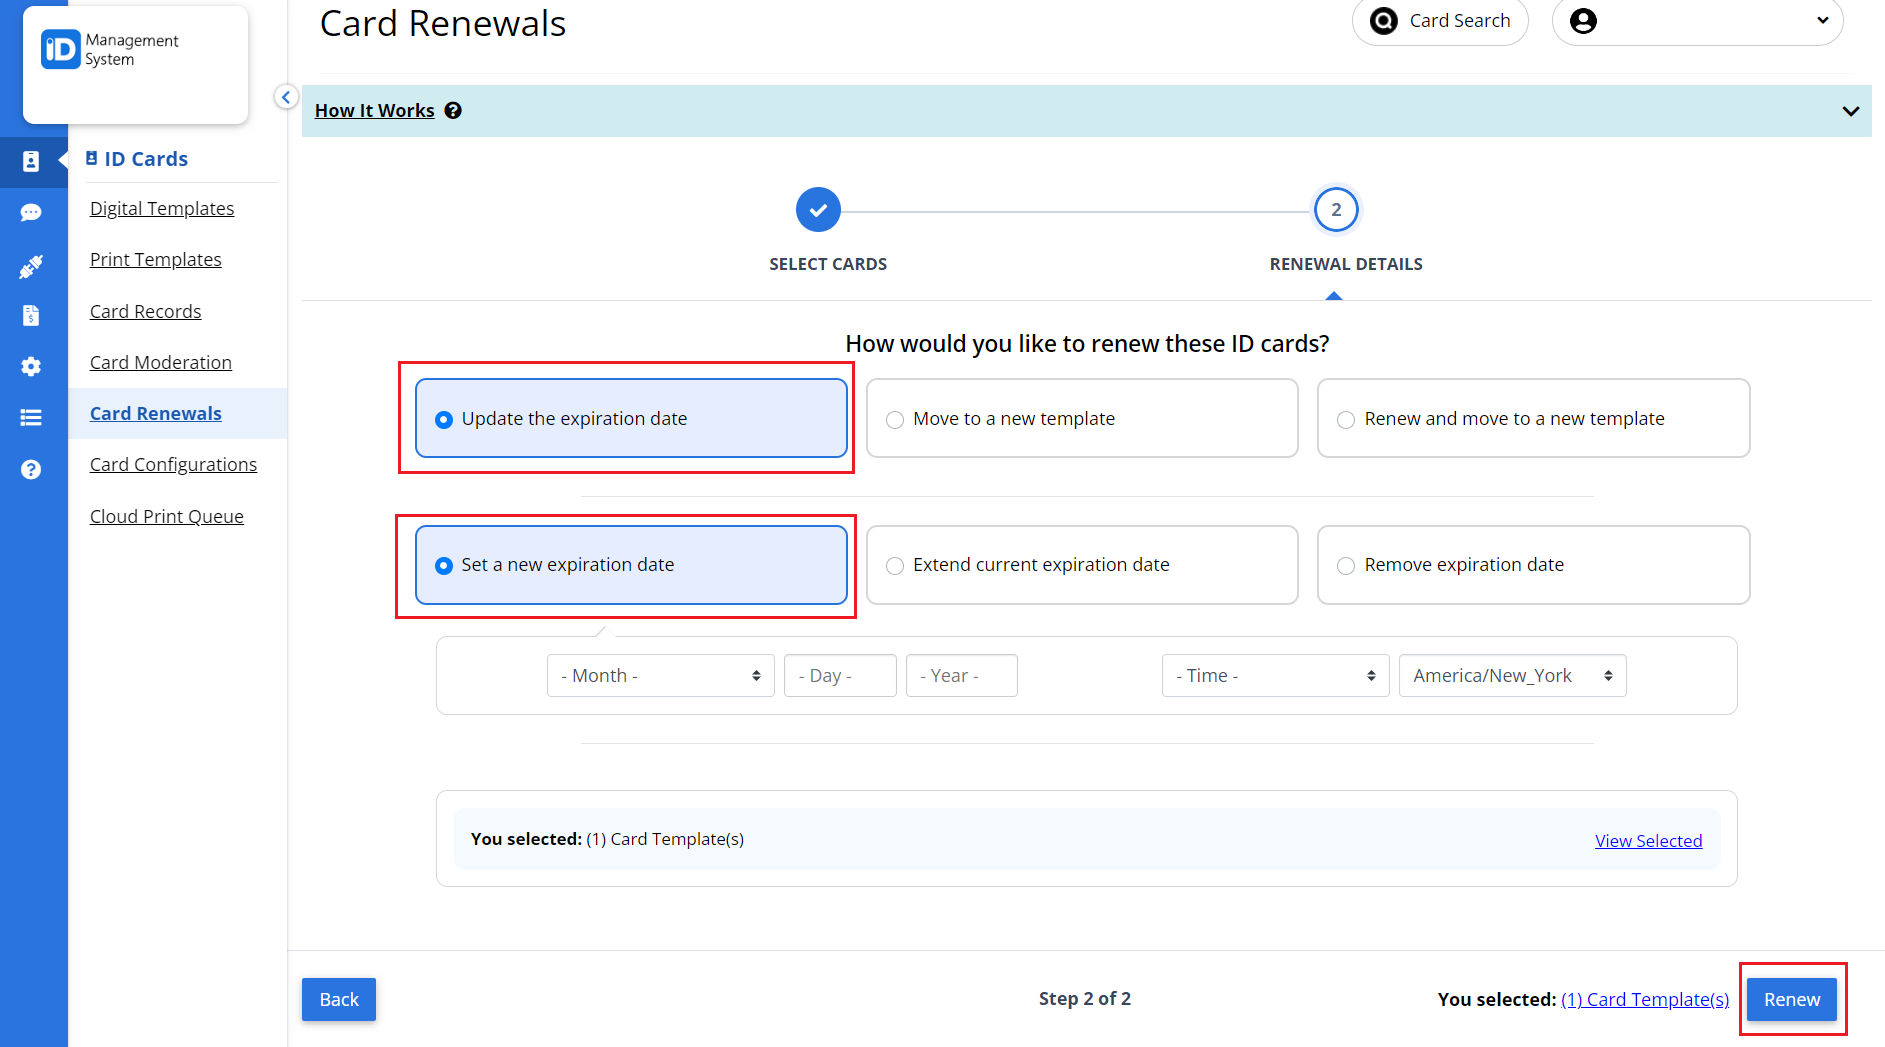
- Click “Update the expiration date”.
- Choose how you’d like to update the expiration date:
- Set a new fixed expiration date.
- Extend the expiration date by a specific number of days, months, or years.
- After confirming your settings, click the “Renew” button.
The selected ID cards will now be updated with the new expiration dates.

Keep Your Digital ID Cards Up to Date
Managing expiration dates ensures your digital ID cards remain valid and secure. Whether you’re updating IDs for students, employees, or members, the Card Renewals tool in IDMS makes the process fast and efficient.
For more information or assistance, feel free to reach out to our support team.
