Important Note
Adding digital ID card records one at a time is ideal when managing a small number of users or making manual updates. This guide will walk you through each step of the process in the ID123 ID Management System, ensuring accurate data entry for each cardholder.
Before adding individual card records, make sure your card template is fully designed and includes all the fields you want to display on the digital ID cards. Learn how to design your card template here.
Step 1: Log in and Access Card Records
- Sign in to your IDMS (ID Management System) account.
- From the left-hand navigation menu, click on “Card Records” under the Digital ID Cards section.
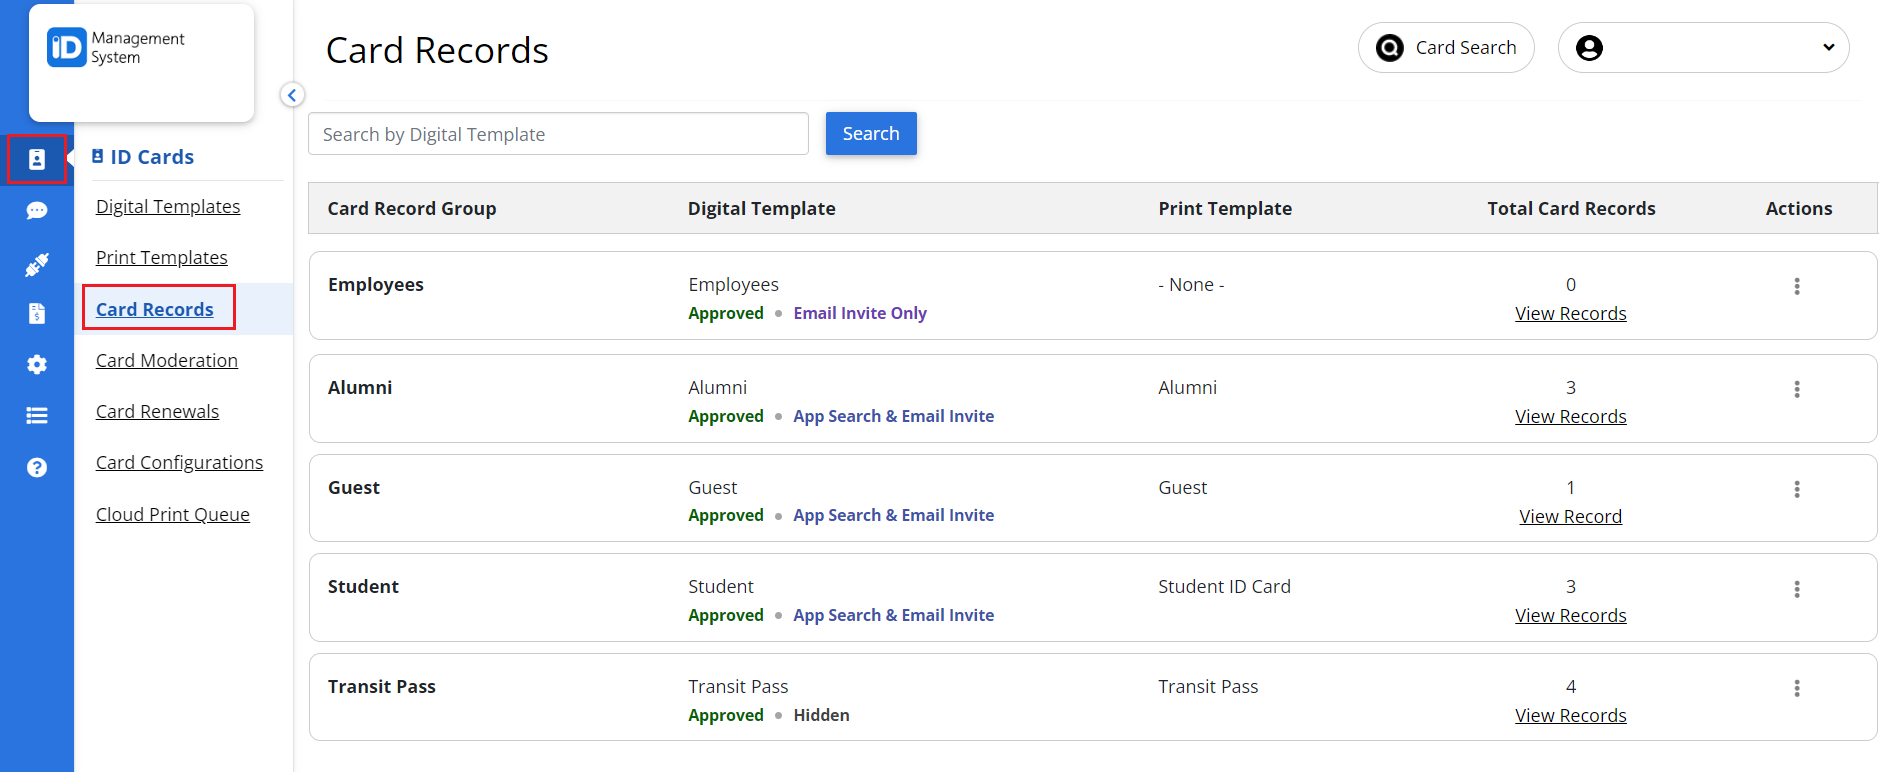
Step 2: Open the Desired Card Template
- On the Card Records page, locate the template you want to update.
- Click “View Record(s)” next to the card template to access its dashboard.
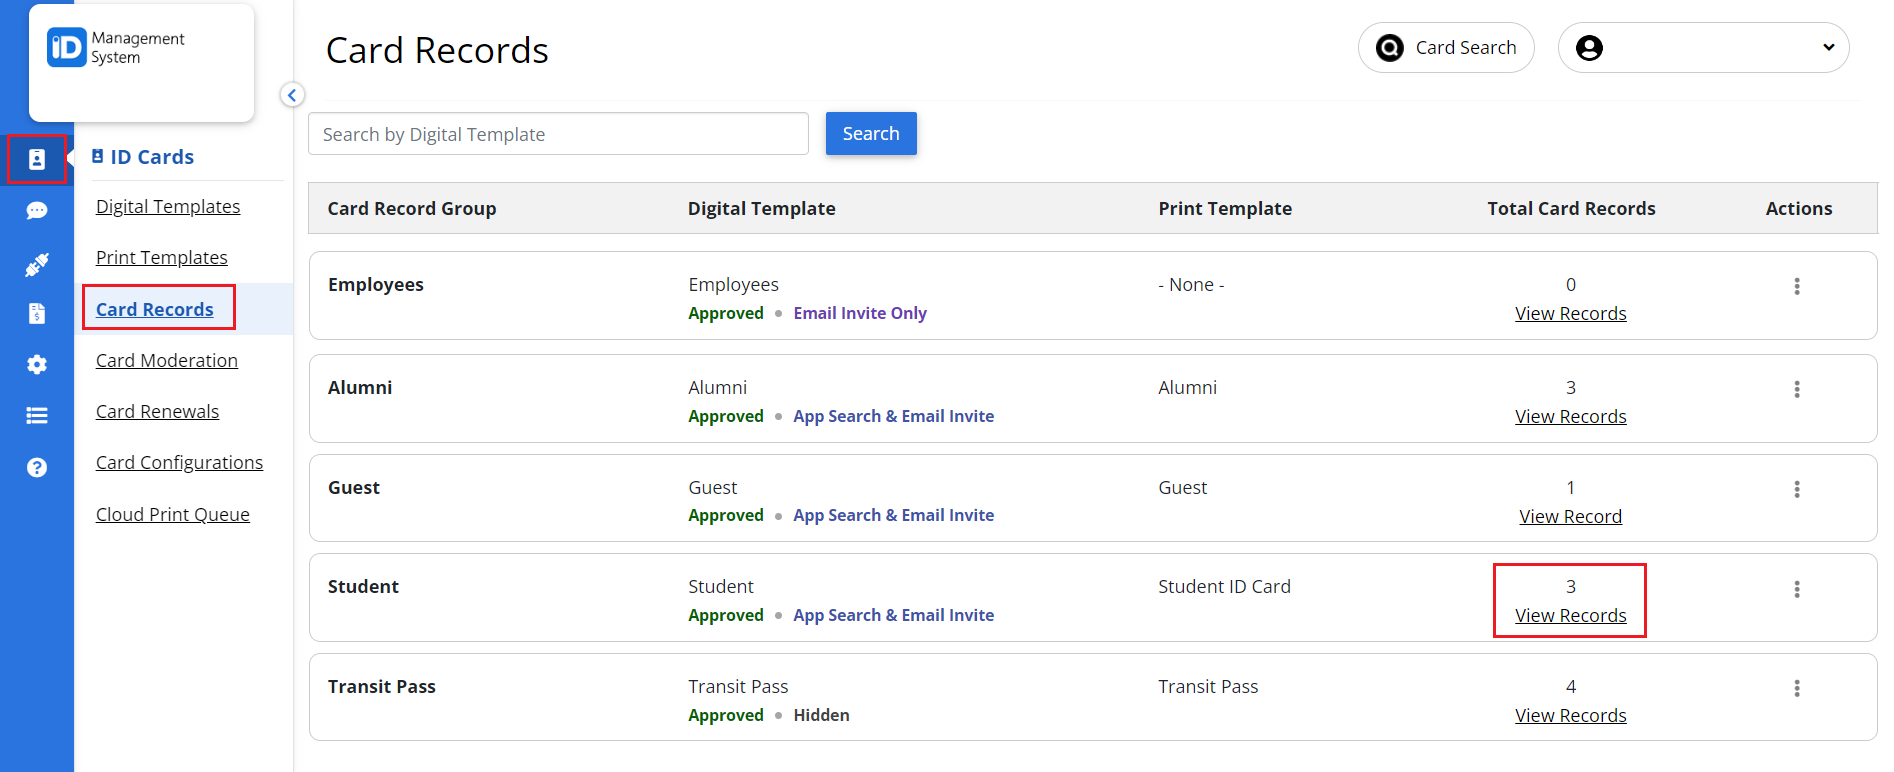
Step 3: Add a New Card Record
- On the Card Record Dashboard, click the “Add Card Record” button.
- A form will appear allowing you to manually enter the cardholder’s details.

Step 4: Enter Cardholder Information
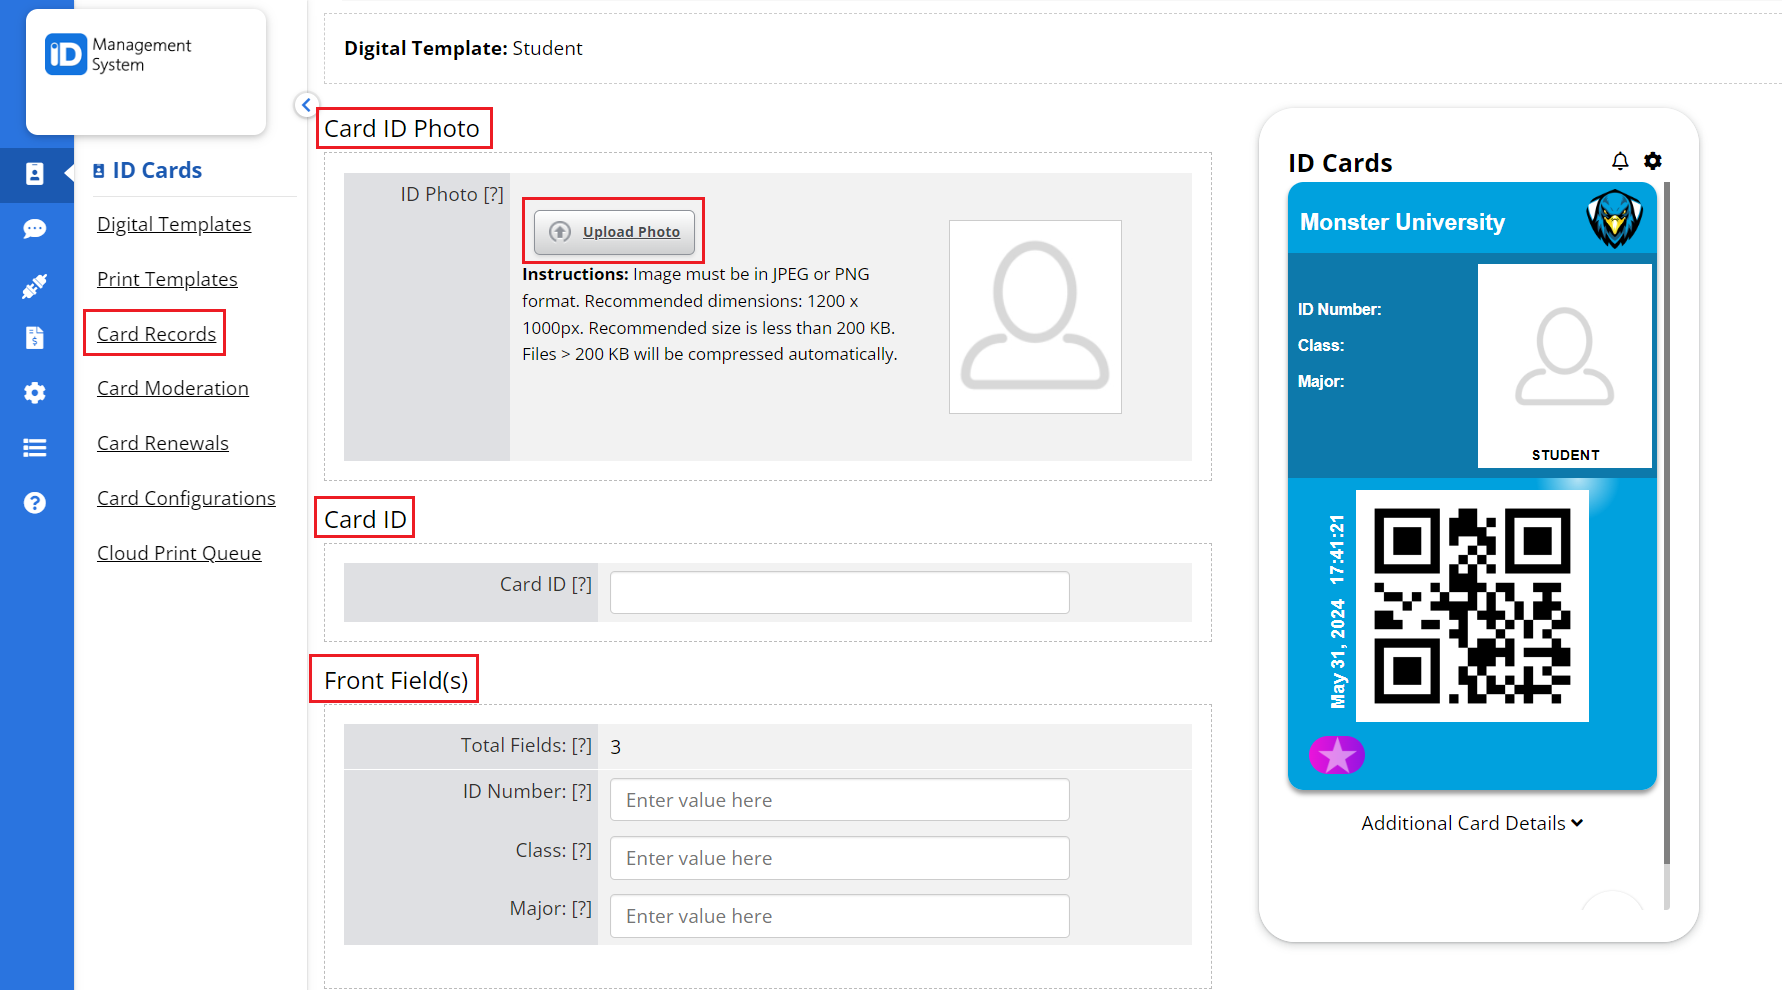
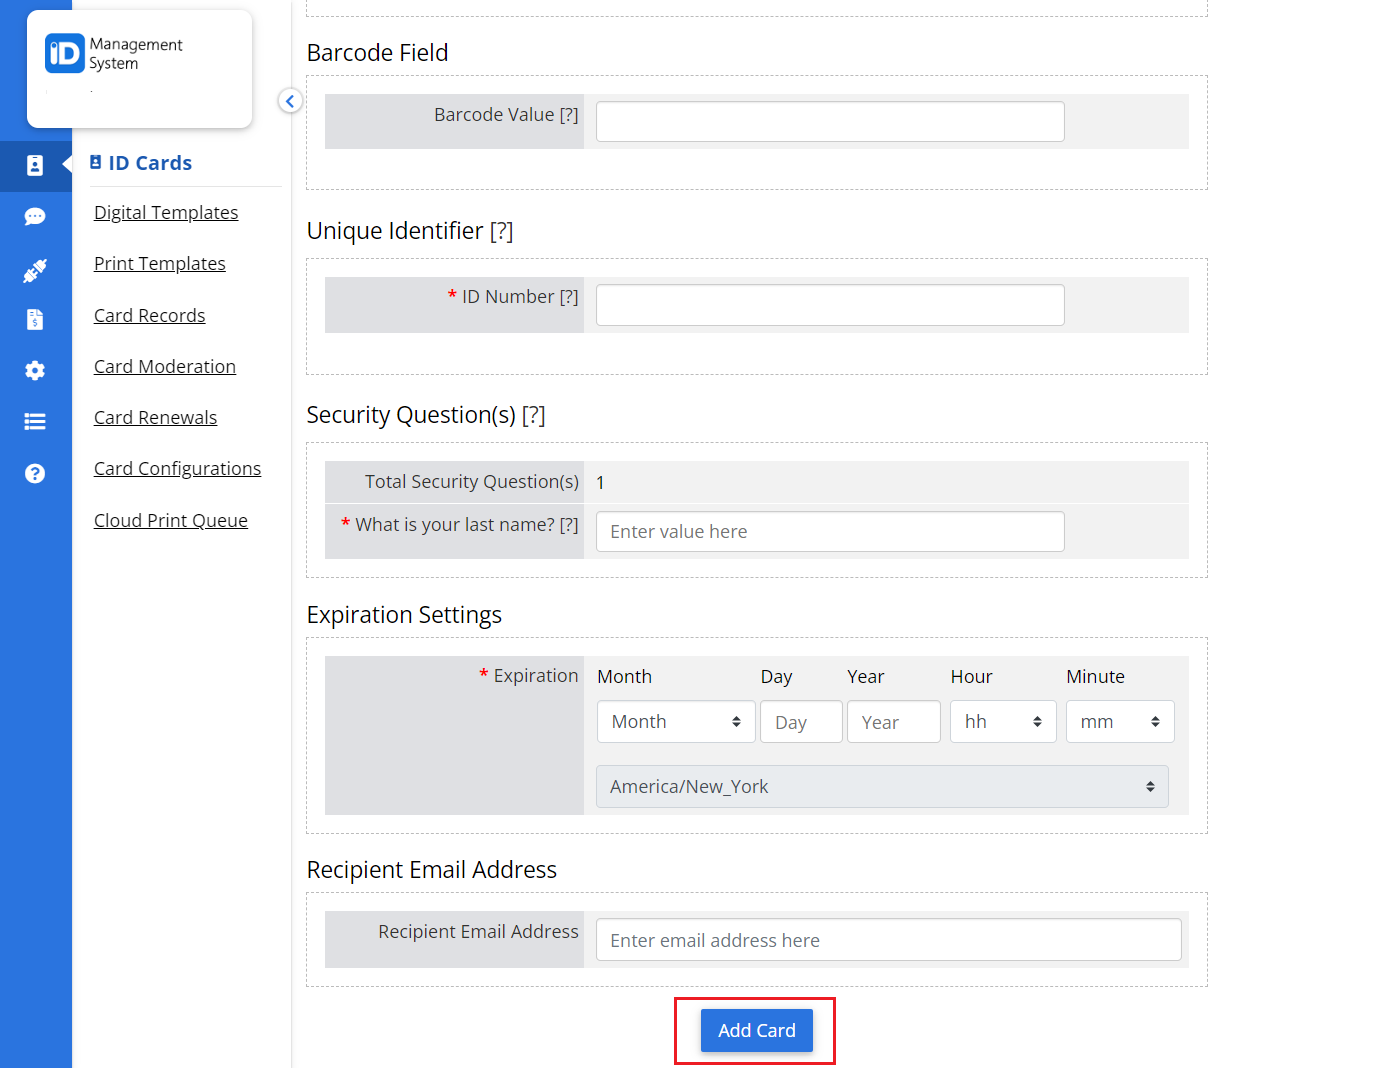
Enter the details to be displayed on the card, as well as the security questions users must answer before the card can be installed.
- Photo (Optional) – You can upload a photo of your user.
- Card ID – A custom ID used to identify each record in the template.
- Front Fields – All the fields that will appear on the front of the cards.
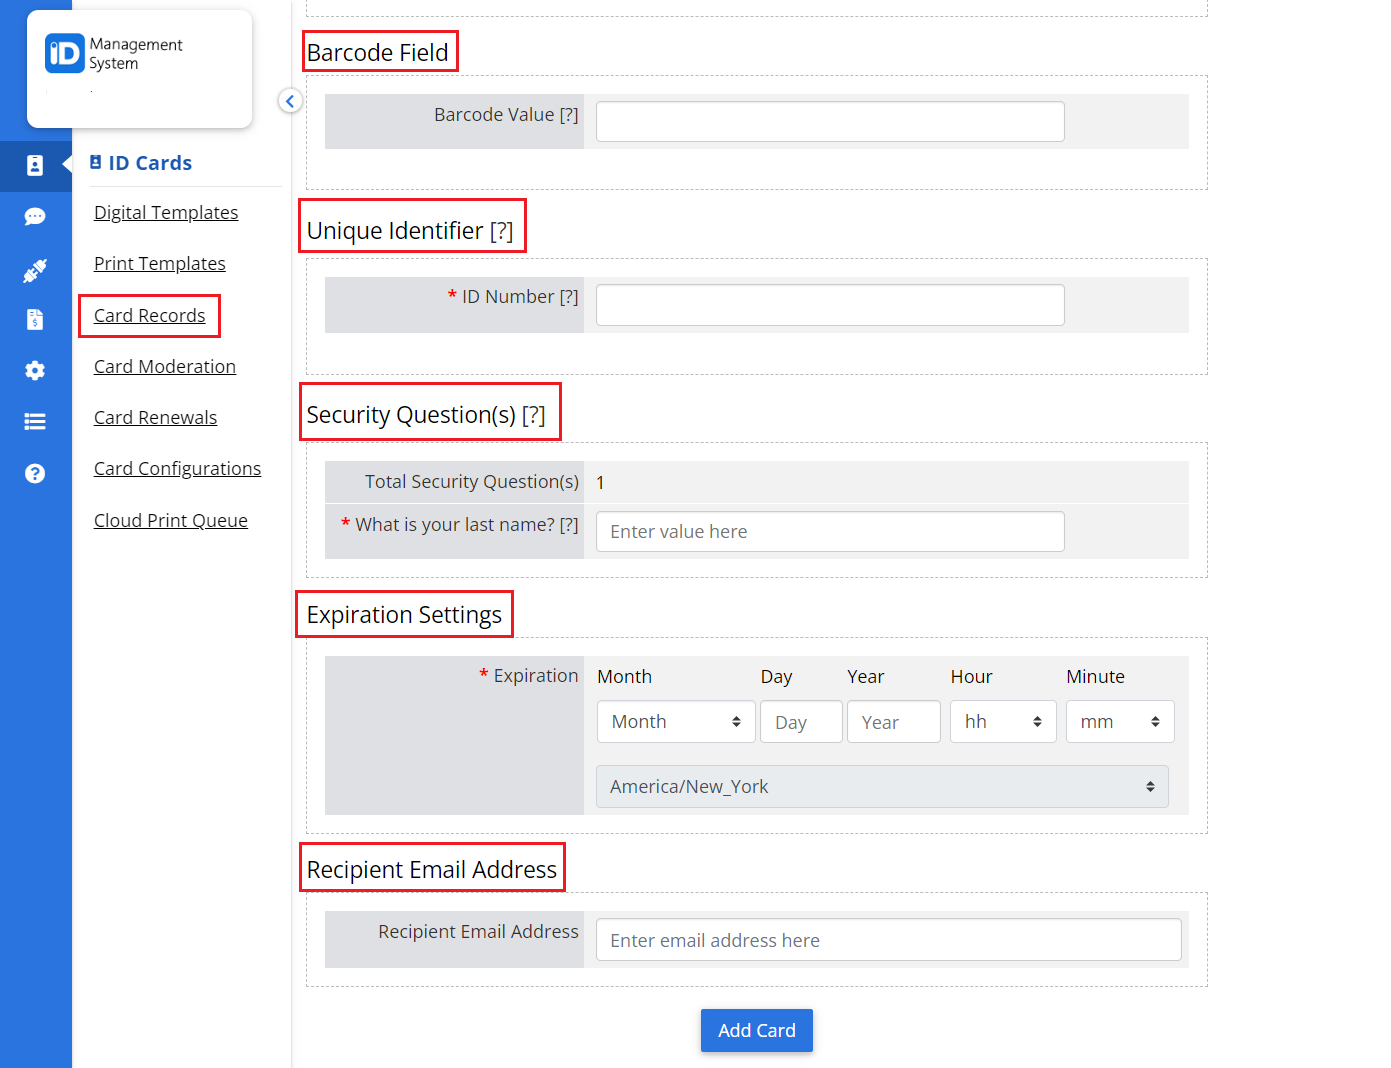
- Barcode – Add a value that will be displayed when the barcode is scanned.
- Unique Identifier – A unique ID used for security to verify user identity before creating a card, such as an email address or ID number.
- Security Questions – Additional security questions that will be used to verify user identity before ID card creation.
- Expiration Settings – Enter the date and time when you want the user’s card to expire.
- Recipient Email Address – The email address of the user where the card email invitation will be sent.
Step 5: Review and Save the Card Record
After filling out all required fields:
- Double-check your inputs for accuracy.
- Click “Add Card” to save and generate the new card record.
Need Help?
That’s it! You’ve successfully added a digital card record individually. If you have further questions or need assistance with the ID Management System, feel free to reach out to our support team.
