Important Note
Efficiently managing and updating digital ID card data is essential for institutions that handle large volumes of cardholders. With ID123’s ID Management System (IDMS), you can bulk import and update existing card records using a CSV file. This guide walks you through each step to ensure your CSV file is uploaded and processed correctly.
- Important: You can import new records and update existing ones at the same time using the same CSV upload process.
- Before You Begin: Ensure your card template is fully designed and contains all the necessary fields. Learn how to customize your card template here:
How to Customize the Design of Your ID Cards.
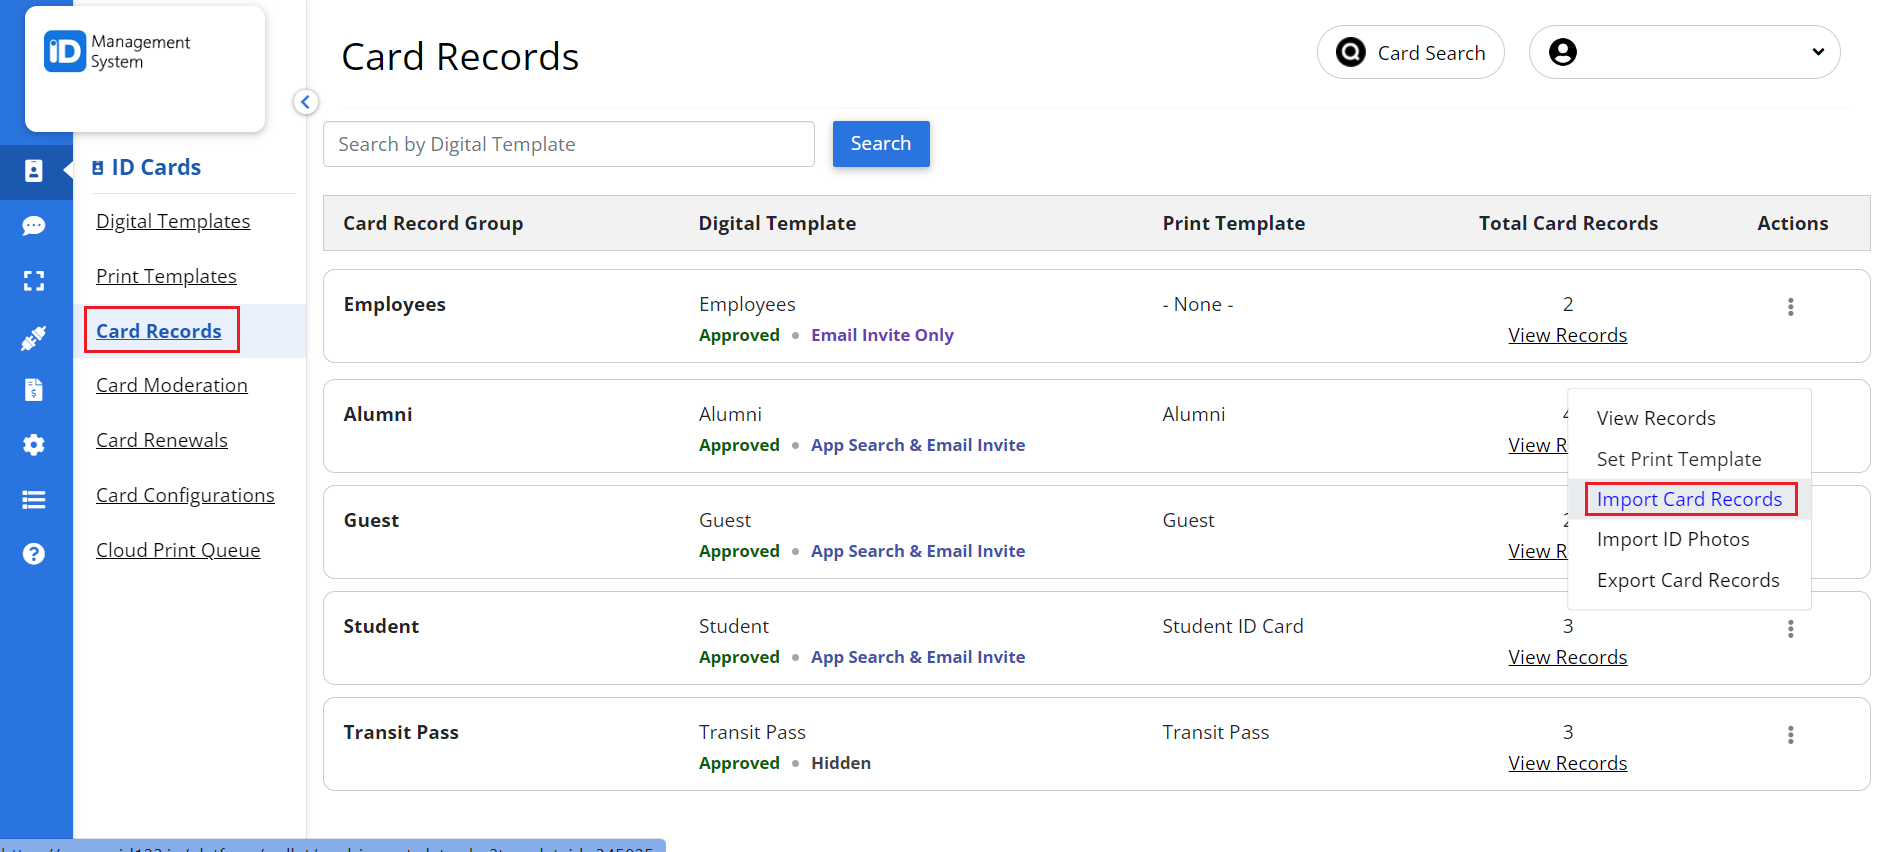
Step 1: Navigate to Import Card Records
- Log in to your IDMS account.
- From the left-hand menu, click on Card Records.
- Locate the card template you want to update.
- Click on the three dots (⋮) next to that template.
- Select Import Card Records to begin the CSV upload process.

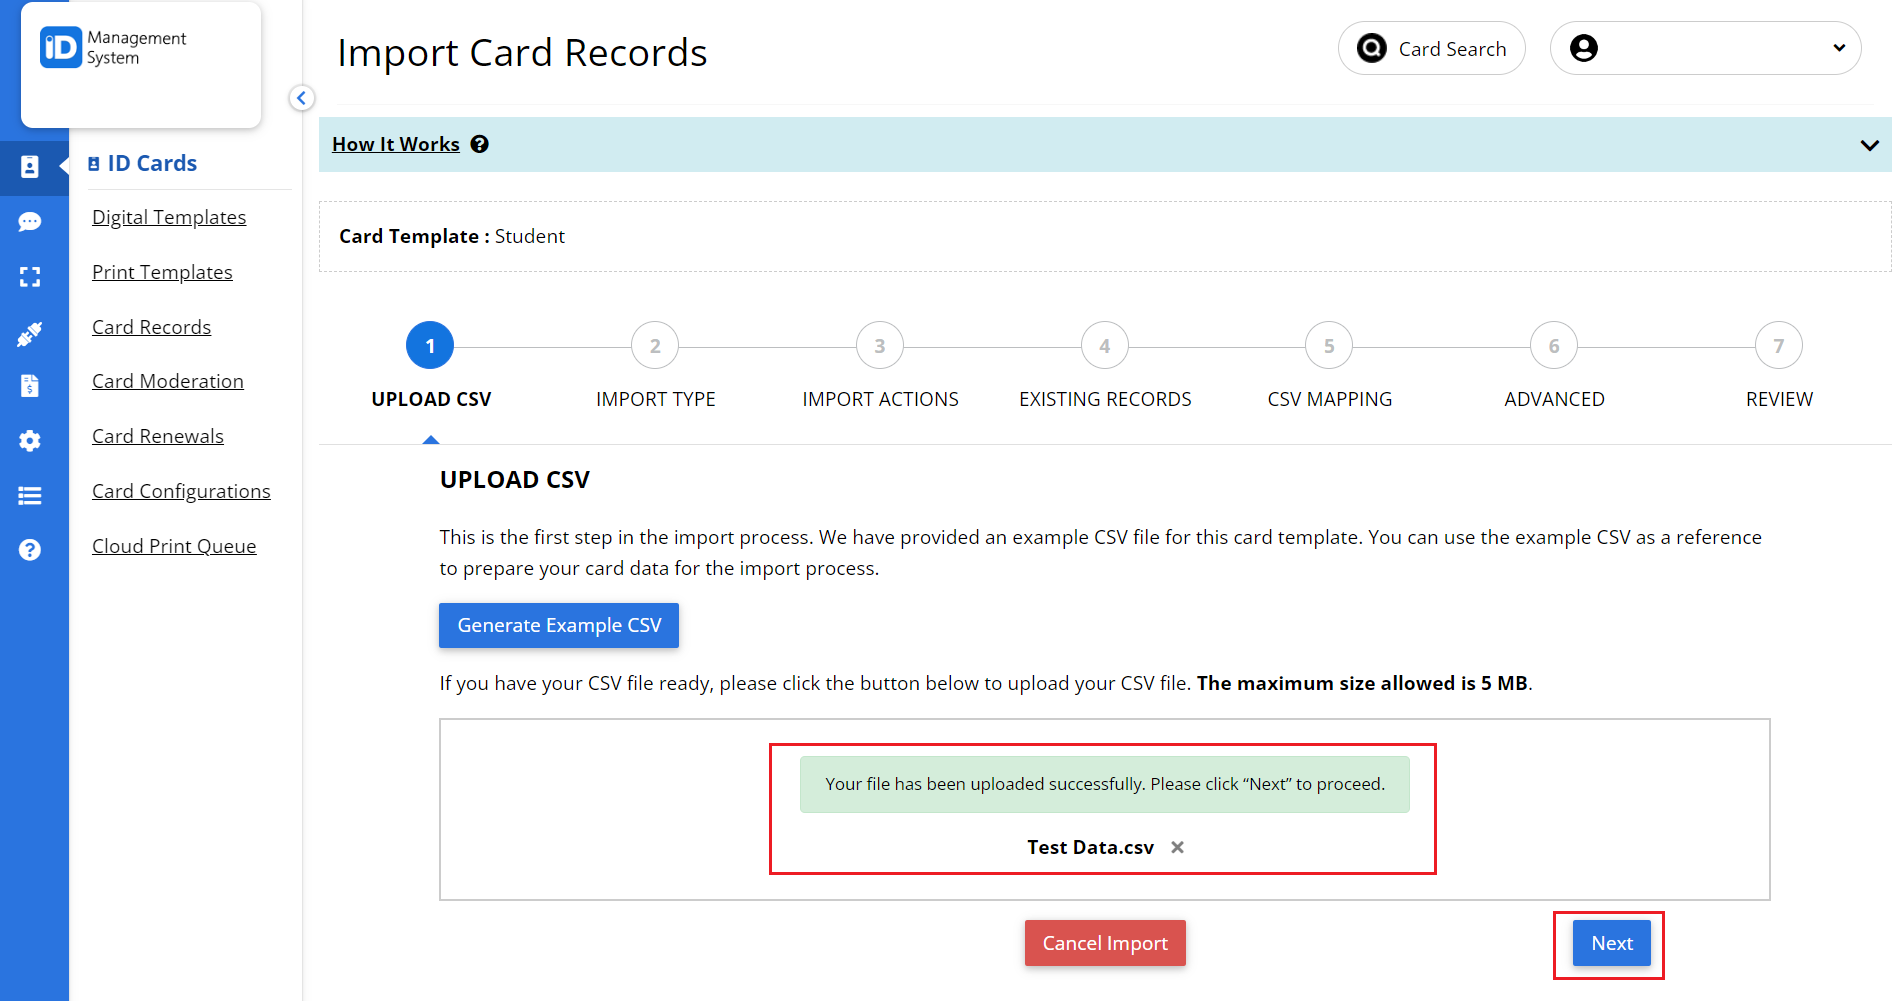
Step 2: Prepare and Upload Your CSV File
- Click the “Generate Example CSV” button to download a sample spreadsheet.
- Use this file as a reference or populate it with your cardholder data, ensuring the column headers match the fields in your template.
- Click “Upload CSV File” and select your completed CSV from your computer.
- Tip: Always verify that field names and formatting match your card template to avoid errors during import.


Step 3: Choose an Import Option
After uploading your CSV, choose one of the following options:
- Add New Records and Update Existing Records: Ideal when you want to update some existing cardholders while adding new ones.
- Add New Records and Update or Archive Existing Records: Use this if you also want to archive existing records that are missing from the new CSV file.

Step 4: Select Actions for Missing Records
If your CSV file doesn’t include some of the existing records, choose what to do with those:
- Keep them as-is
- Archive them
- Delete them (if previously archived)
This gives you control over which card records remain active.

Step 5: Choose Fields to Update
- Select the specific fields you wish to update in the existing card records.
- Deselect any fields that should remain unchanged.
- Click Next to proceed.
Note: Any selected fields will overwrite existing data in those fields.

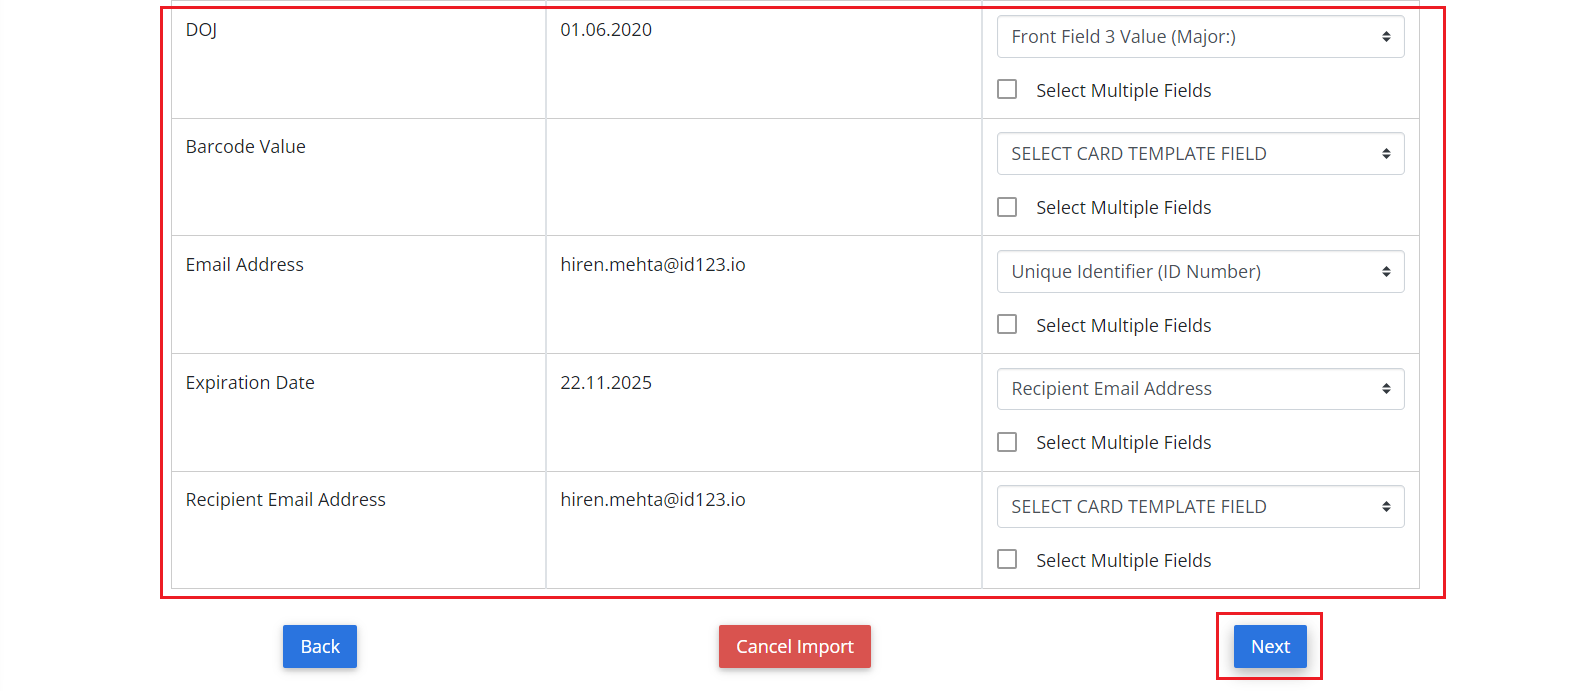
Step 6: Map CSV Columns to Card Template Fields
Match each CSV column to the correct card field in your template. This ensures the data goes into the right place.
- Use the dropdown menus to map each column header to its corresponding field.
- Once complete, click “Import Card Records” to confirm the mapping.


Step 7: Configure Advanced Import Settings (Optional)
If needed, set advanced configurations for the import. These may include:
- Importing settings for expiration dates
- Notifications
- Card issuance status
Skip this step if you do not require any special configurations.

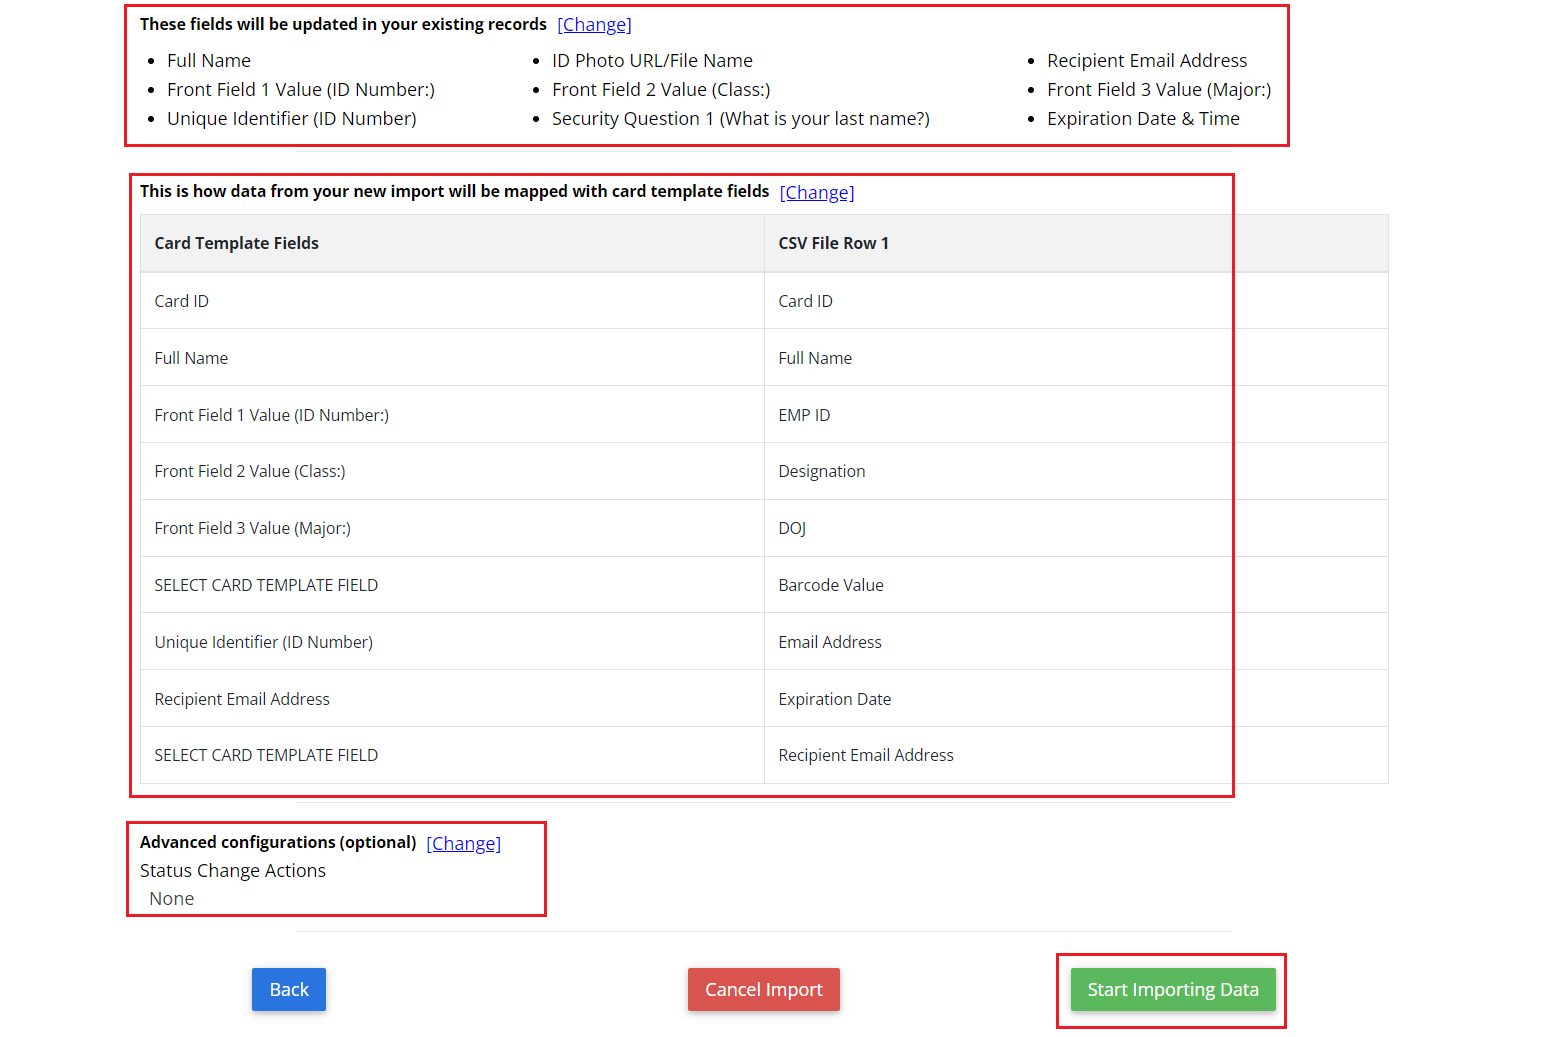
Step 8: Review and Start Import
- Carefully review all your selections, field mappings, and settings.
- Click “Start Importing Data” to begin the bulk update process.
Processing time varies from 3 to 30 minutes depending on the file size. You’ll be able to view the updated records in the “Card Record Dashboard” once the import is complete.


Troubleshooting and Support
If you run into any issues or have questions about bulk updating digital ID card records via CSV, feel free to reach out to our support team. We’re here to help!
