Easily control user access in your ID Management System (IDMS) by setting customized admin permissions. Only account Owners have the authority to manage and assign permissions to other admin roles.
This step-by-step guide will show you how to set and manage admin role permissions for Managers and Users in your IDMS account.
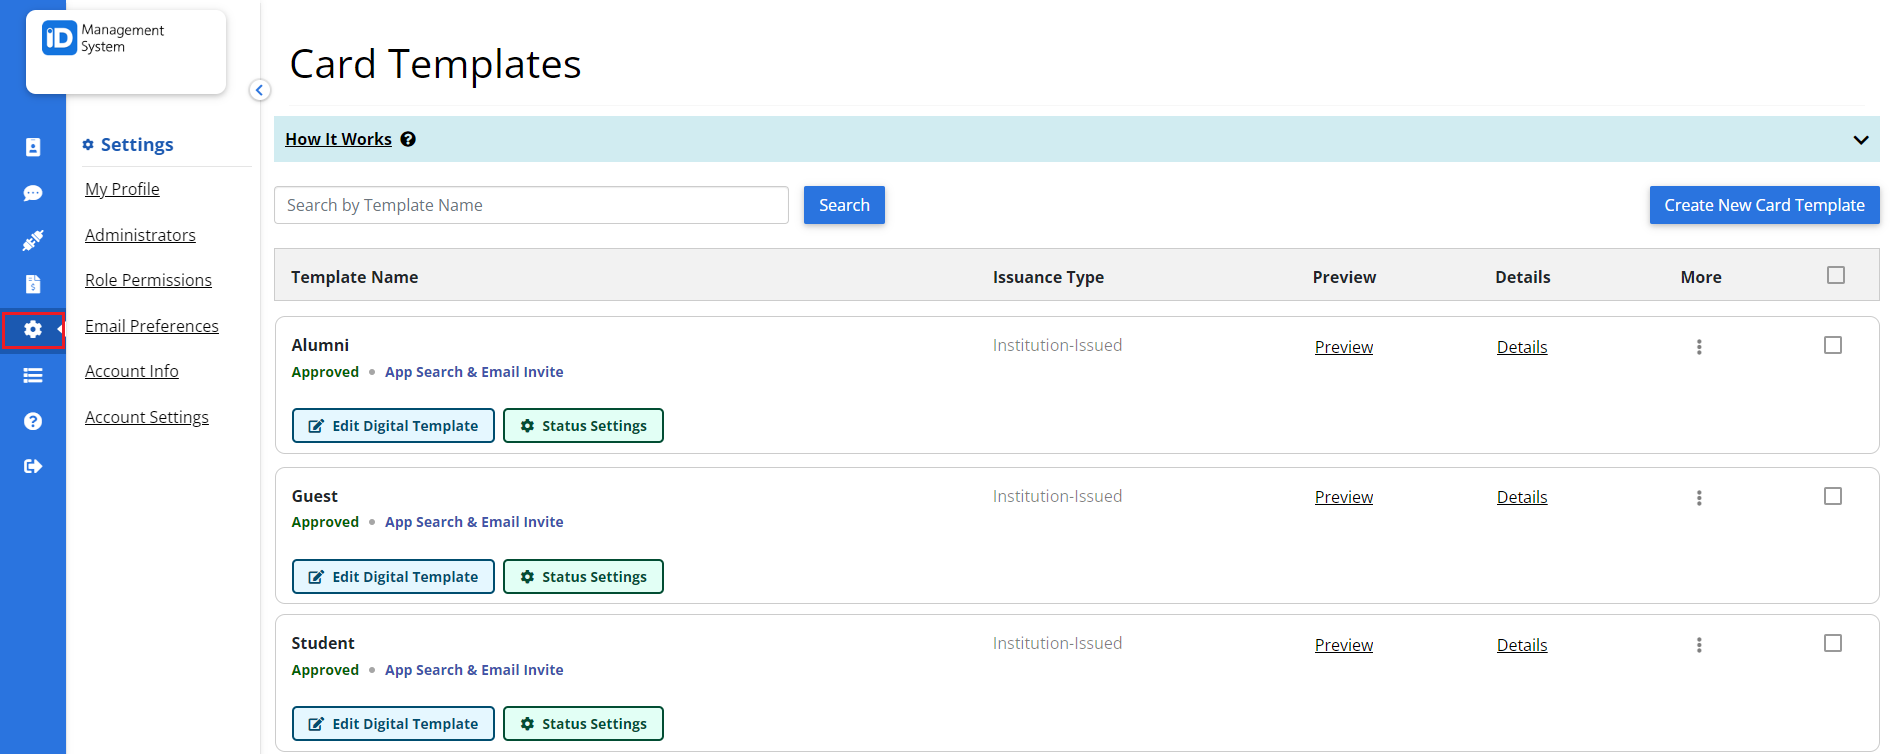
Step 1: Log in and Navigate to “Settings”
- Log in to your IDMS admin account.
- From the left-hand navigation panel, click “Settings”.

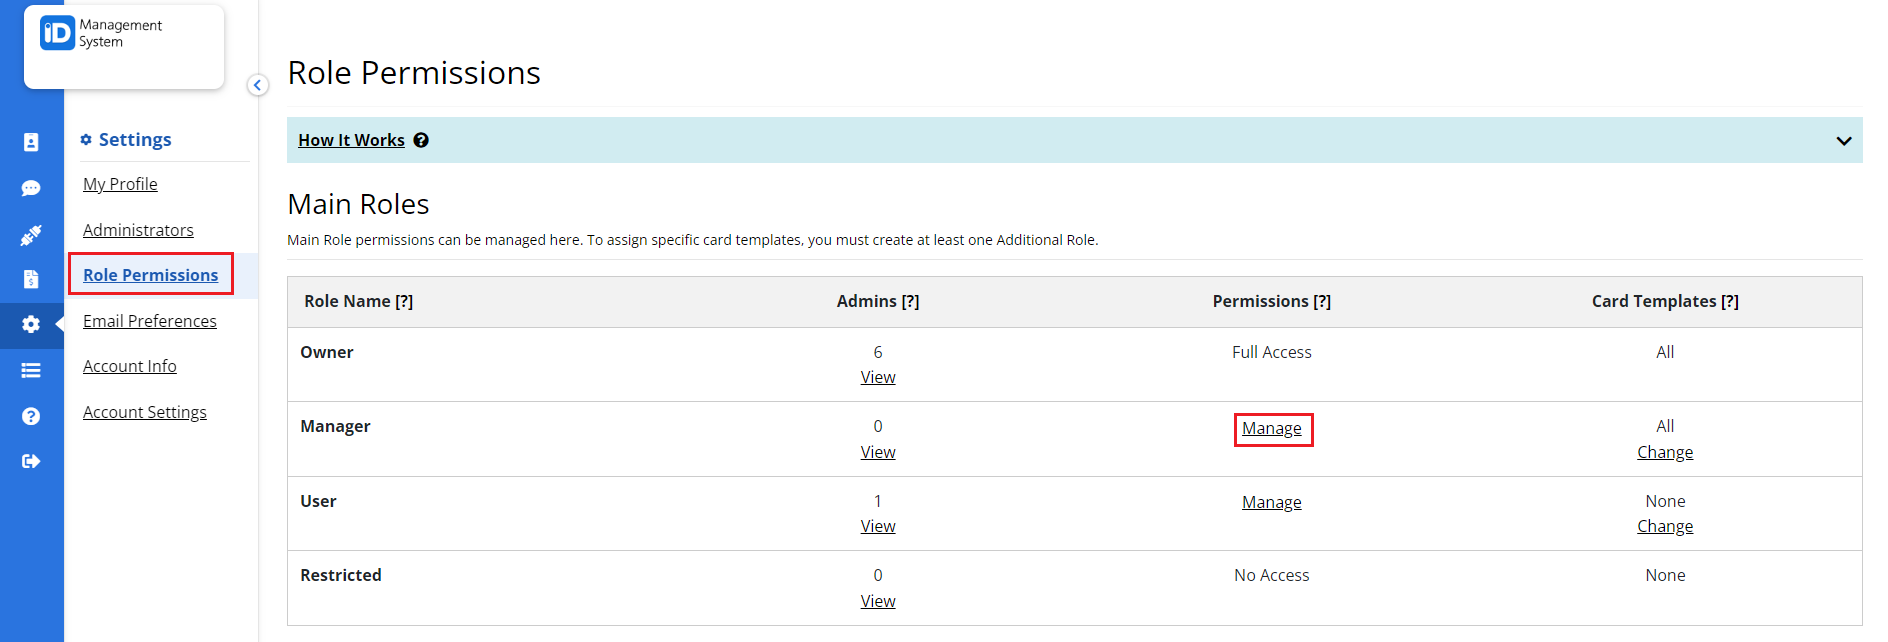
Step 2: Open Role Permissions
- Within the Settings page, select “Role Permissions”.
- Click the “Manage” button next to the role (Manager or User) you wish to configure.
This section allows you to control what each role can access within the IDMS platform.

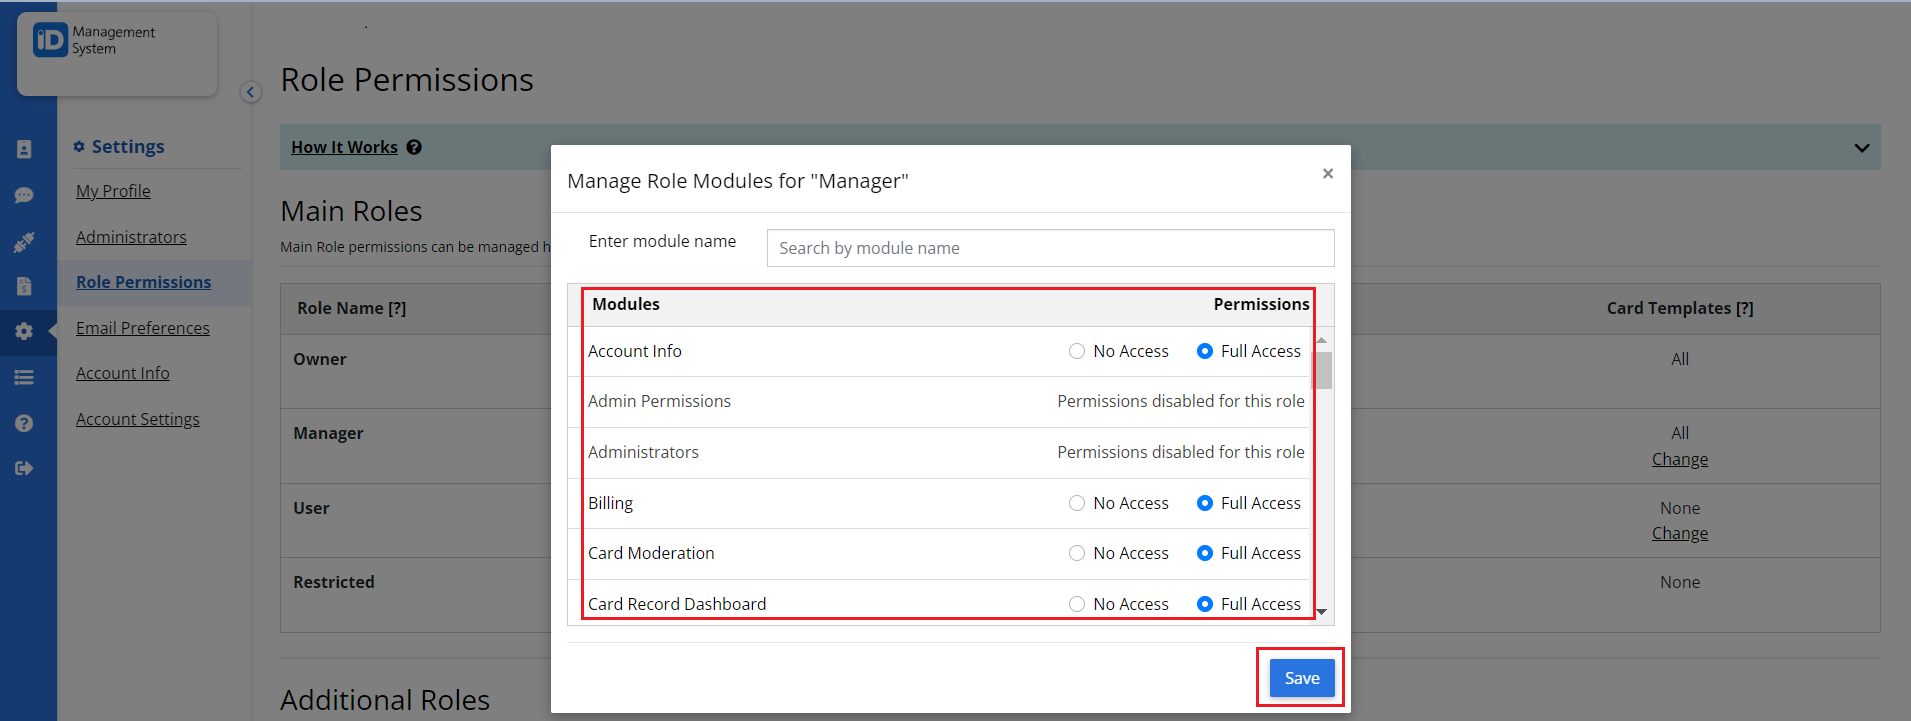
Step 3: Assign Permissions and Save Changes
- Under the Role Modules section, you can assign access levels for each role.
- Choose between:
- Full Access: allows complete control over the module
- No Access: restricts visibility and interaction with the module
- After adjusting permissions, scroll to the bottom and click the “Save” button to apply your changes.

The Owner role is the only one with the authority to view and update admin permissions. Other roles (Managers and Users) cannot modify access settings.
Need Help with Admin Permissions?
If you have any questions about setting up admin permissions or managing user roles in IDMS, feel free to reach out to our support team.
