Adding expiration dates to your digital ID cards ensures better access control and helps keep your ID management system organized and secure. With ID123’s ID Management System (IDMS), administrators can choose from several expiration options—including fixed dates, specific durations, and imported data.
This step-by-step guide explains how to configure expiration settings for your ID card templates and apply them during issuance.
Step 1: Access the Digital Card Templates Page
- Log in to your IDMS account.
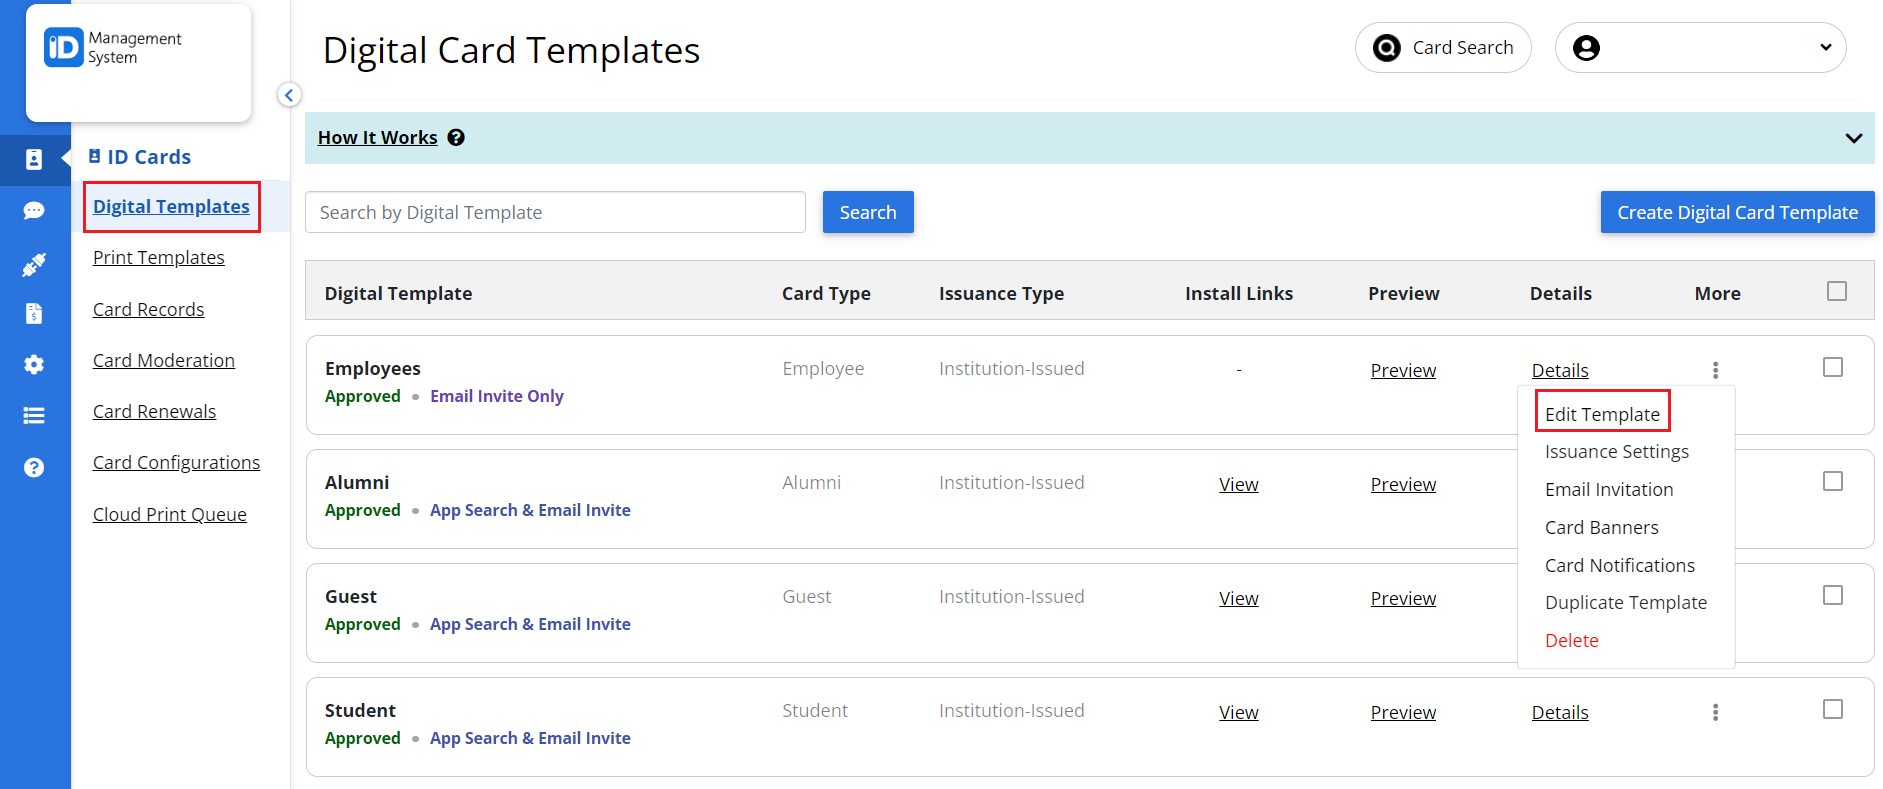
- From the left-hand navigation menu, click “Card Templates”.
- Locate the template you want to modify.
- Click the three dots (⋮) under the “More” column and select “Edit Template”.
Step 2: Open the Expiration Settings
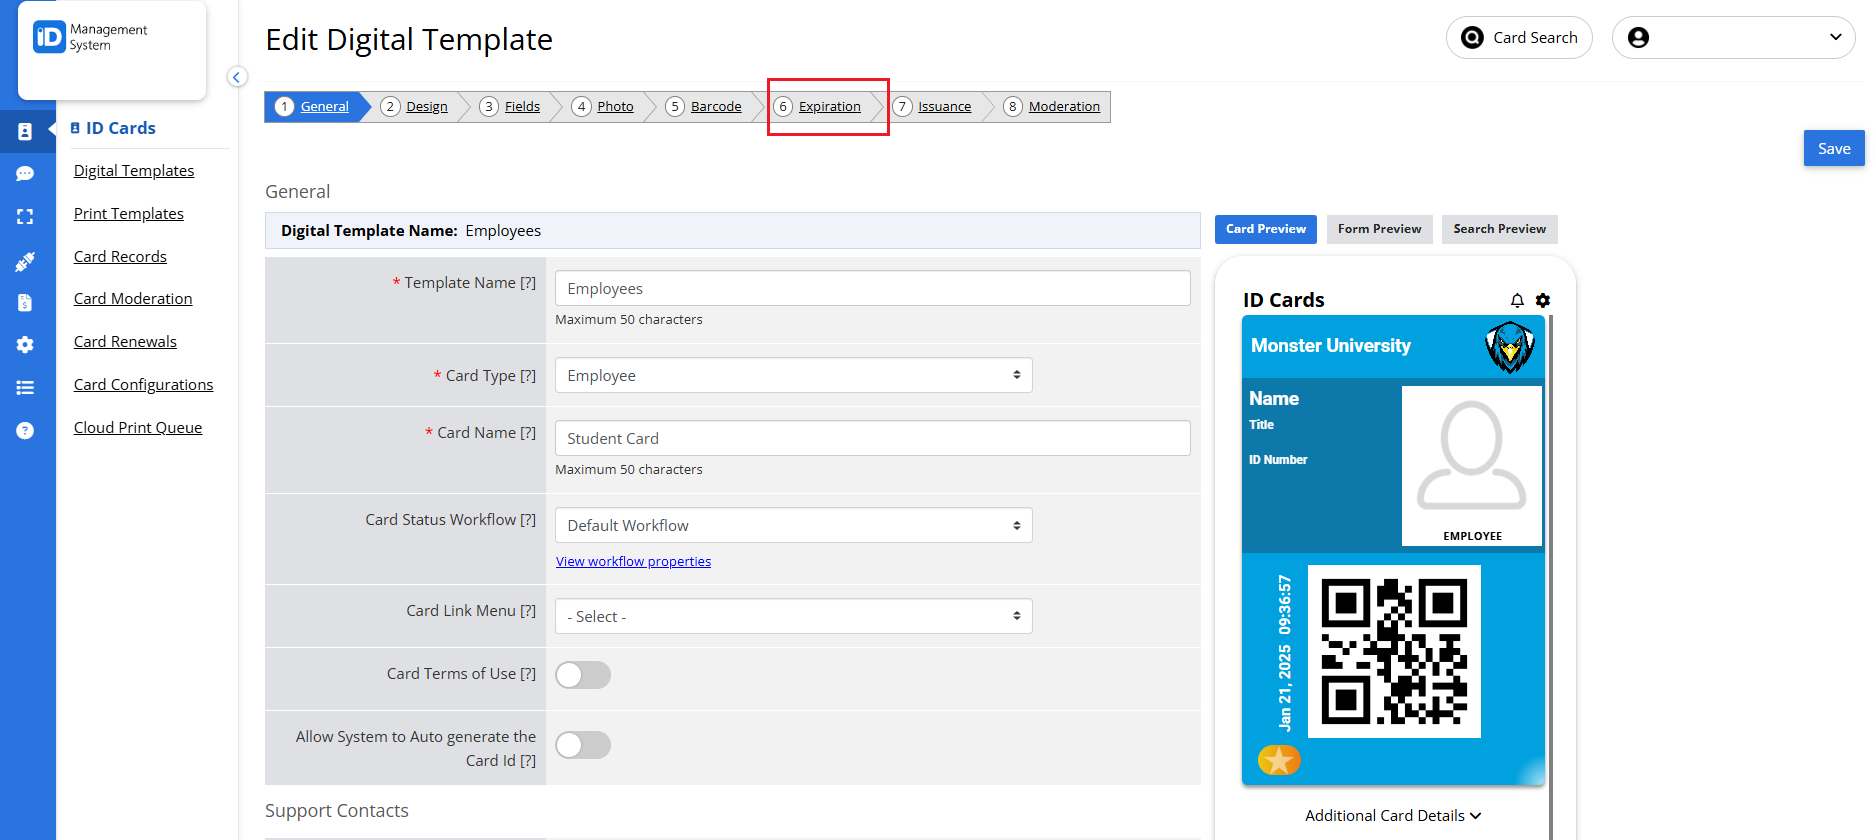
Click the “Expiration” tab located at the top of the template builder.
Step 3: Enable Expiration Settings
To enable expiration settings:
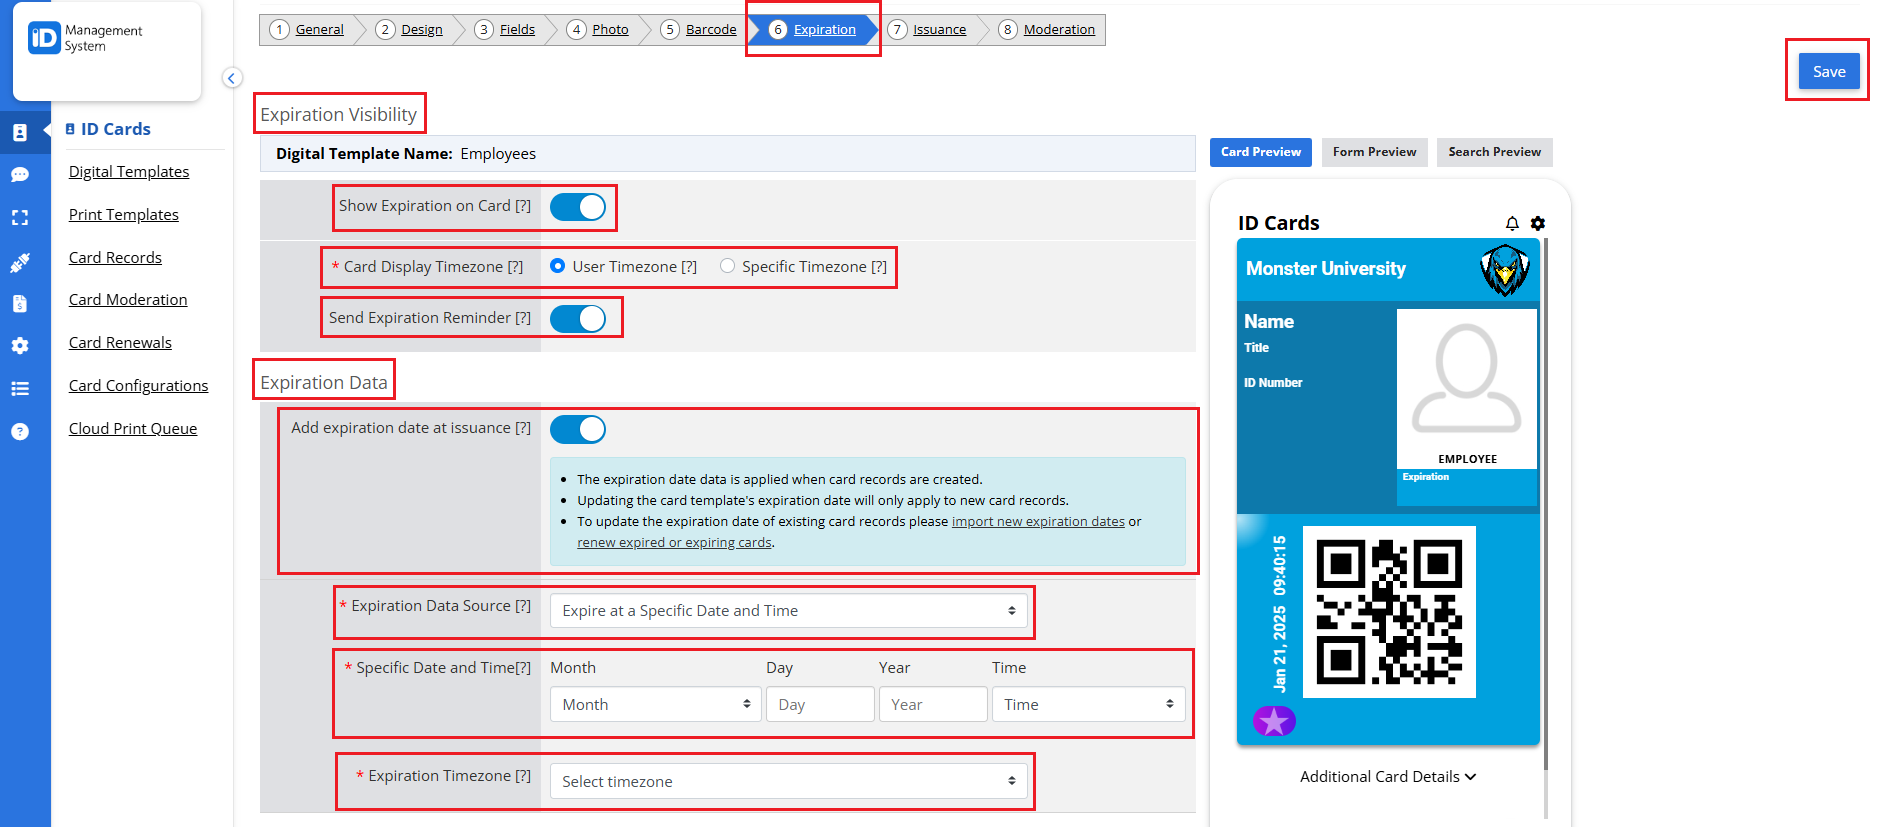
- Check the box for “Show Expiration on Card” if you want the expiration date to be visible on the digital ID.
- Then, enable “Add Expiration Date at Issuance” to set the expiration logic for the card.

Step 4: Select Expiration Data Source
Under the Expiration Data Source dropdown, choose how you want expiration dates to be applied. Below are the available options and how each works:
Option 1: Expire at a Specific Date and Time
- Enter a specific date, time, and time zone.
- All cards issued from this template will automatically expire at that exact time.
- Once expired, the card becomes inactive unless renewed.
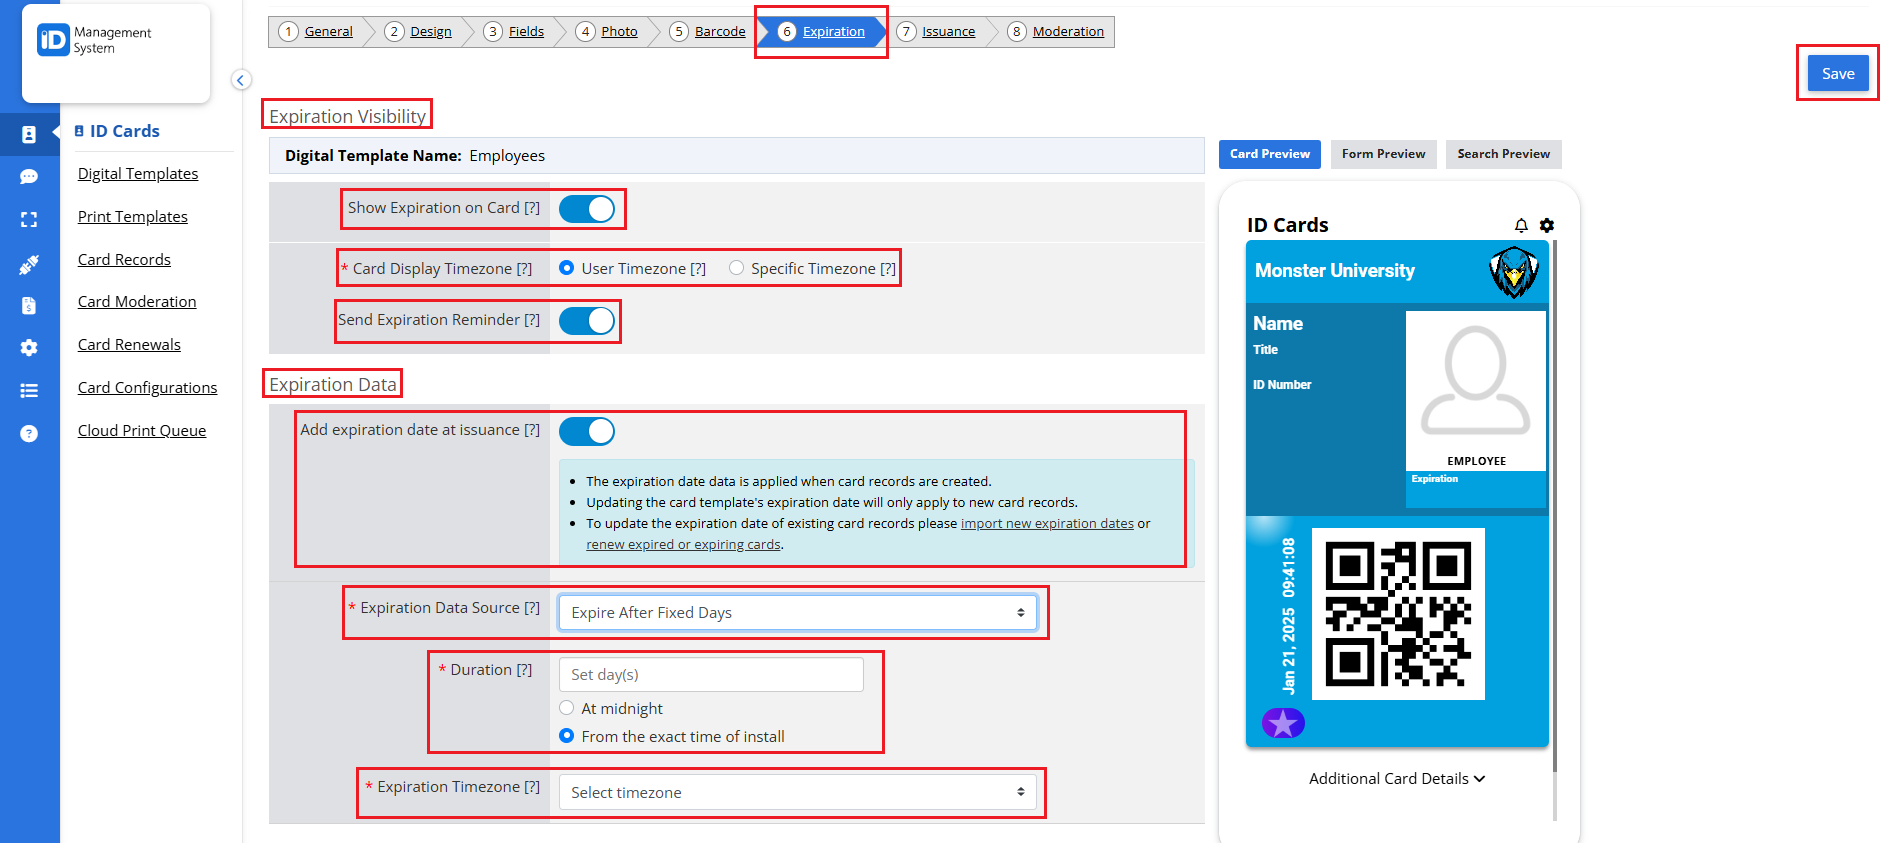
Option 2: Expire After Fixed Number of Days
- Enter a set number of days (e.g., 30 days).
- Each card will expire a certain number of days after issuance.
- This is ideal for temporary access cards or limited-duration IDs.
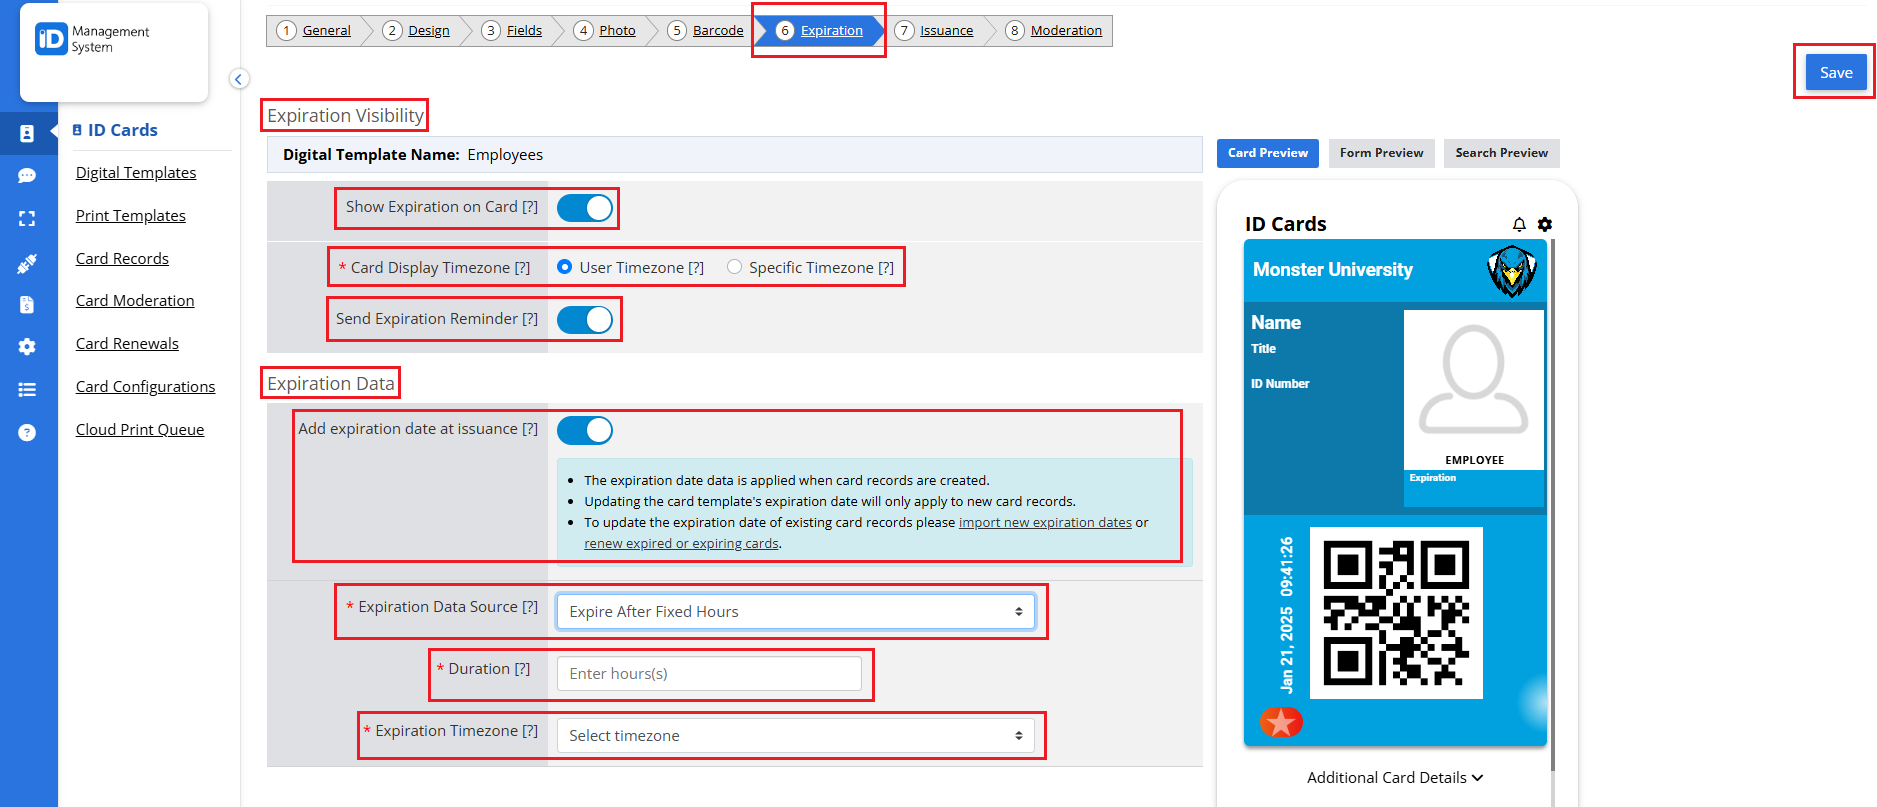
Option 3: Expire After Fixed Number of Hours
- Enter a set number of hours (e.g., 2 hours).
- Useful for short-term visitor passes or event credentials.
- The ID will automatically deactivate once the time window expires.
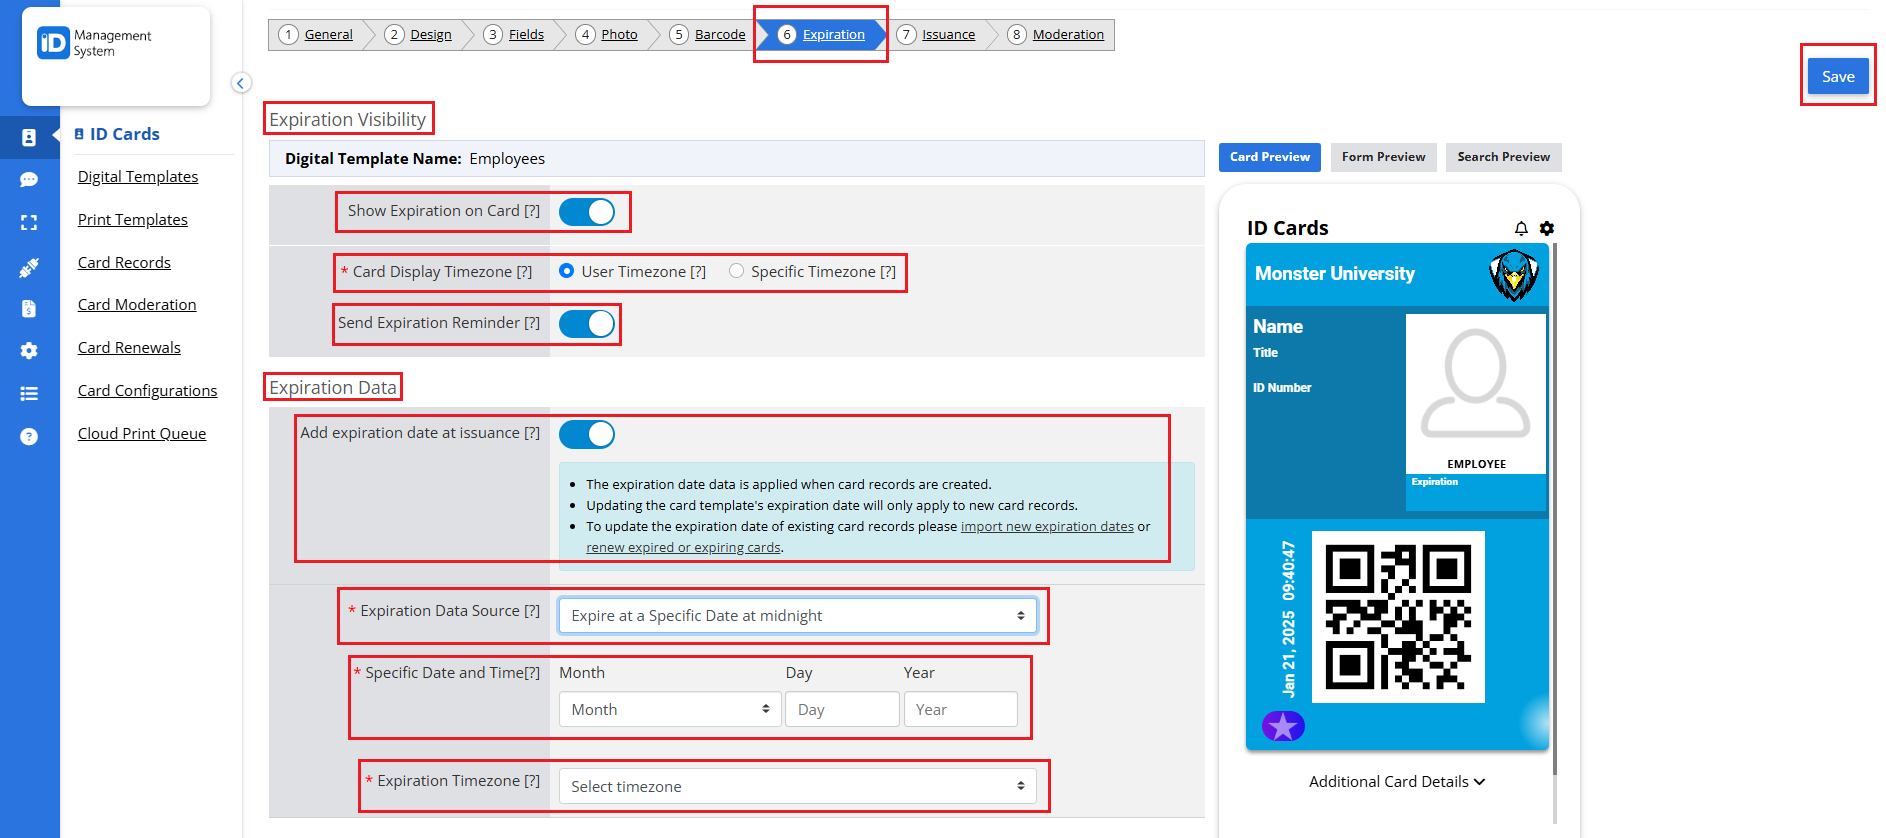
Option 4: Expire at a Specific Date at Midnight
- Select a specific calendar date (month, day, year).
- All cards will expire at 12:00 AM (midnight) on the selected date.
- Suitable for semester-based IDs or seasonal memberships.
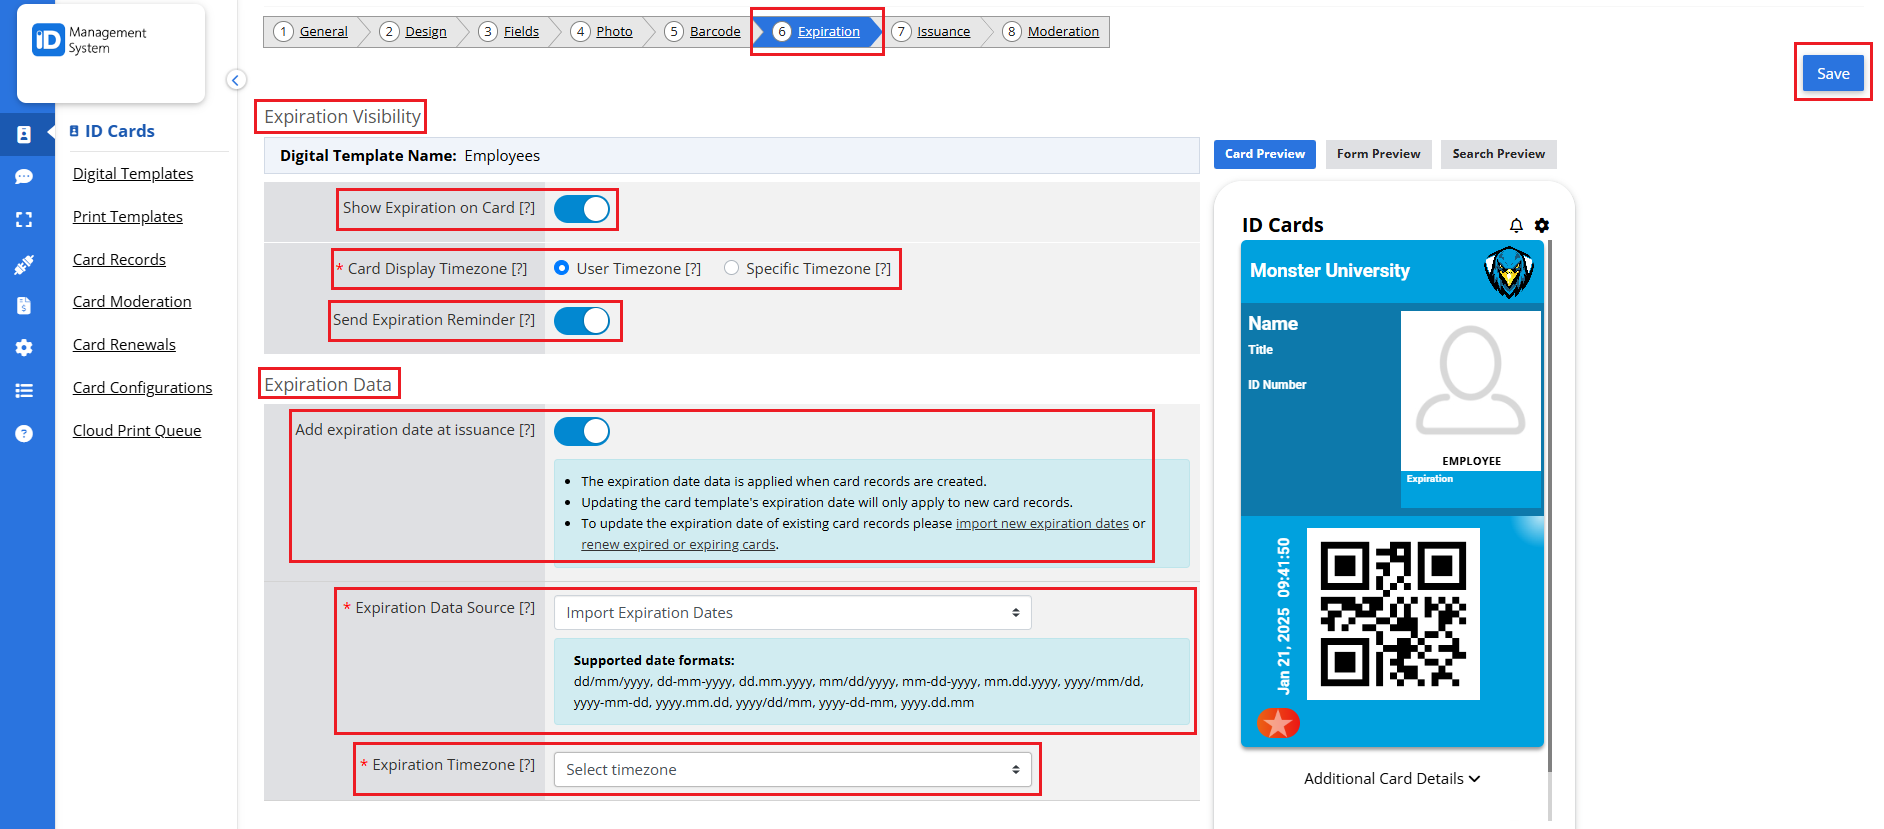
Option 5: Import Expiration Dates
- Choose to import custom expiration dates for each card.
- You can import this information:
- In bulk via CSV file
- Individually, when creating or editing a card record
- This option provides maximum flexibility for organizations with varying expiration needs.
- Learn how to bulk import card records via CSV.
- Learn how to add card data individually.
Step 5: Save Your Settings
Once you’ve selected the appropriate expiration method:
- Click the “Save” button at the bottom of the Expiration tab.
- Your template is now configured with expiration logic. When cards are issued based on this template, they will automatically expire according to your chosen settings.
Why Set Expiration Dates on Digital ID Cards?
Adding expiration dates to mobile ID cards helps institutions:
- Enhance security by deactivating expired credentials.
- Improve user management by keeping ID records current.
- Automate expiration without manual intervention.
- Support compliance for time-based access or licensing requirements.
Need Help?
If you have further questions about setting expiration parameters for your digital ID cards, please contact our support team.
