Adding a barcode or QR code to your digital ID cards allows for easy scanning, fast verification, and seamless integration with access control systems. In this guide, we’ll walk you through how to add and customize a barcode on your digital ID template using ID123’s ID Management System (IDMS).
Step 1: Access Your Digital Card Template
- Log in to your IDMS admin account.
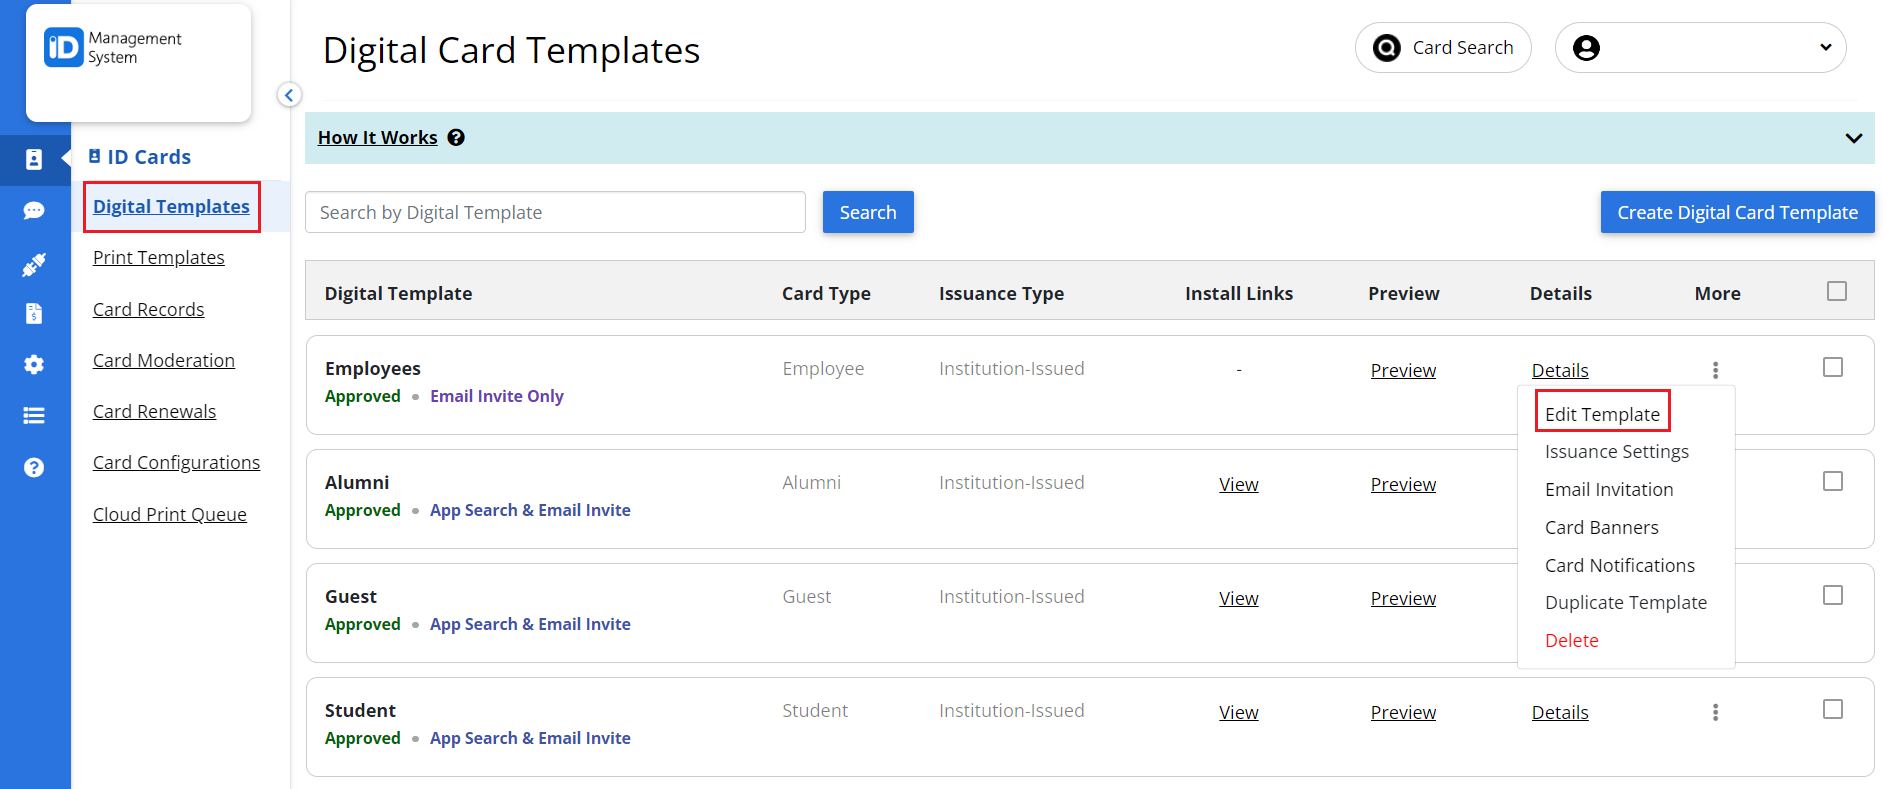
- Navigate to the “Card Templates” section in the left-hand menu.
- Find the card template you want to edit.
- Under the “More” column, click the three-dot icon (⋮) next to the template name.
- Select “Edit Template”.

Step 2: Open the Barcode Settings Tab
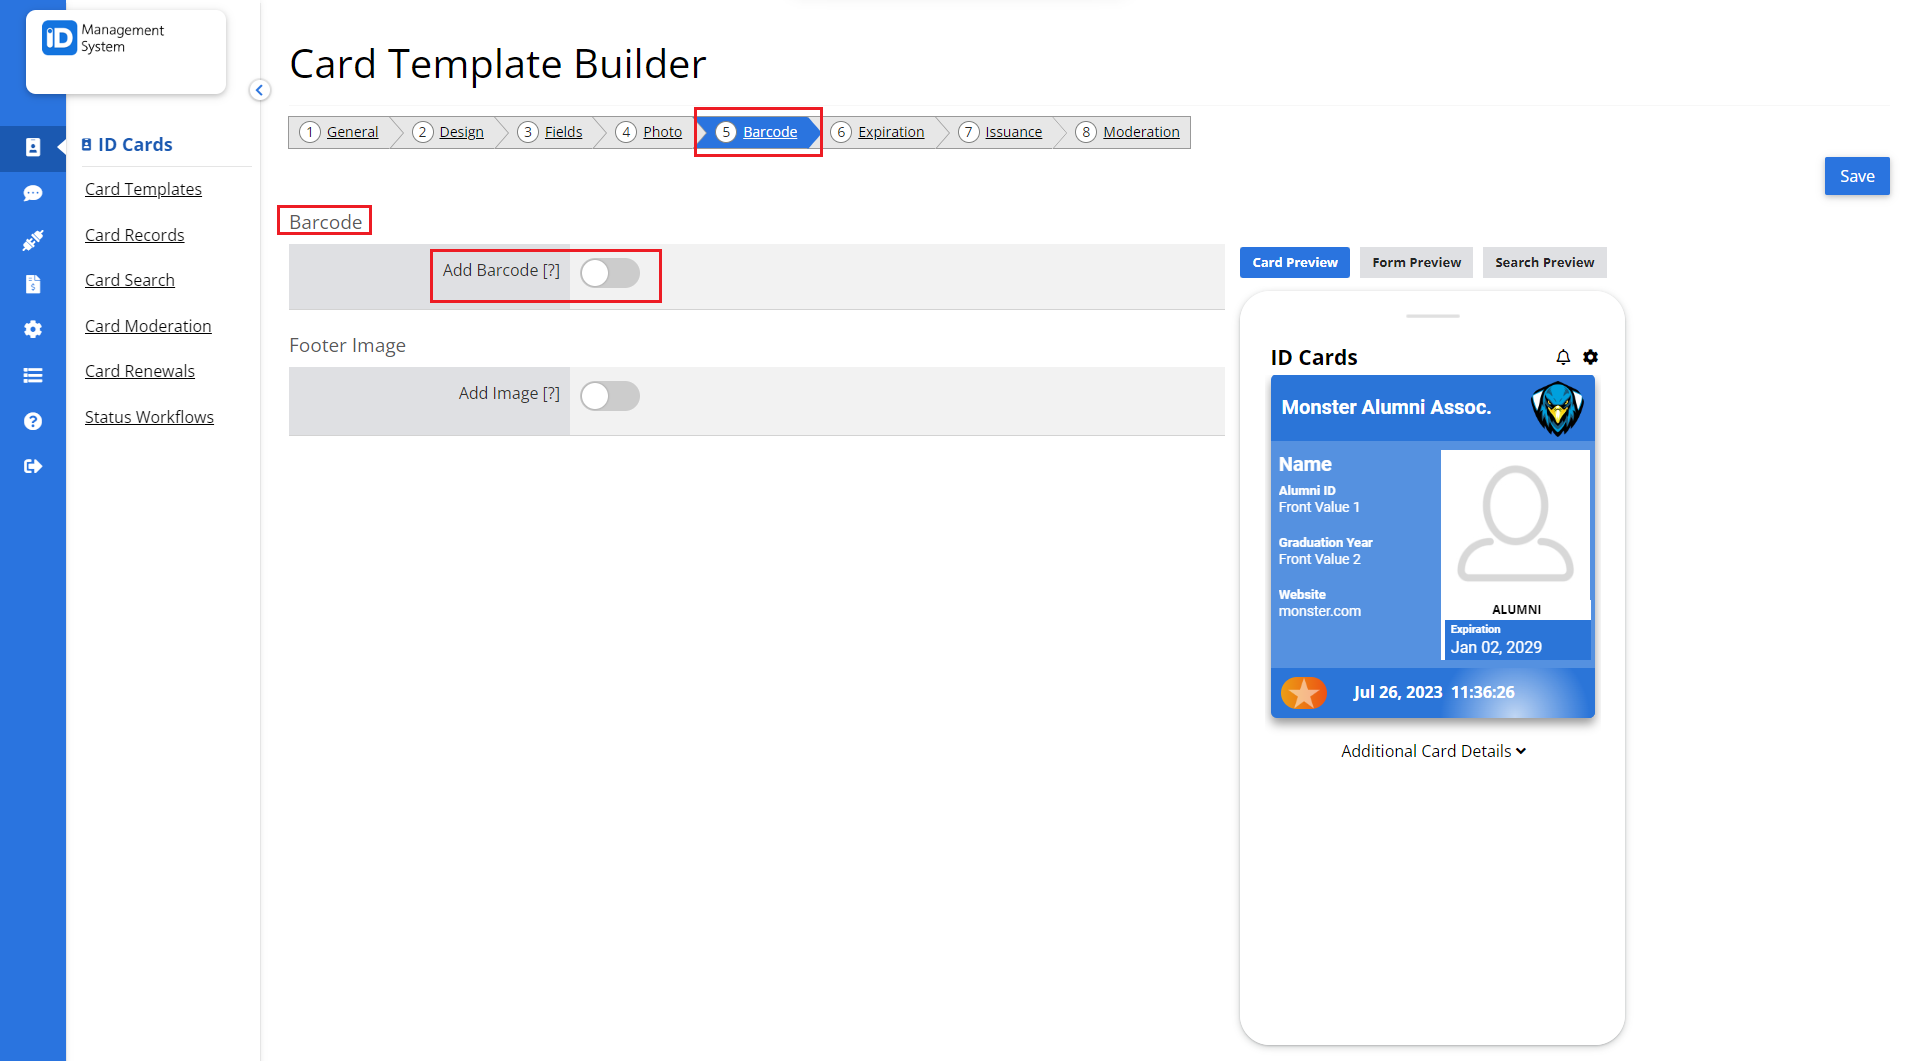
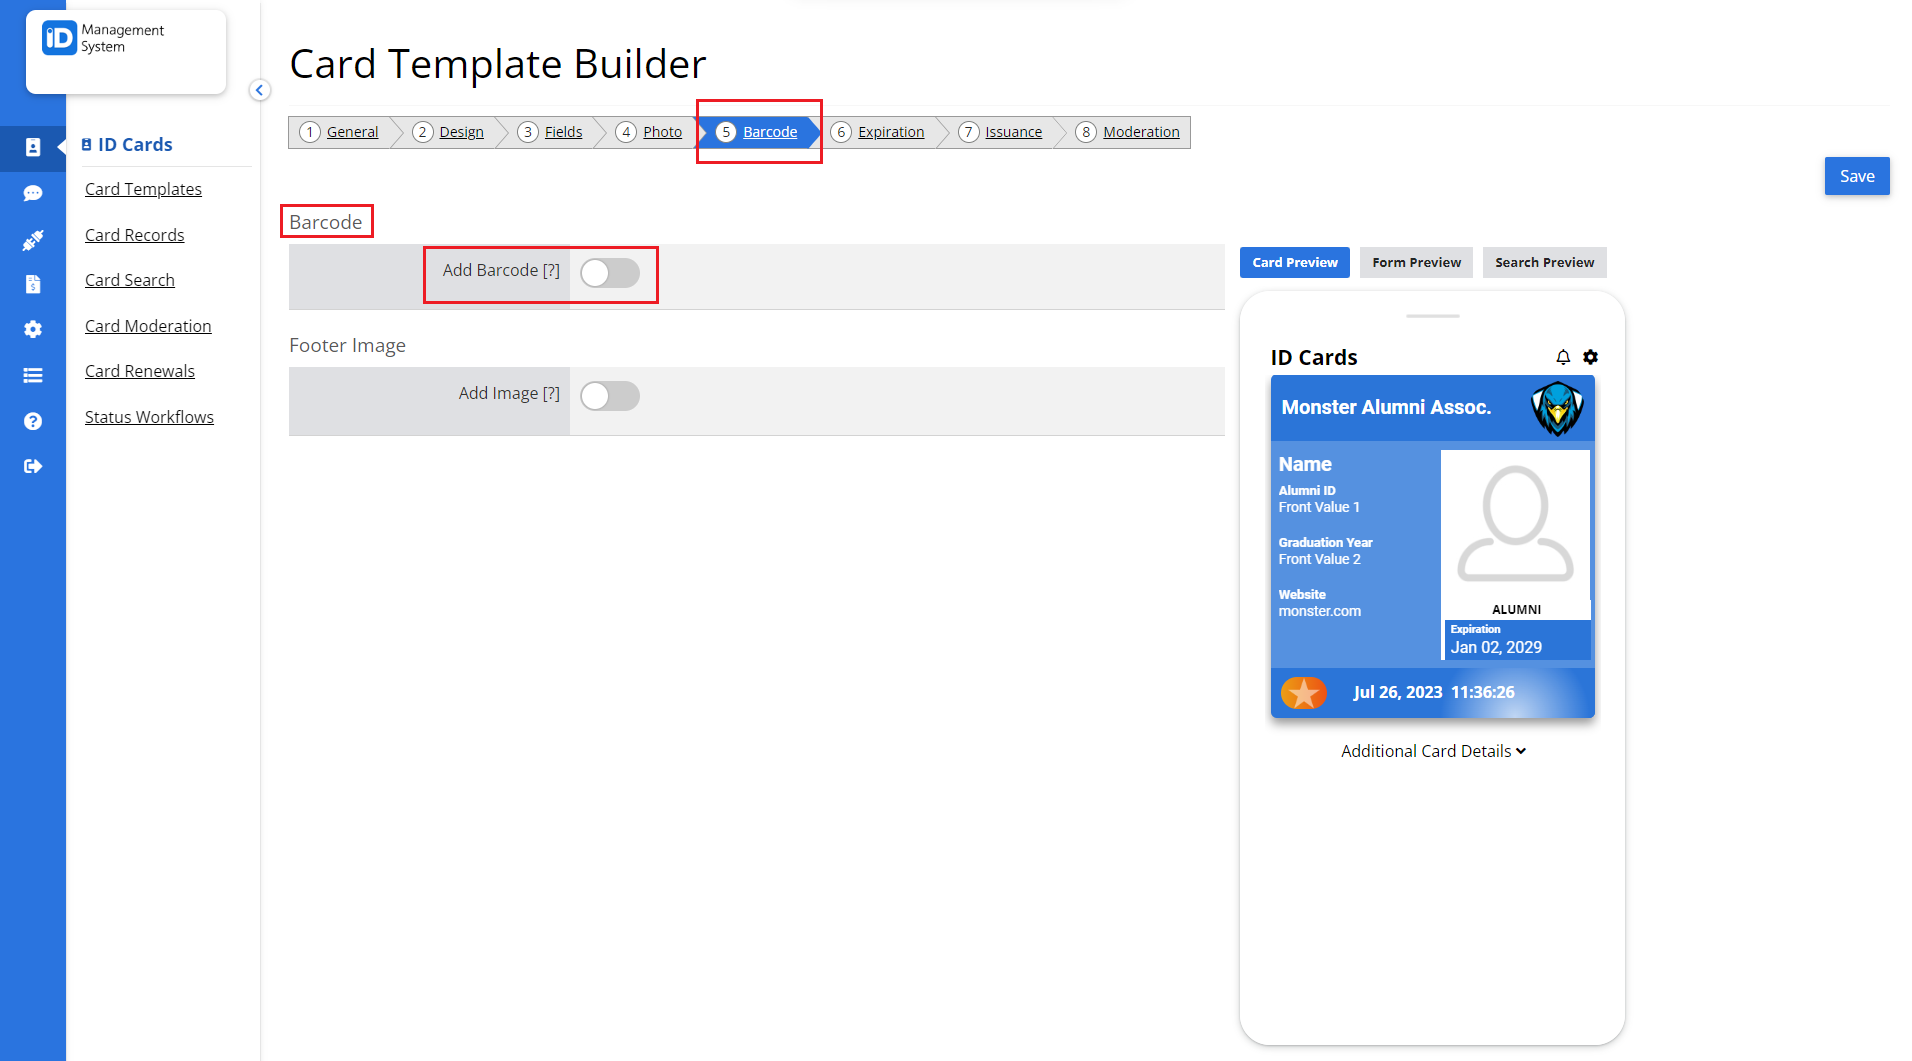
- Once you’re in the Template Editor, click on the “Barcode” tab at the top of the page.
- This tab allows you to configure all barcode-related settings for your digital ID card.

Step 3: Enable and Configure the Barcode Feature
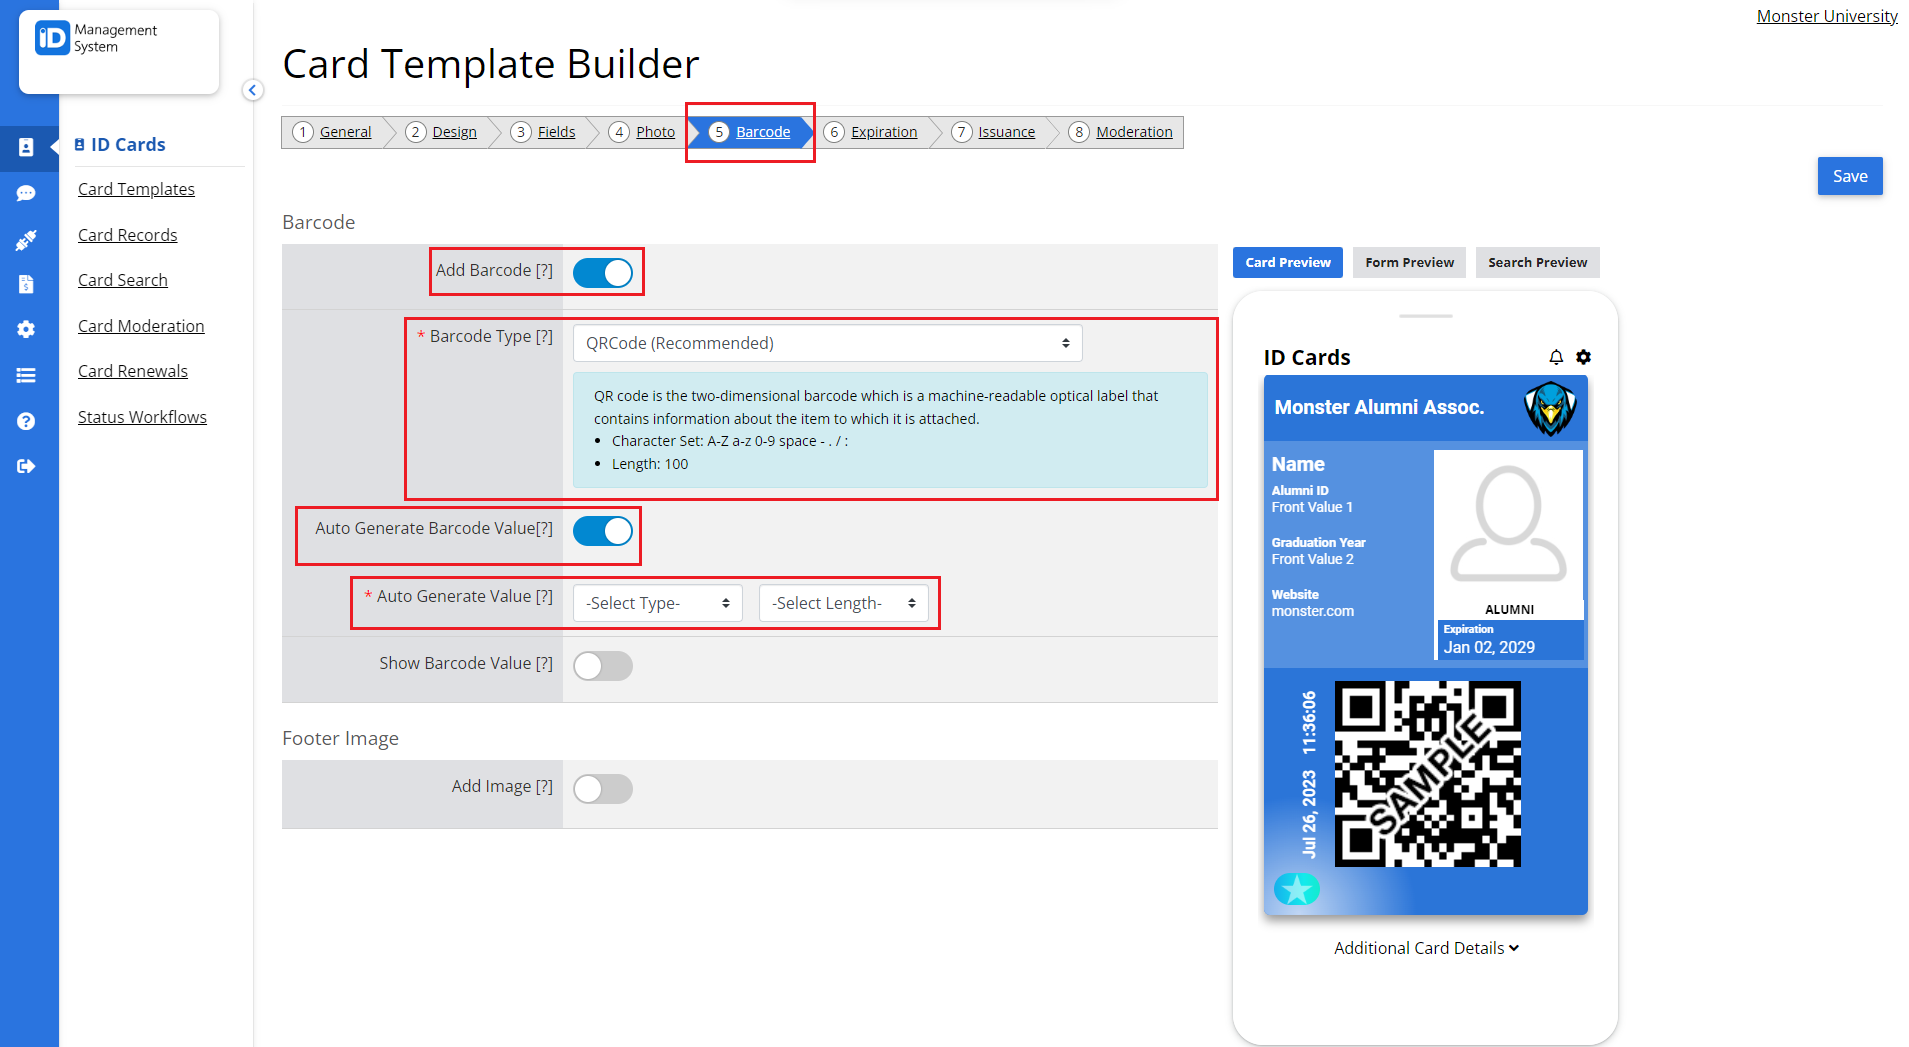
To begin, toggle on the “Add Barcode” switch to display a barcode or QR code on your digital ID card. You now have two setup options based on how you want to assign barcode values:

Option 1: Automatically Generate Barcode Values
Use this method if you want the system to auto-generate a unique barcode for each cardholder.
- Enable “Auto Generate Barcode”
- This will create a unique barcode value for every ID card automatically.
- Select Barcode Type
- Choose a barcode format compatible with your barcode scanner (e.g., QR Code, Code128, PDF417, etc.).
- Set the Value Format and Length
- In the “Auto Generate Value” section, define whether the value should be alphanumeric or numeric, and specify the character length.
- Optional: Display the Barcode Value on the Card
- Toggle on “Show Barcode Value” if you want the numeric or alphanumeric value to appear underneath the barcode on the card.

Option 2: Import or Manually Provide Barcode Values
Choose this method if you already have barcode values you want to assign to each cardholder.
- Disable “Auto Generate Barcode”
- Select Barcode Type
- As in Option 1, choose a format compatible with your scanning device.
- Define Barcode Data Format
- Choose whether the barcode values are alphanumeric or numeric.
- Select the Barcode Value Data Source
- Determine where the barcode value will come from:
- Fixed Value: The same barcode appears on all cards.
- Imported Value: The barcode is assigned during bulk upload or individual record entry.
- User-Submitted: The barcode value is entered by the cardholder via the mobile app.
- Determine where the barcode value will come from:
- Optional: Show Barcode Value on the Card
- Enable “Show Barcode Value” to make the raw value visible below the barcode or QR code on the digital card.

Final Step: Save Your Changes
Once you’ve finished configuring the barcode settings, make sure to save the template to apply the changes.
Need Help?
If you have any questions about adding a barcode to your digital ID cards, don’t hesitate to reach out to our support team via chat or email.
