Setting the card issuance type to “Institution-Issued” ensures that only verified users can access and install their digital ID cards. This guide will walk you through the step-by-step process of updating your card template to use institution-controlled issuance within the ID123 ID Management System (IDMS).
Step 1: Access the Card Templates Page
- Log in to your ID123 IDMS account.
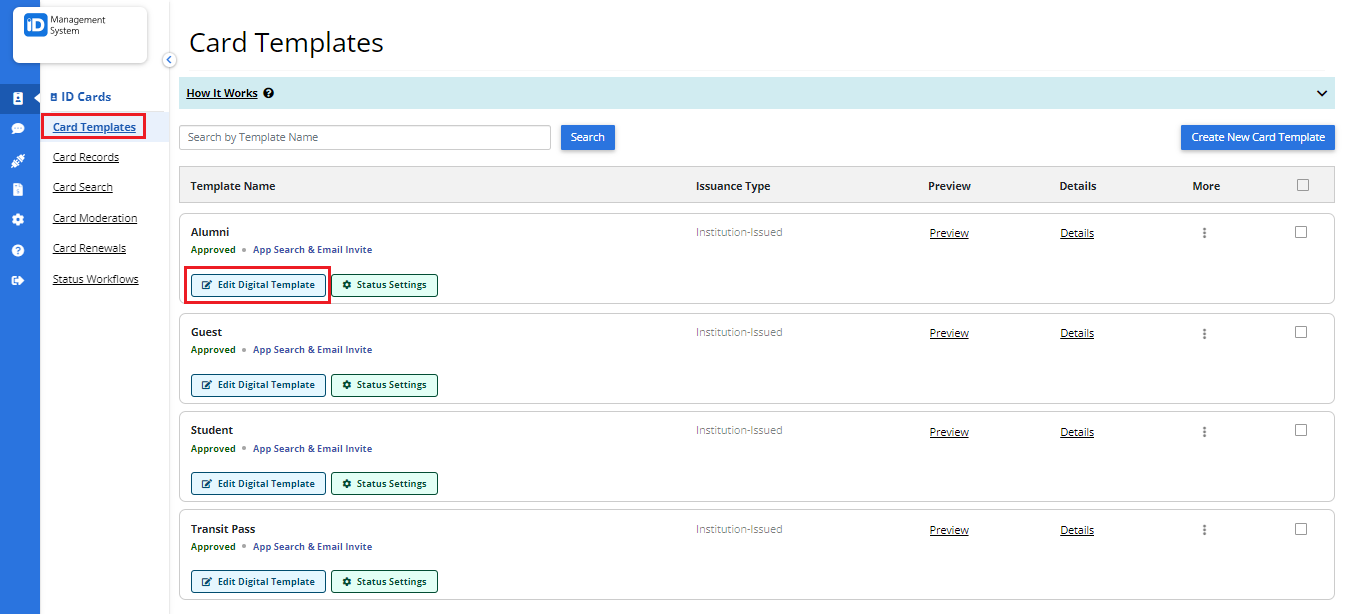
- From the left-hand menu, click on “Card Templates”.
- Find the template you want to update and click “Edit” under the More menu (three dots).
Step 2: Open the “Issuance” Tab
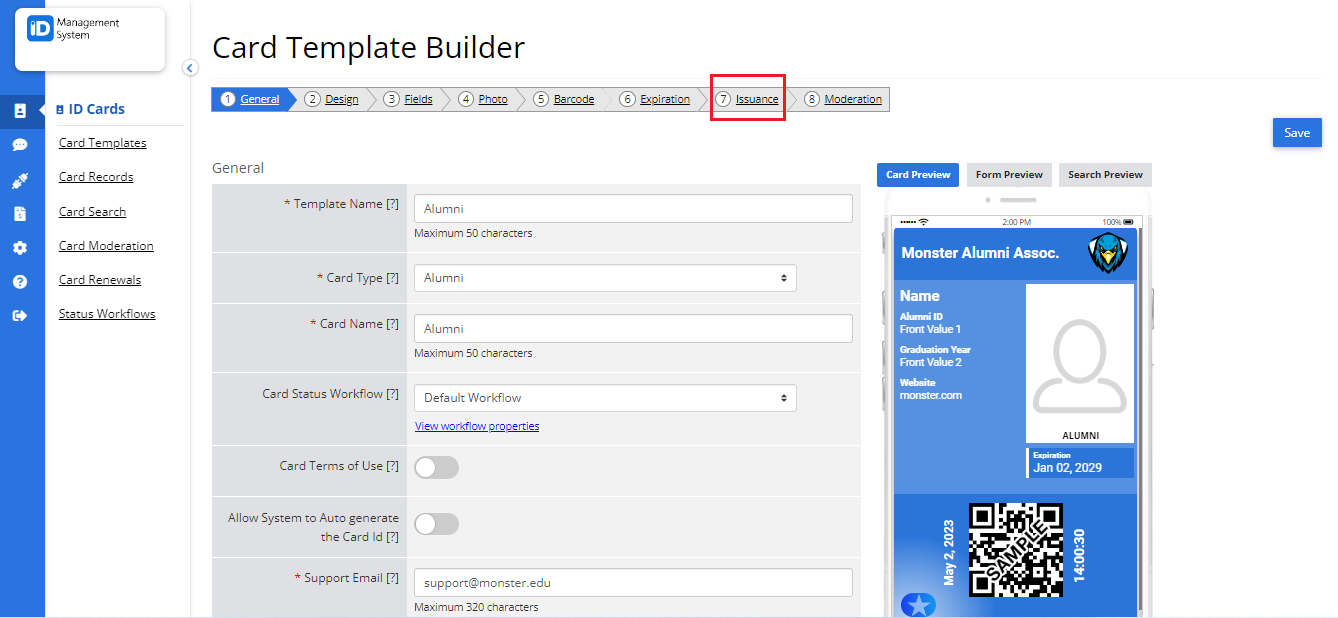
Once you’re inside the card template editor, navigate to the top menu and click on the “Issuance” tab. This section lets you control how your digital ID cards are issued to users.
Step 3: Choose “Institution-Issued” as the Card Issuance Type
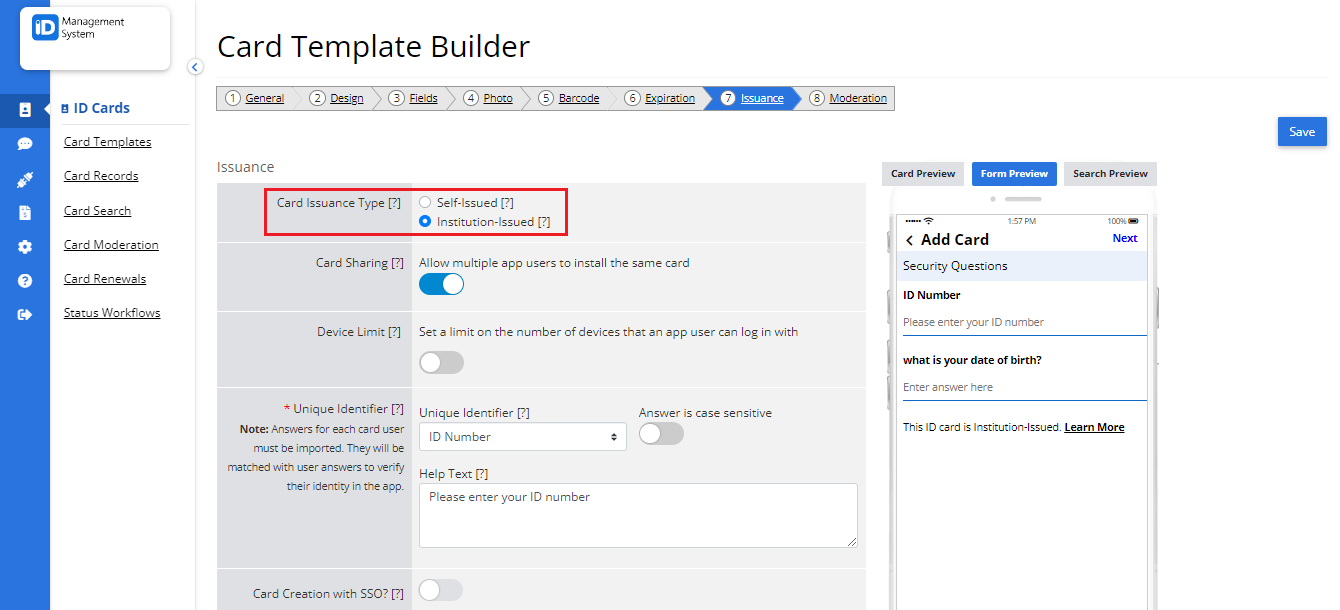
- Select the “Institution-Issued” option.
- By choosing this setting, your institution will have full control over who can install a digital ID card.
- When selected, you will be prompted to enter a Unique Identifier for each user.
Step 4: Define the Unique Identifier
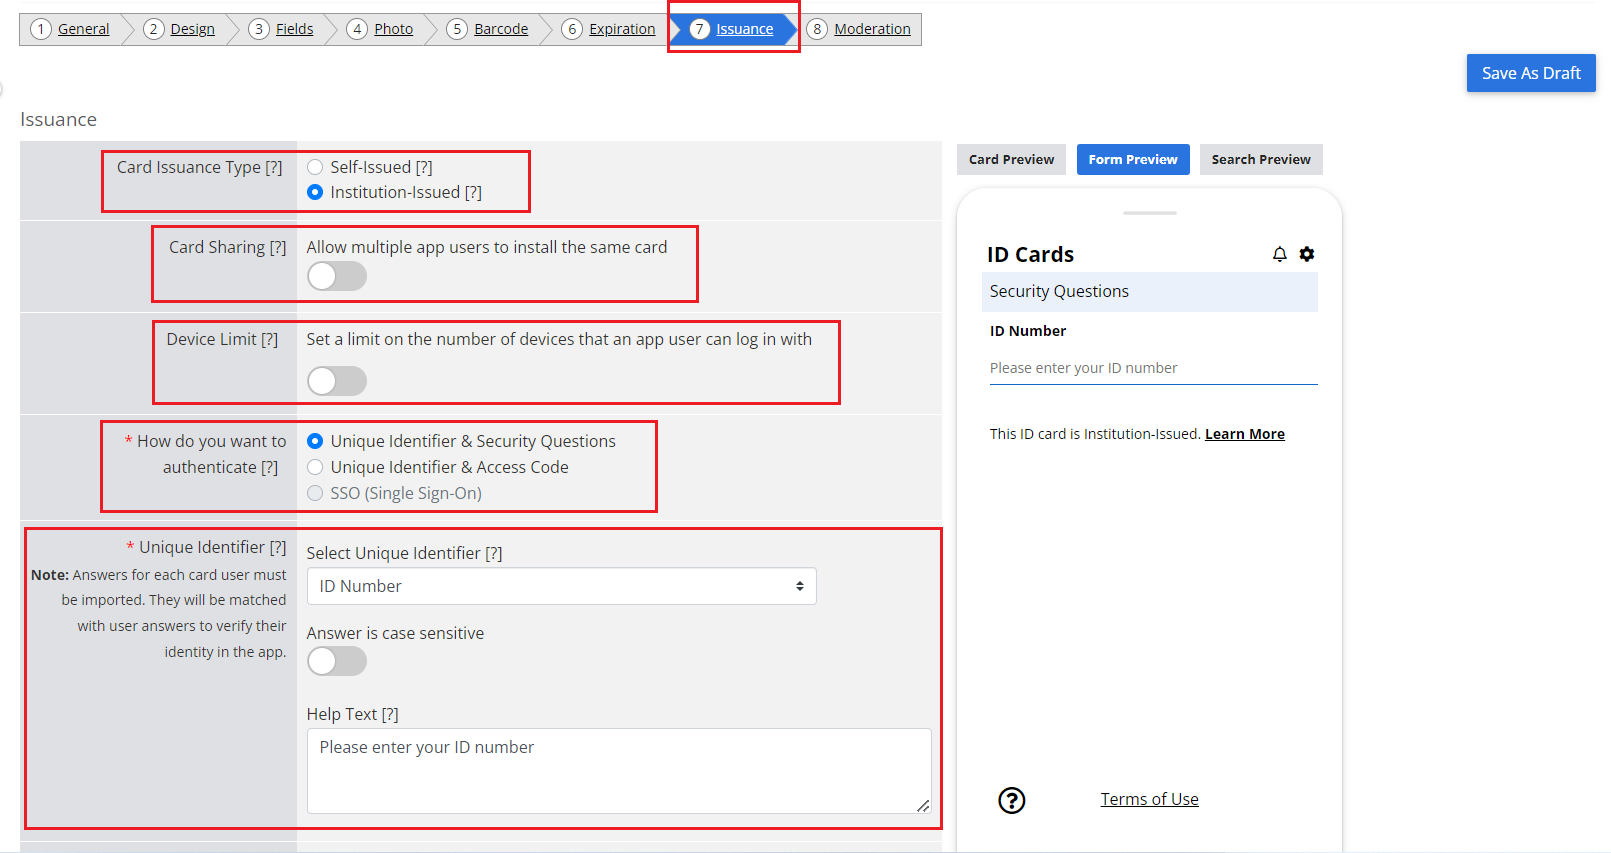
The Unique Identifier is used to verify the cardholder’s identity in the mobile app before issuing the card. You can choose either the user’s email address or ID number as the identifier.
- If you are importing users in bulk, include the unique identifier in your CSV file.
- If you are adding records one by one, make sure to manually enter the unique identifier for each user.
Tip: Be consistent with your identifier type (email or ID number) across all records for accurate verification.
Step 5: (Optional) Add a Security Question for Extra Verification
For added security, you can enable a Security Question. This serves as an additional layer of identity verification before the ID card can be installed.
- You must provide the correct answer for each user, either in your CSV upload or during manual record creation.
- Users will be required to answer this question correctly when installing their digital ID card.
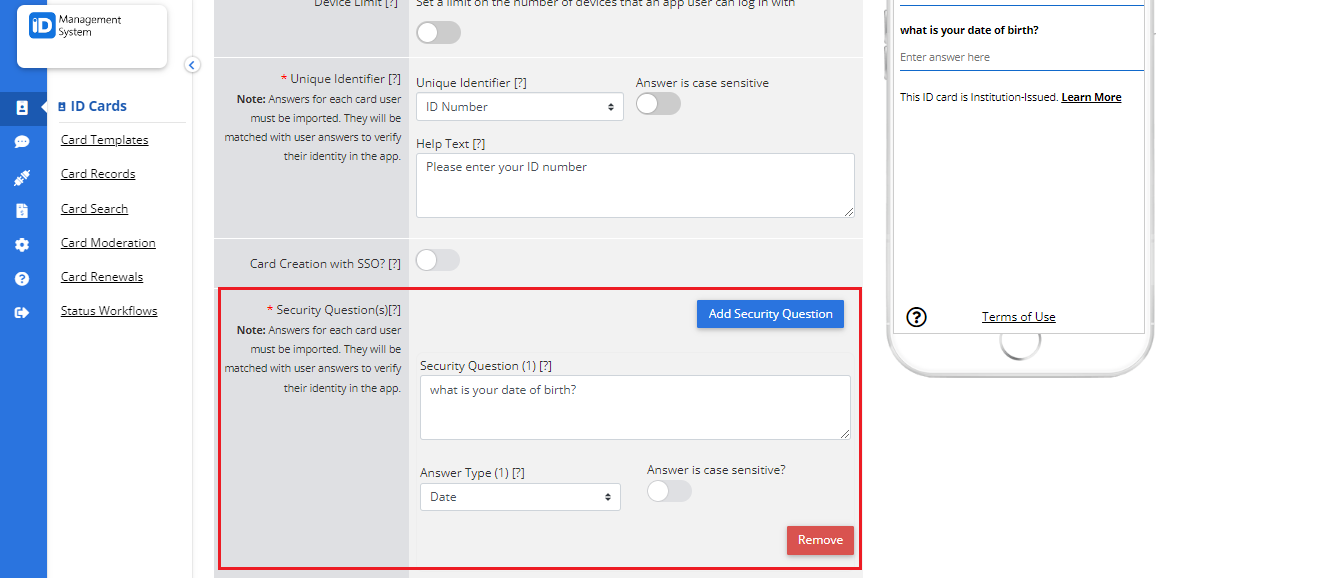
Step 6: Preview the User Experience and Save Changes
- Click “Form Preview” on the right side of the page to see how the verification form will appear in the app.
- Make sure everything looks correct.
- When you’re done, click “Save” to apply your settings.


Need Help?
If you need help or have any questions about updating the Card Issuance Type to “Institution-Issued”, feel free to contact support.
