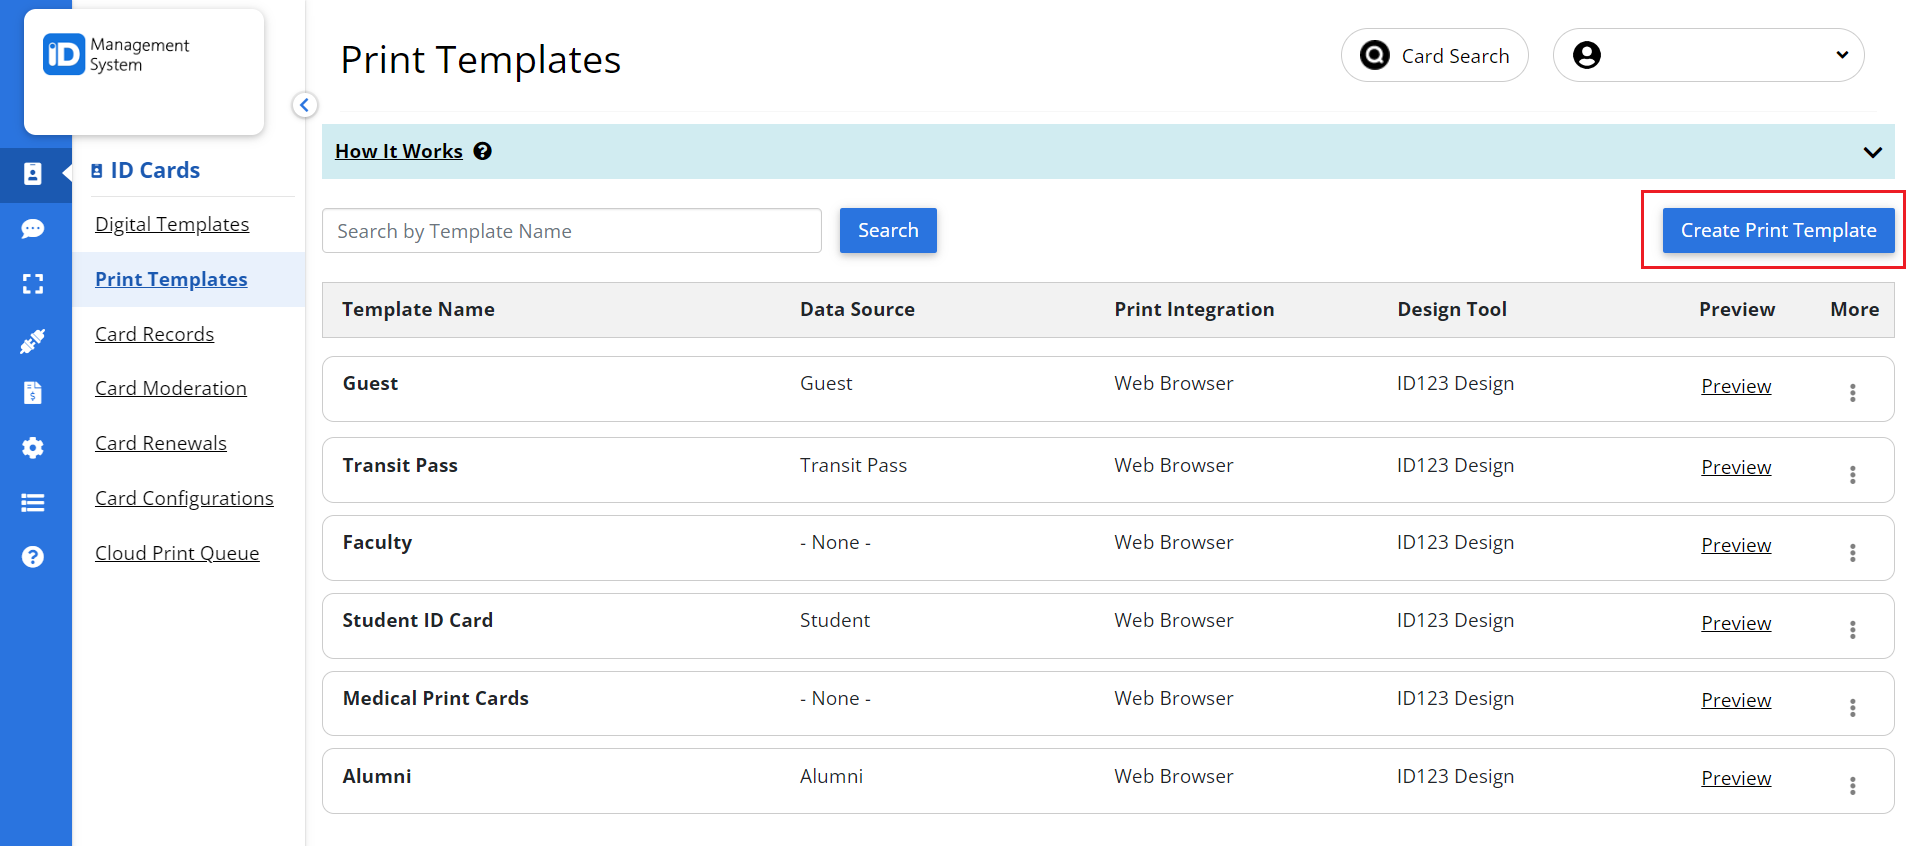
Step 1: Access the Print Card Templates Page
To get started, go to the Print Card Templates section in your admin dashboard and click on the “Create Print Template” button.

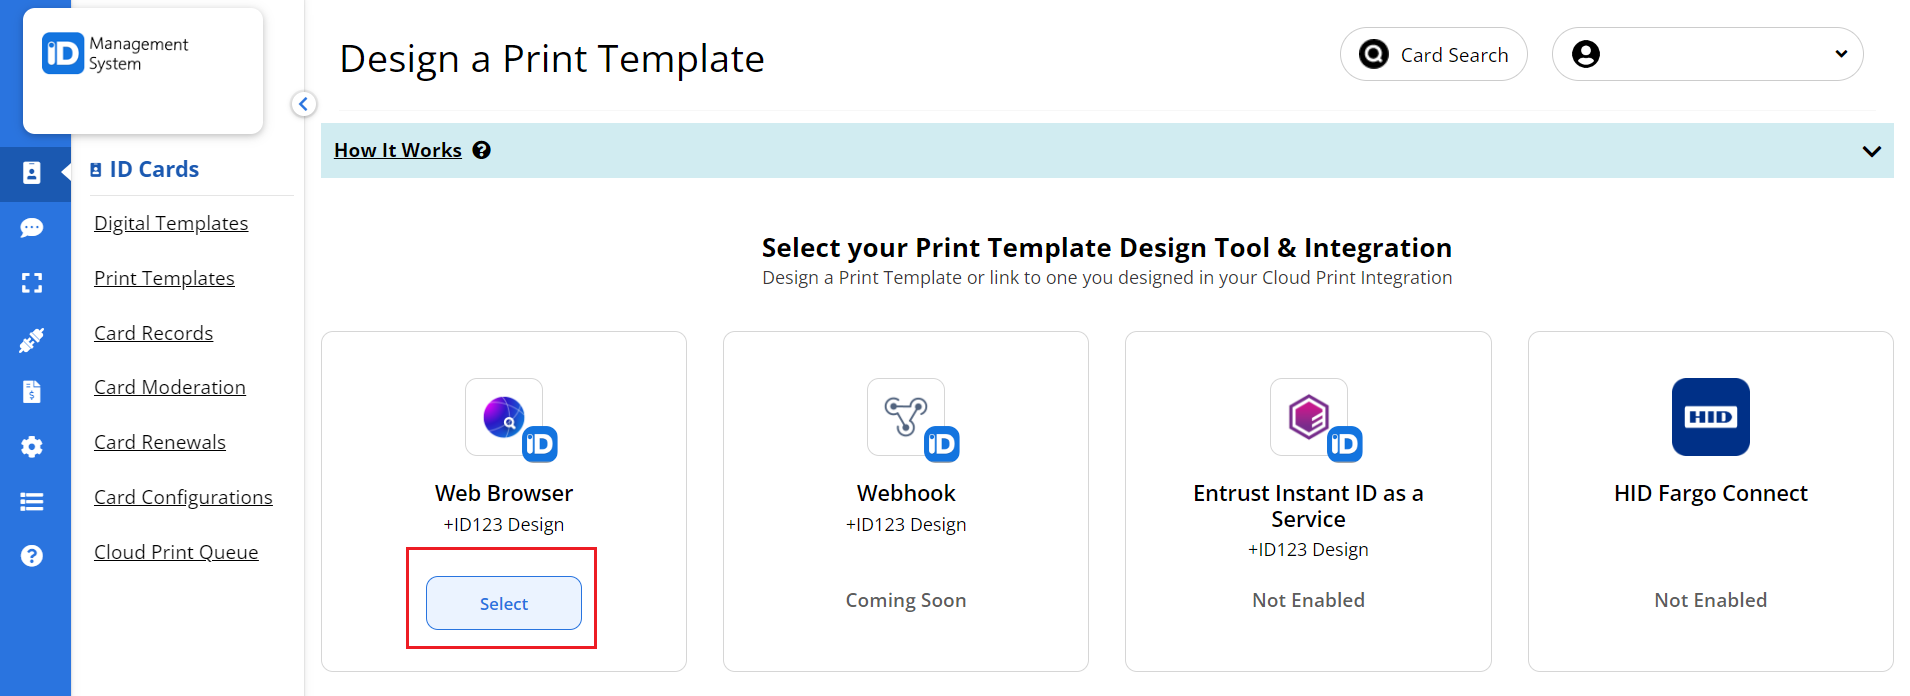
Step 2: Choose a Print Template Tool and Integration Option
Next, select the design tool and integration method for your print template. Under the Web Browser option, click “Select” to open the print template editor. This tool allows you to customize ID card layouts directly within your web browser. No additional software is required.

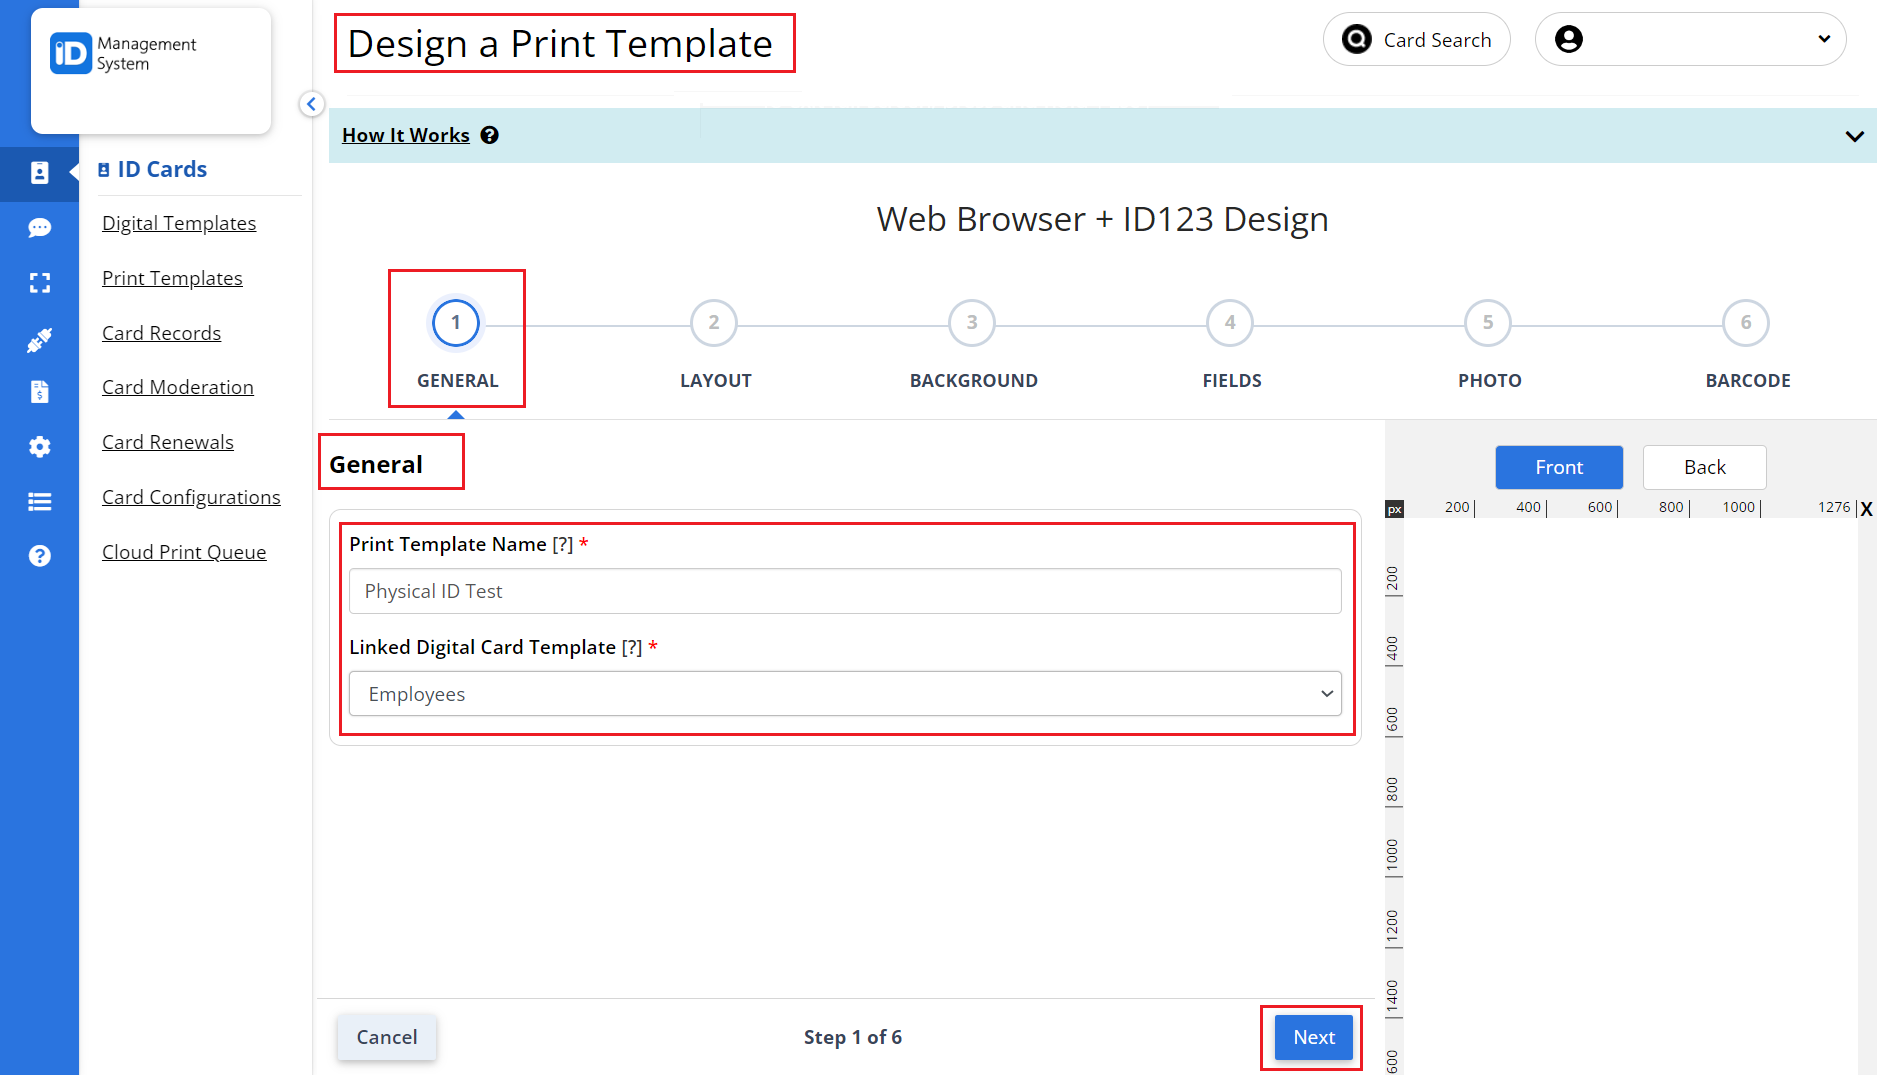
Step 3: Name Your Print Template and Link a Digital Template
Enter a Print Template Name that helps you identify the template later. Then, select the linked digital card template you created earlier. Click “Next” to continue. Linking a digital card ensures consistency between your digital and physical ID card formats.

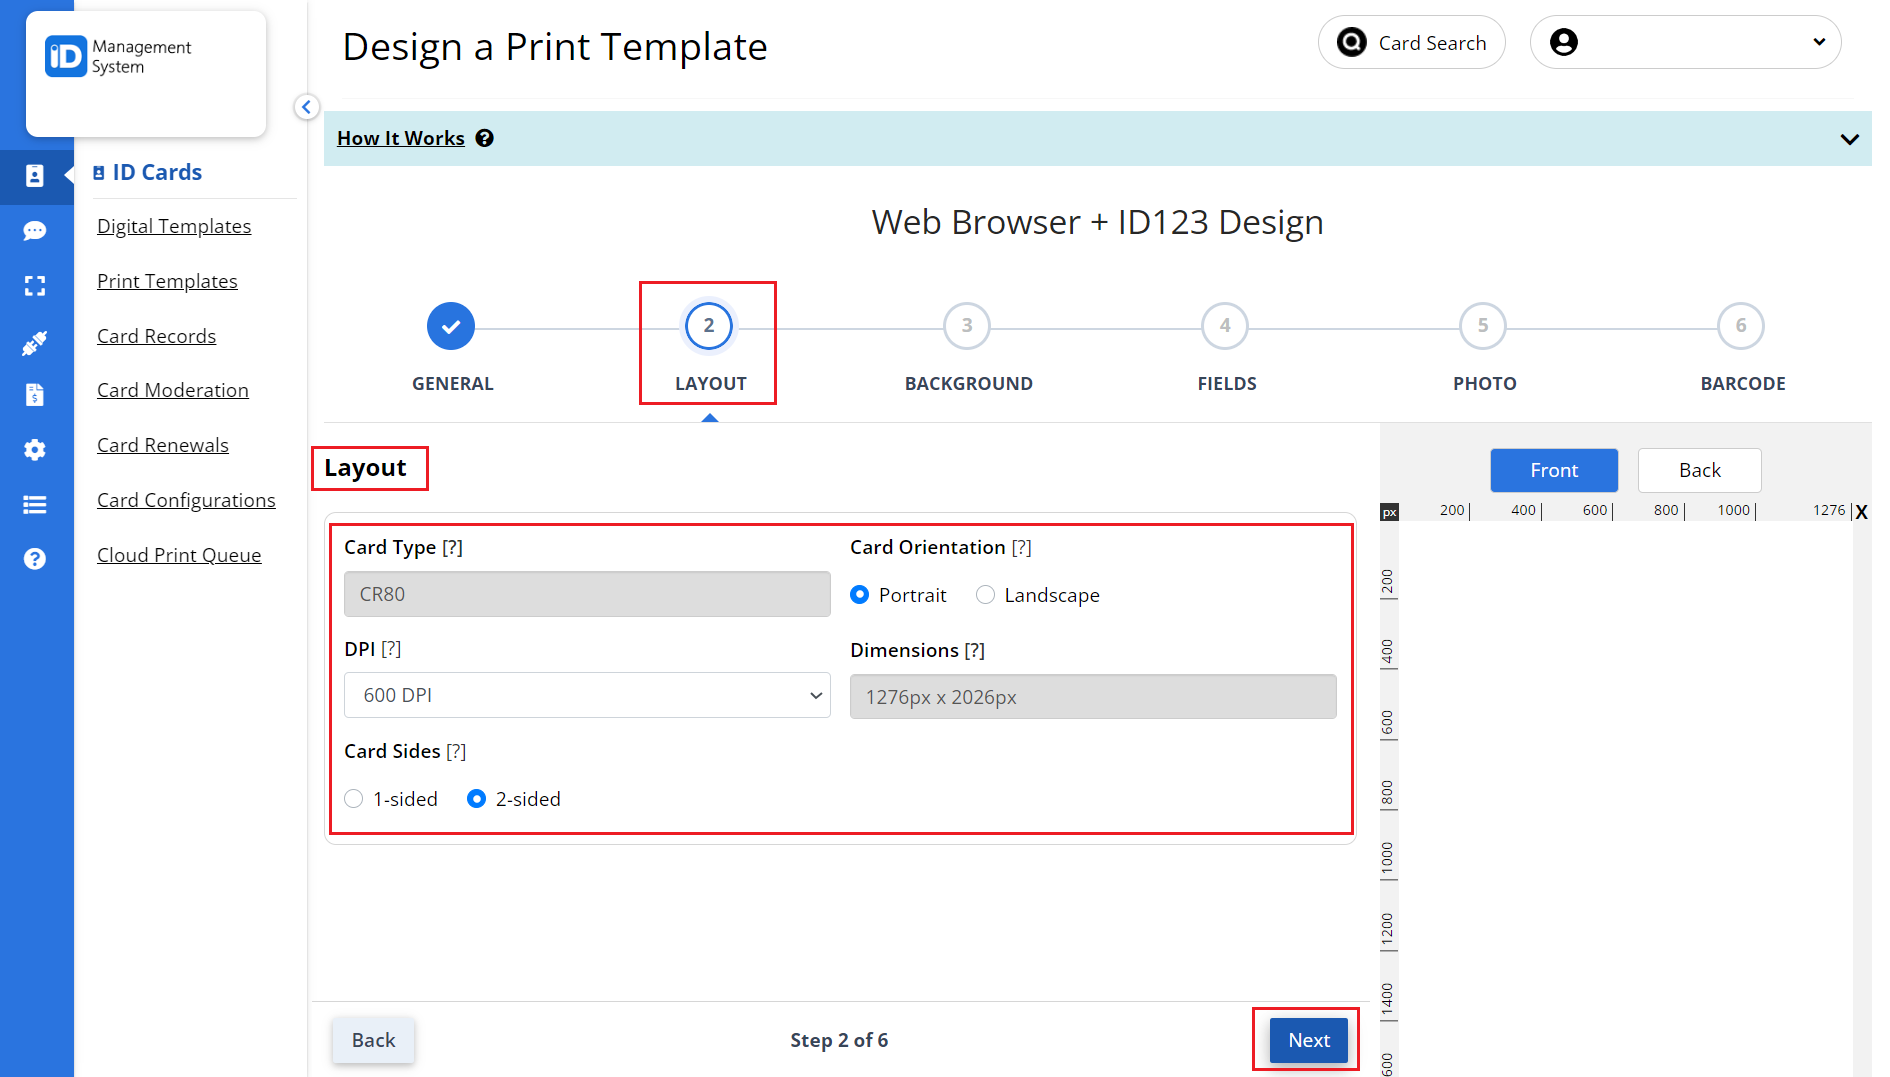
Step 4: Choose Layout Settings
Set up the physical ID card layout:
- Choose the card orientation (Portrait or Landscape).
- Select the print resolution (DPI).
- Choose between a 1-sided or 2-sided card.
- Click “Next” to proceed.

Step 5: Set a Background Color or Image
Customize your card’s appearance by selecting a background option:
- Upload a background image.
- Choose a solid background color.
- Click “Next” when you’re done with the background settings.

Step 6: Add Custom Text Fields
Add the text fields you want to display on the printed card:
- Choose the data source for each field.
- Set the label text and font style.
- Adjust text size, position, and other formatting options.
- These fields can include name, title, ID number, expiration date, and more.

Step 7: Include an ID Photo
Enable the ID photo option and customize:
- Photo placement (top, center, corner, etc.)
- Photo dimensions for the printed card
- This ensures every printed ID card includes a clear visual identifier.

Step 8: Add a Barcode (Optional)
If your institution uses barcode scanning for access control, attendance, or verification, you can:
- Enable the barcode option.
- Choose the barcode type (e.g., Code 39, QR code).
- Set the barcode’s size and position on the card.

Step 9: Save and Finalize Your Print Template
Once you’ve finished designing your custom physical ID card template, click on the “Save & Finish” button. Your template is now ready to be used for printing physical ID cards using compatible printers and software integrations.
Final Tips
- Ensure your digital and physical ID templates are always synchronized for consistent branding.
- Preview the template before printing a batch to avoid formatting errors.
- Use high-resolution images and fonts for optimal print quality.
By following these steps, you can easily create a personalized and professional physical ID card print template that aligns with your institution’s branding and functional needs. Looking for more help? Contact ID123 Support.

