Learn how to configure a trigger webhook in the ID123 ID Management System to send real-time data to external systems when a specific event occurs. This guide walks you through each step, from creating the webhook to mapping variables—optimized for clarity, usability, and SEO.
What is a Webhook?
A webhook is a way for one system to send real-time data to another system whenever a specific event takes place. It works by sending an automated HTTP request to a pre-defined URL. Webhooks are ideal for integrating external applications, enabling them to stay synchronized with your internal data changes.
What is a Trigger Webhook?
A trigger webhook is a type of webhook that activates when a specific event or condition occurs within the ID Management System (IDMS). When the trigger condition is met—such as a new card being created—the webhook sends data to an external service or application via a specified URL.
Step 1: Navigate to the Webhook Creation Page
- Log into your IDMS admin account.
- In the left-hand navigation panel, click on “Integrations”.
- Select “Webhooks” from the options.
- Click the “Create a Webhook” button to begin the setup process.

Step 2: Choose Webhook Type and Triggering Event
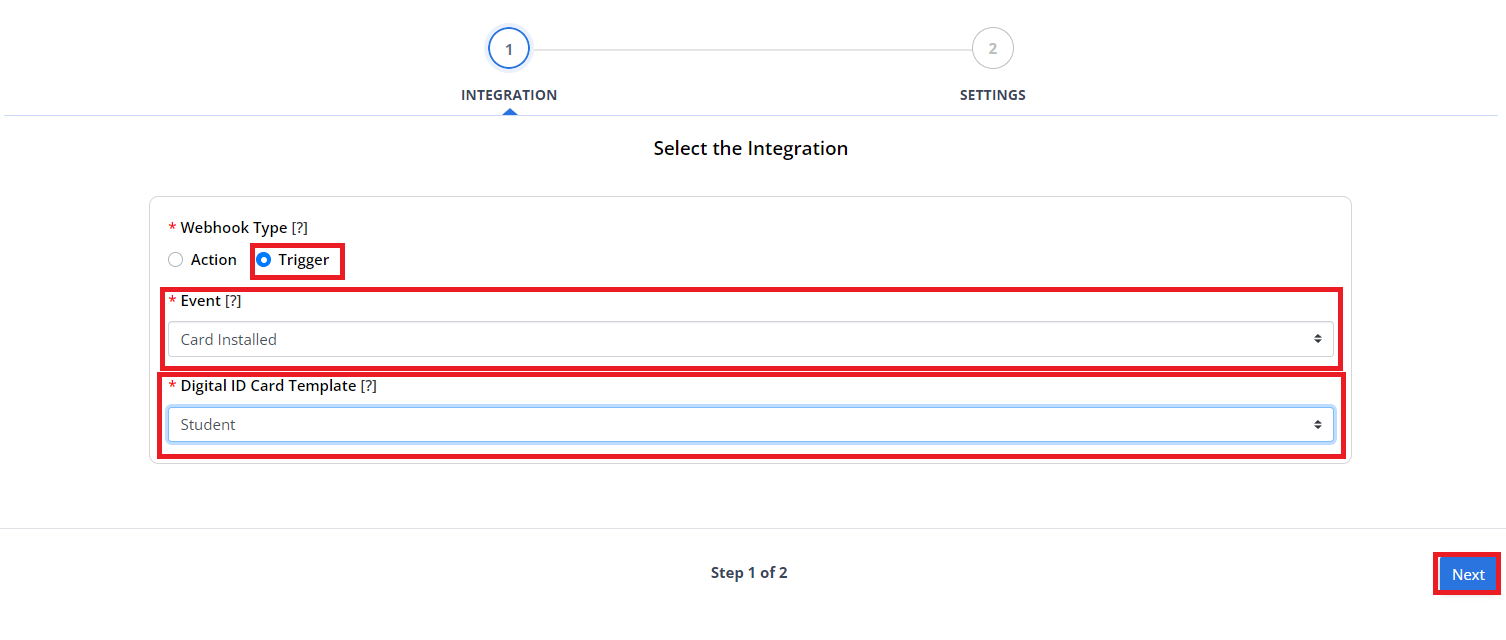
- In the Integration step, choose the “Trigger” webhook type by selecting the “Trigger” radio button.
- Select a triggering event from the dropdown menu. This event will activate the webhook. Available options may include actions like card record creation, updates, revocation, and more.
- Choose the card record group you want this webhook to apply to.
- Once configured, click “Next” to continue.
Need help selecting the right event?
Refer to our Webhook Event Definitions Guide for details on all supported trigger events.

Step 3: Define Webhook Settings
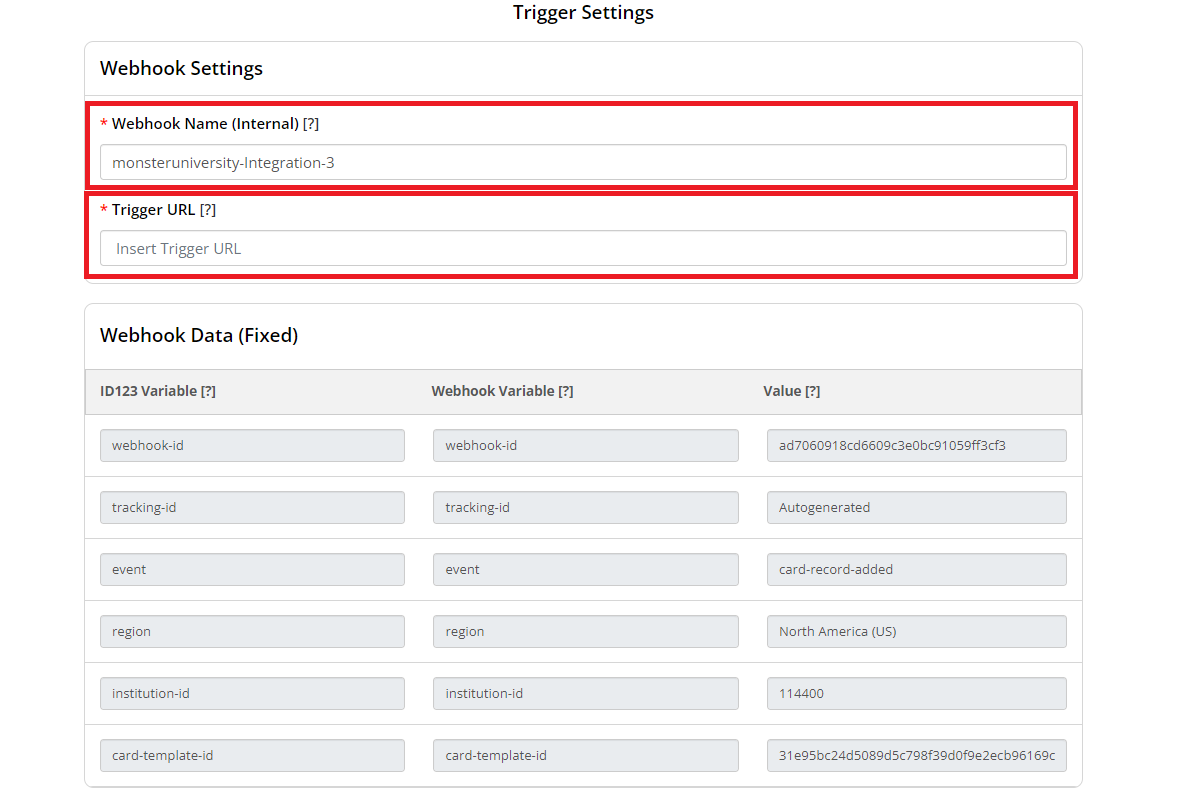
- In the Settings step, enter an internal name for your webhook to help you identify it later in the IDMS. This name is auto-filled but can be edited.
- Enter the Trigger URL from the external system that will receive the webhook data. This is the endpoint where the webhook request will be sent.

Step 4: Review Fixed Webhook Data
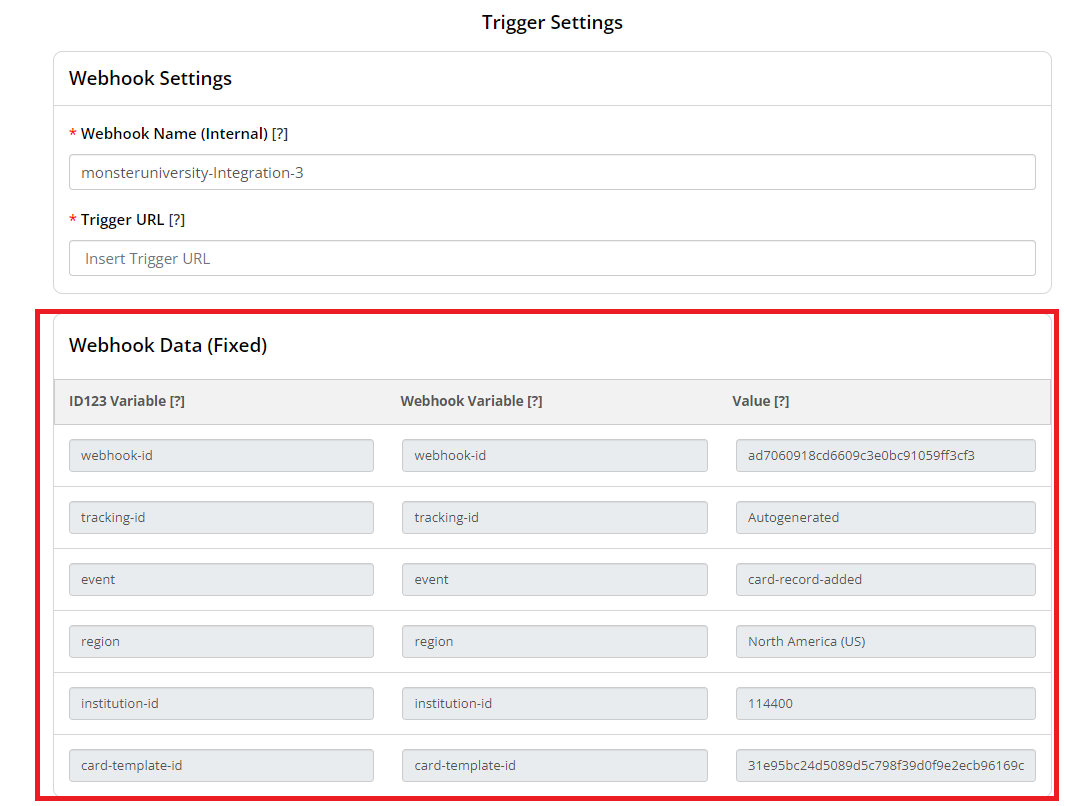
The system will now display fixed webhook data, which is pre-populated based on your account details, selected triggering event, and card record group.
- Review this information to ensure accuracy.
- If changes are needed, click Back to return to the Integration step and update your selections.

Step 5: Map Webhook Data Fields
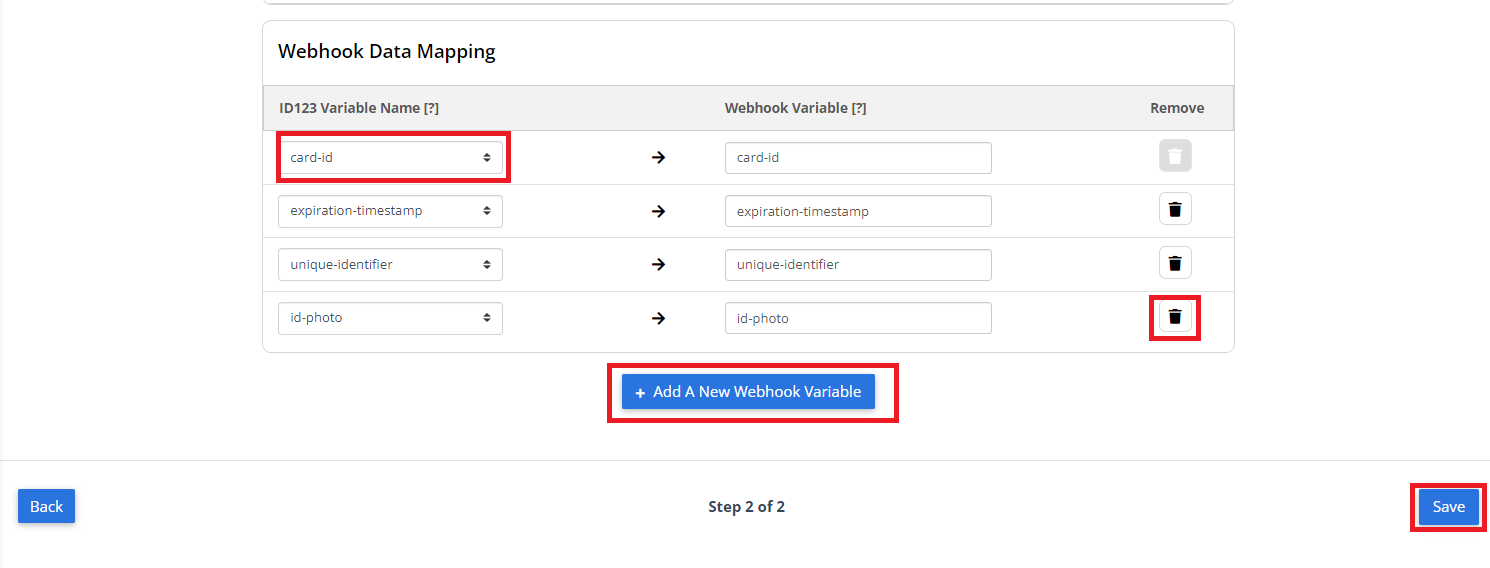
- In the Data Mapping section, map ID123 system variables to the webhook variables expected by your external application.
- The ID123 variables are based on the card record group you selected.
- To add a custom webhook variable, click the “Add a New Webhook Variable” button.
- To remove a variable, click the trash icon in the “Remove” column next to the variable you want to delete.
- After completing your mappings, click “Save” to finalize and activate your trigger webhook.

Final Notes on Webhook Configuration
- Ensure your receiving system is prepared to accept webhook requests at the provided URL.
- Only valid card record groups and supported events will result in successful webhook triggers.
- Webhooks can be edited later from the Webhooks dashboard within IDMS.
