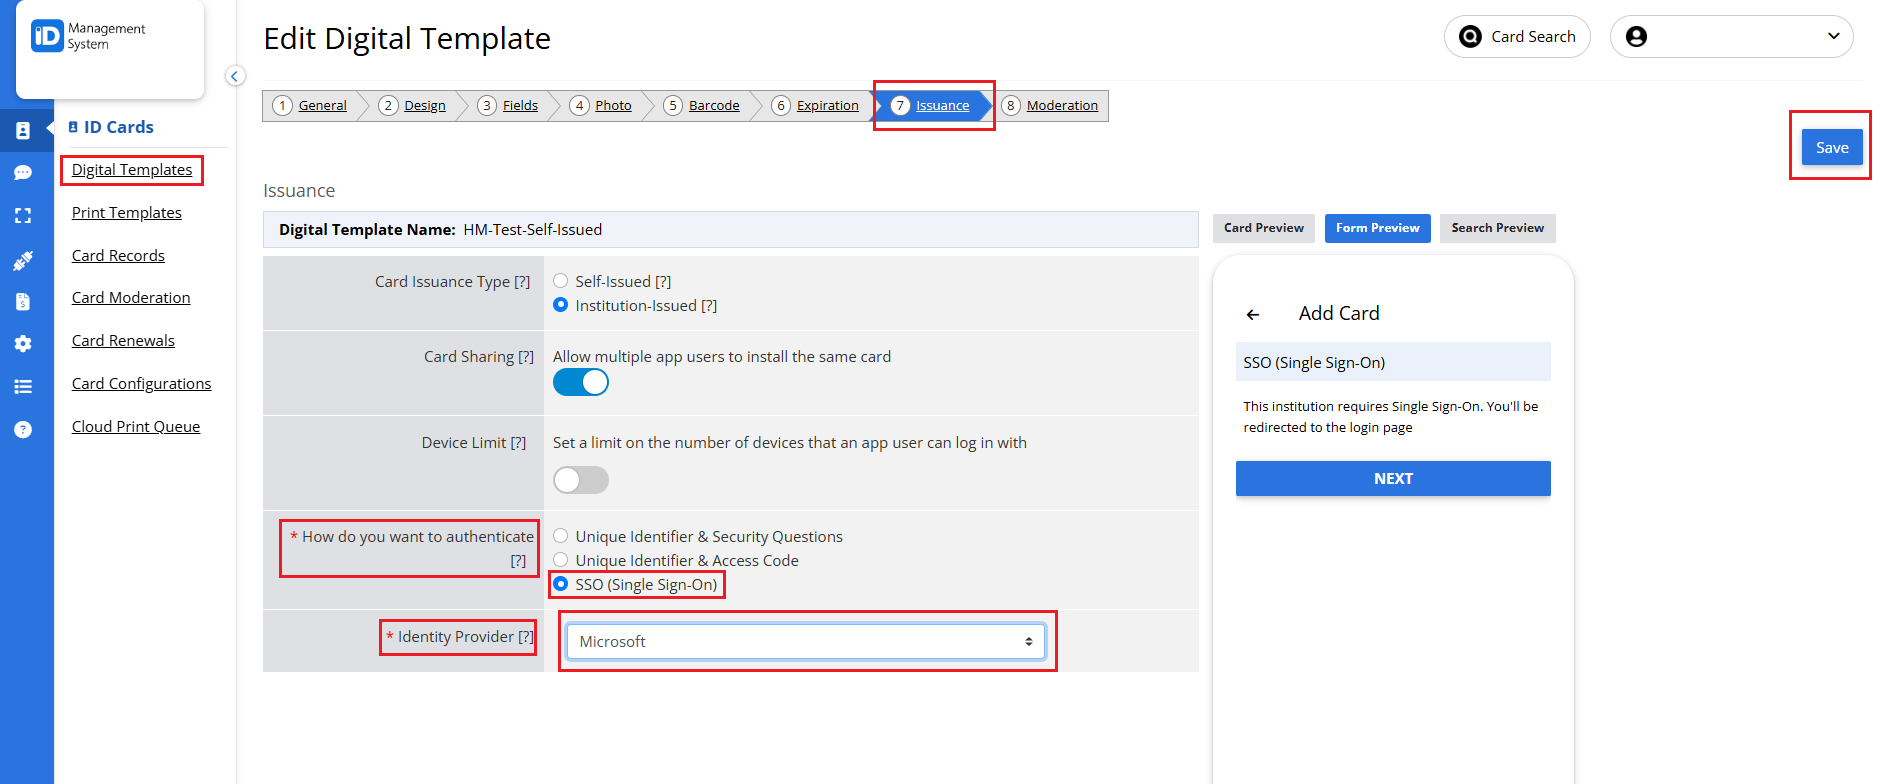
Microsoft Single Sign-On (SSO) allows users to authenticate their digital ID card installations seamlessly using their Microsoft credentials. This guide will walk administrators through enabling Microsoft SSO for a card template in the ID123 ID Management System (IDMS).
Step 1: Log in to the ID Management System (IDMS)
Start by logging into your ID123 ID Management System account. From the left-hand navigation menu, click on “Digital Templates” to view your available ID card templates.

Step 2: Choose the Card Template to Configure
Find the card template where you want to enable Microsoft SSO. Under the “More” column, click the three-dot menu (⋮) for that template, and then select “Edit Template”.

Step 3: Enable Microsoft SSO Authentication
- In the Edit Template screen, go to the “Issuance” tab.
- Scroll to the section titled “How do you want to authenticate?”
- Select “SSO (Single Sign-On)” as the authentication method.
- Choose “Microsoft” from the list of identity providers.
- Before saving, make sure all required fields in your template are completed.
- Click the “Save” button to apply your changes.

Final Step: Microsoft SSO Is Now Active
Microsoft SSO is now successfully enabled for this card template. App users will be able to authenticate and install their digital ID card using their Microsoft login credentials through the ID123 mobile app.
Need Help?
If you encounter any issues setting up Microsoft SSO or have additional questions, please contact our support team for assistance.
