Looking to automate tasks in real time? With an action webhook, you can send data between the ID Management System (IDMS) and external applications automatically when a specific event occurs. This guide walks you through how to create an action webhook in ID123’s IDMS platform.
What is a Webhook?
A webhook is a method of communication between two web applications. When a specific event happens in one system, it sends an HTTP request (usually POST) to a specified Action URL in another system. This enables real-time data exchange without needing manual input.
What is an Action Webhook?
An action webhook in IDMS triggers a specific task or response in a third-party application after an event occurs in the ID Management System. This type of webhook is ideal for automating external workflows such as updating databases, notifying third-party platforms, or syncing user data.
Step 1: Navigate to the Webhooks Section
- Log in to your IDMS admin account.
- From the left-hand navigation menu, click on “Integrations”.
- Select “Webhooks” from the submenu.
- Click the “Create a Webhook” button.

Step 2: Choose the Webhook Type and Target Group
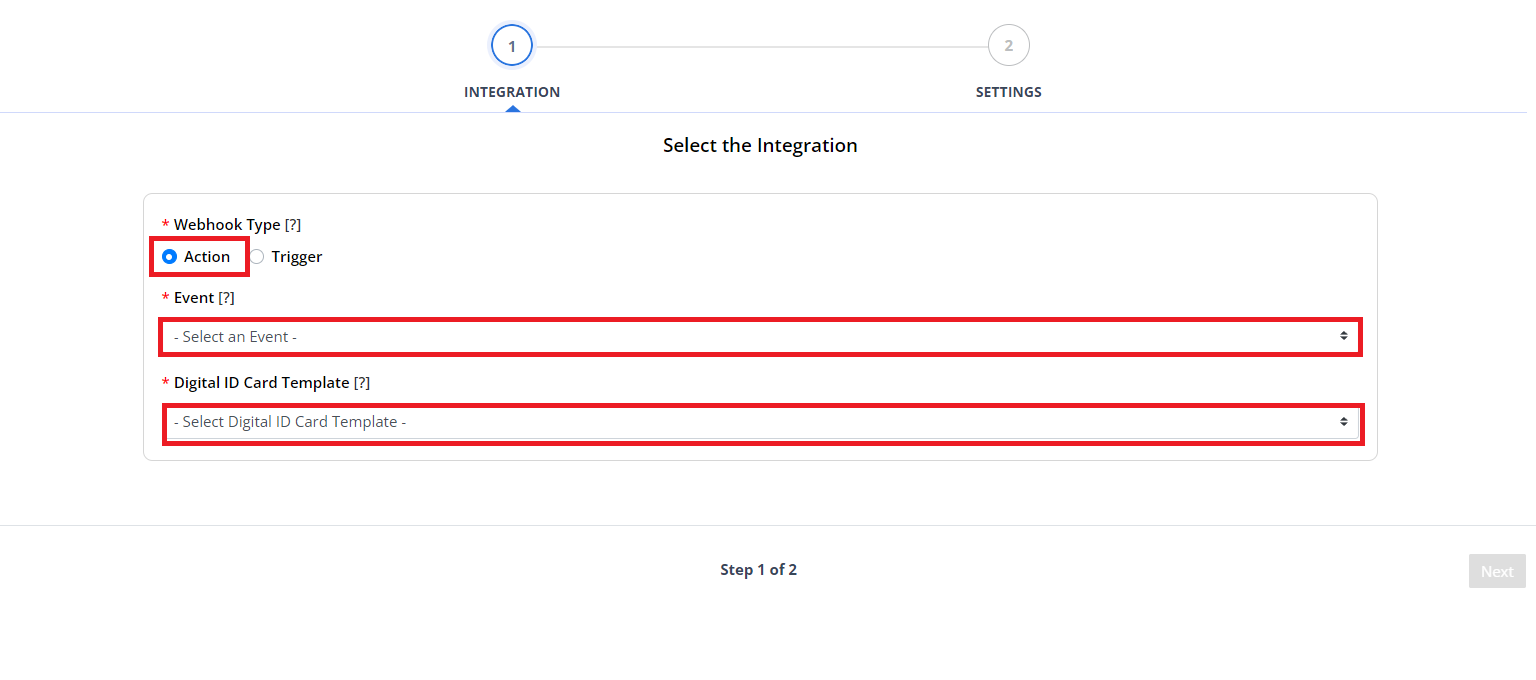
- In the Integration setup step, select “Action” as the webhook type by clicking the Action radio button.
- From the Event dropdown, choose the action that the webhook should perform in IDMS.
- For a full list of supported events, refer to the Action/Trigger Webhook Event Definitions knowledge base article.
- Next, select the Card Record Group where the webhook should be applied.
- Click “Next” to proceed.

Step 3: Configure Webhook Action Settings
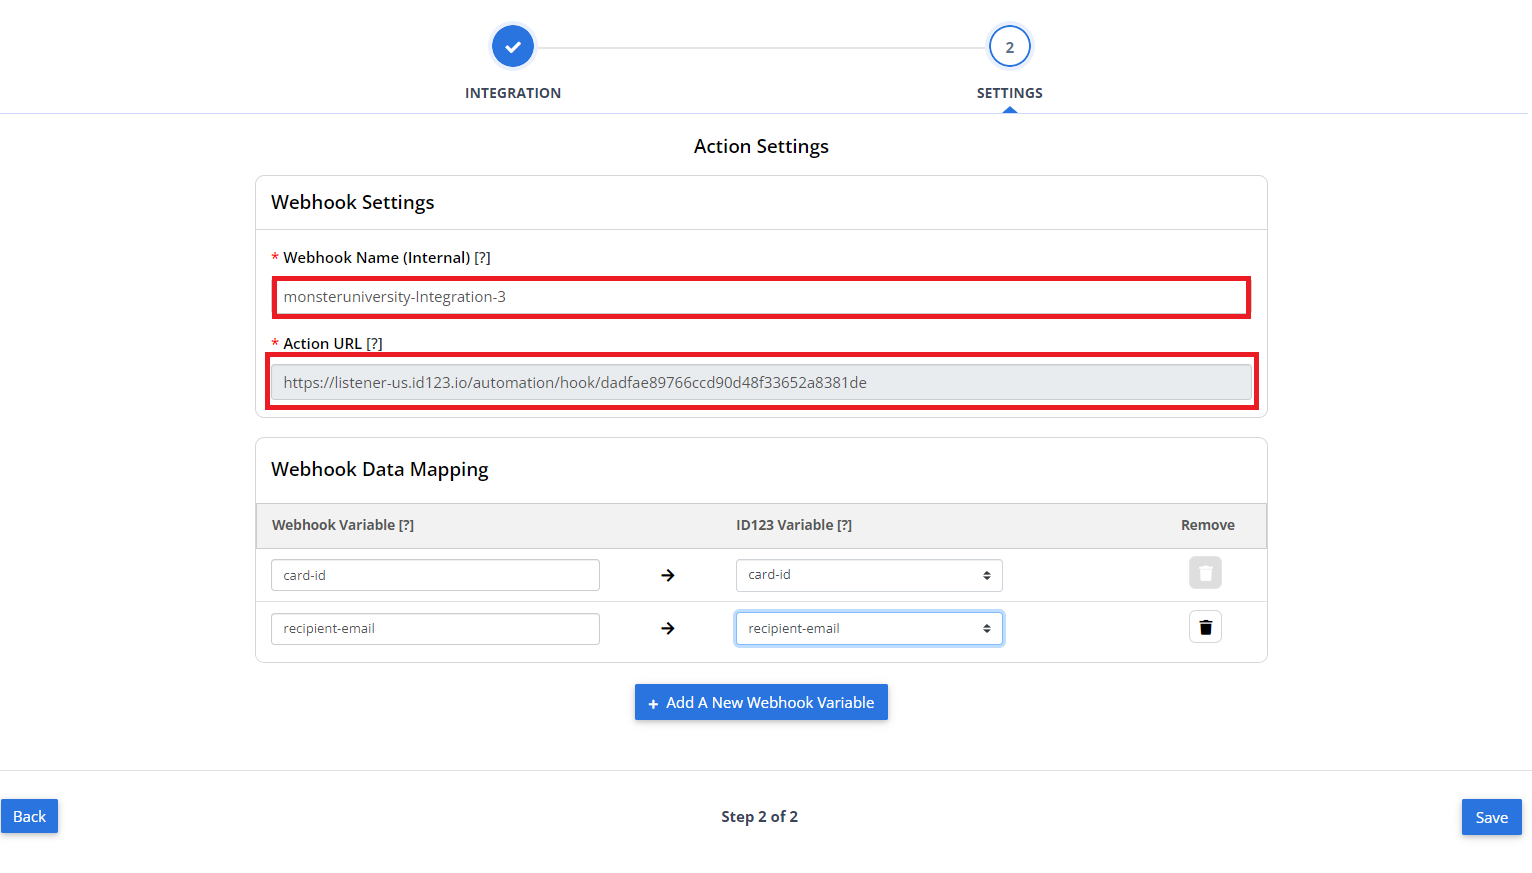
- In the Settings step, enter a name for your webhook.
- A default name will be auto filled, but you can customize it to reflect the purpose of the webhook.
- Copy or take note of the Action URL.
- This is the endpoint where the external application will send the HTTP request when the specified action occurs in IDMS.

Step 4: Map Webhook Data Variables
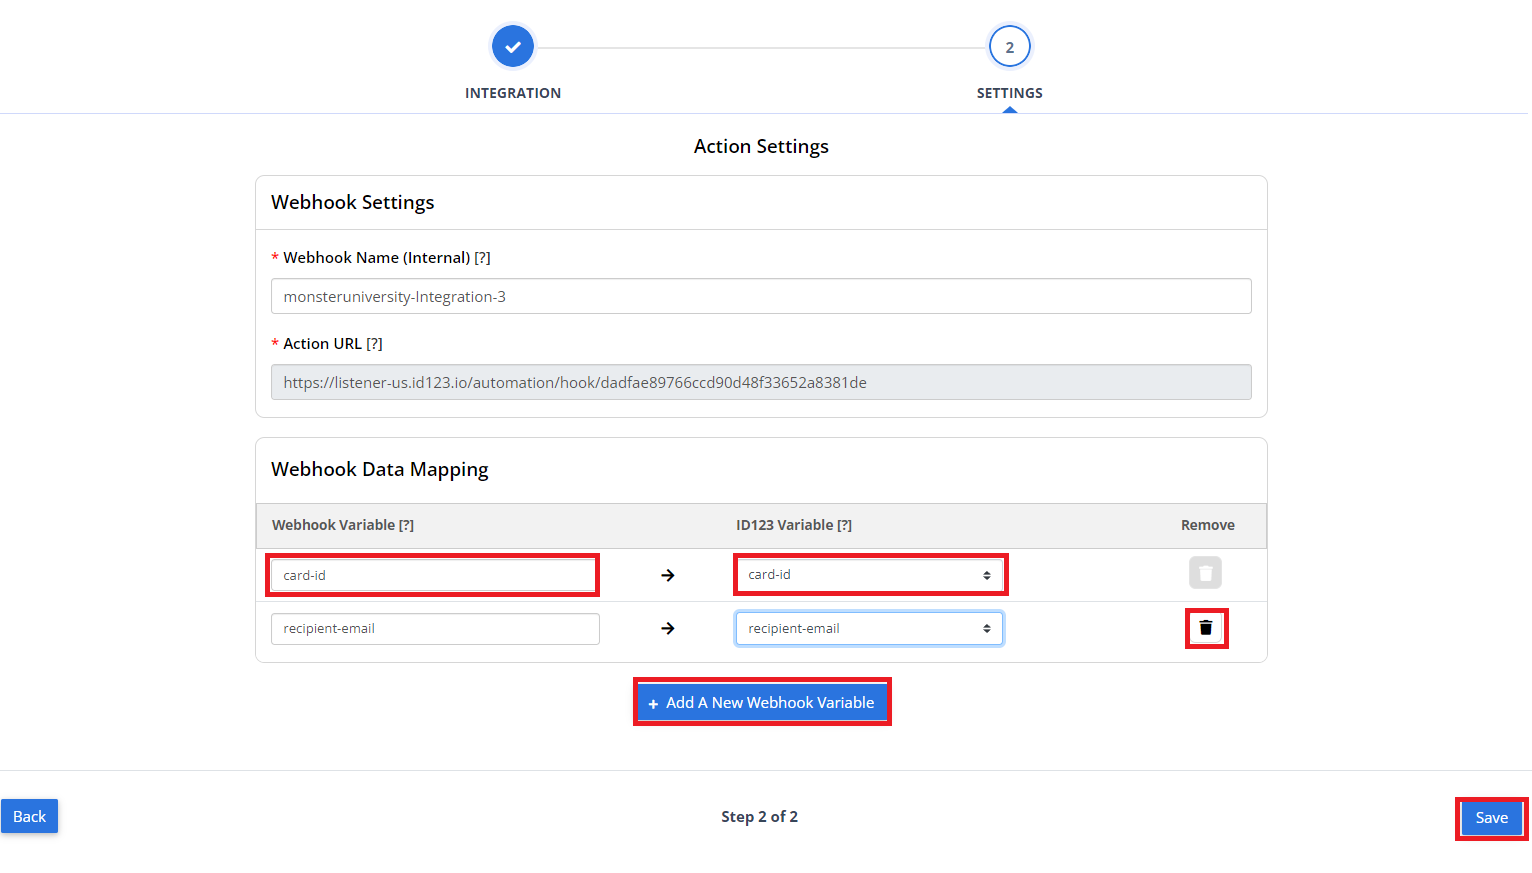
- Map the webhook variables to the appropriate ID123 card record variables.
- These variables are based on the card record group selected in Step 2.
- To add a new variable, click “Add a New Webhook Variable”.
- To remove a variable, click the trash icon in the “Remove” column.
- Once your mapping is complete, click “Save” to finalize your webhook configuration.

Once your action webhook is saved, it will automatically respond to the selected event and send data to the configured Action URL. This allows for efficient, real-time integration between ID123’s ID Management System and your external applications.
