Creating a customized digital ID card template is easy using the ID123 ID Management System (IDMS). Follow the step-by-step instructions below to build a new card template that fits your institution’s branding and issuance needs.
Step 1: Start a New Card Template
- Log in to your IDMS account.
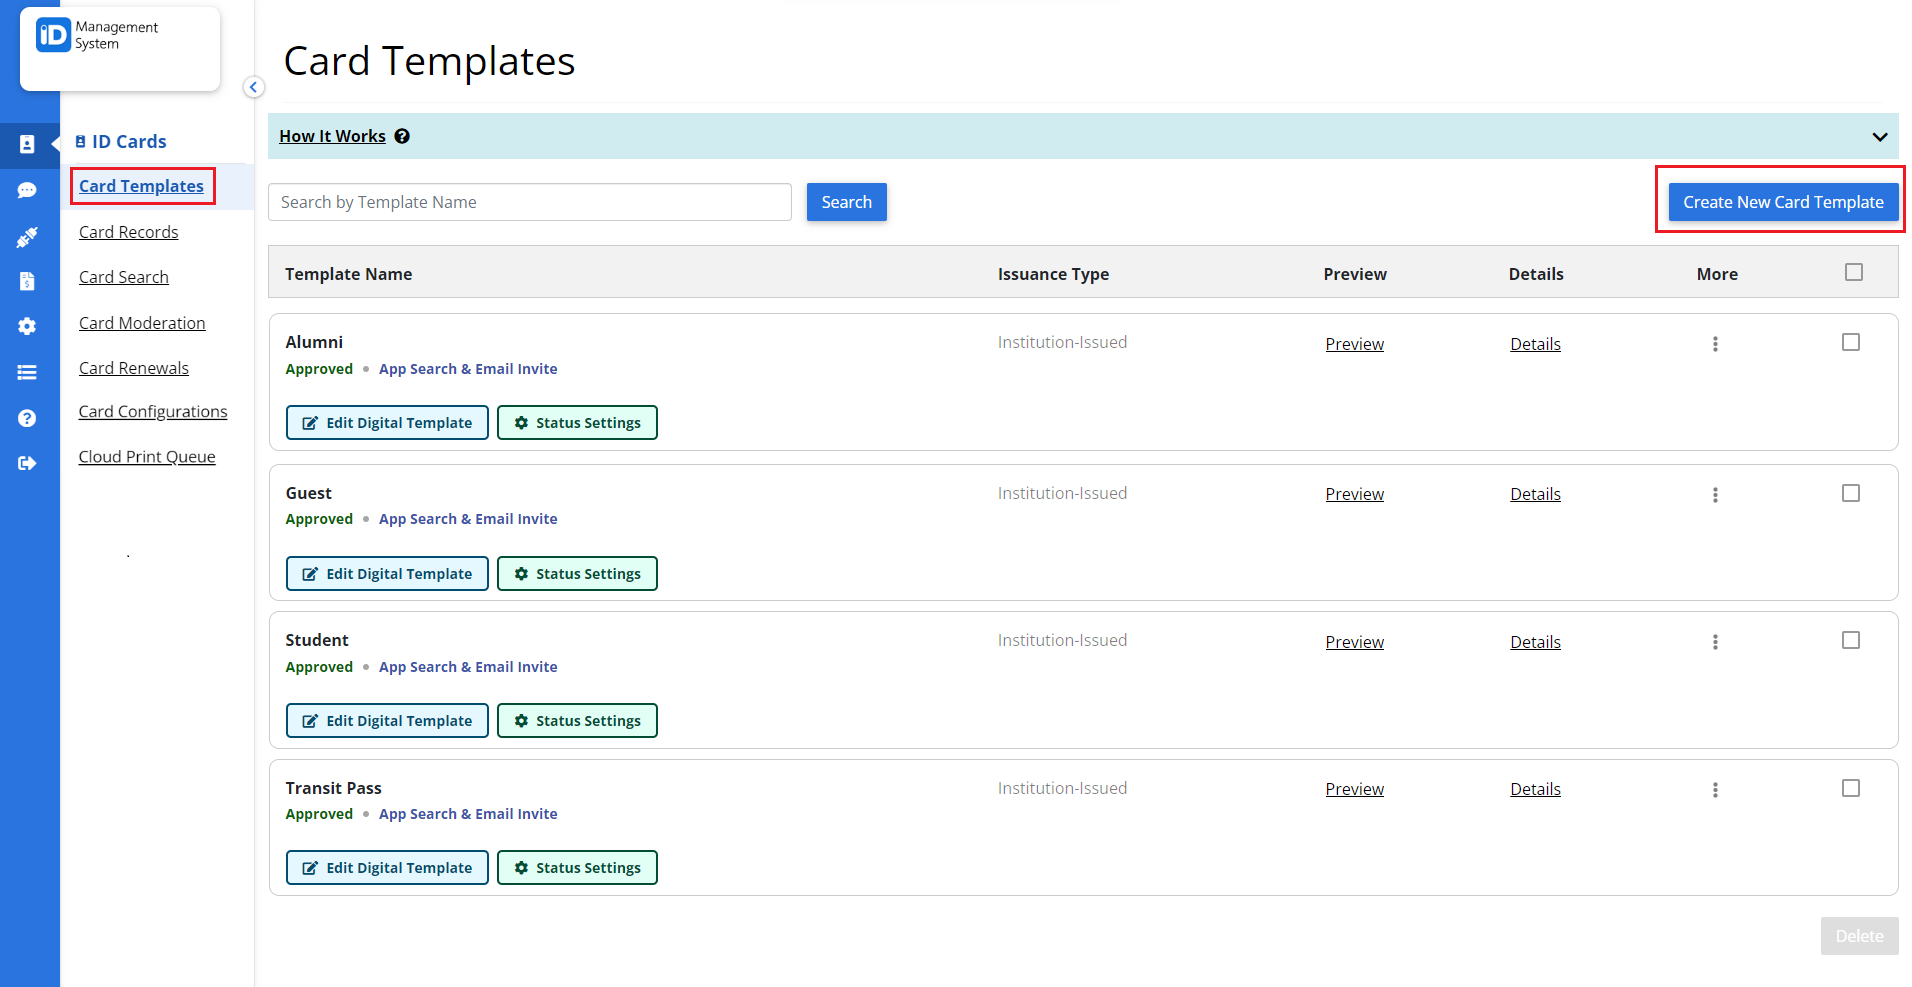
- Navigate to the Card Templates section in the left-hand menu.
- Click the Create New Card Template button to begin.
Step 2: Configure General Card Information
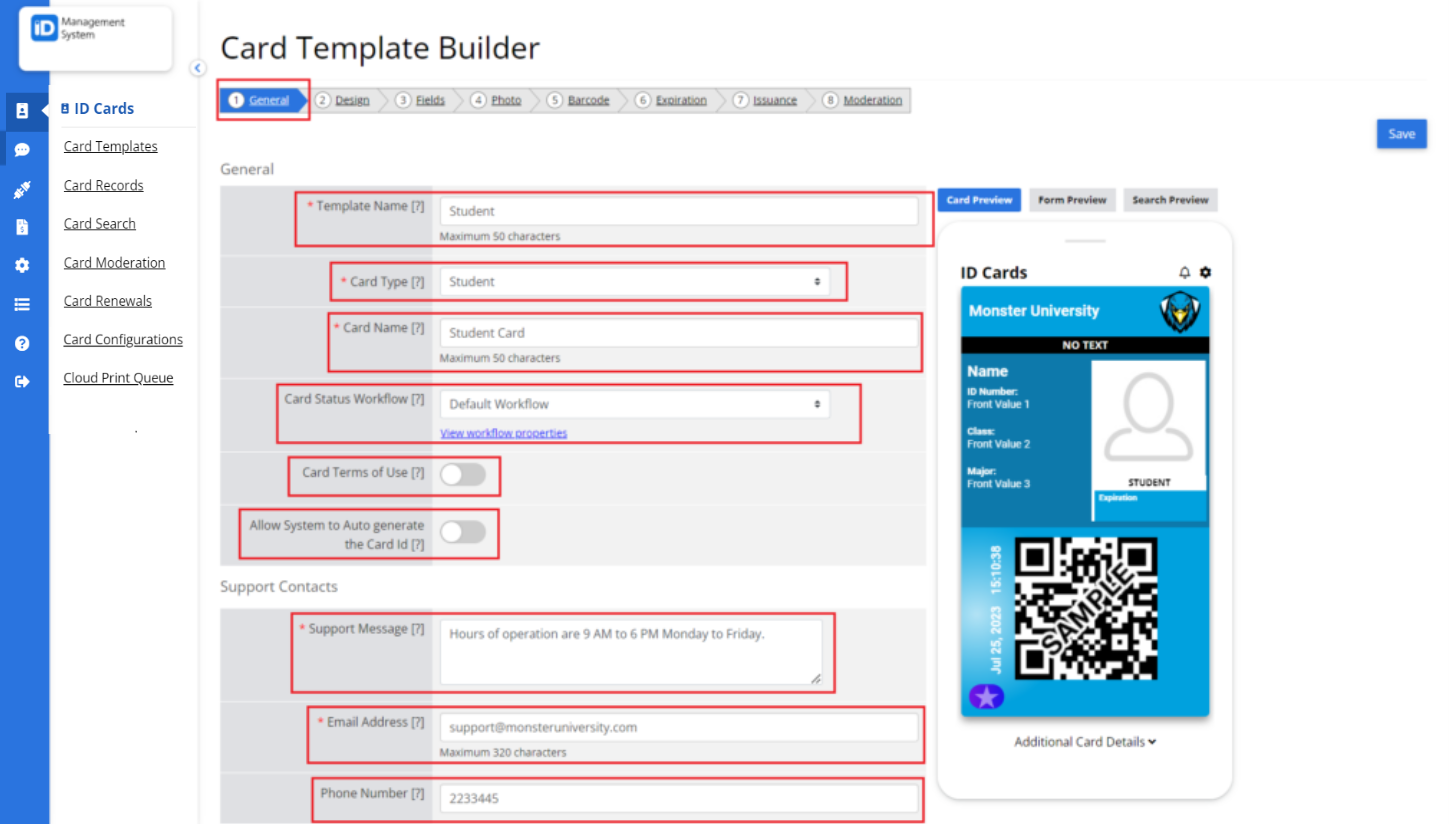
In the General tab, fill in the required details for your new card template:
- Template Name (for internal reference).
- Card Type (choose the appropriate category).
- Card Name (visible to users if your institution is searchable in the ID123 app).
- Card Terms of Use (optional).
- Support Contact Info: Provide a message, email, and phone number for cardholder support. ID123 handles all technical support.
- Click Next to move to the Design section.
Step 3: Customize Card Design Settings
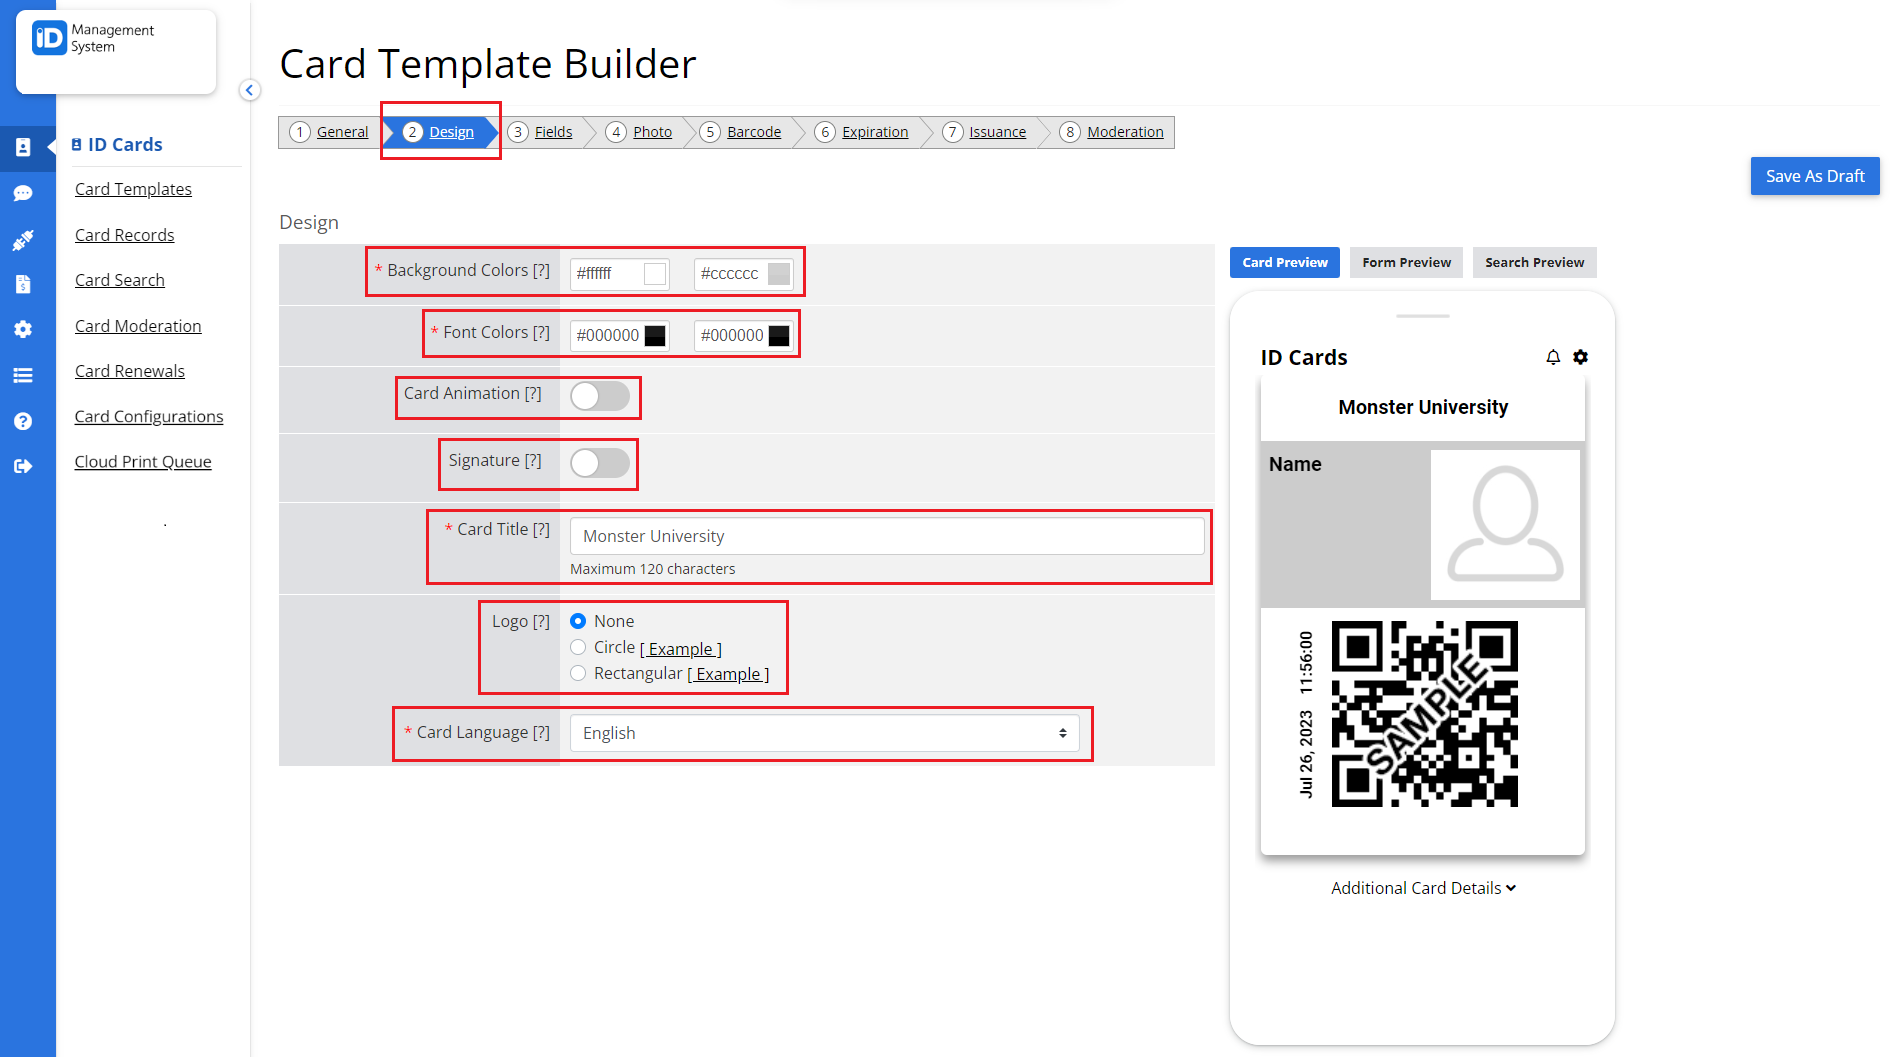
In the Design tab, tailor the appearance of your card:
- Background and Font Colors: Choose colors that match your institution’s branding.
- Card Animation (optional): Add a rotating hologram for extra authenticity.
- Signature Field (optional): Require users to digitally sign their card.
- Card Title: Add a visible card title.
- Card Logo: Upload a circular (top right corner) or rectangular logo (replaces card title).
- Click Next to proceed to the Fields tab.
Step 4: Add Cardholder Fields
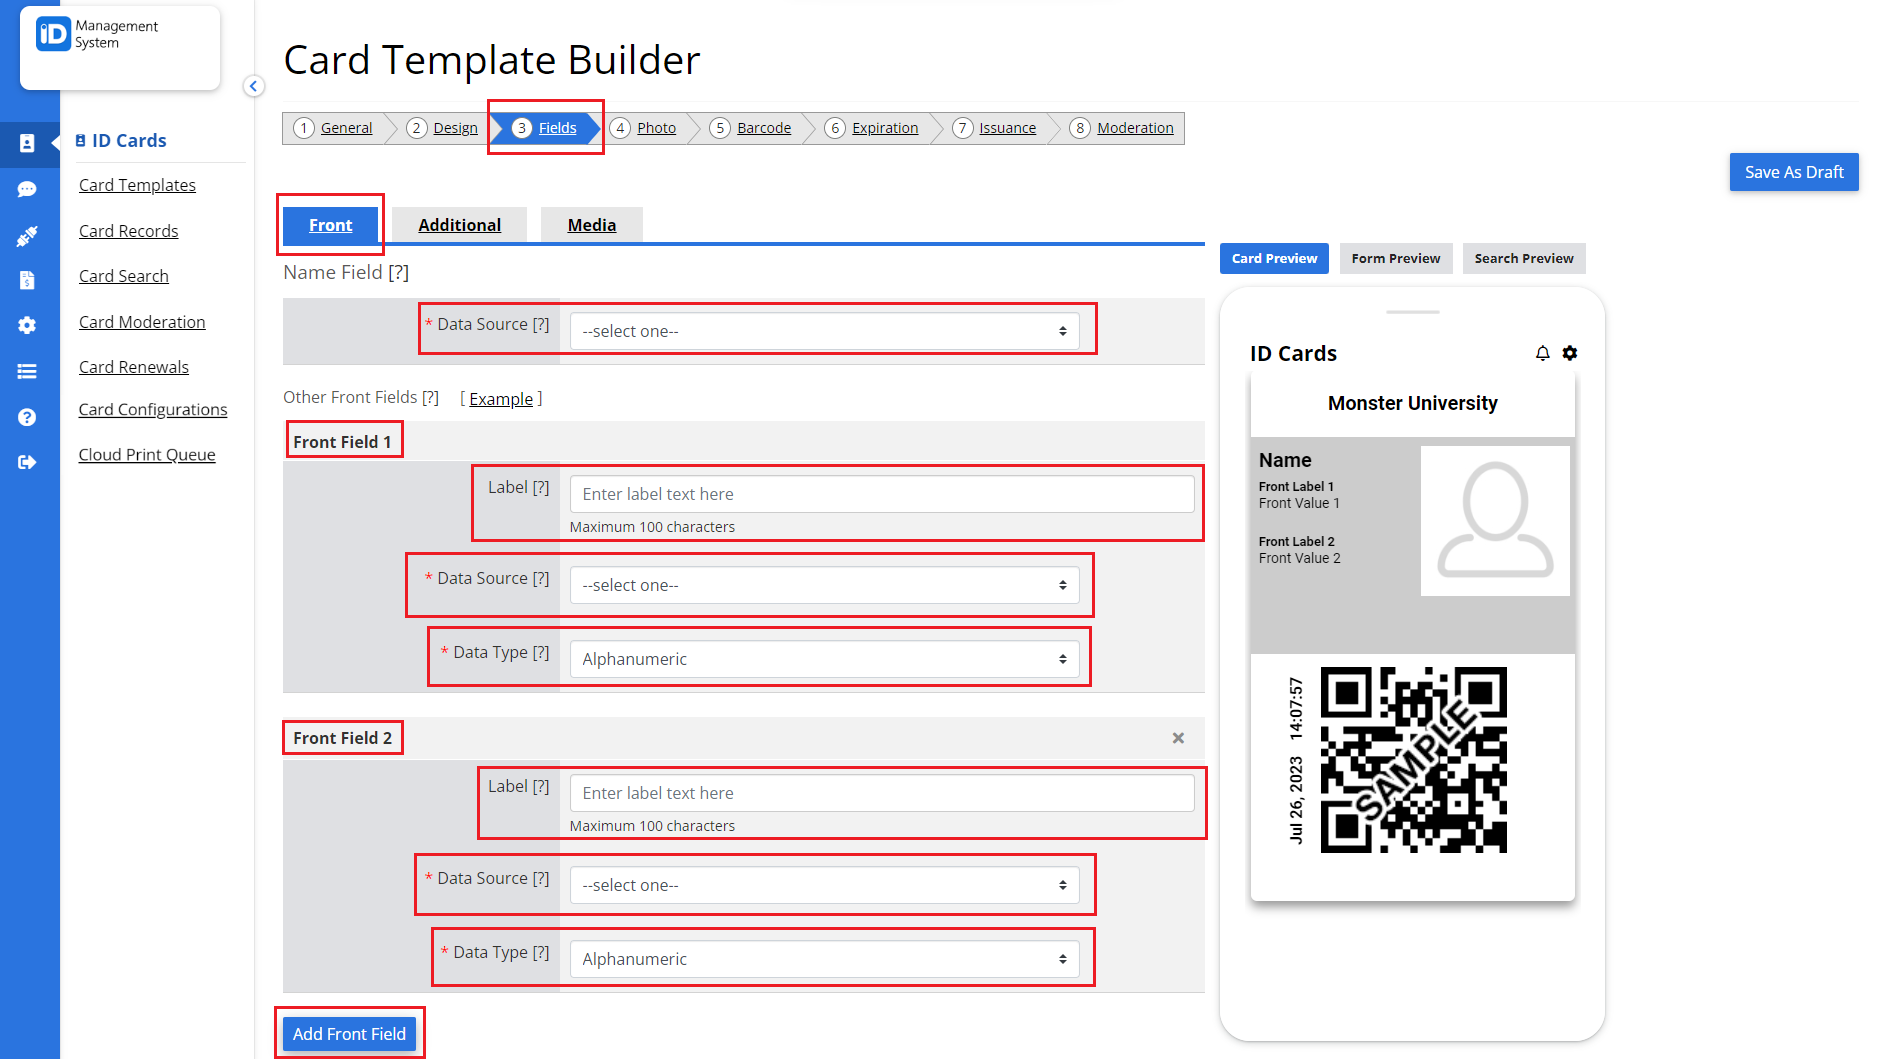
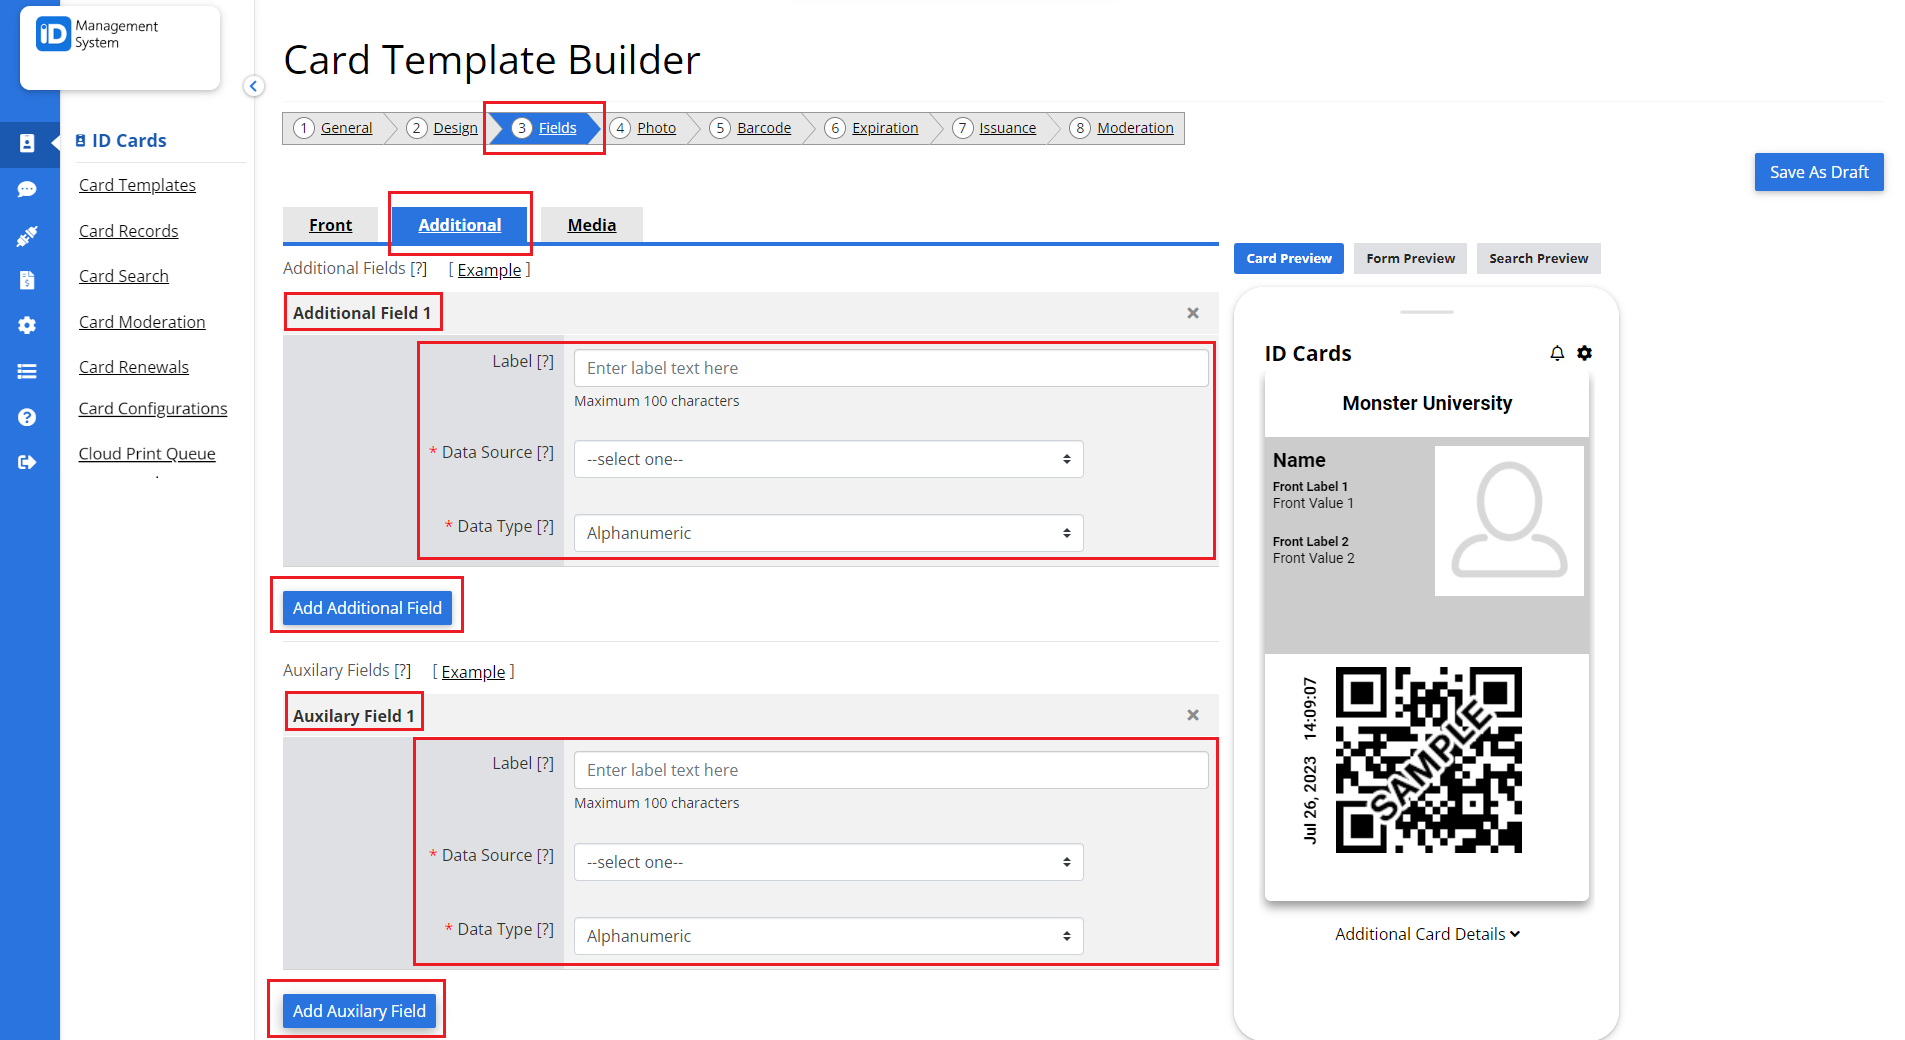
In the Fields tab:
- Name Field: Select a data source for the cardholder’s name.
- To add more fields to the front of the card, click Add Front Field, then:
- Enter a Label,
- Choose the Data Type,
- Select the Data Source.
- Use the Additional tab for extra back-end fields.
- Use the Media tab to add images.
- Click Next to continue to the Photo tab.
Step 5: Configure Photo Settings
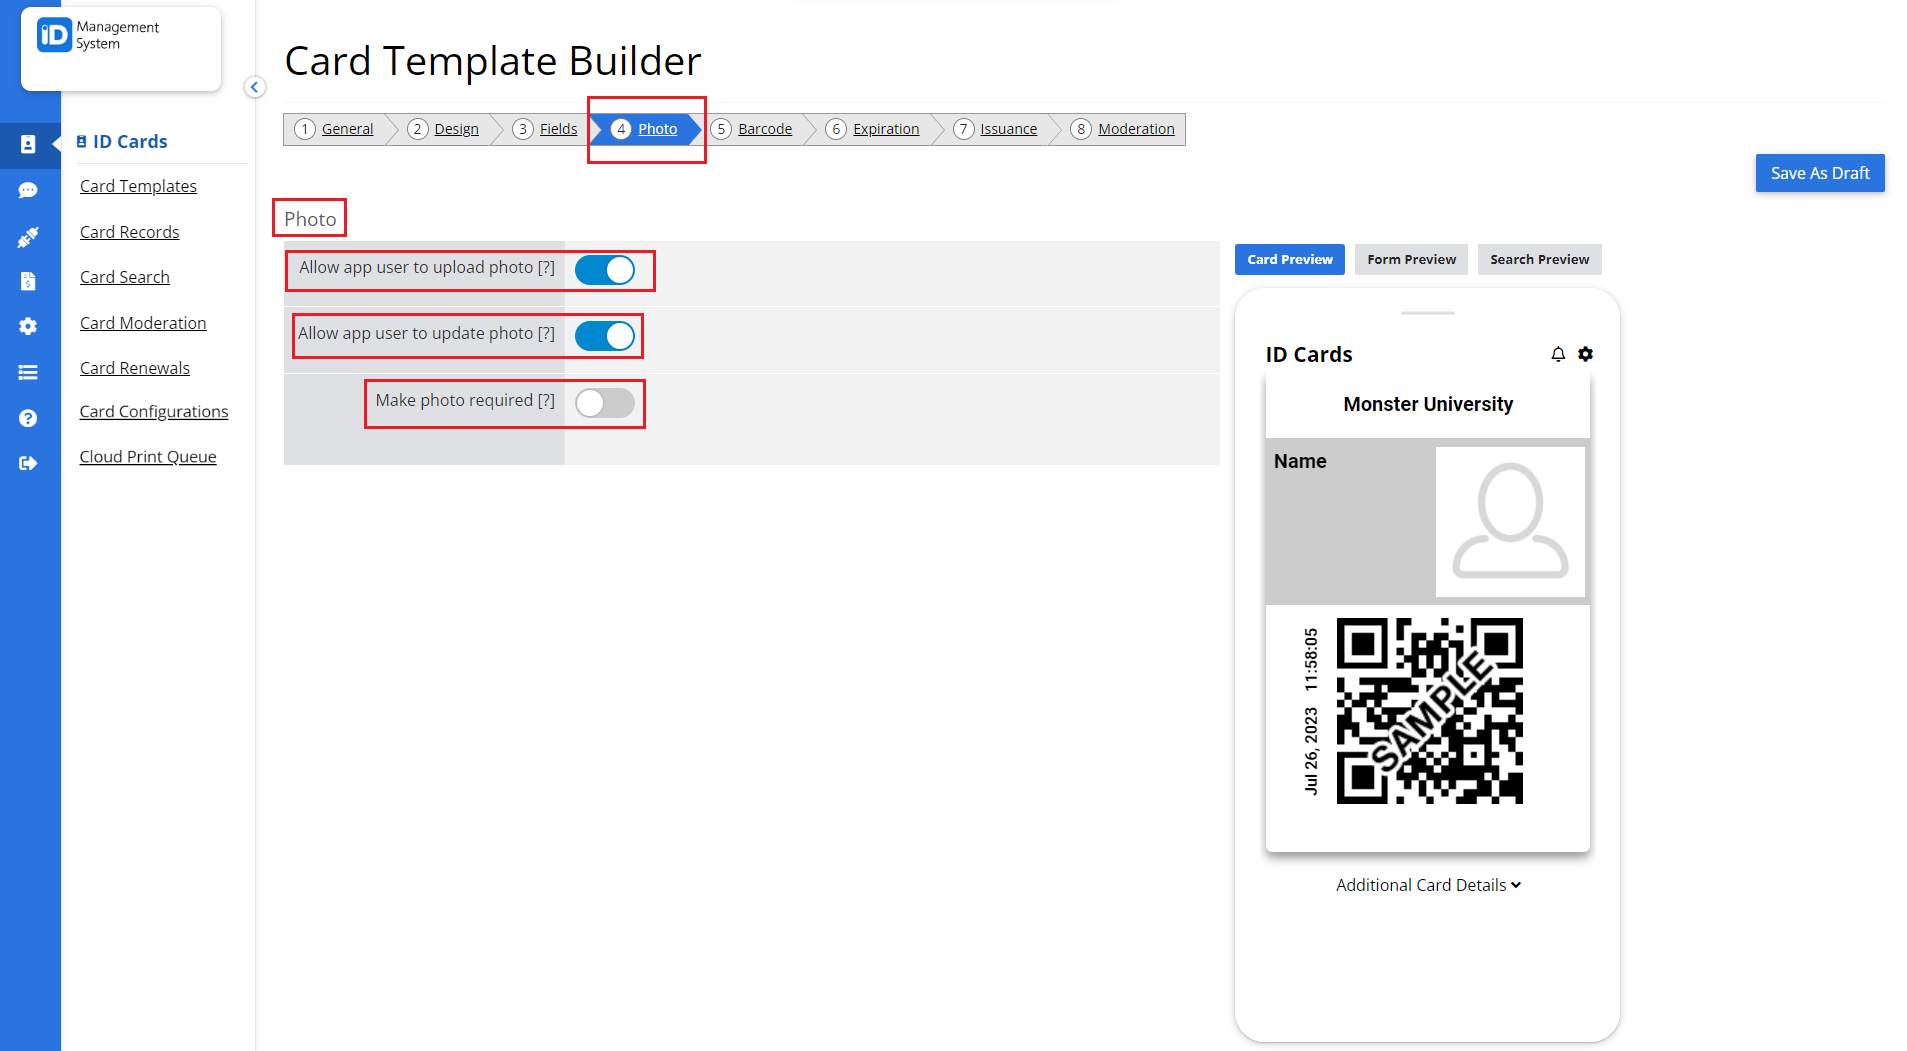
In the Photo tab, manage how ID photos are handled in the app:
- Allow app user to upload photo: Enable if users can optionally upload a photo.
- Make photo required: Enable if a photo is mandatory for card issuance.
- Allow app user to update photo: Let users replace their existing photos.
- Click Next to proceed to the Barcode tab.
Step 6: Add a Barcode (Optional)
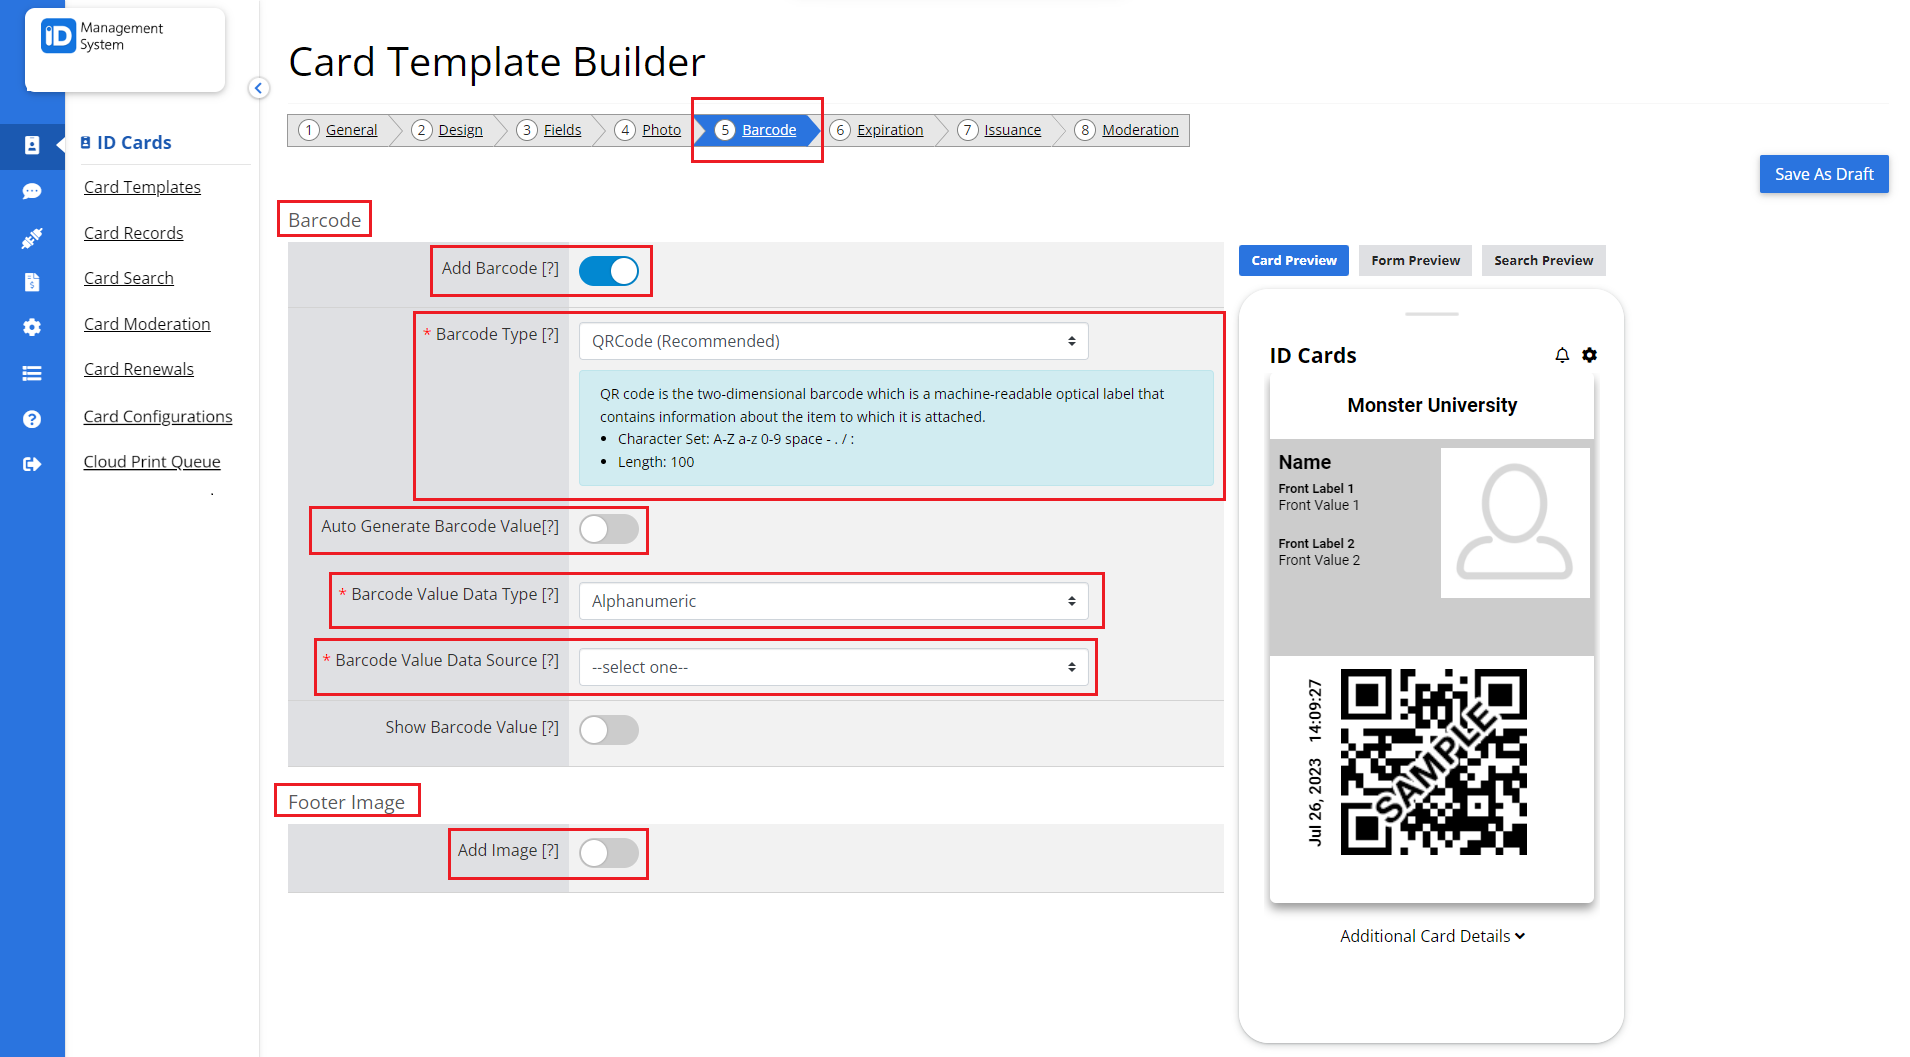
In the Barcode tab:
- Click Add Barcode if you want to include one.
- Toggle Auto Generate Barcode ON/OFF.
- Choose the Barcode Value Data Type.
- Footer Image (optional): Add a logo/image at the bottom of the card. This moves the barcode to the bottom right, allowing users to tap to enlarge it.
- Click Next to open the Expiration tab.
Step 7: Set Card Expiration Rules (Optional)
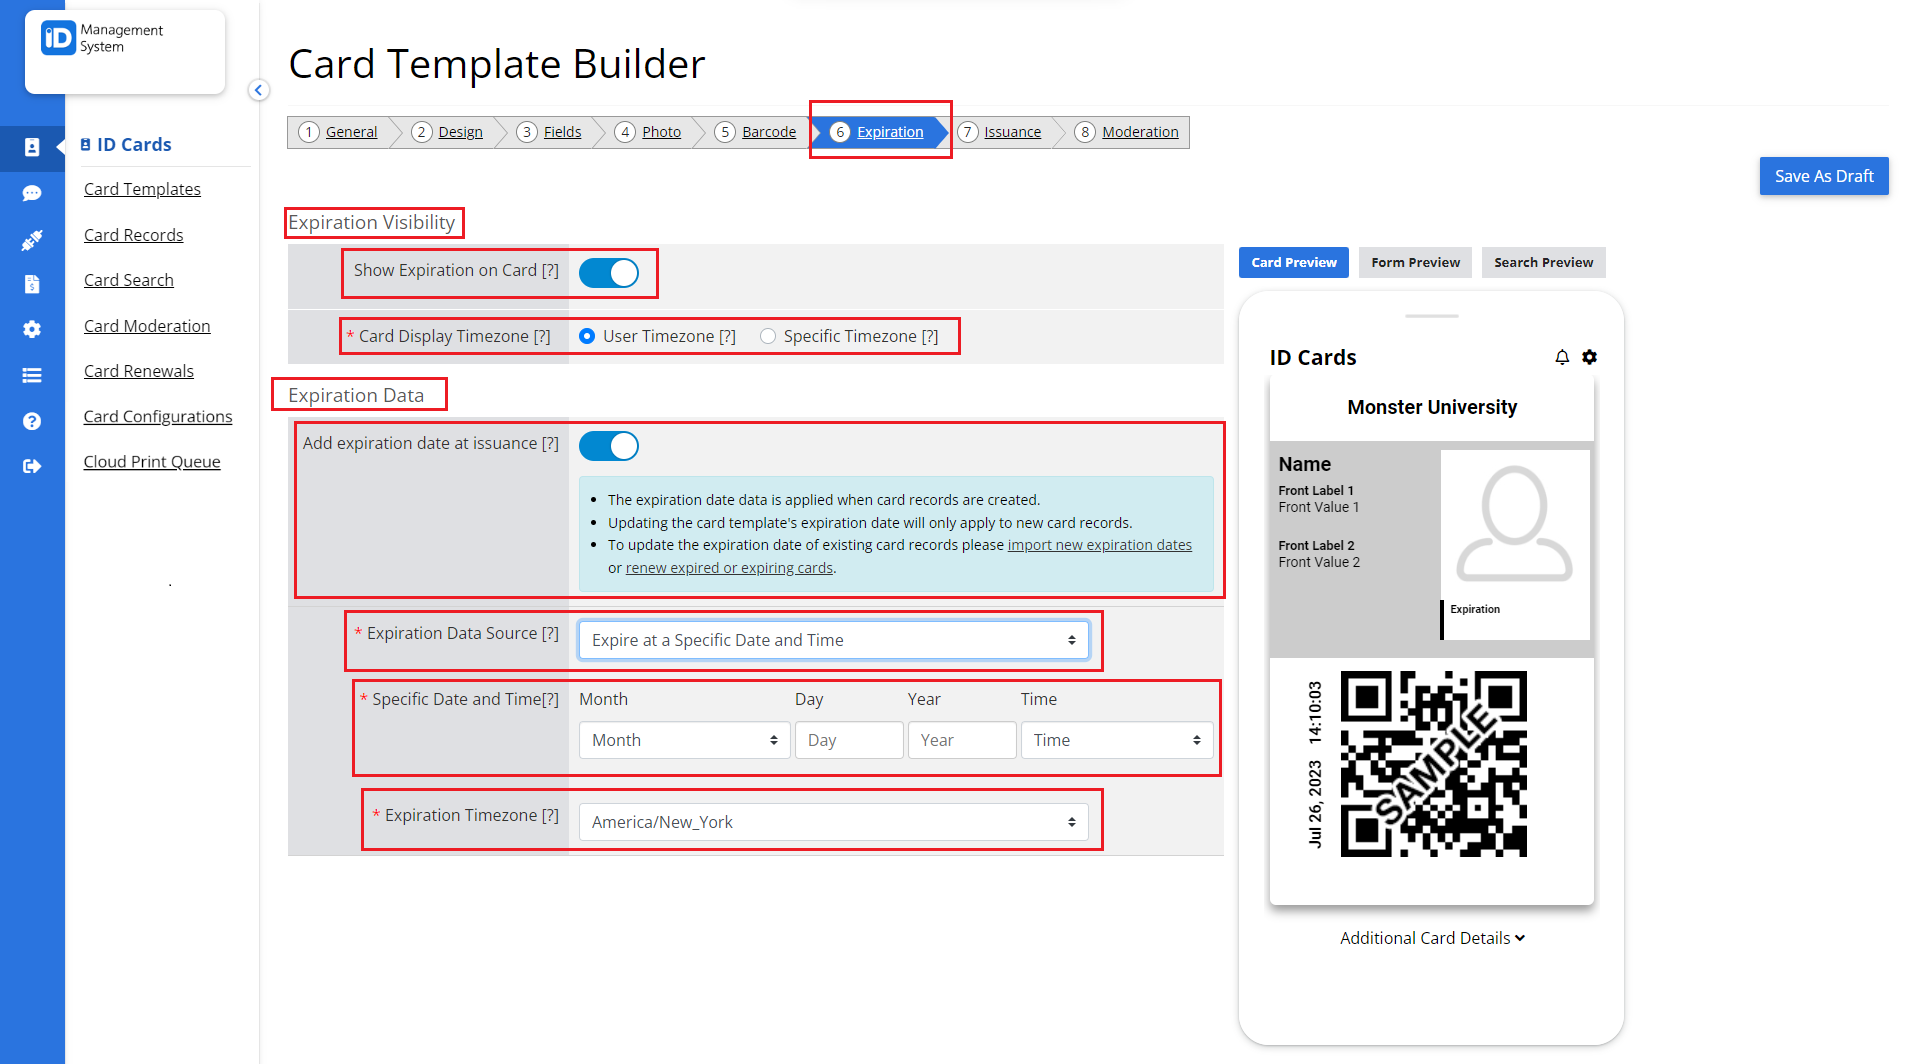
In the Expiration tab:
- Toggle Show expiration on card if you want the expiration date visible.
- Choose a Display Timezone for the expiration.
- Enable Add Expiration at Issuance to assign dates when issuing cards.
- Select the Expiration Data Source.
- Click Next to move to the Issuance tab.
Step 8: Define Issuance Settings
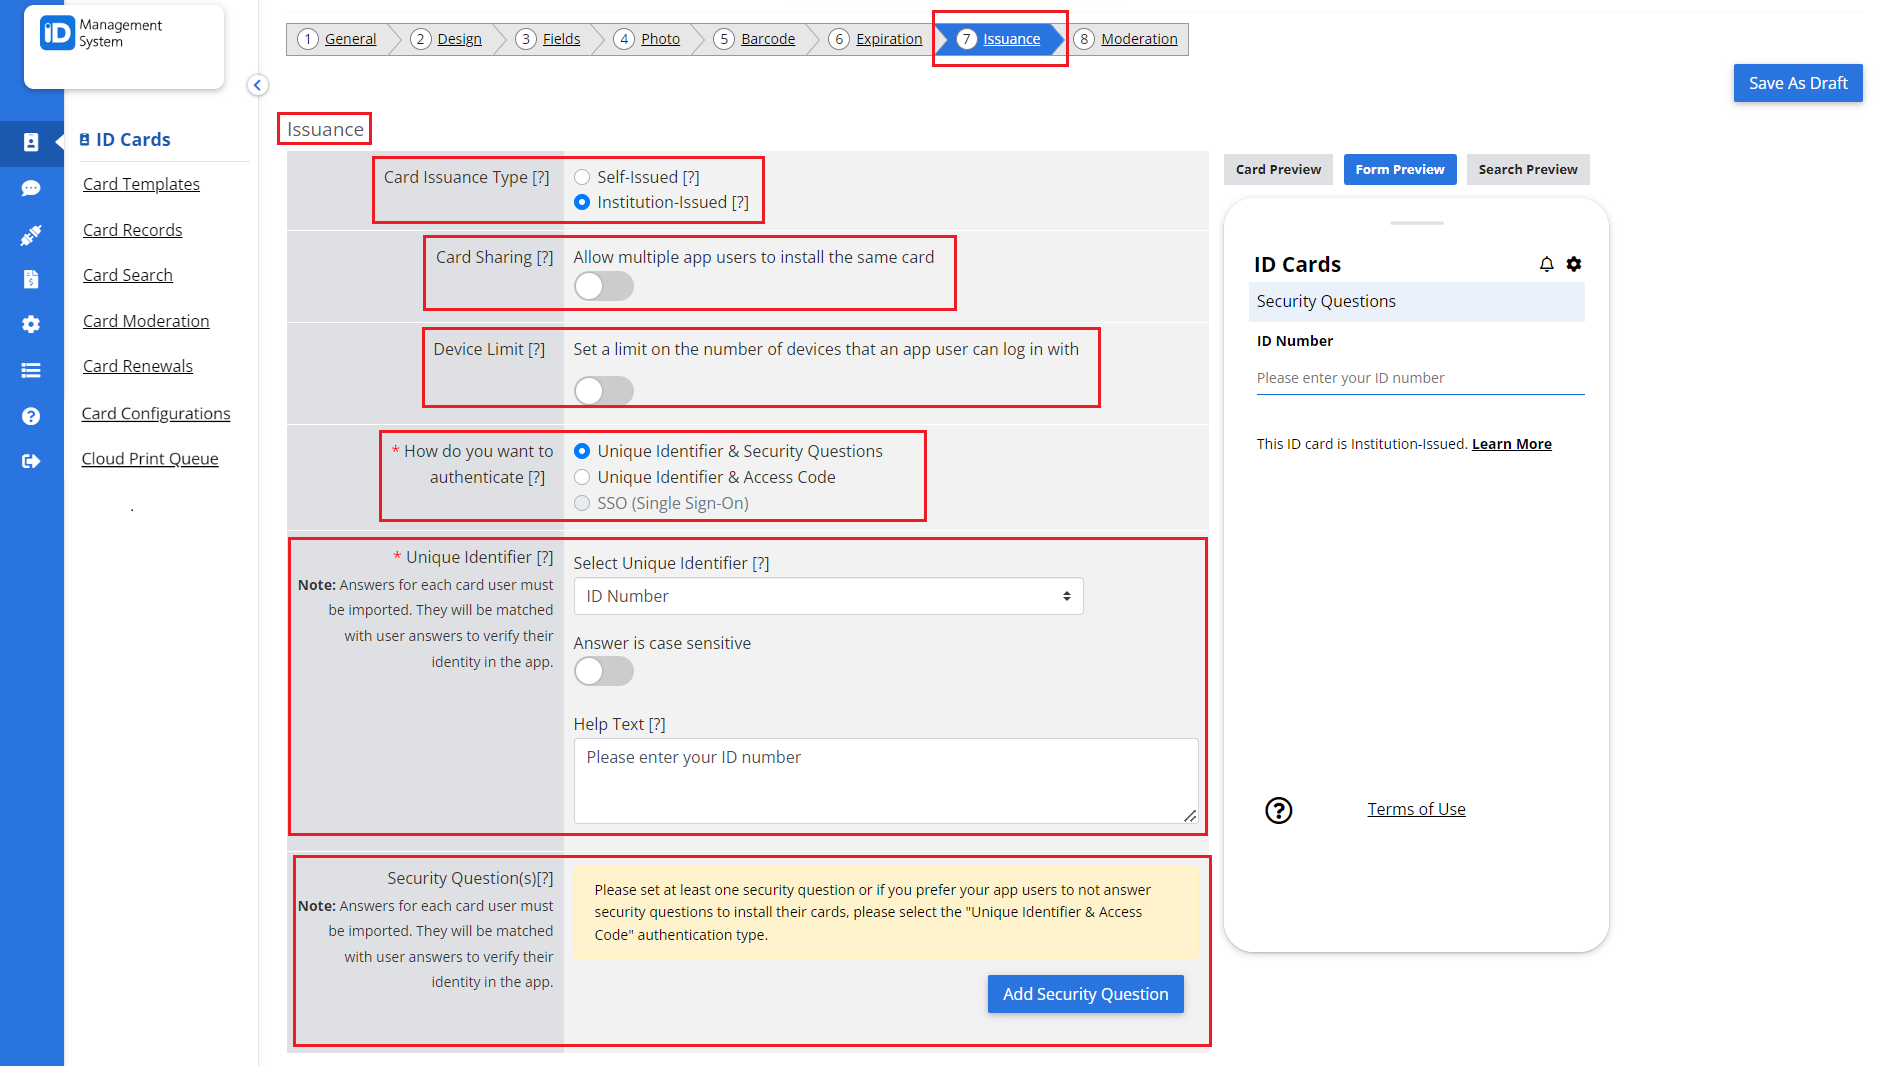
In the Issuance tab, choose how cards are distributed:
- Card Issuance Methods:
- Self-Issued: Cardholders search for your institution in the app and enter their data.
- Tip: Enable Card Moderation for security.
- Institution-Issued: Cards are issued via email invitation. Authentication is required.
- Optional Settings:
- Card Sharing: Allow multiple users to install the same card on different devices.
- Device Limit: Restrict the number of devices a user can access their card on.
- Authentication Options:
- Unique Identifier & Security Question
- Unique Identifier & Access Code
- Single Sign-On (SSO) – Ideal for institutions using SSO systems.
- Click Next to continue to the Moderation tab.
Step 9: Enable Moderation Options (Optional)
In the Moderation tab:
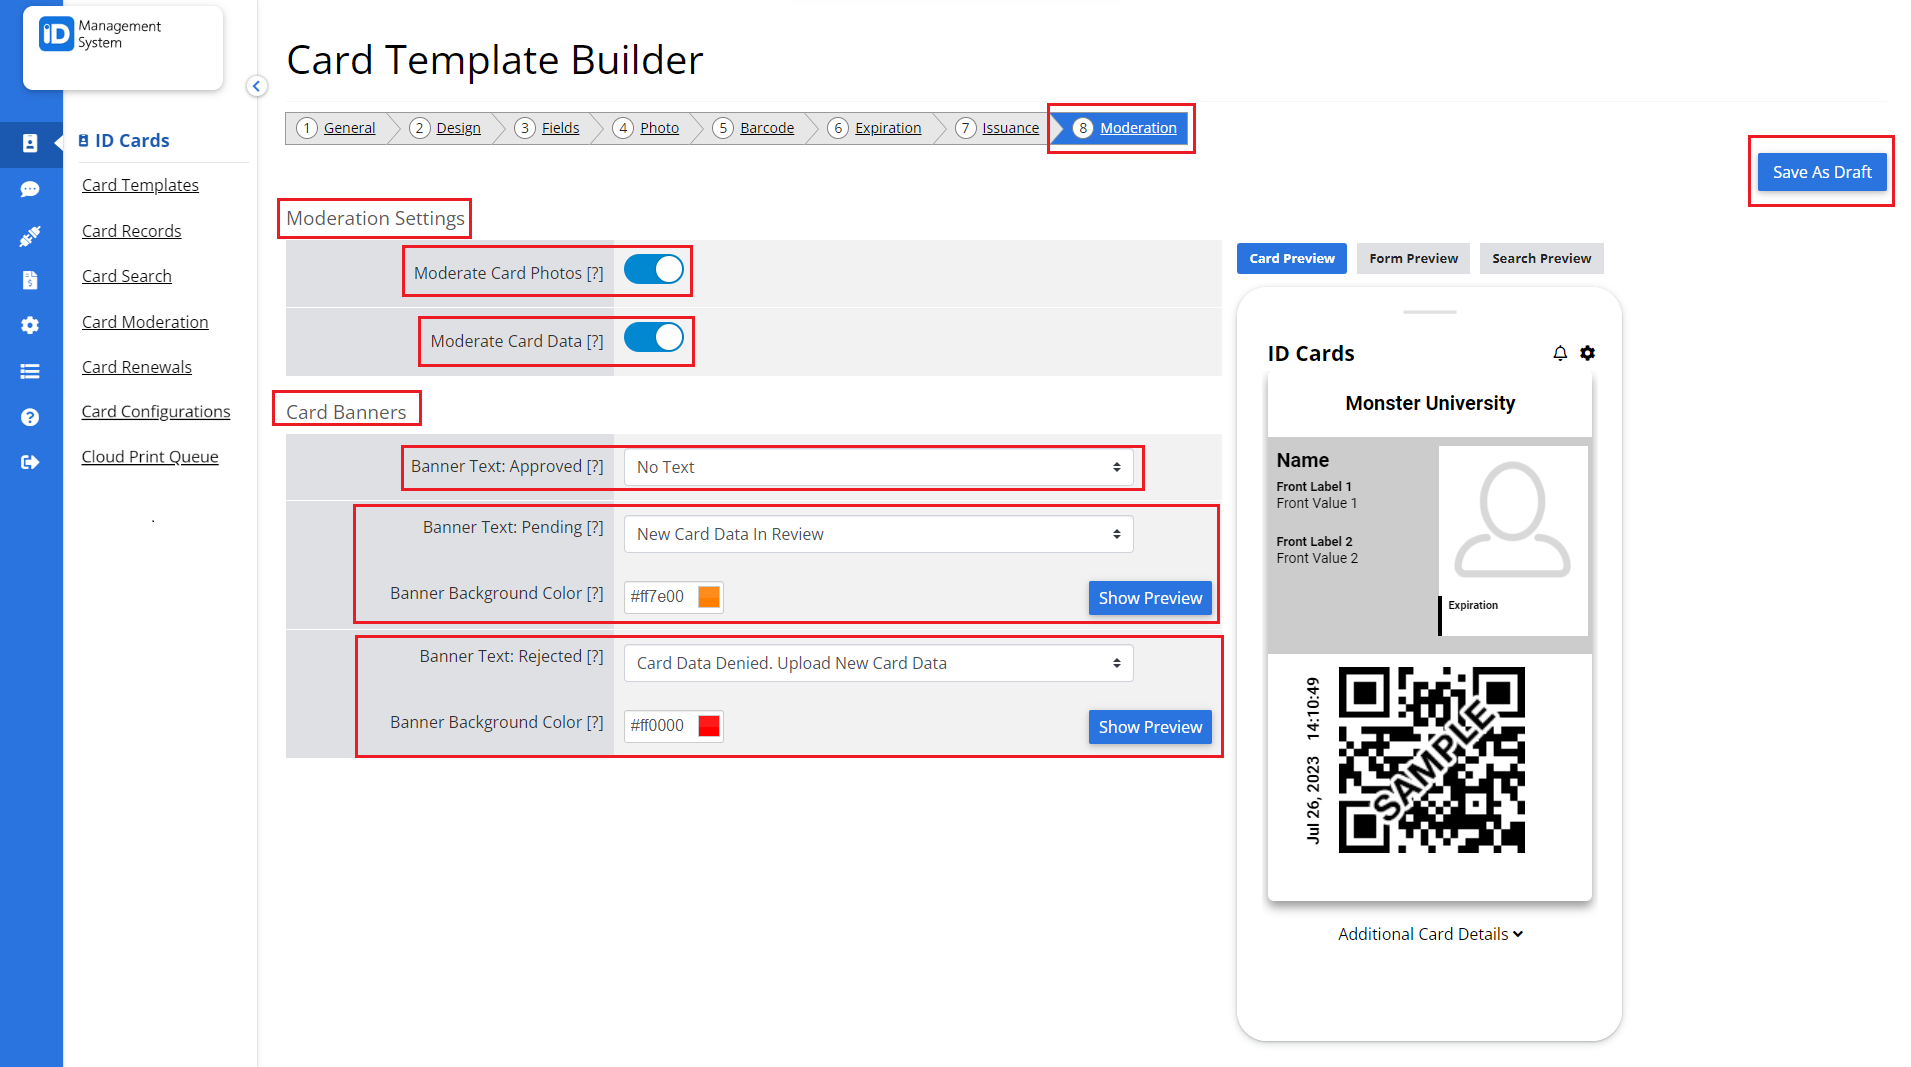
- Toggle Card Moderation ON if you want to manually review data or photos before cards are issued.
- Enable Moderate Card Photos and/or Moderate Card Data as needed.
- Card Banners (optional): Add custom messages to appear on the card banner.
- If you plan to send card invitations via email, proceed to the Email Invitation tab to customize your message.
Step 10: Save and Finalize Your Card Template
Once all settings are configured:
- Click Save as Draft to save your progress.
- Note: All new card templates are saved as drafts by default.
- To approve and publish your template:
- Go to the Card Templates page.
- Click Status Settings on the desired template.
- Note that approval permissions may be restricted by the account owner.

Need Help?
If you have questions or need assistance designing your digital ID card template in the ID Management System, don’t hesitate to contact our support team.
