Google Single Sign-On (SSO) allows app users to securely install their digital ID cards using their Google credentials. With SSO enabled, administrators can streamline the card installation process while ensuring user authentication is seamless and secure. This guide walks you through how to enable Google SSO for a specific card template within the ID123 ID Management System (IDMS).
Step 1: Log In to the ID Management System (IDMS)
- Visit app.id123.io.
- Enter your admin credentials to log in.
- From the left-hand navigation menu, click on Digital Templates to view your existing card templates.
Step 2: Select the Card Template You Want to Configure
- Locate the card template you want to enable Google SSO for.
- In the More column next to the template, click the three-dot menu.
- Choose Edit Template to open the template builder.

Step 3: Enable Google SSO Authentication
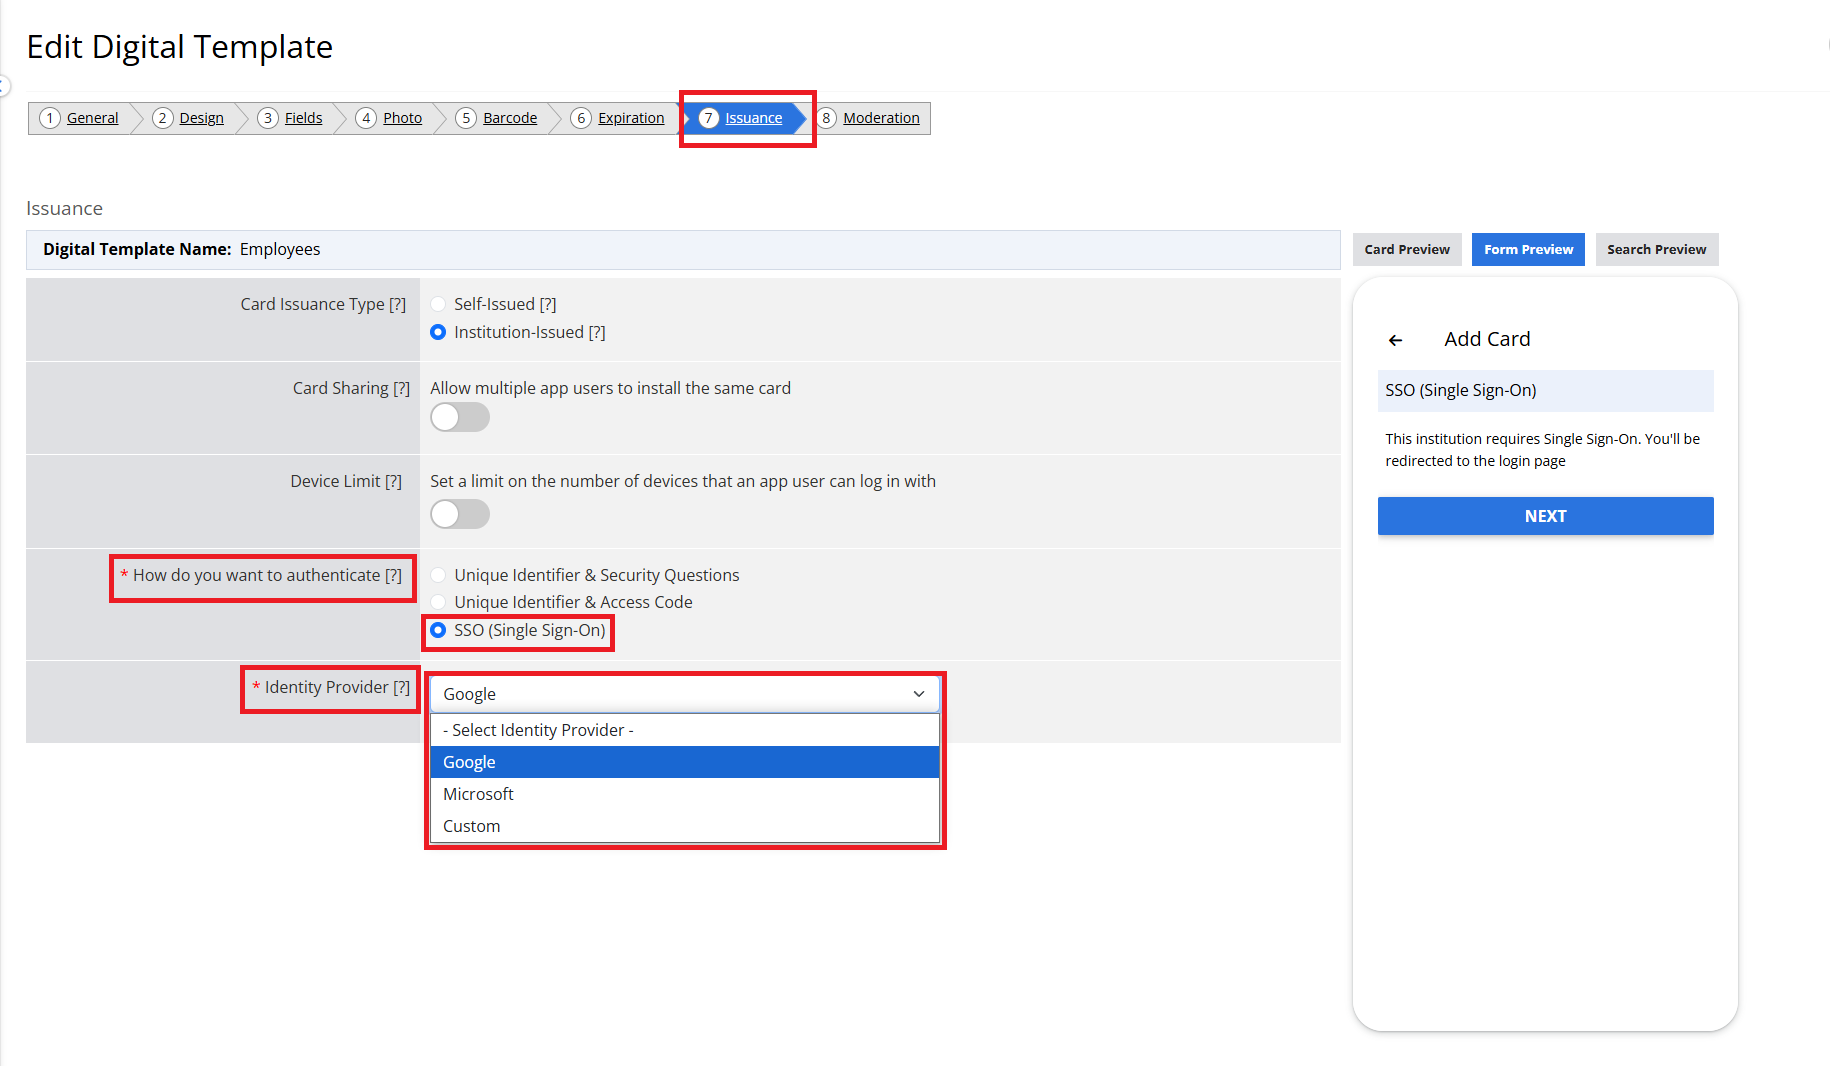
- In the template editor, navigate to the Issuance tab.
- Under the section titled “How do you want to authenticate?”, select the SSO (Single Sign-On) option.
- Once SSO is selected, choose Google as your identity provider.
- Before saving, ensure that all other required fields in the card template are completed.
- Click the Save button to apply the changes.

Need Help?
That’s it! Google Single Sign-On is now enabled for this digital ID card template. App users can now authenticate and install their digital ID cards using their Google accounts directly from the ID123 mobile app, improving both convenience and security.
Need help setting up Google SSO or have additional questions? Contact our support team for assistance.
