Importing digital ID card records in bulk helps streamline the card issuance process, especially for institutions handling large volumes of users. This step-by-step guide shows you how to upload new card records to your ID123 ID Management System (IDMS) account using a CSV file.
Step 1: Prepare and Design Your Card Template
Before you begin the CSV import process, you must first create and design your card template. The card template defines the data fields and layout required for your card records. Need help? Follow this guide: How to Design Your Card Template.
Step 2: Access the Import Card Records Tool
- Log in to your IDMS administrator account.
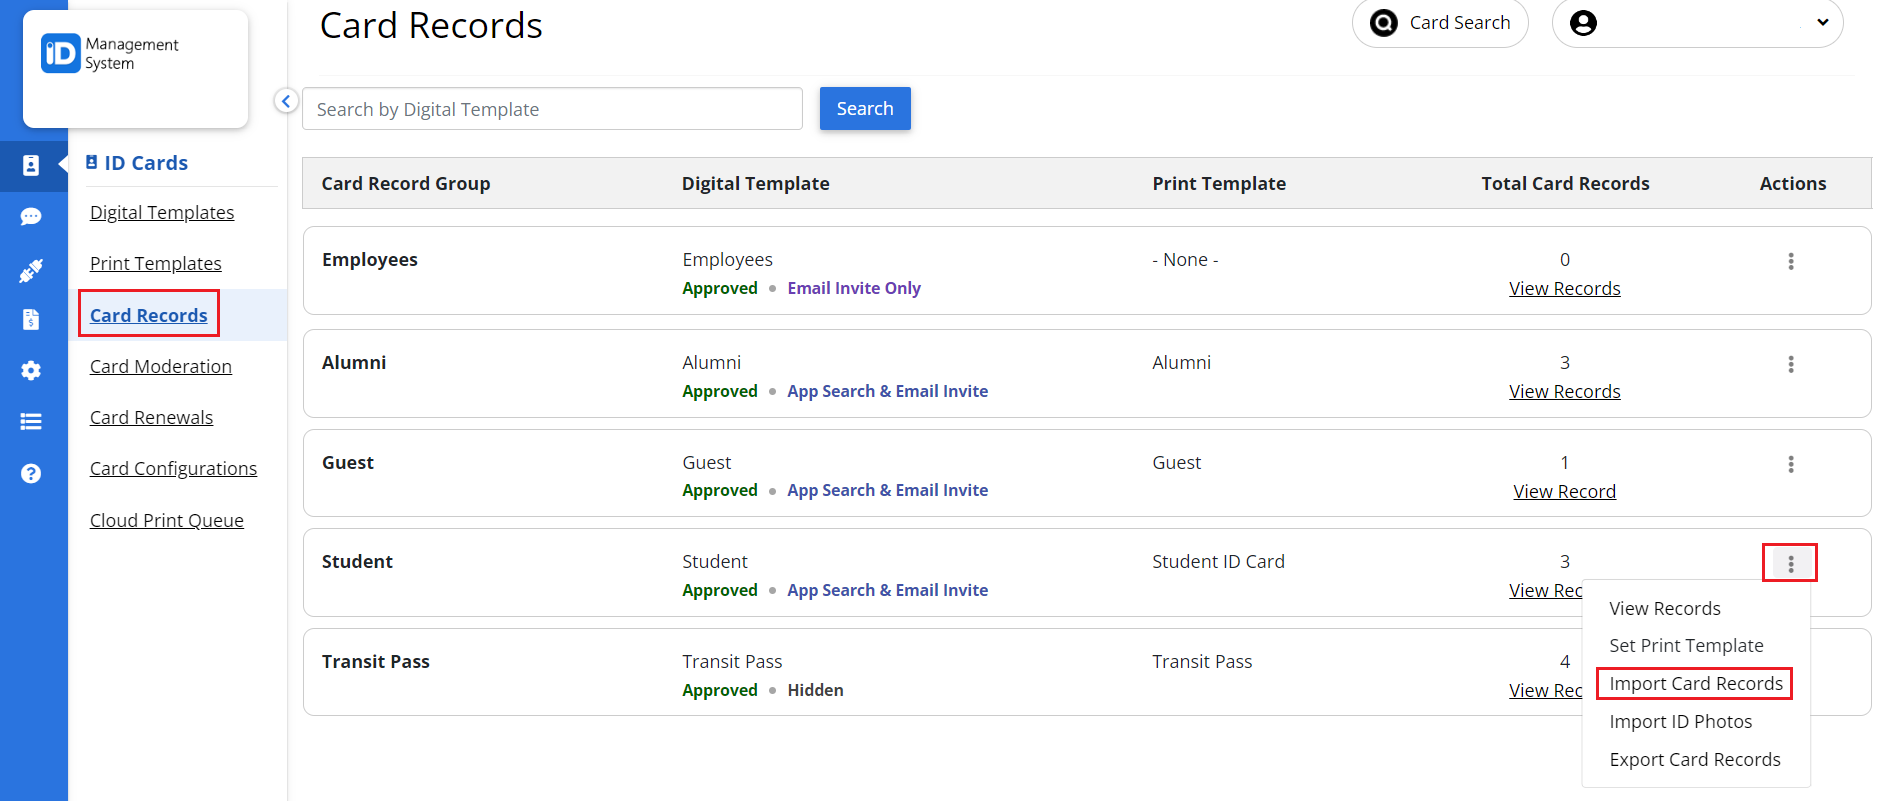
- From the left-hand navigation menu, click on “Card Records”.
- Find the card template you want to use. Click on the three dots (⋮) next to the template name and select “Import Card Records”.

Step 3: Download or Prepare Your CSV File
To ensure your data matches the format required by the selected card template:
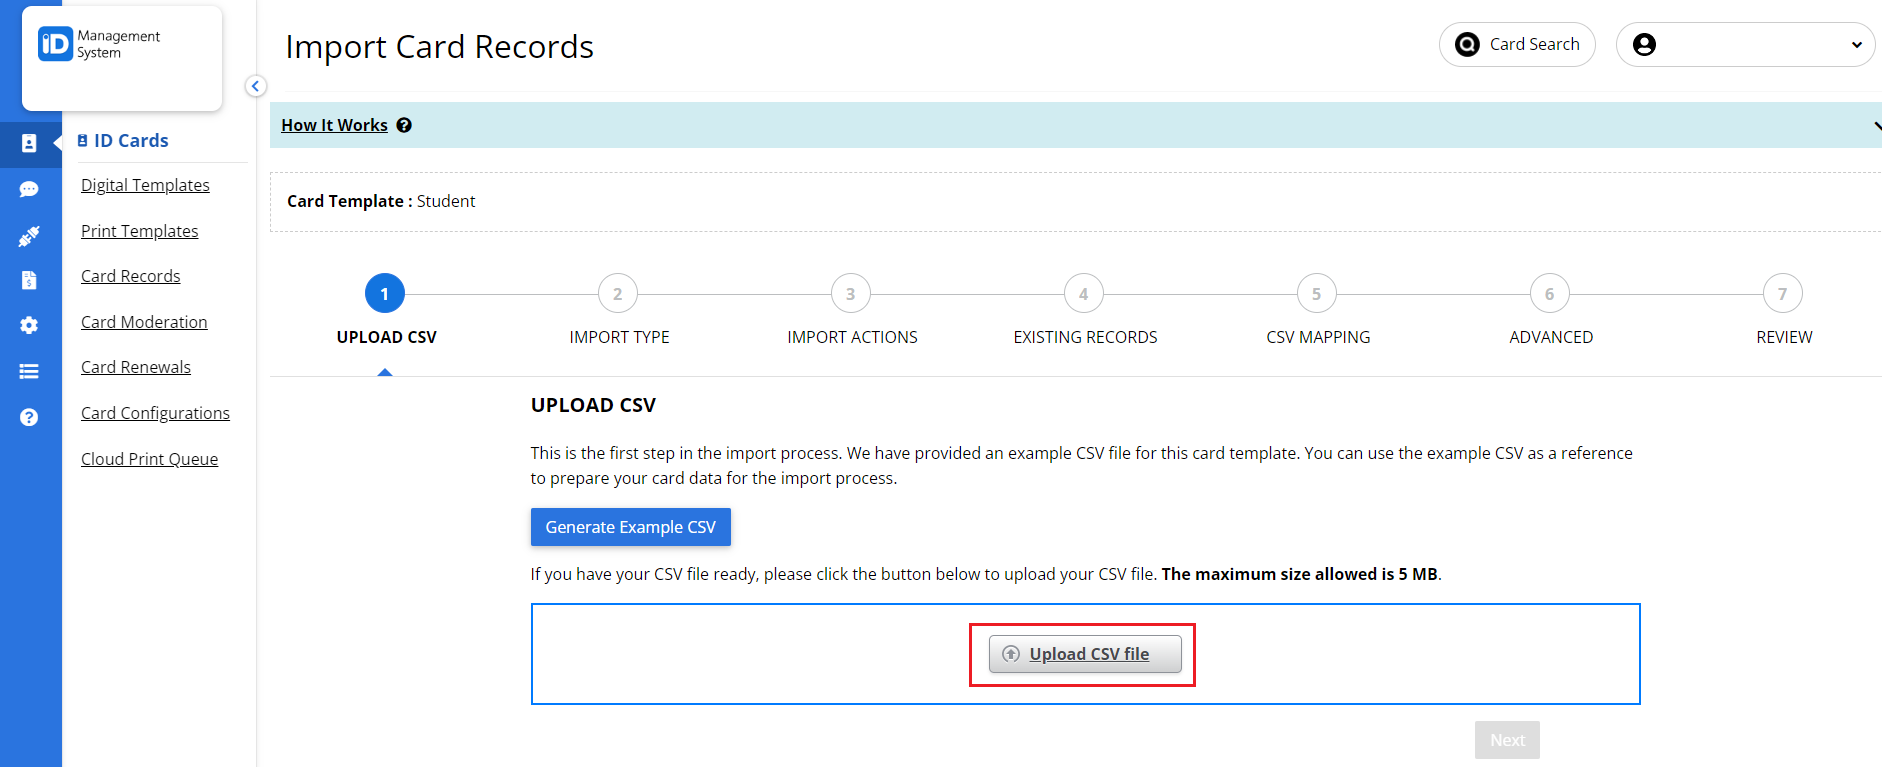
- Click the “Generate Example CSV” button. This will download a sample spreadsheet that reflects your template’s custom data fields.
- You can:
- Use the sample file directly and enter your data into it, or
- Use it as a reference to format your own CSV file.
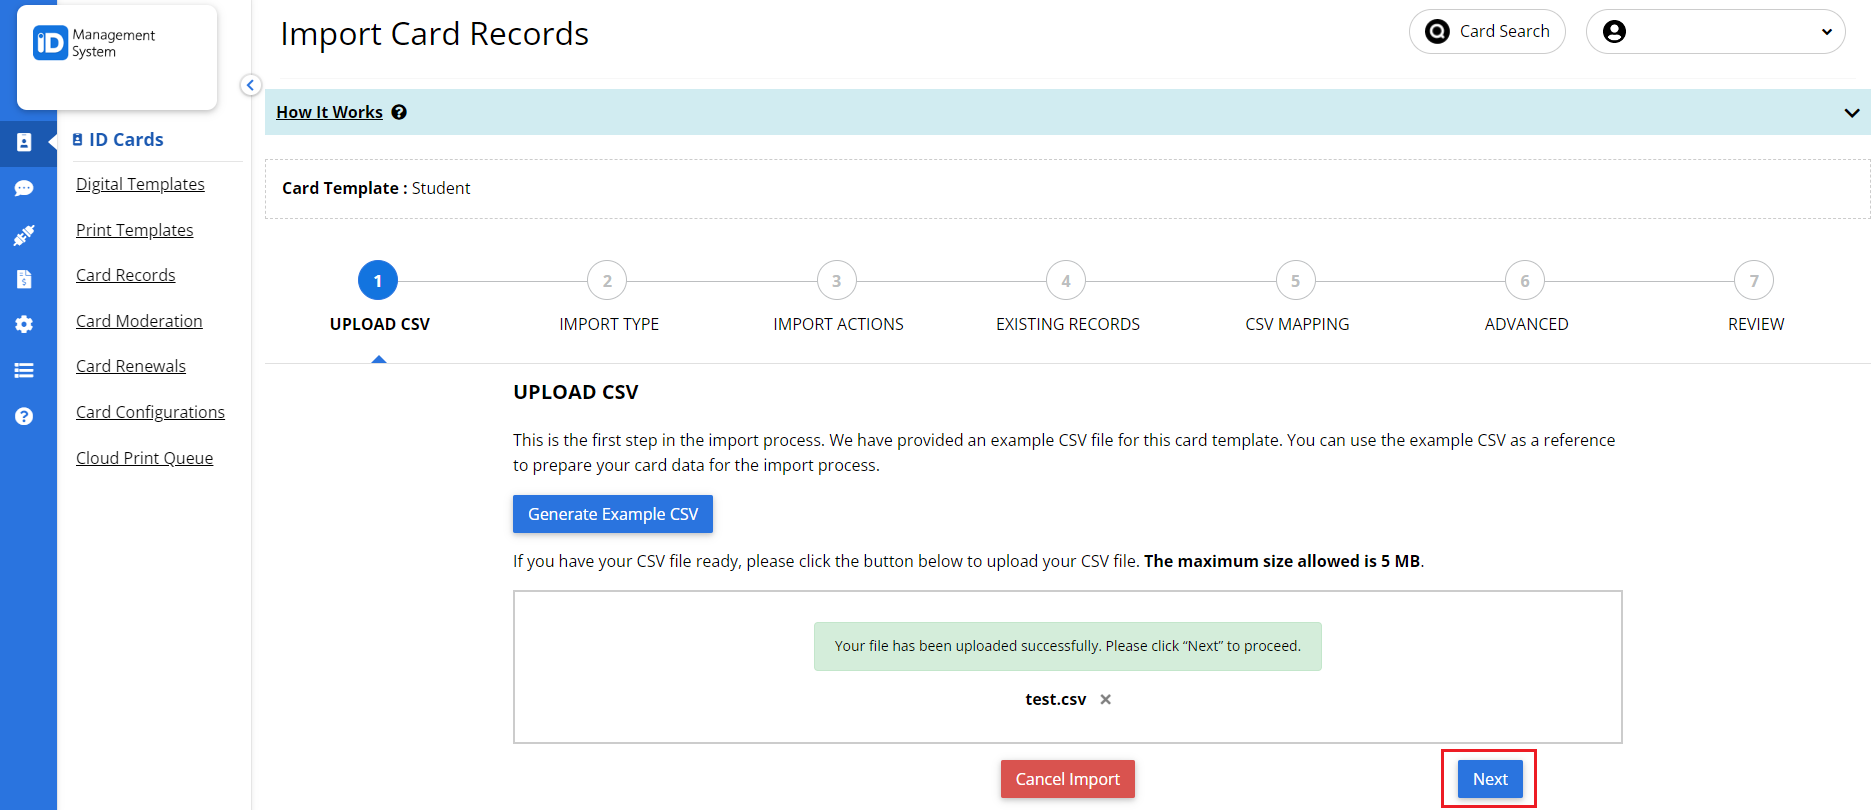
- Once your CSV file is properly formatted, click the “Upload CSV File” button and select your file from your computer.
- Tip: Ensure your CSV matches the column structure and field types defined in your card template to avoid errors during upload.


Step 4: Choose ‘Add New Records Only’
To add only new cardholder records without updating existing ones:
- Select the option “Add New Records Only”.
- Click “Next” to continue.

Step 5: Map CSV Columns to Card Fields
The system will prompt you to map your CSV column headers to the corresponding card fields in your template. Carefully match each CSV column to the appropriate card data field (e.g., Name, ID Number, Email, Expiration Date, etc.).
This step ensures the data you upload correctly populates each digital ID card field.


Step 6: Configure Advanced Actions (Optional)
You can apply optional actions to the card records during import:
- Click “Add Action” to choose from the following:
- Activate
- Deactivate
- Archive
- Unarchive
- Delete
- Alternatively, skip this step by clicking “Next”.
- Advanced configurations are useful for managing card status immediately after import.

Step 7: Review and Import Your Card Data
Before completing the process:
- Review all your settings, mappings, and selected actions.
- Once confirmed, click “Start Importing Data”.
- Your card records will now be processed and added to your IDMS account.

Need Help?
If you have any questions about bulk importing card records using a CSV file in ID123, don’t hesitate to contact our support team.
