Integrating your digital ID card system with Ellucian Banner enables seamless syncing of student or staff data through secure API connections. Follow the steps below to complete the integration within your IDMS (ID Management System) account.
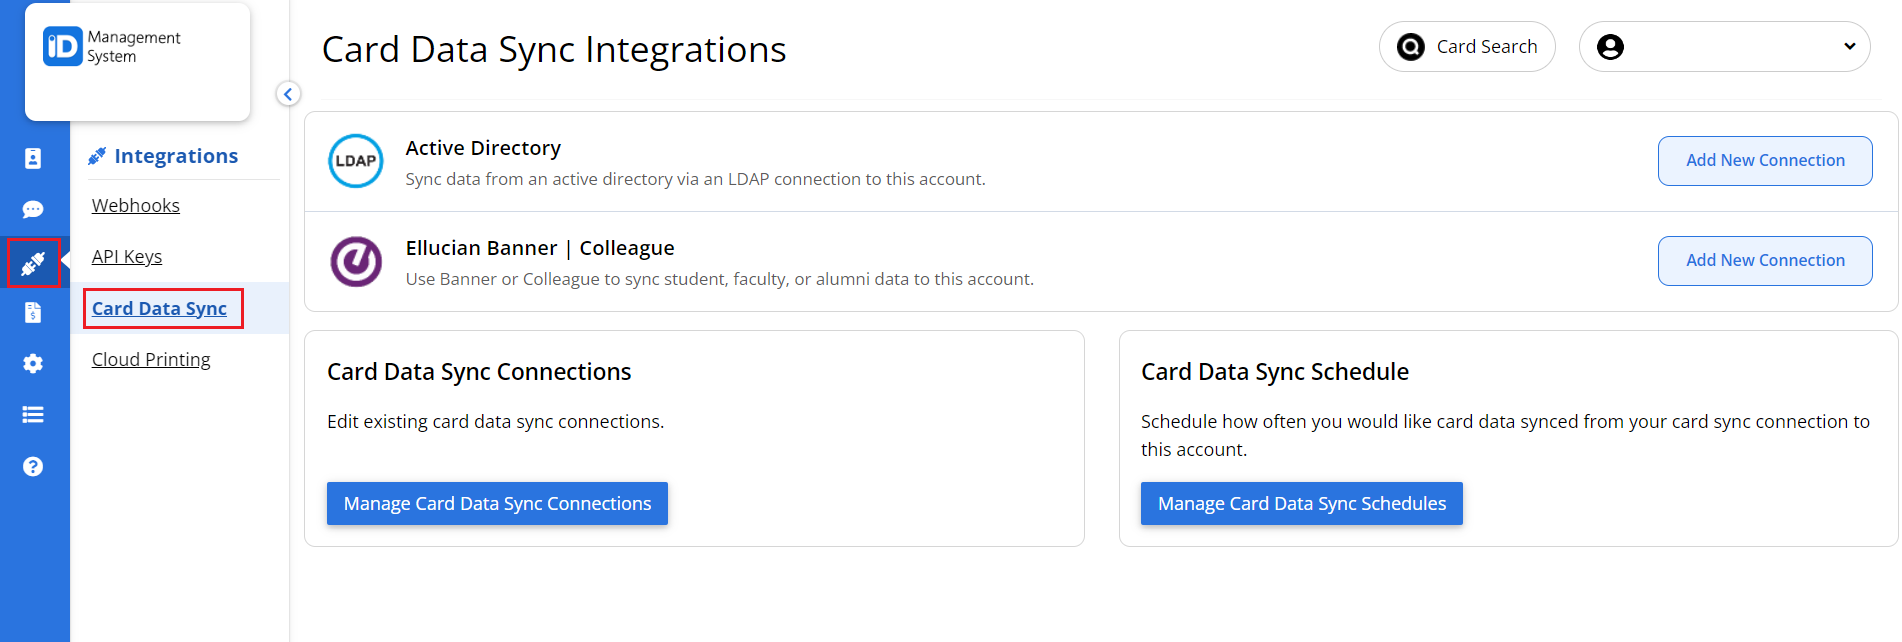
Step 1: Access the Card Data Sync Section
- Log in to your IDMS account at app.id123.io.
- From the left-hand navigation panel, click on the “Integrations” icon.
- Select “Card Data Sync” from the available options.
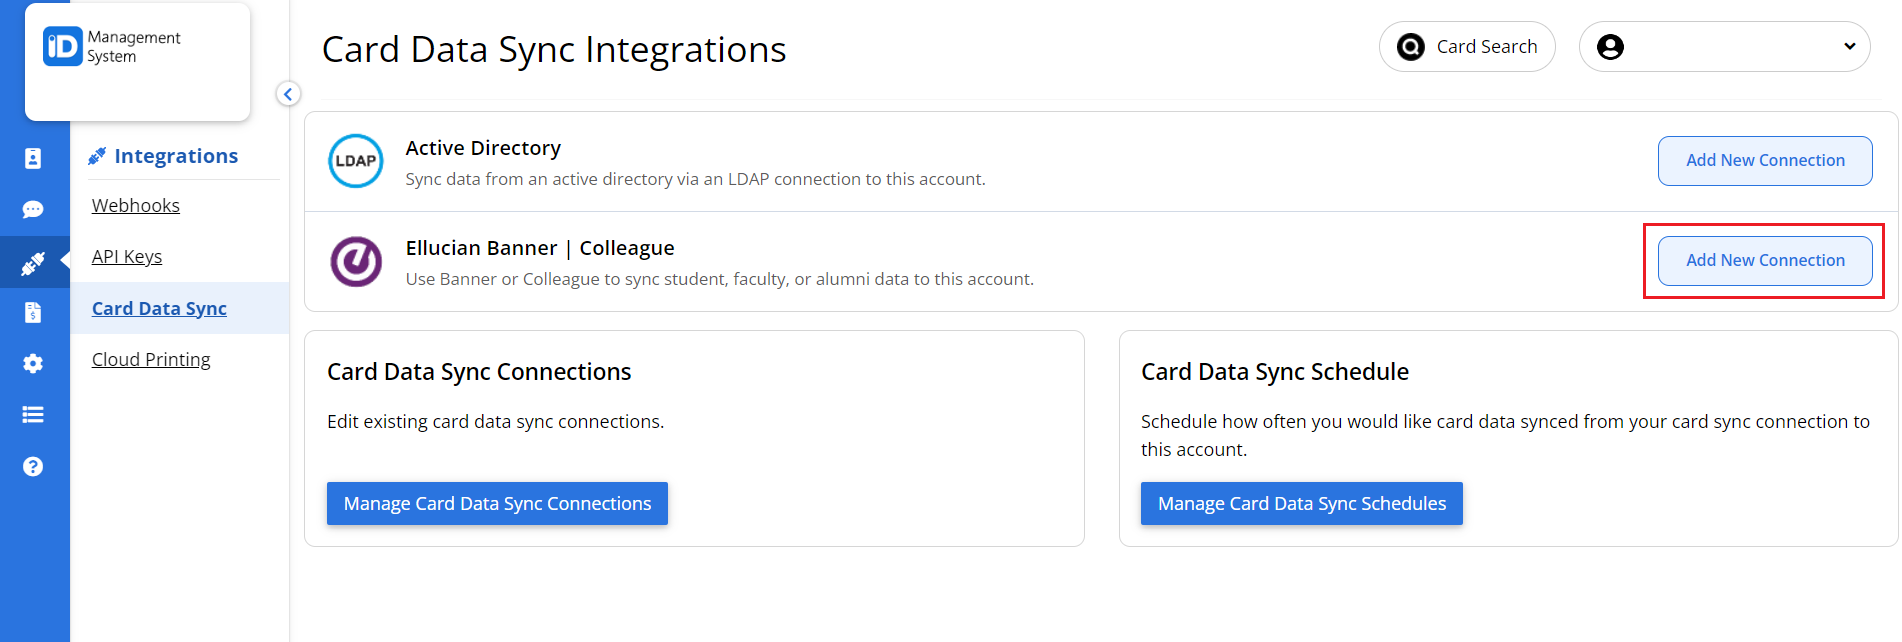
Step 2: Add a New Ellucian Banner Connection
- Locate the Ellucian Banner | Colleague integration option.
- Click on “Add New Connection” to start the setup process.
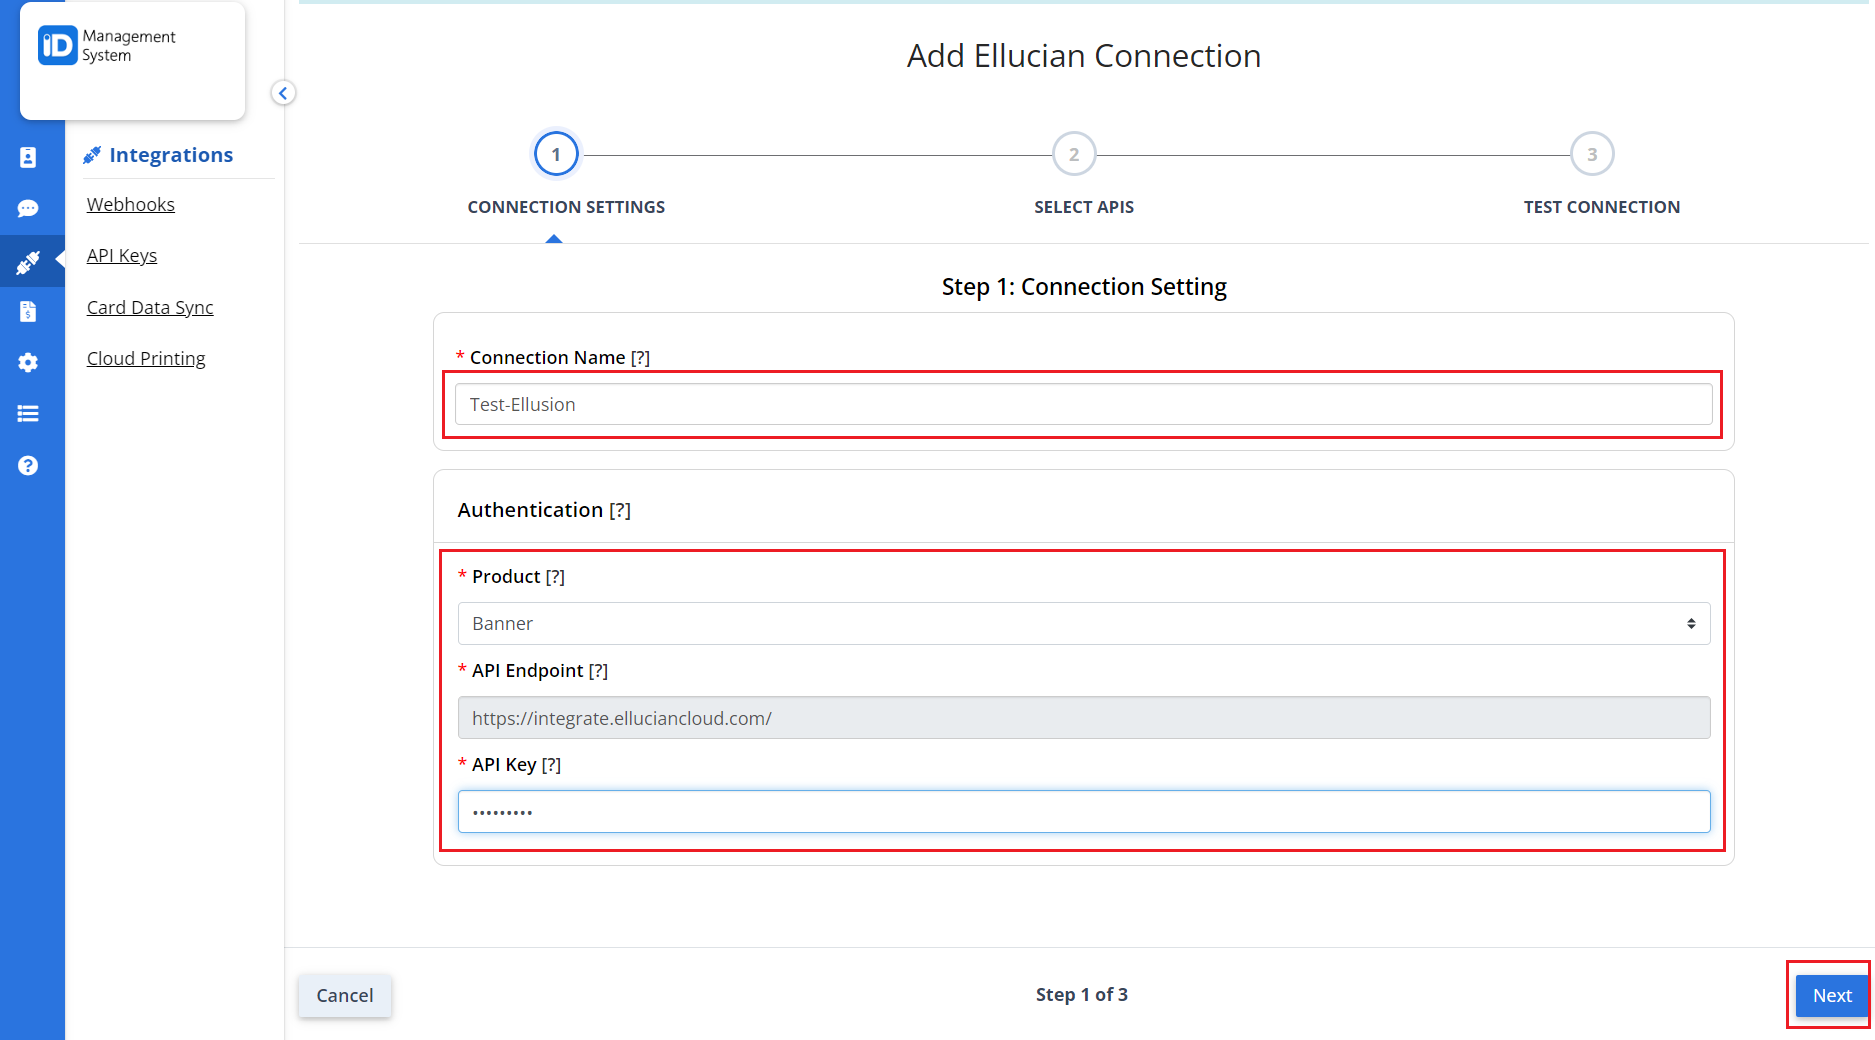
Step 3: Configure Connection Settings
- Enter a unique Connection Name.
- From the product dropdown, select Banner.
- Paste your Ellucian API Key into the designated field.
- Click “Next” to continue.
If you’re unsure how to generate an API key from Ellucian, please contact our support team at support@id123.io.
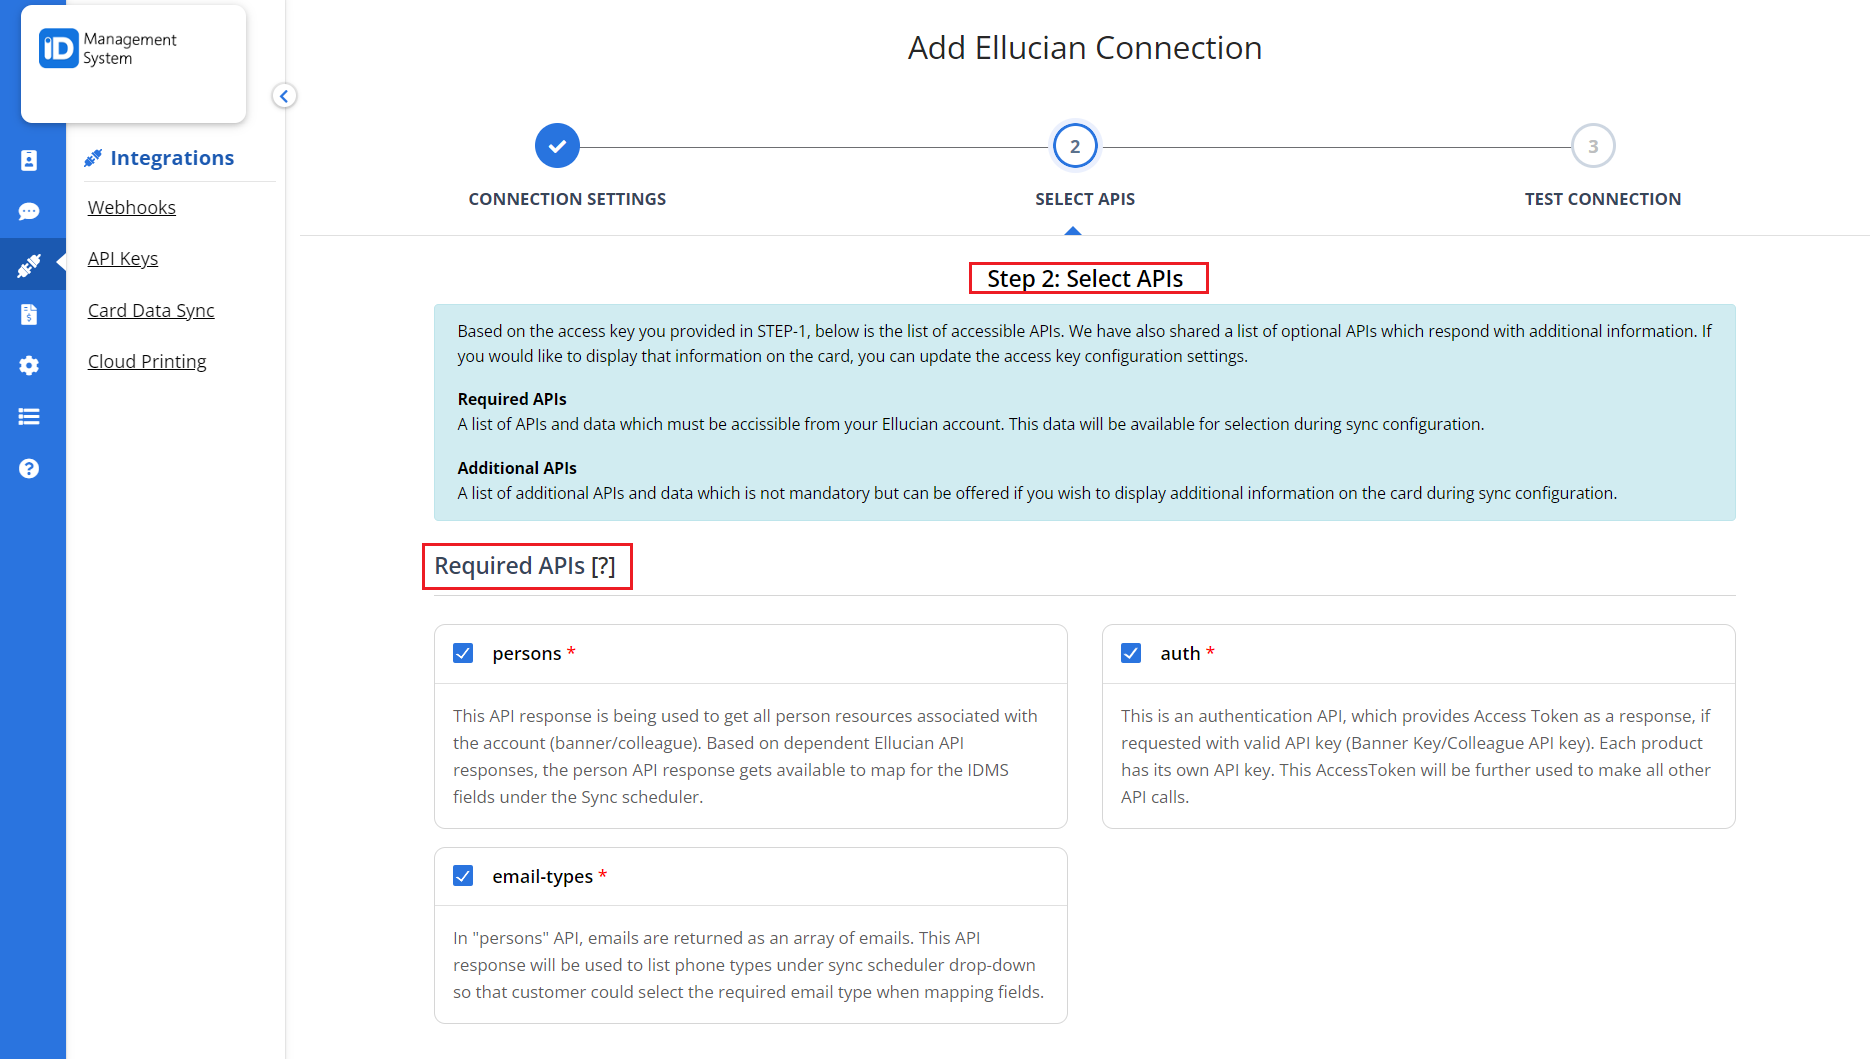
Step 4: Select Required and Optional APIs
- In the Required APIs section, make sure all necessary APIs are selected.
- Optionally, select additional APIs under the “Additional APIs” section to sync extra data fields.
- Once selections are complete, click “Next”.
- Custom Data Mapping Tip:
- If your institution uses a custom field in the Persons API (e.g., extended Banner database fields), ID123 can map that custom field to a corresponding field on the digital ID card.
Step 5: Test and Save the Connection
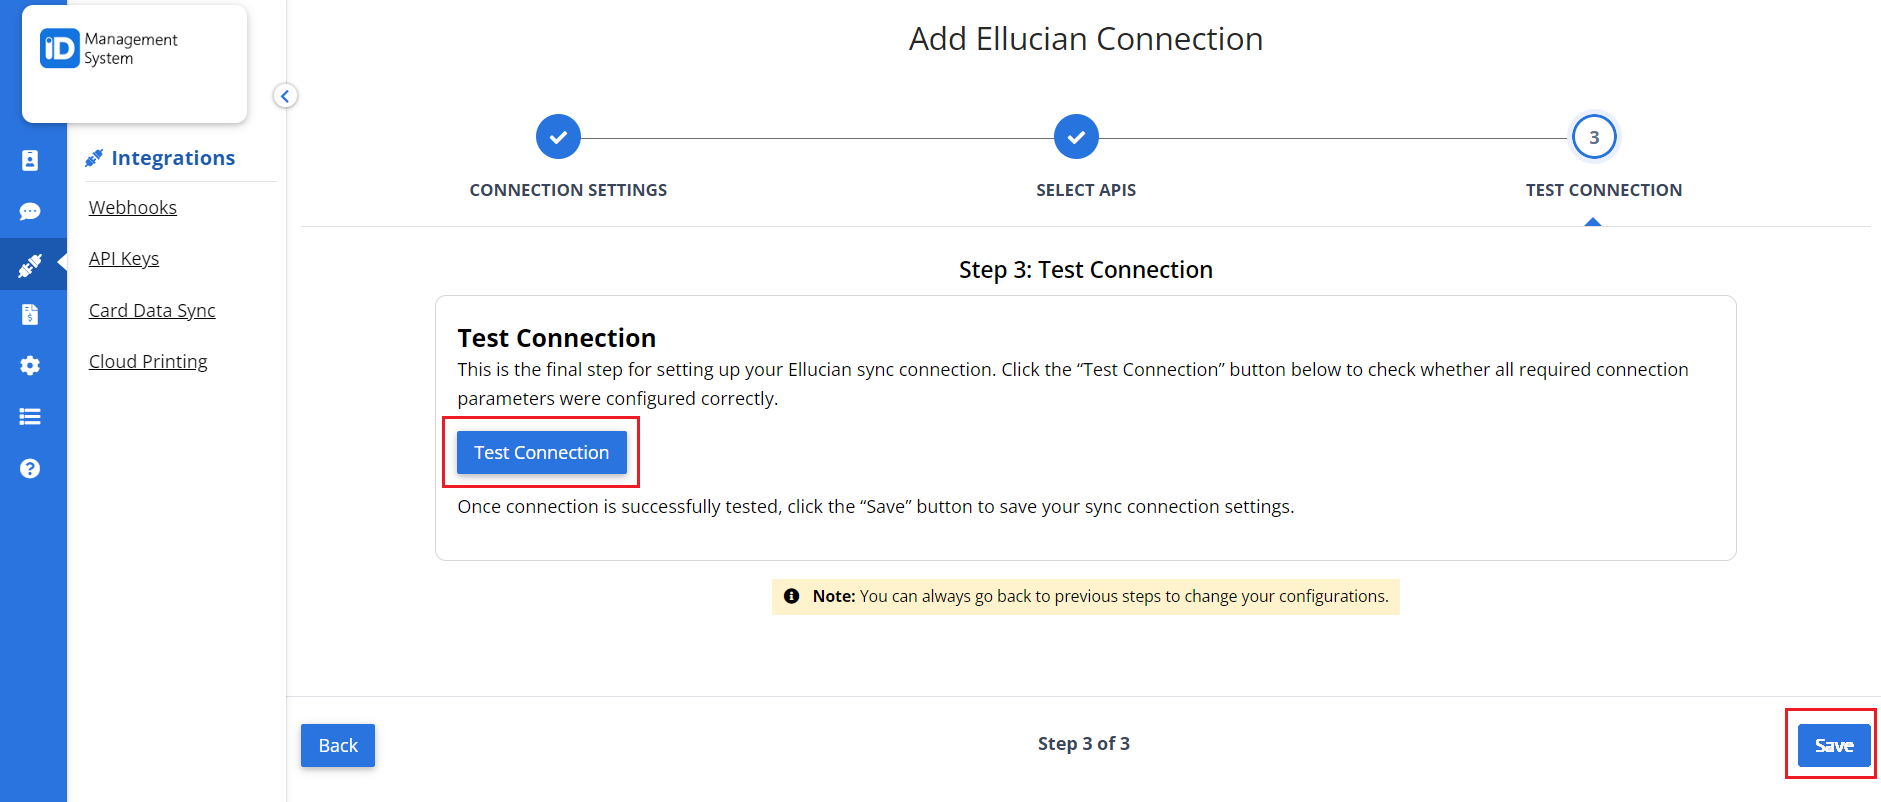
- Click the “Test Connection” button to verify that your setup is working correctly.
- After a successful test, click “Save” to complete the Ellucian Banner integration.
Need Help?
With the Ellucian Banner integration in place, your institution can securely and efficiently sync cardholder data into your ID123 digital ID card platform. For further assistance, reach out to our support team.
