Managing email preferences in your ID Management System (IDMS) ensures that your administrators receive only the notifications that matter most to them. Follow the steps below to customize email notification settings for each administrator.
Step 1: Log In and Access the Settings Menu
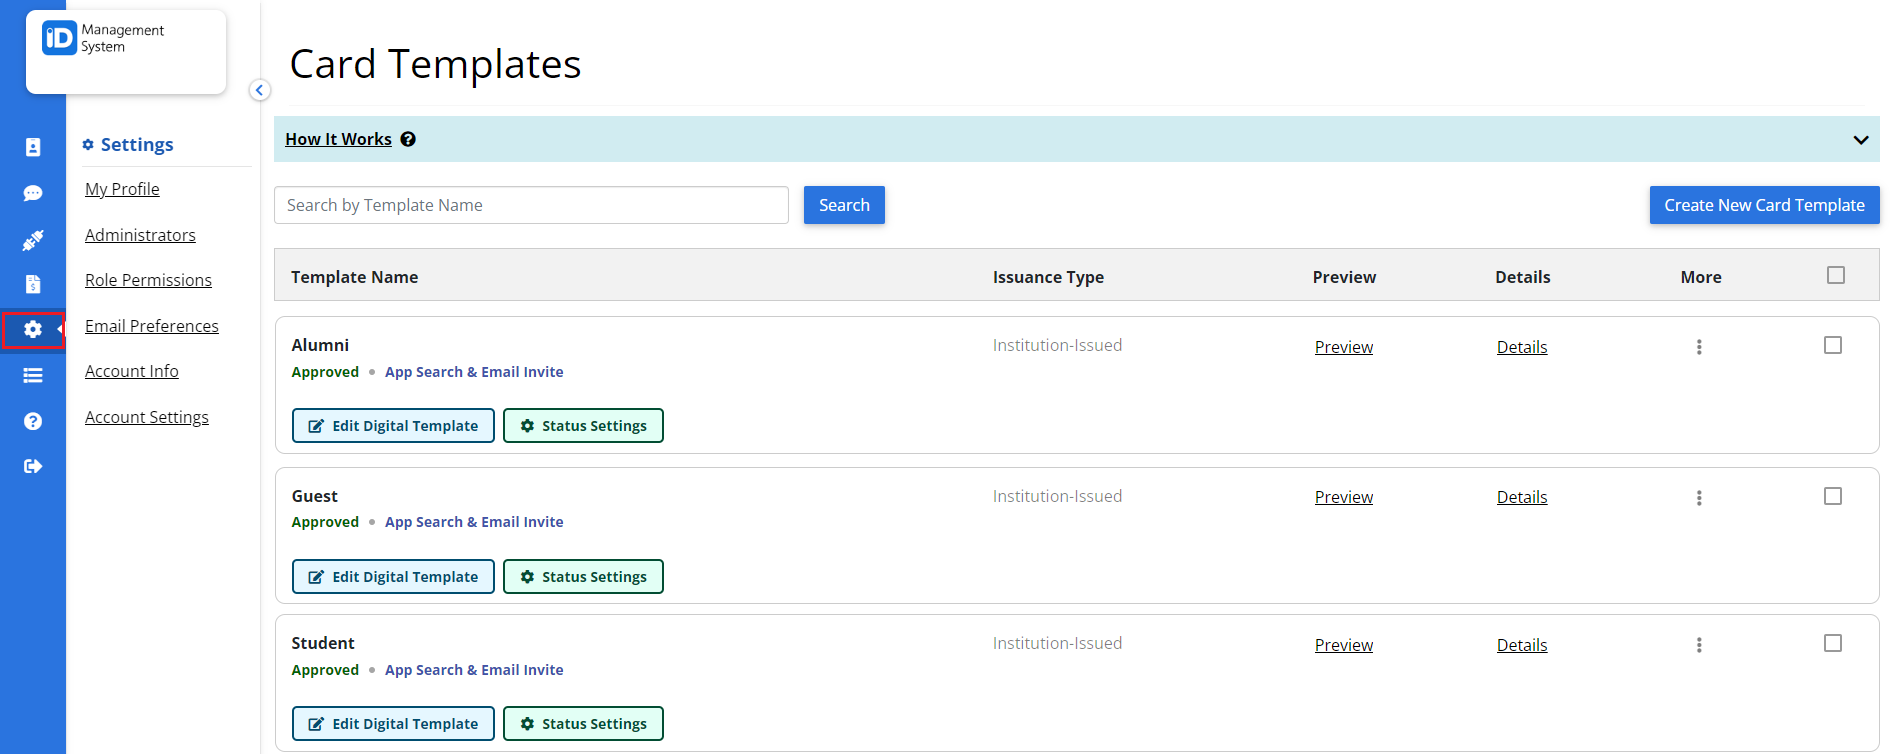
- To get started, log in to your IDMS administrator account.
- From the left-hand navigation menu, click on “Settings”. This is where you’ll manage various admin-related preferences, including email notifications.

Step 2: Open the Email Preferences Page
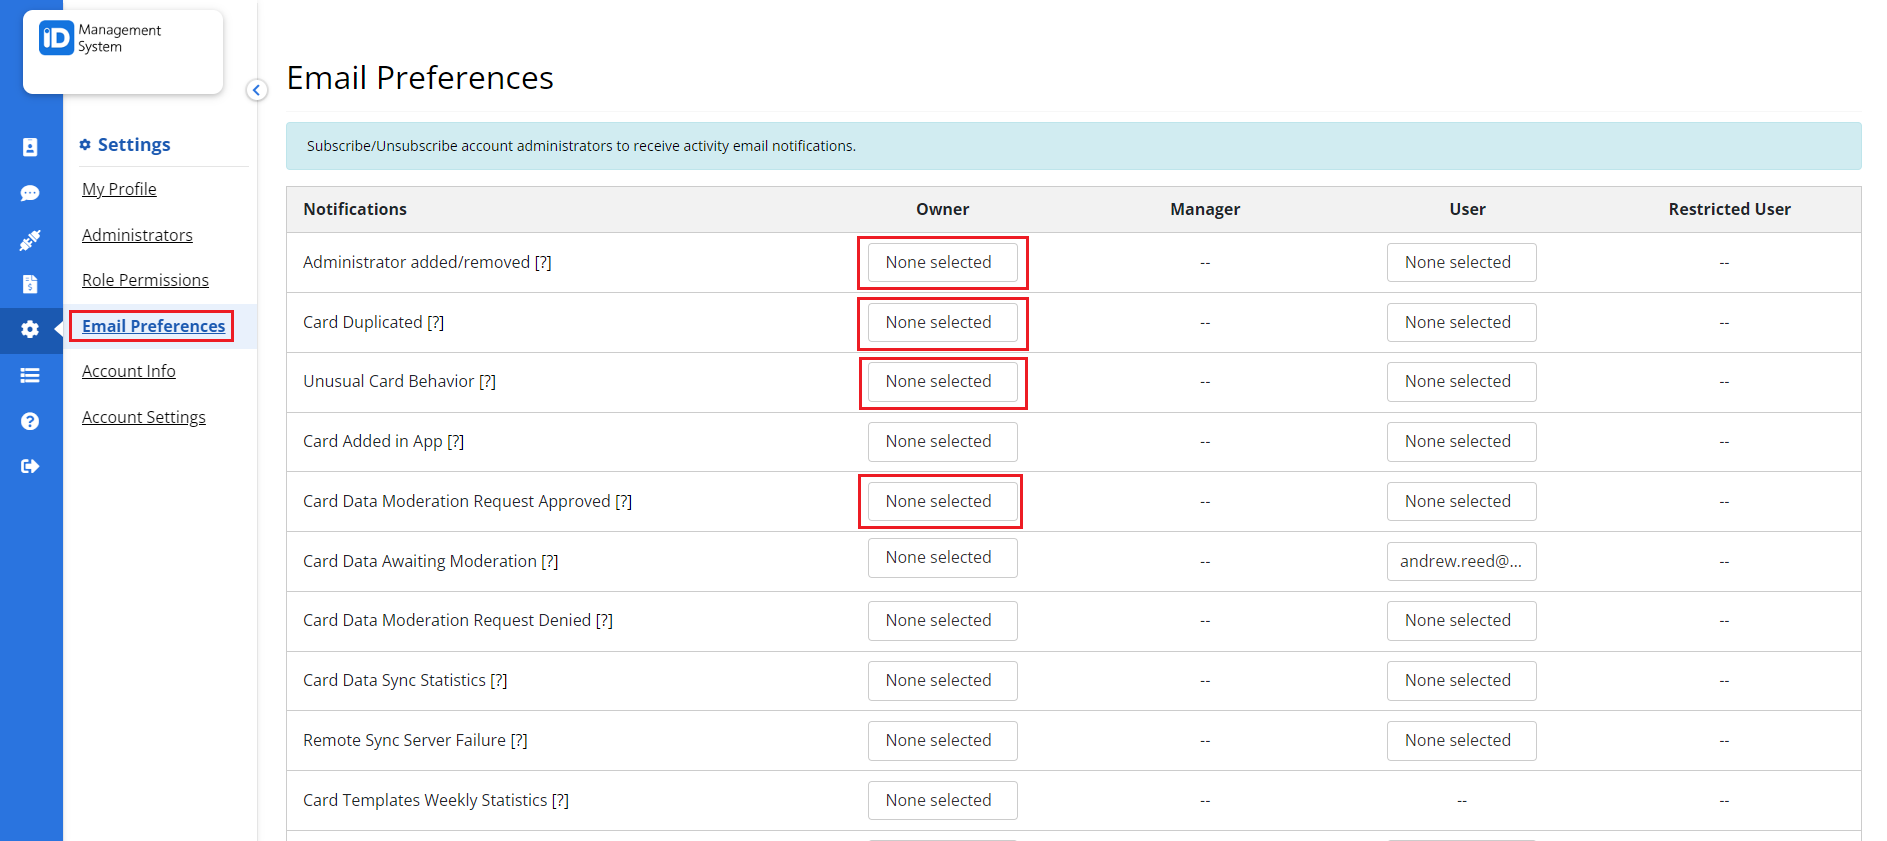
- In the Settings menu, select “Email Preferences”.
- This section allows you to control which administrators receive which types of email notifications.
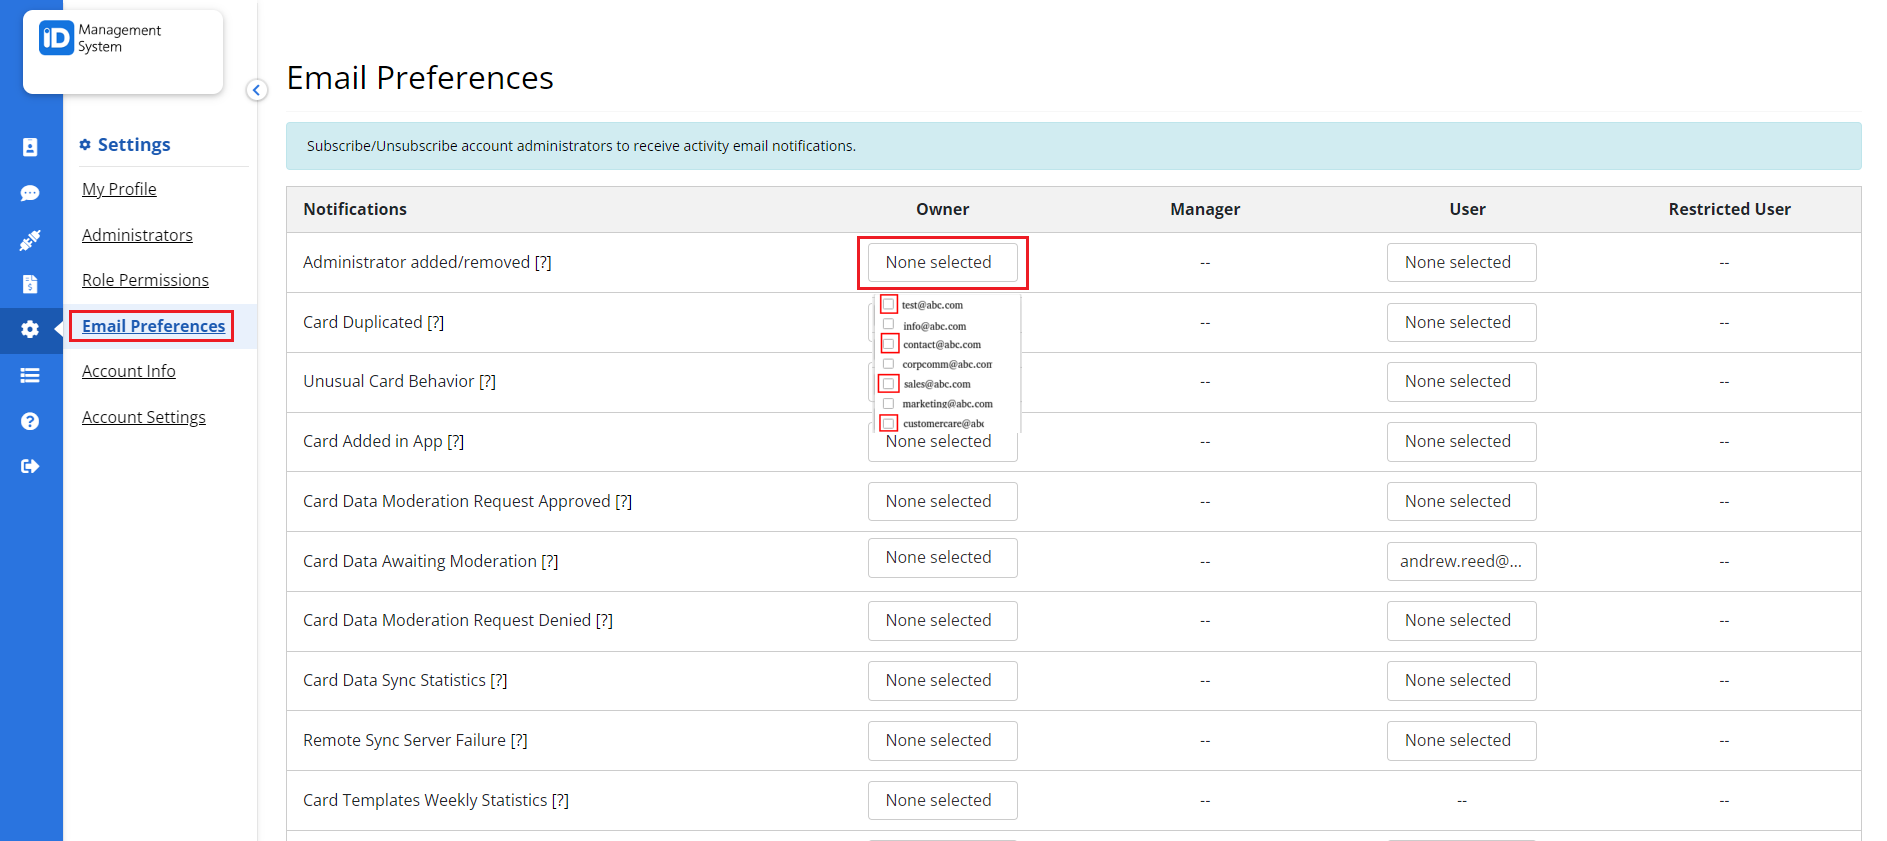
- To assign notifications, click the button next to a specific notification type (the button will say “None selected” by default). A list of all administrators will appear.

Step 3: Customize and Save Administrator Email Preferences
- From the list of administrators, check the box next to each admin who should receive that specific email notification.
- You can repeat this process for multiple notification types and administrators.
- Once all selections are made, scroll down and click “Save Preferences” to apply your changes.

Why Setting Administrator Email Preferences Matters
Customizing email preferences ensures that the right team members receive timely updates about digital ID card activity, card issuance, billing, and more. This helps streamline communication and avoid inbox overload.
If you have any questions or need help with email notification settings in IDMS, feel free to contact our support team.
