Adding a logo to your email card invitation is a great way to brand your digital ID card communications and maintain a professional appearance. Follow the steps below to easily upload a logo to your email invitation using the ID123 ID Management System.
Why Upload a Logo to Your Email Invitation?
Including a logo in your email card invitation:
- Reinforces your institution’s branding.
- Increases recognition and trust.
- Creates a consistent visual experience across your digital ID card communications.
Step 1: Select Your Digital Card Template
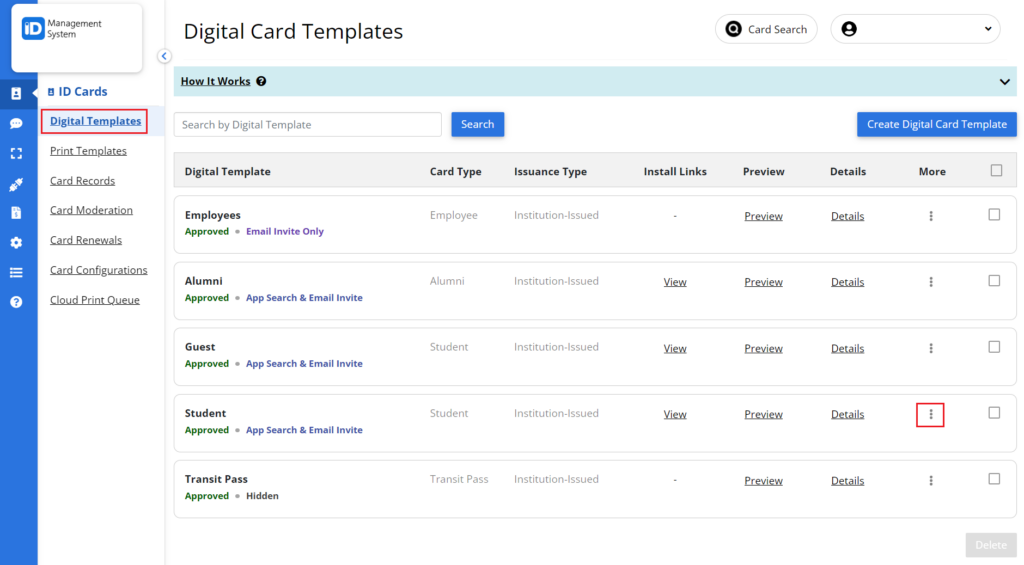
- Log in to your ID123 account.
- Go to the Card Templates section.
- Locate the digital ID card template you want to customize.
- Click on the three dots (•••) under the More column of that template.

Step 2: Open the Email Invitation Settings
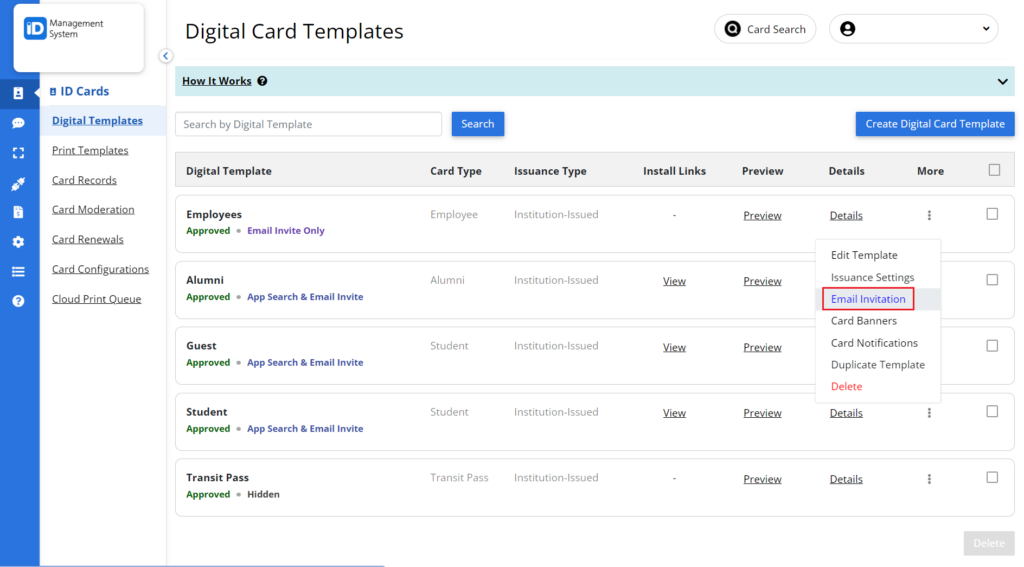
- From the dropdown menu, select Email Invitation.
- This will take you to the Email Invitation customization page for the selected card template.

Step 3: Upload Your Logo
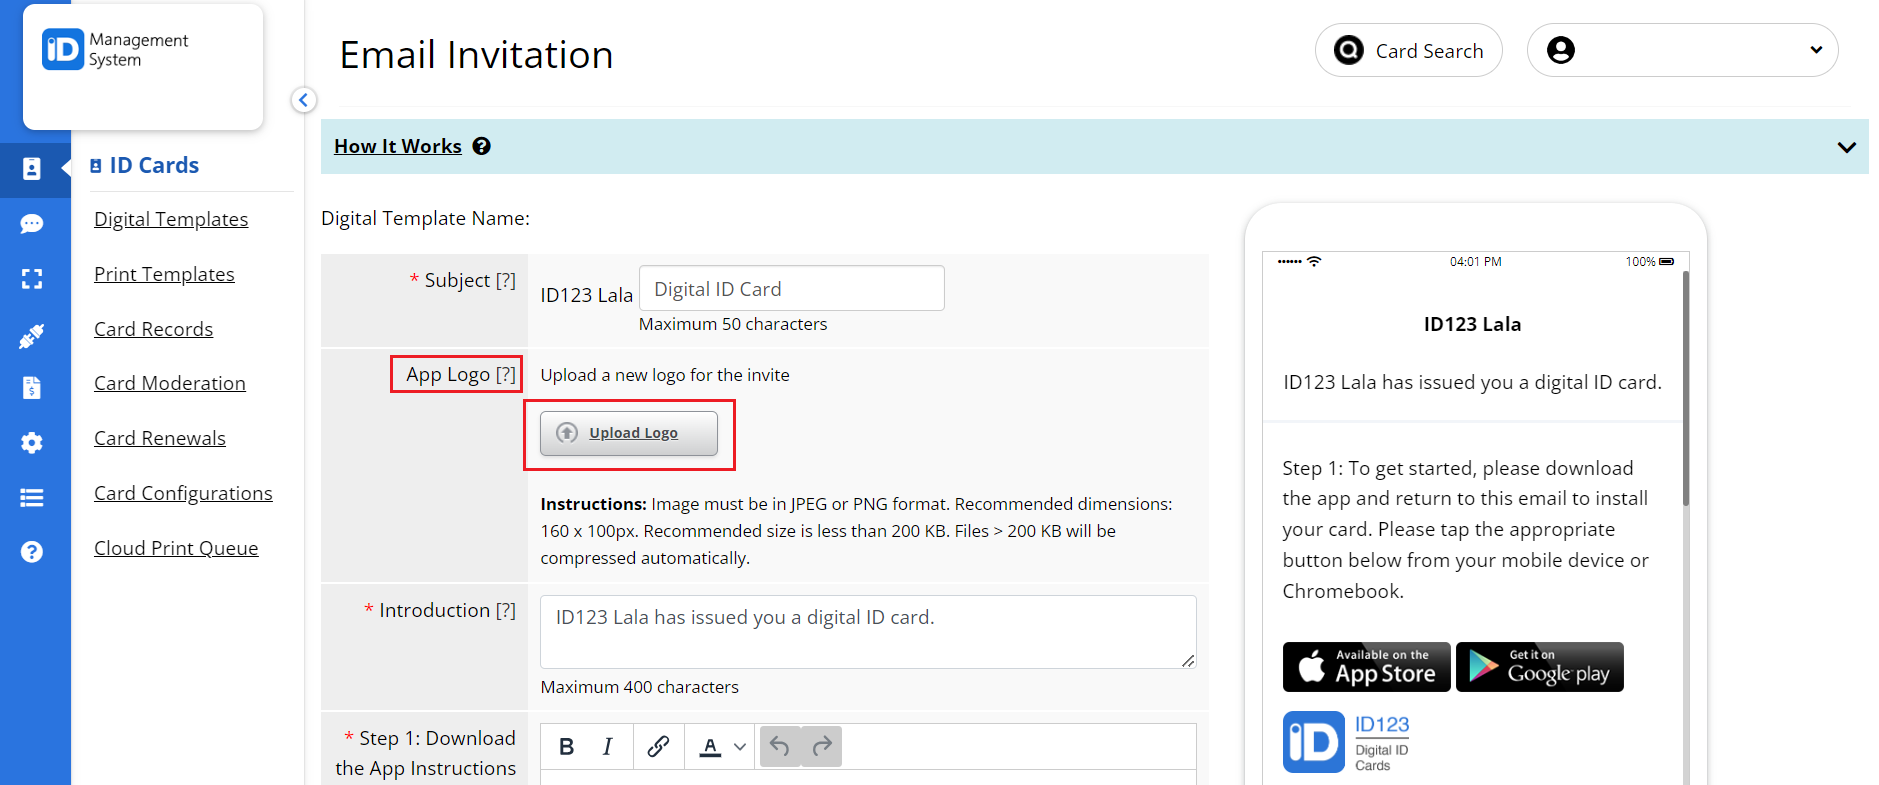
- On the Email Invitation page, click the Upload Logo button.
- Select the logo image file from your device that you want to include in the email invitation.
Note: For best results, follow the image size guidelines listed just below the “Upload Logo” button. Ensuring your logo meets the recommended dimensions will help it display properly on all devices.

Step 4: Preview and Save Your Logo
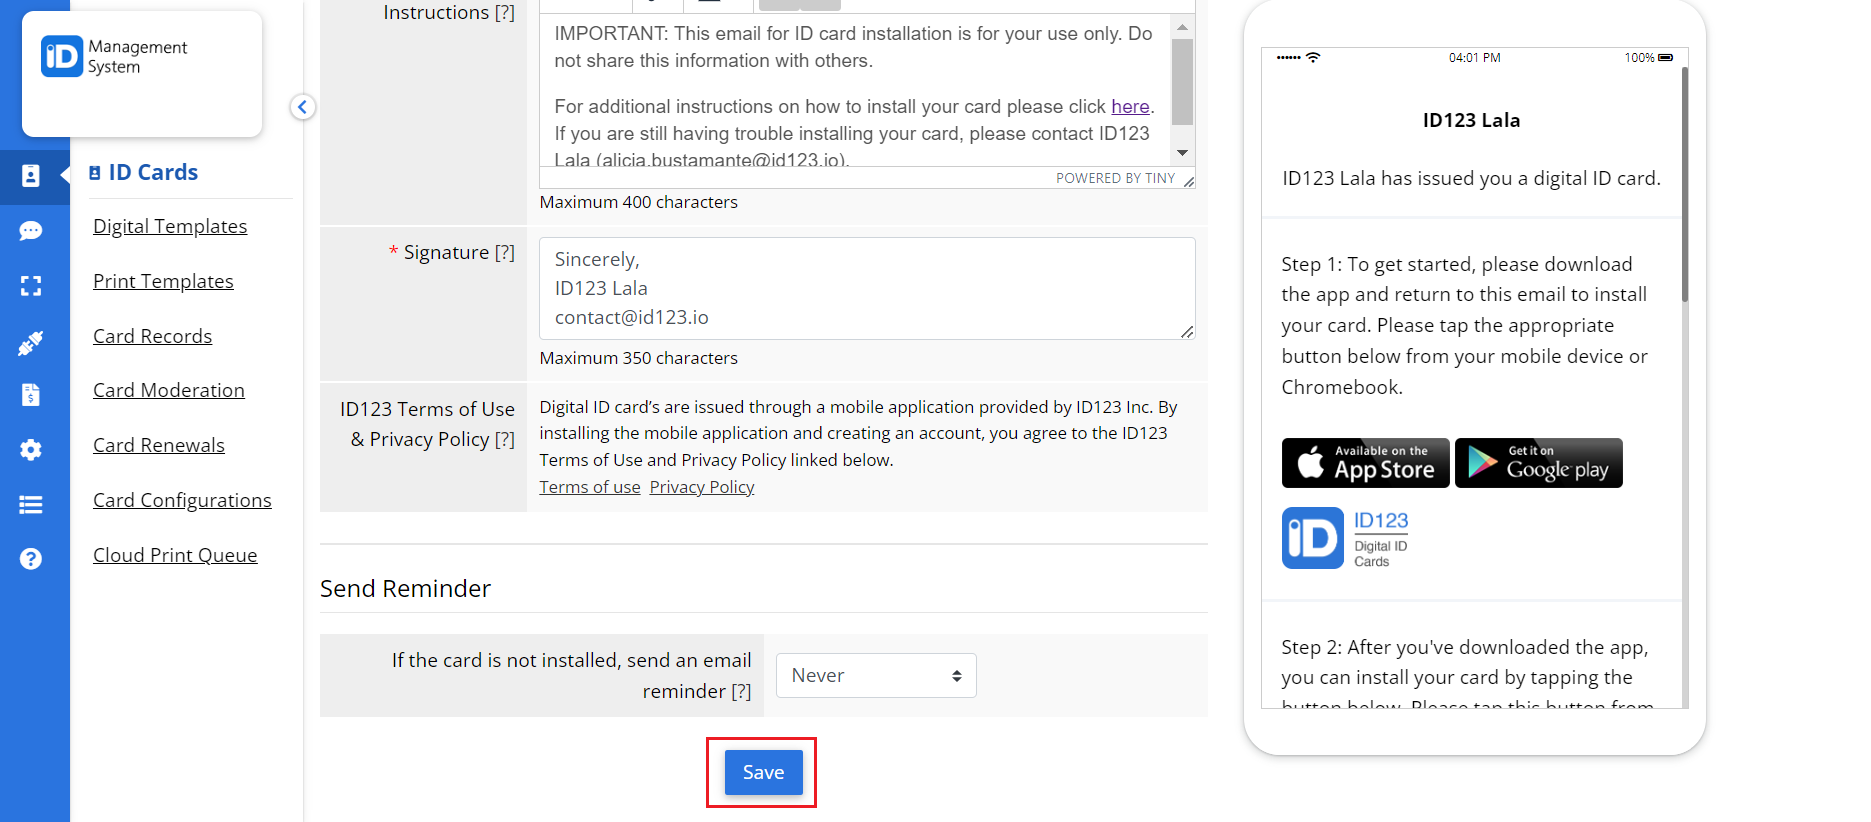
- Once uploaded, you’ll see a preview of the logo displayed on a mobile phone image to the right.
- If the logo appears as expected, click the Save button to finalize the changes.

Need Help?
That’s it! Your email card invitation is now branded with your logo. If you run into any issues or have questions about uploading your logo, feel free to contact our support team.
