
Custom Single Sign-On (SSO) lets your institution’s administrators log in to the ID123 ID Management System (IDMS) using credentials from your own identity provider (for example, Okta, OneLogin, Azure AD/Entra, or Ping Identity), instead of an ID123-specific email and password. This guide walks you through verifying your domain and configuring a custom identity provider for IDMS admin login.
Note: This is separate from enabling custom SSO for cardholders installing a digital ID card in the Digital ID Card App. If you want cardholders to authenticate with a custom identity provider when installing their card, please reference the Configure a Custom Single Sign-On Provider for App Login & Digital ID Authentication knowledge base article.
Before You Begin
- You must be an account admin with access to Account Settings in the IDMS.
- You’ll need access to your organization’s DNS settings to complete domain verification.
- Have your identity provider’s SSO configuration details on hand (for example, your SSO/login URL, Entity ID or Issuer, and signing certificate) — you’ll enter these when you add the identity provider in Step 3.
- Multi-factor authentication (MFA) is always enforced for IDMS admin logins and cannot be disabled from Account Settings, including for accounts using custom SSO.
Step 1: Log In to the ID Management System (IDMS)
- Go to app.id123.io, select your account’s data region, and log in with your IDMS admin credentials.
Step 2: Verify Your Account’s Domain
- Before you can add a custom identity provider, ID123 requires you to verify ownership of your organization’s domain.
- From the left-hand navigation menu, click the Settings (gear) icon, then select Account Settings.
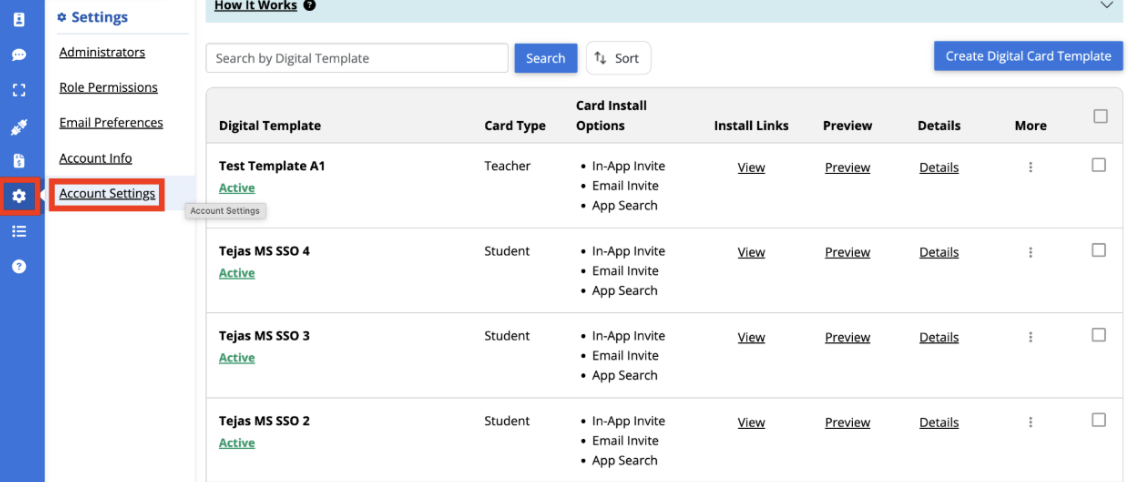
- Scroll to the Domain Verification section and click Verify A Domain.

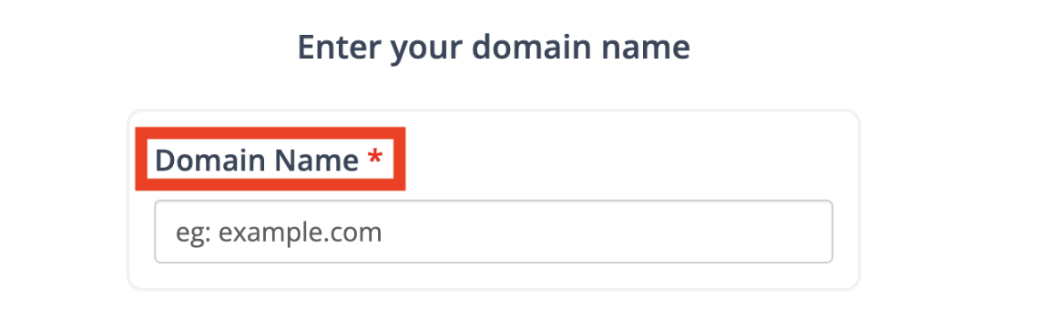
- On the Domain Name step, enter your organization’s domain (for example, yourschool.edu) and click Next.
- On the Verify Ownership step, copy the TXT Record that’s generated.
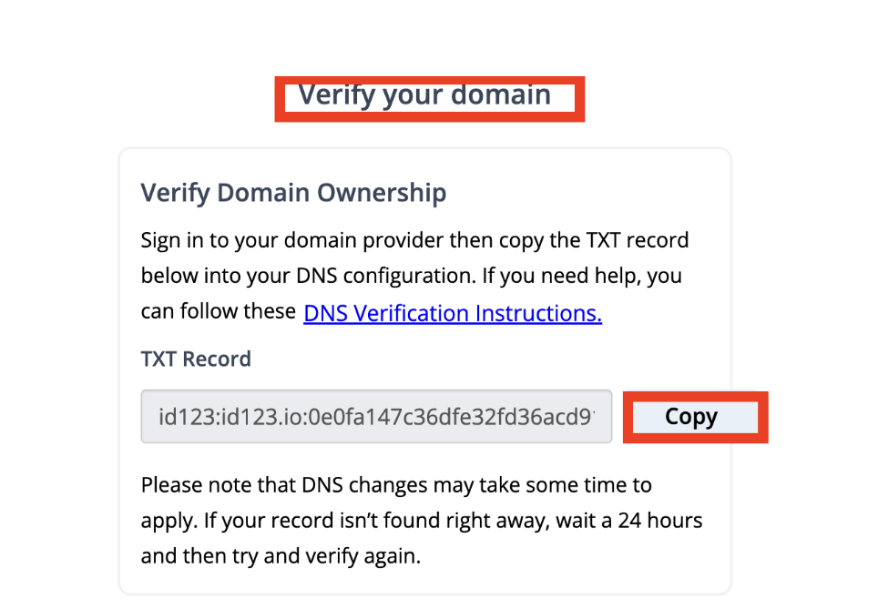
- Sign in to your DNS provider (GoDaddy, Cloudflare, Namecheap, Google Domains, etc.) and add the copied value as a new TXT record for your domain. If you need help with this part, follow the on-screen DNS Verification Instructions, which walk through:
-
- Logging in to your DNS provider’s control panel or API
- Navigating to DNS management
- Selecting the domain
- Creating a new TXT record
- Pasting in the IDMS-provided value
- Saving the record
- Return to the Domain Verification step and click Verify. (You can also click Verify Later to save the domain as Pending and come back once your DNS change has propagated — this can take up to 24 hours.)
Once verification succeeds, your domain’s status will change from Pending to Verified in the Domain Verification table on the Account Settings page.
Step 3: Add Your Custom Identity Provider
- Still on the ‘Account Settings’ page, scroll to the ‘Single Sign-On’ (SSO) section.
- Click Add Custom Identity Provider. (This button stays disabled, with a reminder to verify your domain, until your domain’s status shows Verified.) This opens the SSO Configuration page.

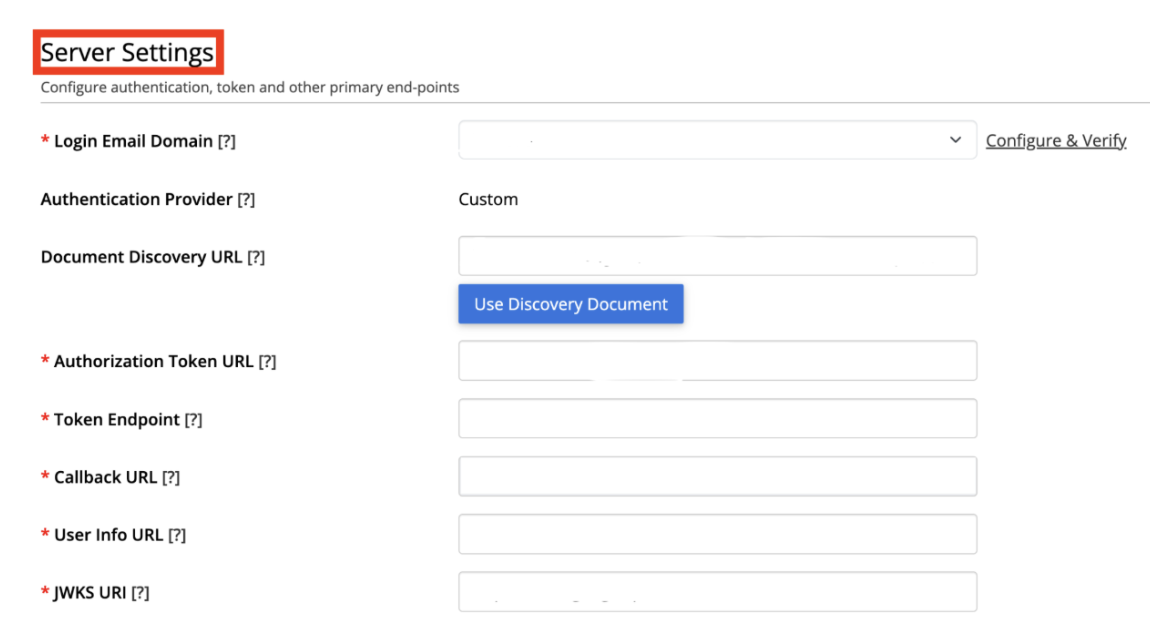
- Under Server Settings, fill in:
-
- Login Email Domain — select the verified domain this identity provider applies to. If the domain you need isn’t listed, click Configure & Verify to add and verify it first.
- Authentication Provider — set automatically to Custom for this flow. (Google and Microsoft use their own dedicated SSO setup instead of this form.)
- Document Discovery URL (optional) — if your identity provider publishes an OpenID discovery document (usually a .well-known/openid-configuration URL), paste it here and click Use Discovery Document to auto-fill the fields below.
- Authorization Token URL (required) — your identity provider’s authorization endpoint.
- Token Endpoint (required) — your identity provider’s token endpoint.
- Callback URL (required, pre-filled) — a d2c-us.id123.io/sso/callback-style URL that IDMS generates for you. Copy this into your identity provider’s app configuration as the allowed redirect/callback URL so it doesn’t reject the redirect after login.
- User Info URL (required) — your identity provider’s userinfo endpoint.
- JWKS URI (required) — your identity provider’s JSON Web Key Set endpoint, used to verify token signatures.
- Under OIDC Settings, fill in:
-
- OIDC Client ID (required) — the unique client identifier your identity provider issued when you registered IDMS as an application.
- OIDC Client Secret (required) — the secret key associated with that Client ID.
- Supported Scopes (required) — the OIDC scopes to request, typically openid email.
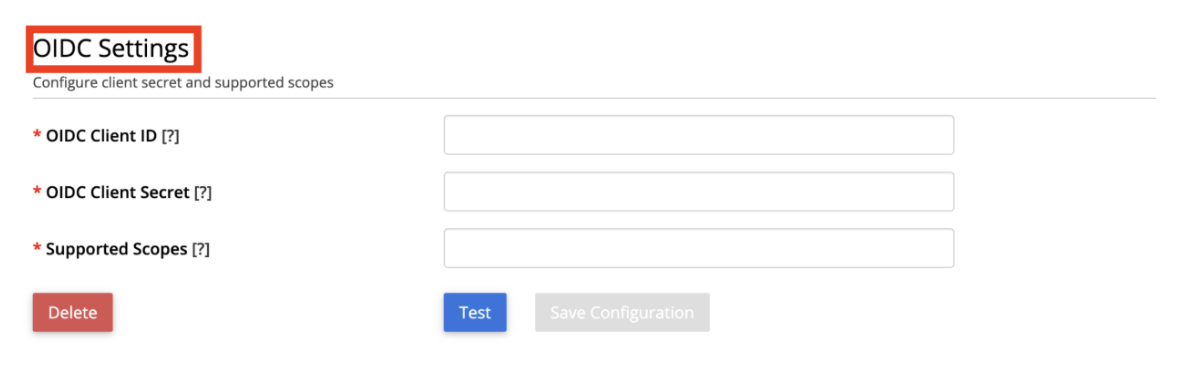
- Click Test to confirm the connection works, then click Save Configuration.
- You can return to this page anytime to Delete an identity provider or update its settings — the same SSO Configuration page also lists any other identity providers already configured for your account, along with which card templates (if any) use each one.
Step 4: Turn On Custom SSO for IDMS Login
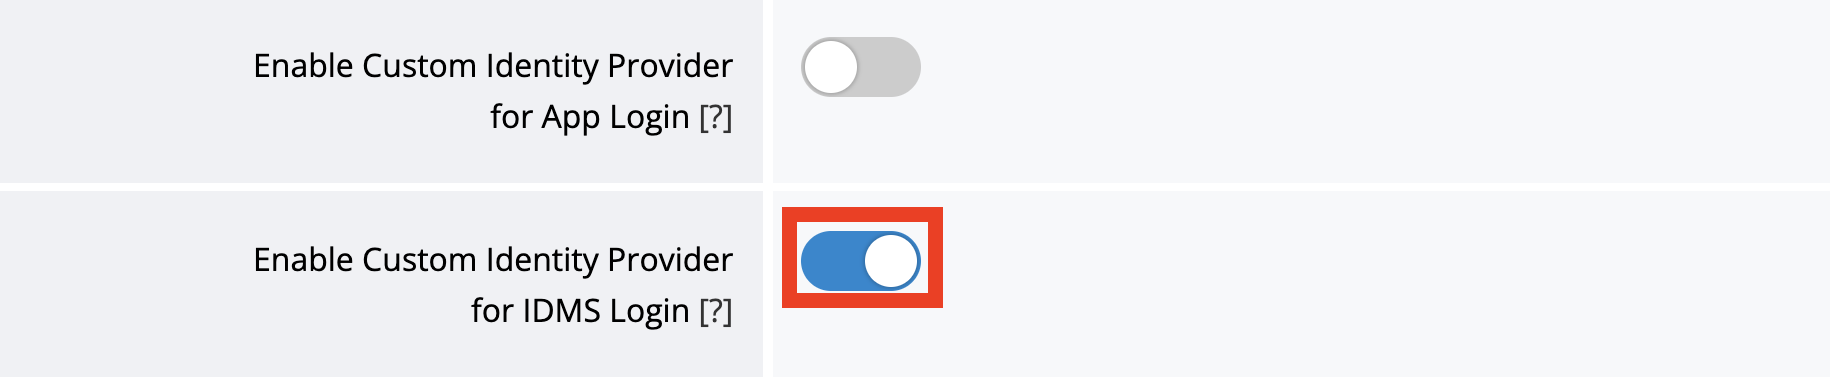
- Back in the Single Sign-On (SSO) section of Account Settings, you’ll see two separate toggles:
- Enable Custom Identity Provider for App Login — “When this setting is enabled for the account, app users can login using SSO credentials provided by the identity provider.” Turn this on only if you also want cardholders to use this identity provider to install or authenticate their digital ID card in the ID123 app.
- Enable Custom Identity Provider for IDMS Login — “When enabled, account admins and app users can log in through their organization’s custom Single Sign-On (SSO) system, using credentials managed by their configured identity provider.” Turn this on to require or allow admin logins to the IDMS itself through your custom identity provider.
- Toggle Enable Custom Identity Provider for IDMS Login on to complete the setup.
Step 5: Confirm the Setup
- Log out of IDMS and return to the login page at app.id123.io.
- You should now see your custom identity provider available as a login option alongside (or in place of) the standard email/password and Google/Microsoft login buttons.
- Sign in using your identity provider’s credentials to confirm the connection works, and complete the MFA step, which is still required.
- Toggle Enable Custom Identity Provider for IDMS Login on to complete the setup.
If you run into issues verifying your domain or connecting your identity provider, contact ID123 Support for assistance.