Adding an additional email address to your ID123 Digital ID Card App account gives you more flexibility when logging in. With multiple email addresses linked to your account, you can sign in using any verified email you’ve added. Follow the step-by-step instructions below to easily add a secondary email address to your ID123 App account.
Why Add a Secondary Email to Your Digital ID App?
Adding an extra email address enhances your account accessibility and ensures continued access even if you lose access to your primary email. This is especially useful for students, employees, or members who use both personal and institutional email addresses.
Step 1: Log in to the ID123 Digital ID Card App
Open the ID123 App on your mobile device and log in using your current primary email address.
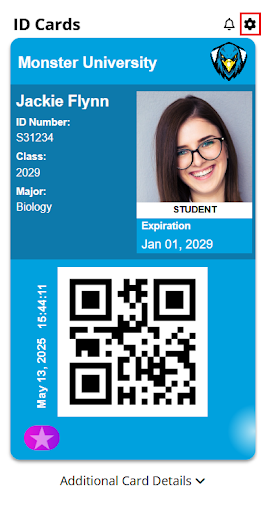
Step 2: Access App Settings
Once logged in, tap the Settings icon located in the navigation menu.

Step 3: Go to My Account
In the settings menu, tap on ‘My Account’ to manage your personal account information.

Step 4: Select the Email Address Section
Tap the drop-down arrow next to the Email Address field to view your current email settings.
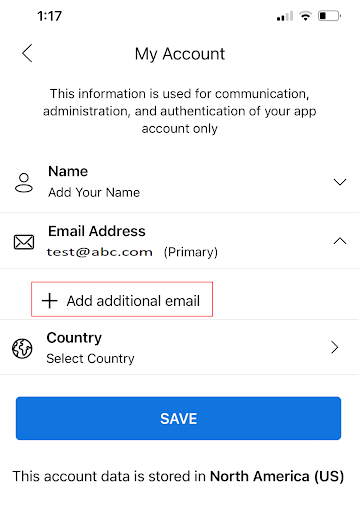
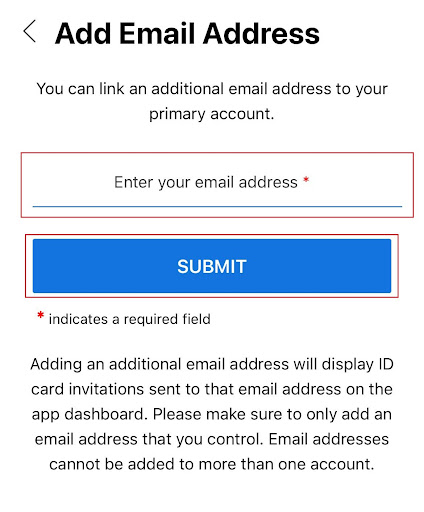
Step 5: Add a New Email Address
Tap the plus (+) icon to add a new email address. Enter the additional email address you want to associate with your account, then tap Submit.
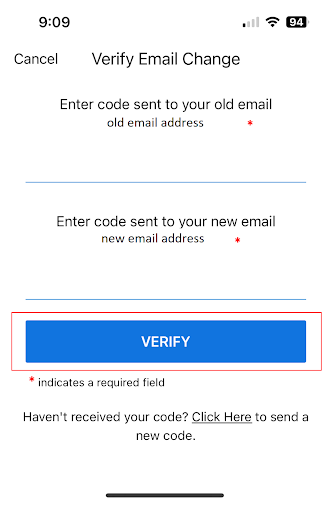
Step 6: Verify the New Email
Check your email inbox for a verification code. Enter the code in the app when prompted and tap Verify. Once verified, you will see a confirmation message indicating the new email has been successfully added.
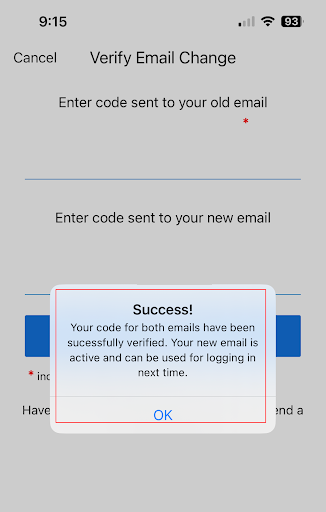
You can now log in to your ID123 Digital ID Card App using either your original email or the newly added one. Managing your digital ID card credentials has never been easier.
