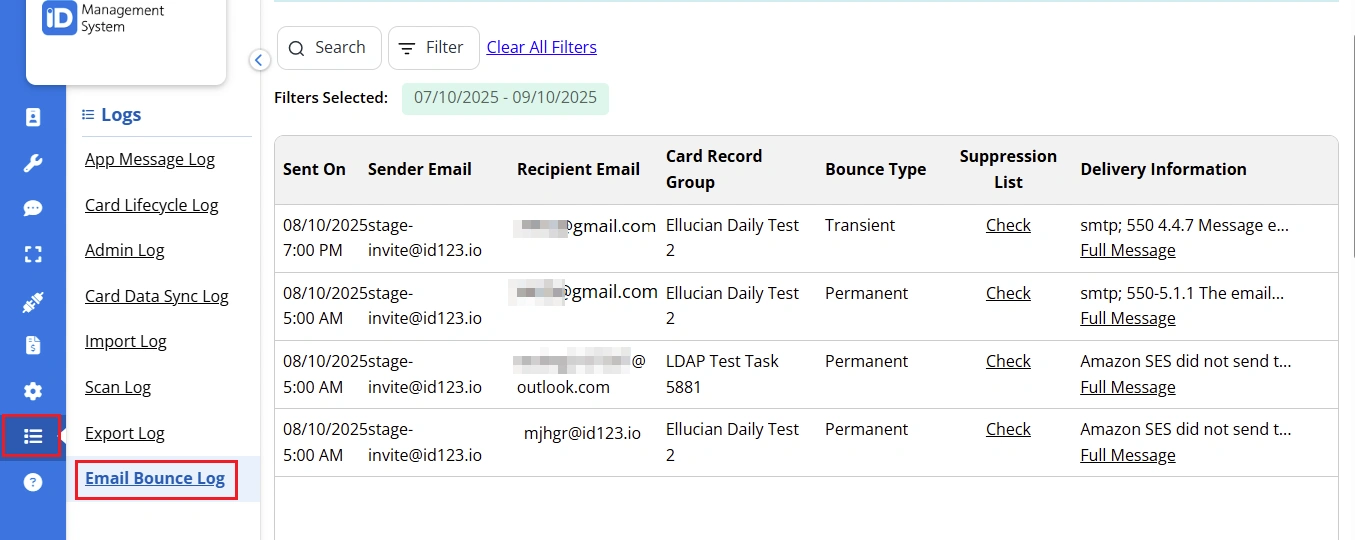
Step 1: Navigate to the Email Bounce Log Page
Log in to the ID Management System (IDMS), then from the left-hand panel, go to the Log section and select “Email Bounce Log”.
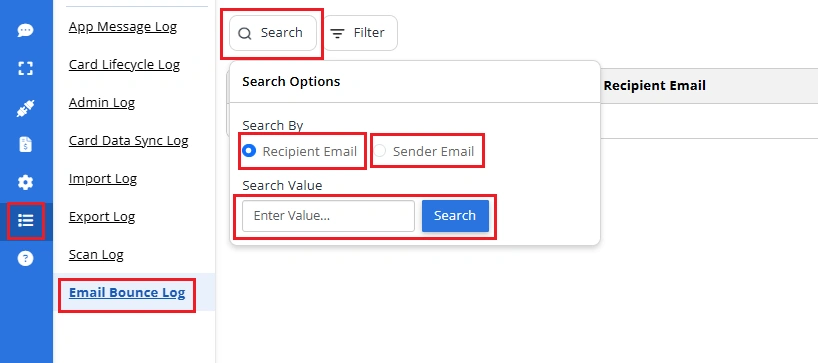
Step 2: Use the Search or the Filter Option
You have two options to view the list of bounced email records, as outlined below.
Select the option to “Search.” This allows you to look up bounced email records by the recipient’s email or the sender’s email.
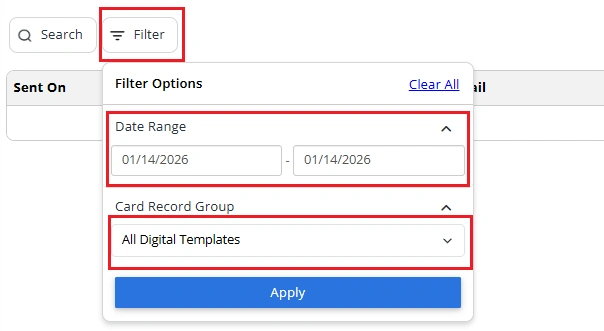
Select the “Filter” option. The filter option allows you to filter bounced email records by a “Date Range” and “Card Record Group.”
Step 3: Check the Email Suppression List
What is an Email Suppression List? An email suppression list is a collection of email addresses that have been excluded from receiving further communications. This typically occurs when an email is hard bounced, marked as spam, or the recipient unsubscribes. In IDMS, we most often see addresses added to this list due to repeated delivery issues.
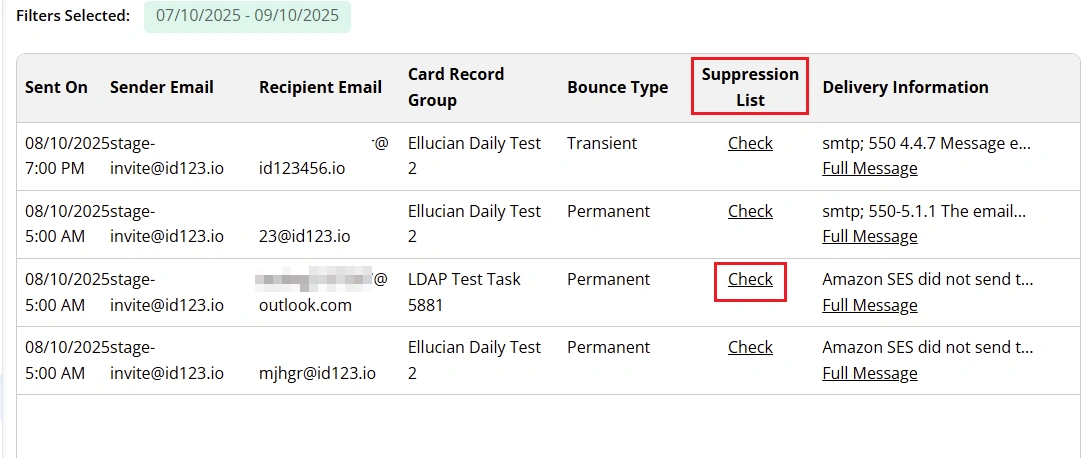
Once the list is displayed, you can click on the “Check” link under the “Suppression List” header to view the email address.
Step 4: Remove Email from Suppression List
Review the email address shown in the suppression list. Click “Yes, Remove” to take it off the suppression list. Please note that if your email server is blocking emails from the sender, then the email will end up back on the suppression list. You will need to whitelist the sender’s email in your email client in order to prevent future emails from bouncing.
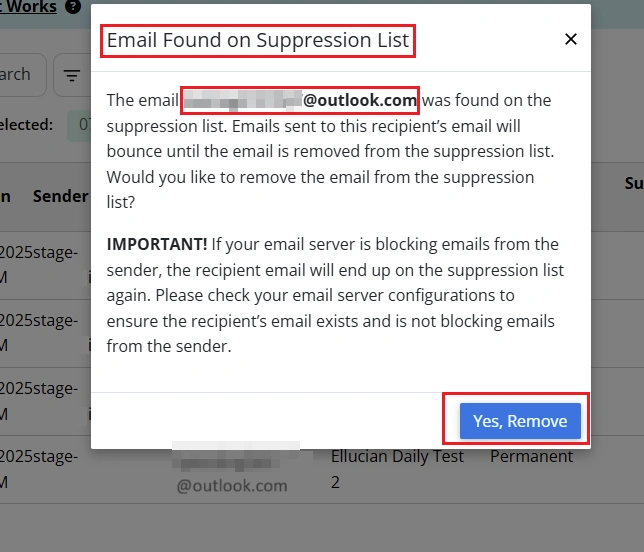
That’s it, your email will be successfully removed from the suppression list.