
Scanner users are the people invited to scan and verify ID cards in your scan sessions. A scanner user can be an IDMS Admin or a Guest, such as event staff, volunteers, or security personnel. The Scanner Users page in the ID123 ID Management System (IDMS) lists every scanner user across all of your scan sessions, so you can quickly find a user and control their access. This article shows you how to search and filter scanner users, and how to resend invites, deactivate, reactivate, and delete scanner users.
Step 1: Navigate to the Scanner Users Page
- Log in to your ID123 ID Management System (IDMS) account
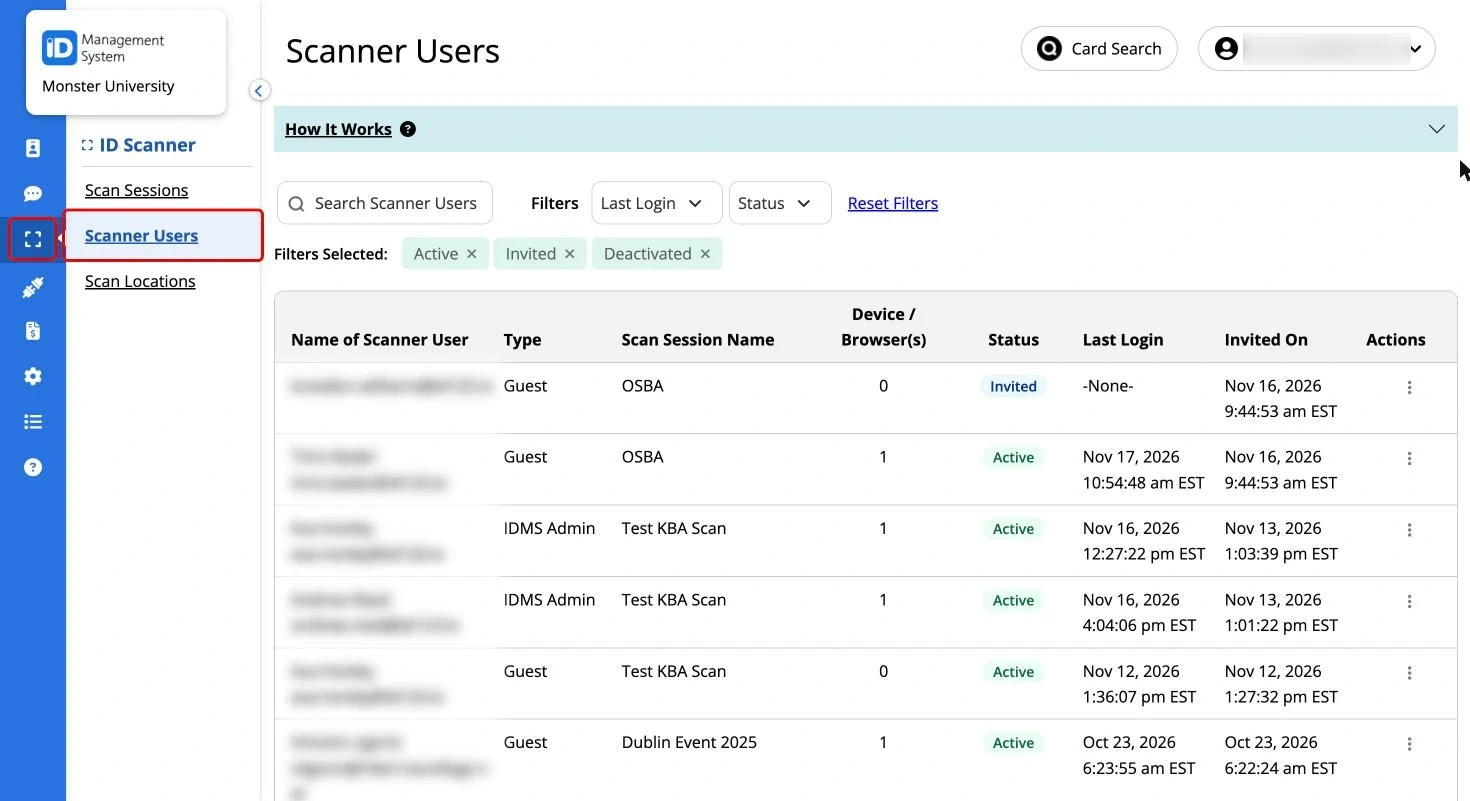
- From the left-hand navigation bar, click the ‘ID Scanner’ tab
- Select ‘Scanner Users’ in the sub-menu
The Scanner Users table shows the following information for each user:
- Name of Scanner User: The user’s name and email address. Users who have not joined yet show their email address only
- Type: Whether the user is a Guest or an IDMS Admin
- Scan Session Name: The scan session the user was invited to
- Device / Browser(s): The number of devices or browsers linked to the user
- Status: Active, Invited, or Deactivated
- Last Login: The date and time of the user’s most recent session activity
- Invited On: The date and time the user was invited
- Actions: The menu (⋮) used to manage the user
Tip: Click ‘How It Works’ at the top of the page for a quick in-app summary of the filters, columns, and actions.
Step 2: Find Scanner Users with Search and Filters
Use the search bar and filters at the top of the table to narrow down the list:
- Search by Name: Type a scanner user’s name into the ‘Search Scanner Users’ bar to find them
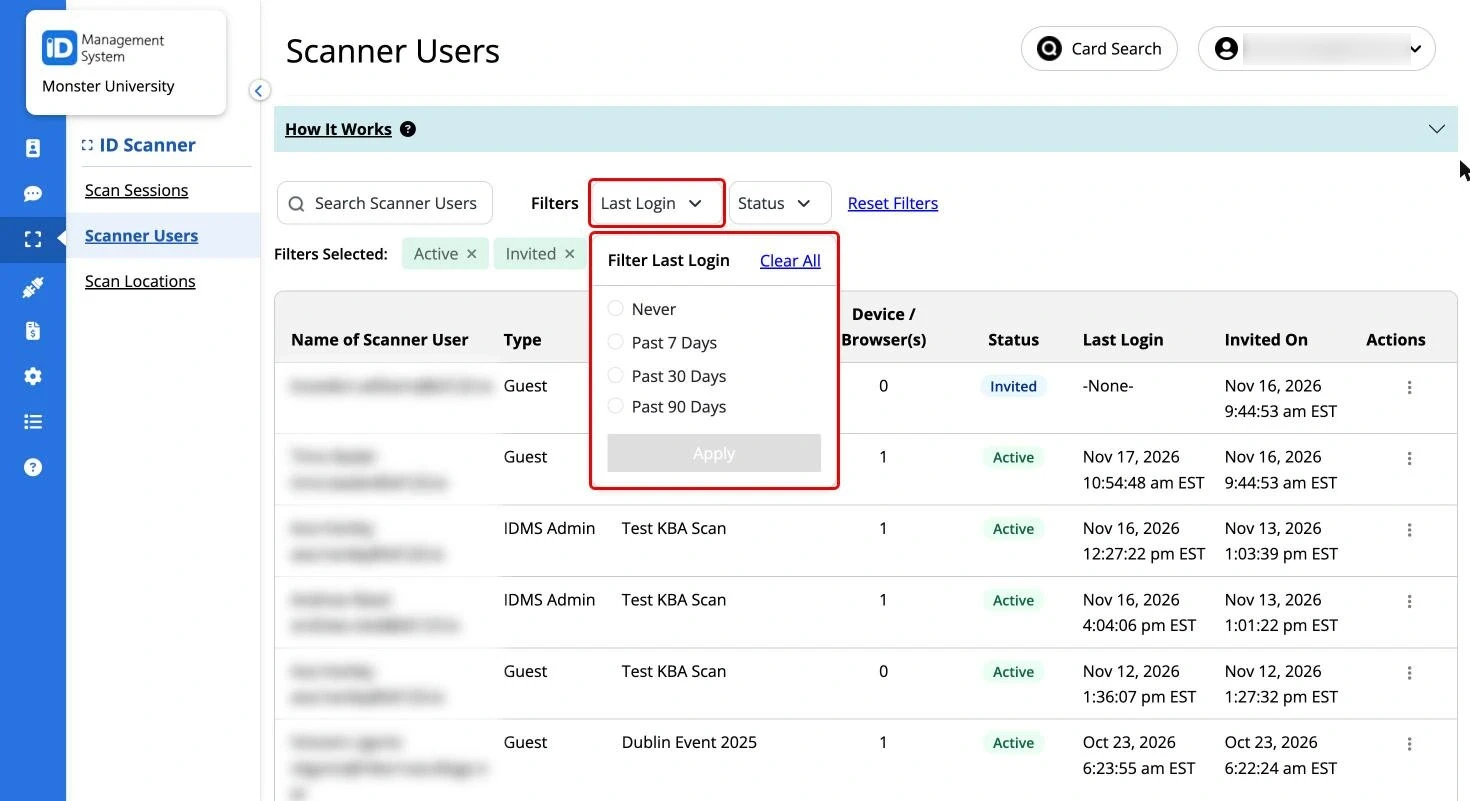
- Last Login: Click the ‘Last Login’ filter and choose ‘Never’, ‘Past 7 Days’, ‘Past 30 Days’, or ‘Past 90 Days’, then click ‘Apply’. Choose ‘Never’ to find users who were invited but haven’t logged in yet
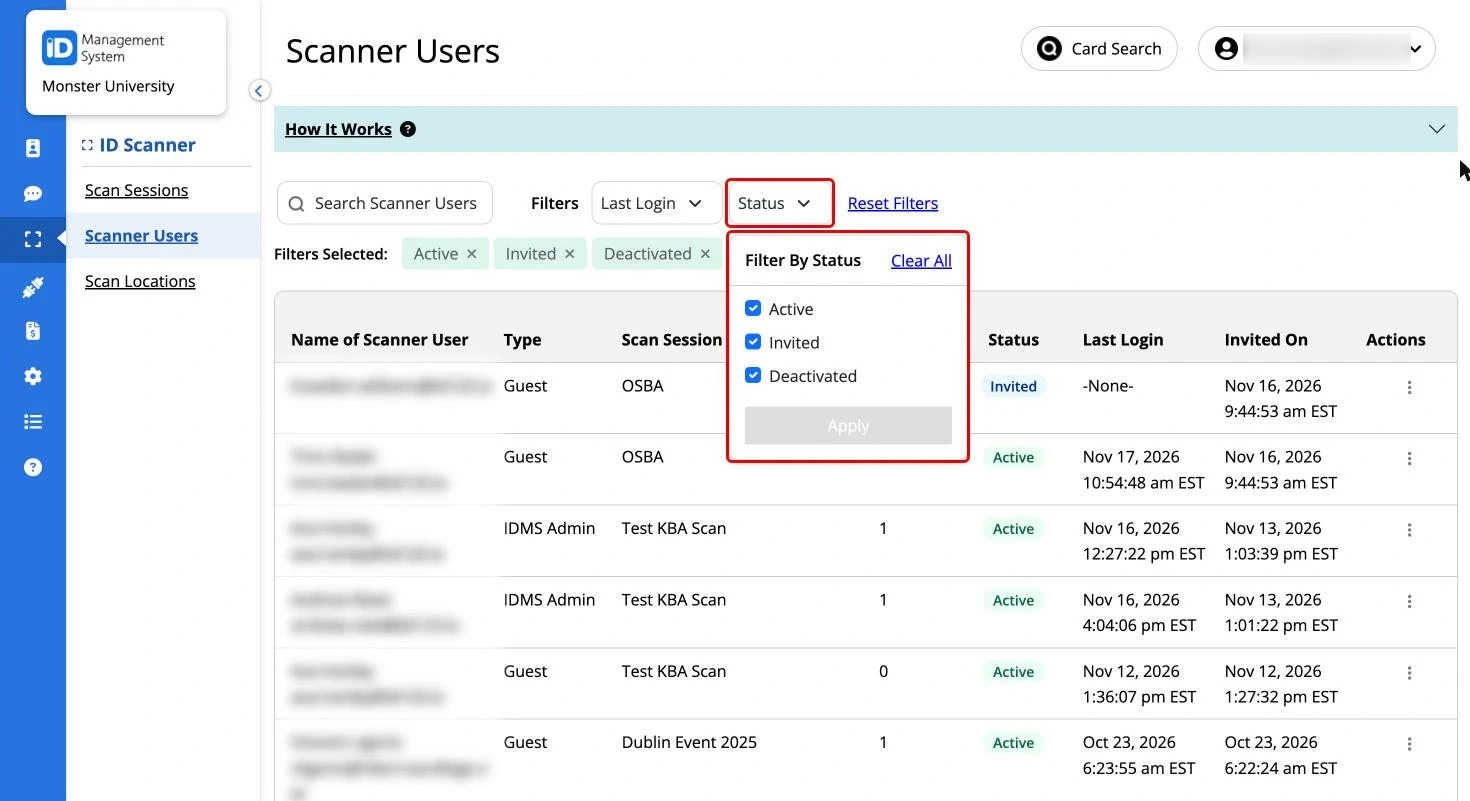
- Status: Click the ‘Status’ filter, check ‘Active’, ‘Invited’, and/or ‘Deactivated’, then click ‘Apply’
Your active filters appear next to ‘Filters Selected’. Click the ‘×’ on a filter to remove it, or click ‘Reset Filters’ to return to the default view.
Note: By default, the table shows only Active and Invited scanner users. To see deactivated users, check ‘Deactivated’ in the Status filter and click ‘Apply’.
Step 3: Resend a Scanner Invite
Resending an invite sends the scan session invitation email to the scanner user again. This is useful if the user didn’t receive the original email or can’t find it.
- Find the scanner user in the table. Users who haven’t joined yet have an ‘Invited’ status
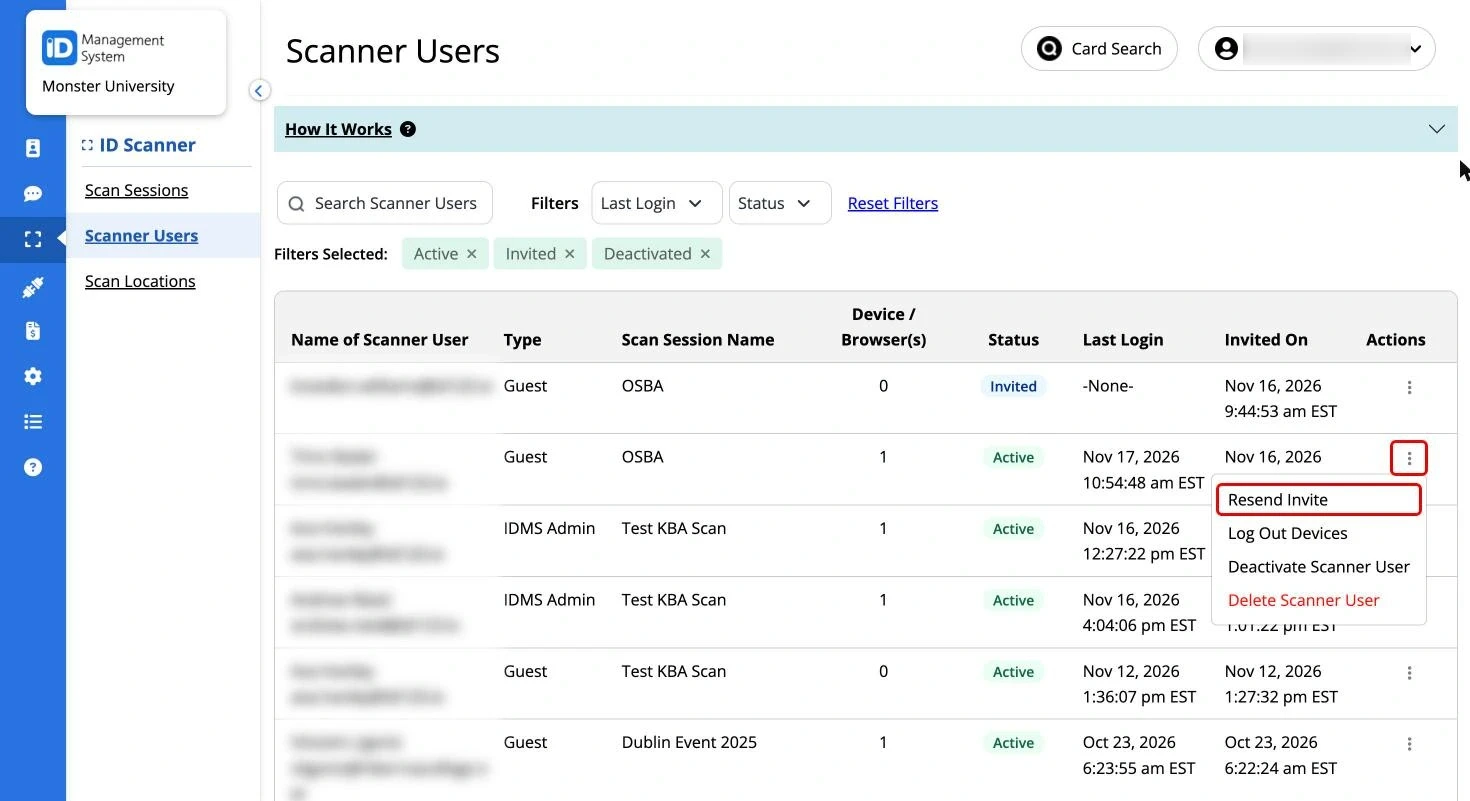
- Click the Actions menu (⋮) in the user’s row
- Select ‘Resend Invite’
‘Resend Invite’ is available for Active and Invited scanner users.
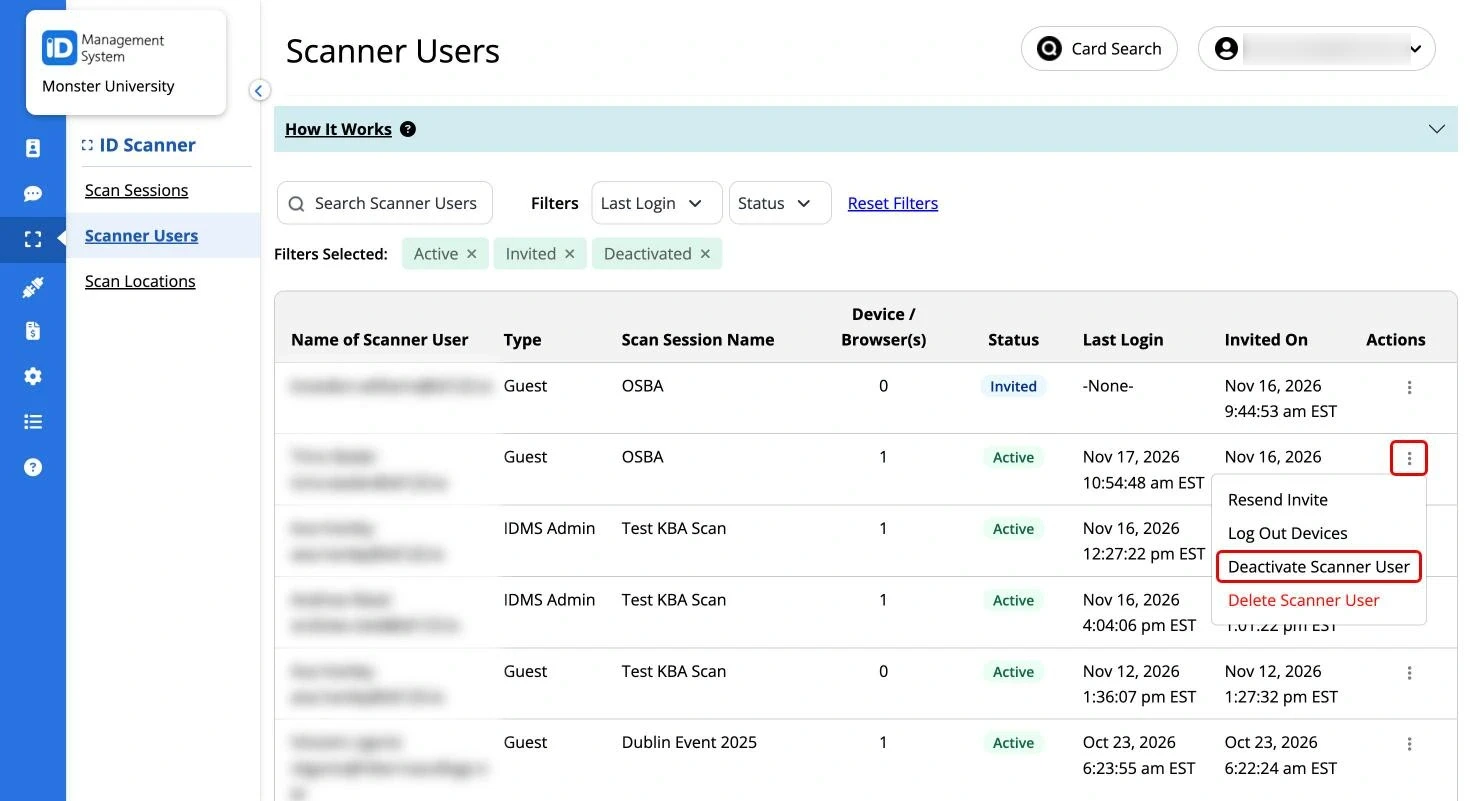
Step 4: Deactivate a Scanner User
Deactivating a scanner user temporarily removes their access to the scan session they were assigned to. Their record stays on the Scanner Users page so you can restore their access later.
- Find the Active or Invited scanner user in the table
- Click the Actions menu (⋮) in the user’s row
- Select ‘Deactivate Scanner User’
The user’s status changes to ‘Deactivated’ and they can no longer scan in that session.
Step 5: Reactivate a Scanner User
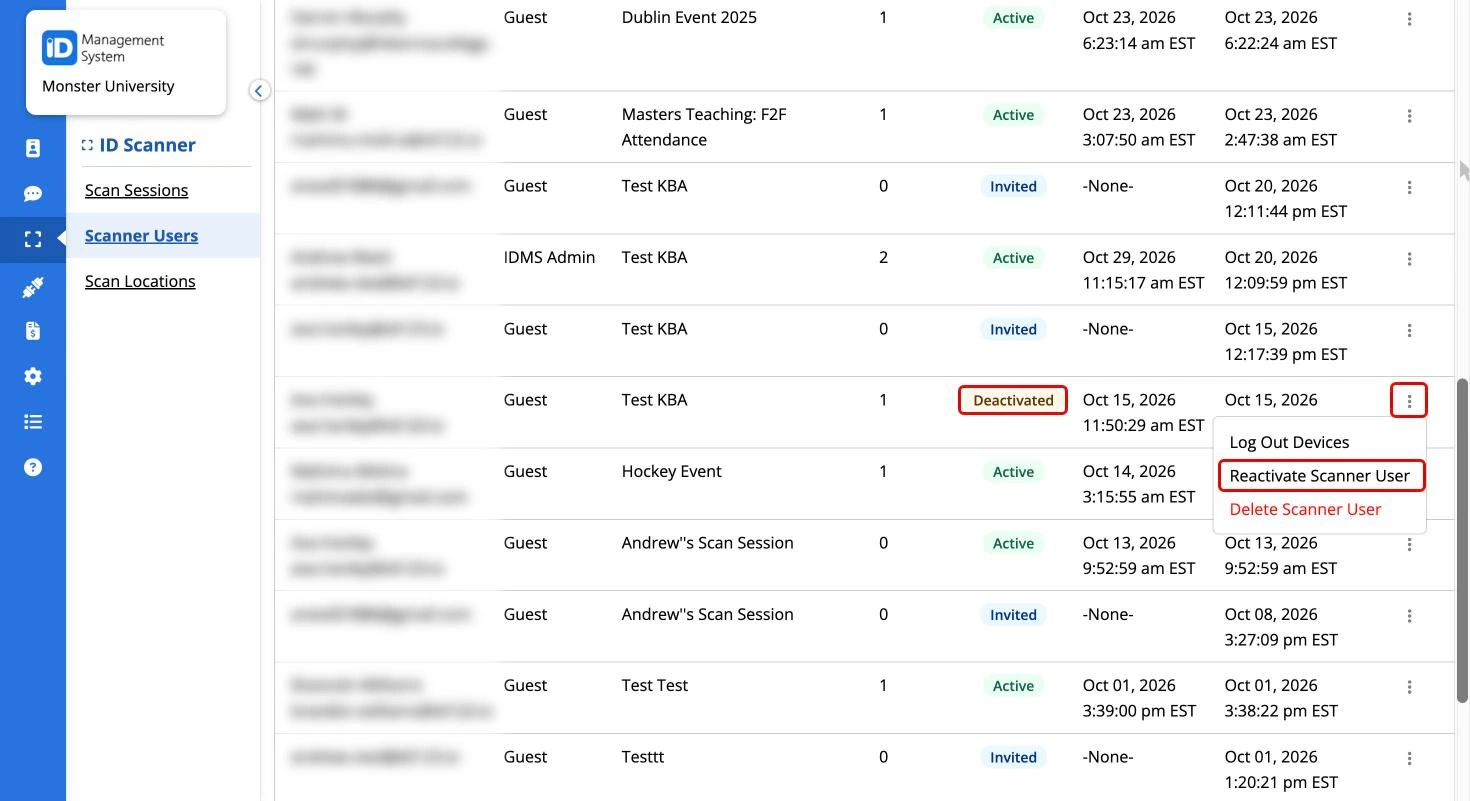
Reactivating a scanner user restores their access to the scan session they were assigned to.
- Click the ‘Status’ filter, check ‘Deactivated’, and click ‘Apply’ so deactivated users appear in the table
- Click the Actions menu (⋮) in the deactivated user’s row
- Select ‘Reactivate Scanner User’
The user’s status changes back to ‘Active’ and they can scan in the session again.
Step 6: Delete a Scanner User
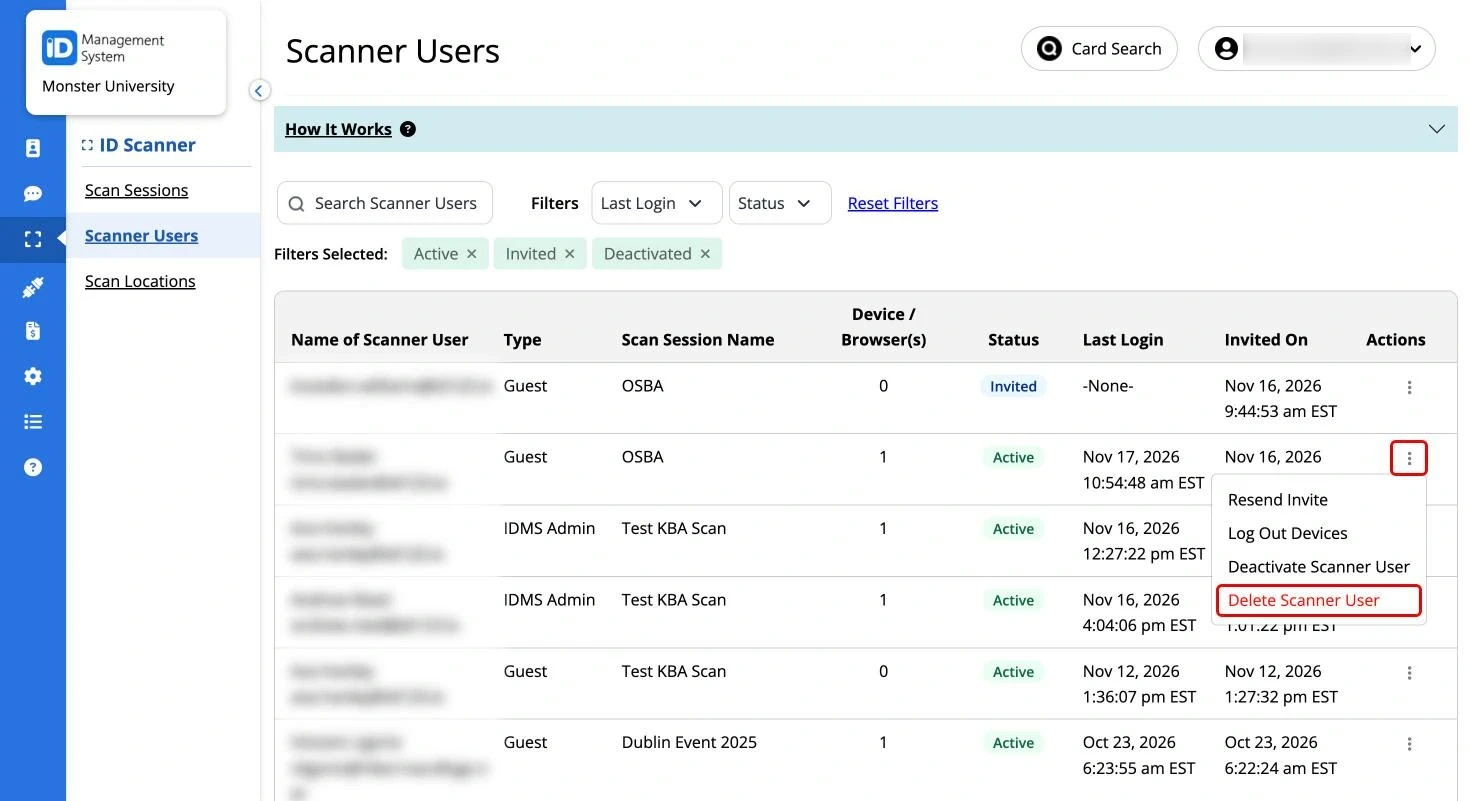
Deleting a scanner user permanently removes their access to the scan session they were assigned to. Unlike deactivation, this can’t be undone. To give the person access again, you’ll need to send them a new invitation.
- Find the scanner user in the table
- Click the Actions menu (⋮) in the user’s row
- Select ‘Delete Scanner User’
Tip: If you only need to remove access for a while, such as between events, deactivate the user instead.
You’re now ready to manage your scanner users! If you have any questions or need help, feel free to contact our support team.