
API keys let your systems connect securely to the ID123 API so you can create, update, and manage digital ID cards from your own applications. The API Keys page in the ID123 ID Management System (IDMS) lets you generate new keys, control which APIs each key can access, restrict the IP addresses that can use a key, and turn keys on or off. This article shows you how to generate an API key, limit the APIs it includes, whitelist IP addresses, and activate the key.
Step 1: Navigate to the API Keys Page
- Log in to your ID123 ID Management System (IDMS) account
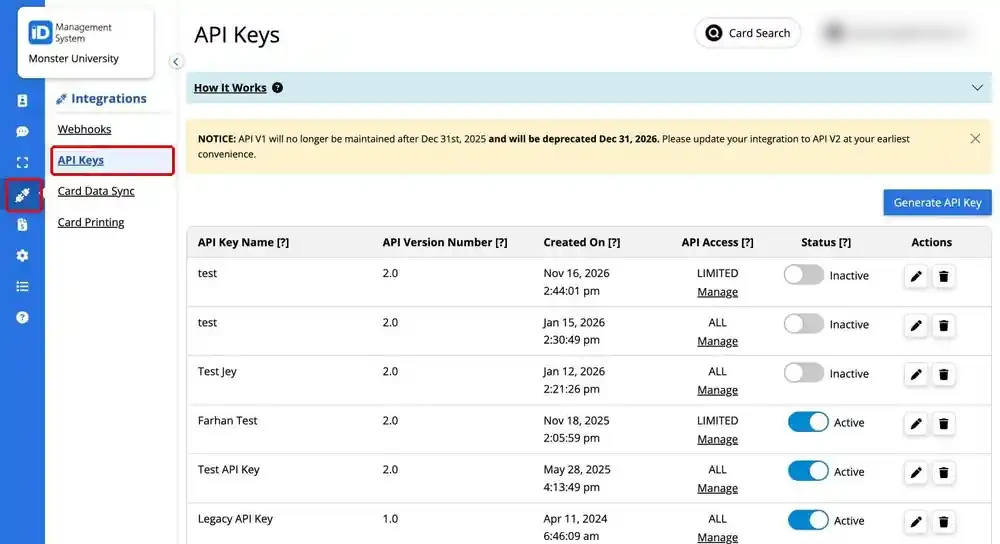
- From the left-hand navigation bar, click the ‘Integrations’ tab
- Select ‘API Keys’ in the sub-menu
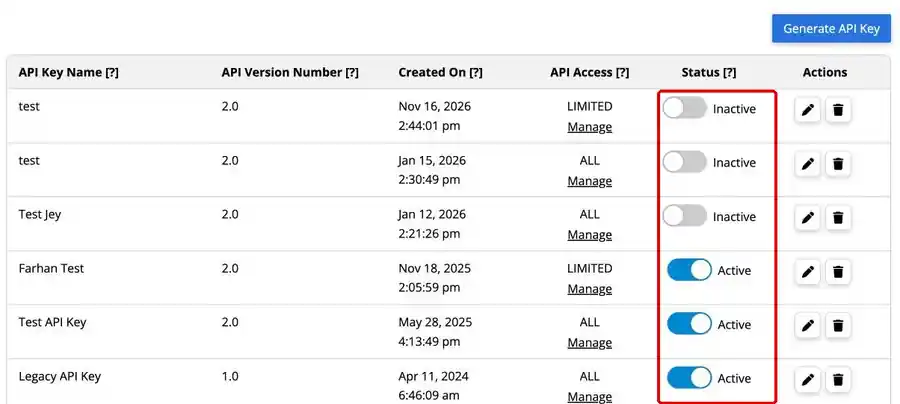
The API Keys table shows the following information for each key:
- API Key Name: The name given to the key for easy recognition
- API Version Number: The API version the key works with
- Created On: The date and time the key was created
- API Access: Whether the key can access ALL APIs or a LIMITED set
- Status: Whether the key is Active or Inactive
- Actions: The Edit and Delete options for the key
Step 2: Click ‘Generate API Key’
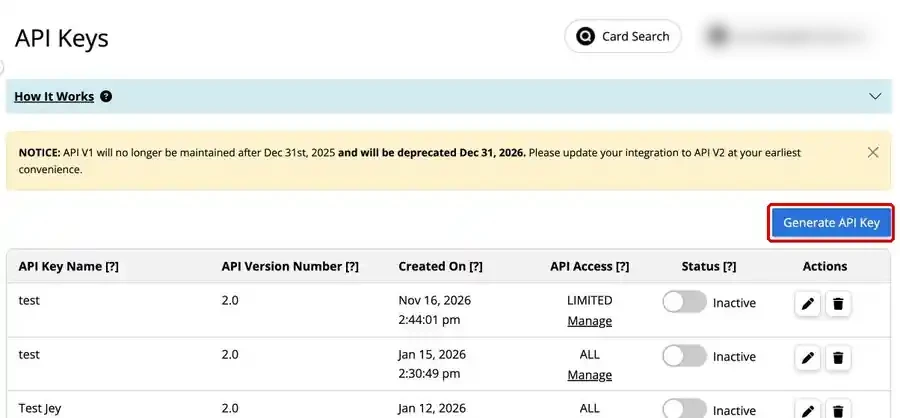
- On the API Keys page, click the ‘Generate API Key’ button in the top right corner
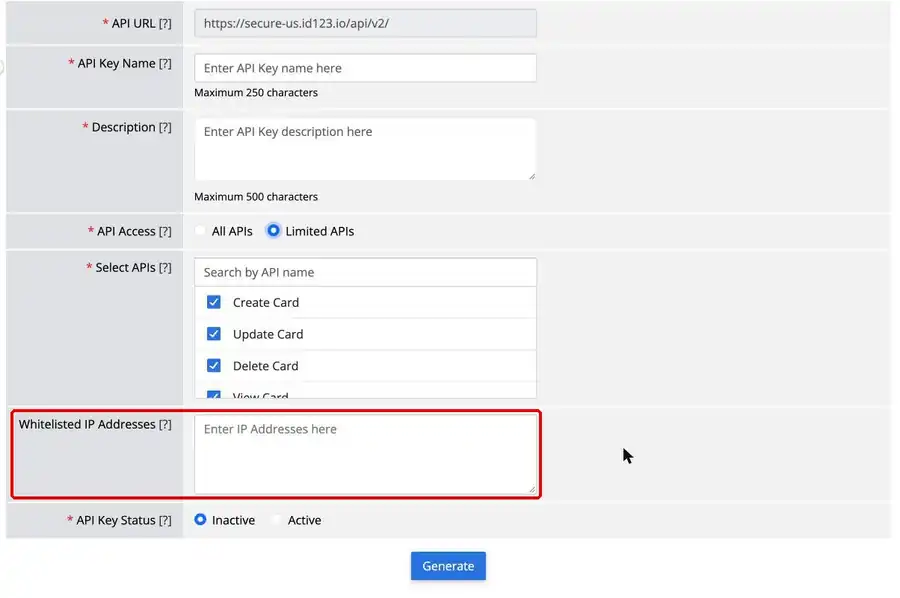
Step 3: Enter the API Key Details
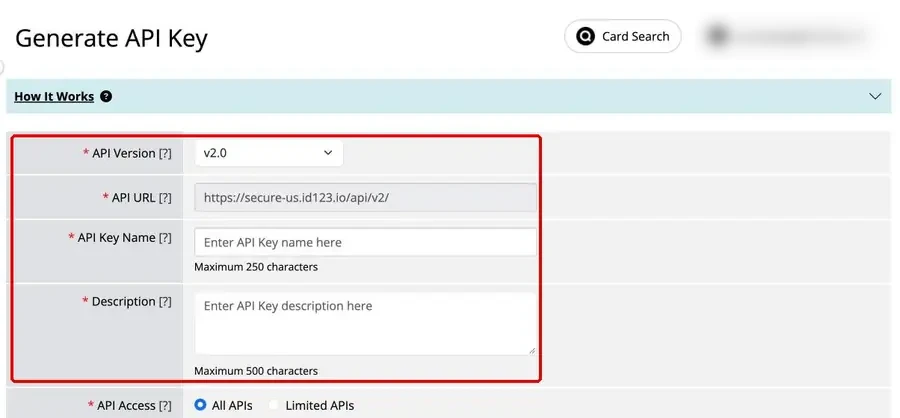
Fill in the following fields at the top of the form:
- API Version: Select the API ‘v2.0’
- API URL: The URL of the API for the version you selected. This fills in automatically
- API Key Name: Enter an internal name for the key so your team can easily recognize it in the API Keys table (maximum 250 characters)
- Description: Enter an internal description of what the key will be used for, such as the system or integration that will use it (maximum 500 characters)
Note: The API Key Name and Description are for internal reference only. They help your administrators identify the key and are not used when calling the API.
Step 4: Limit the APIs Included in the API Key
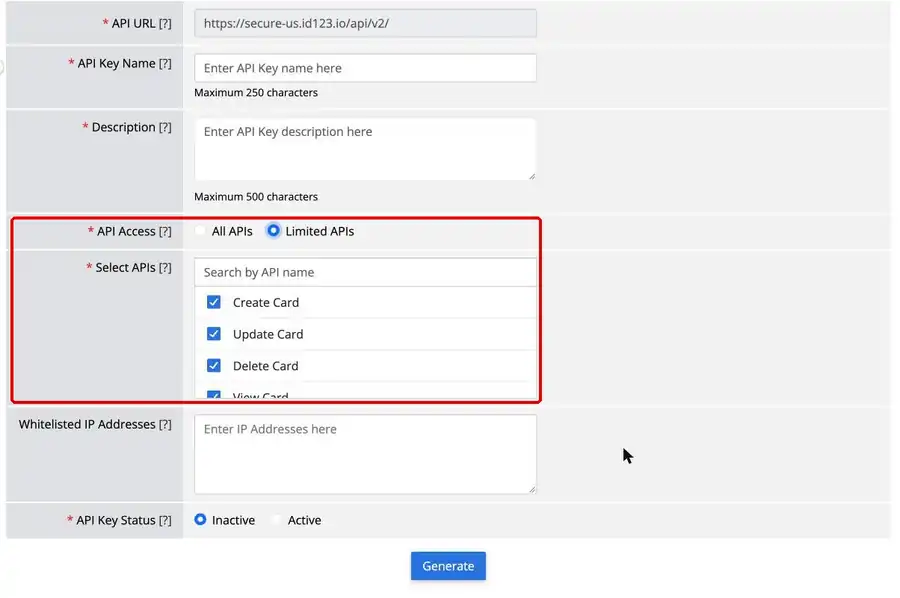
Under ‘API Access’, choose which APIs the key can use:
- All APIs: The key can access every available API
- Limited APIs: The key can access only the APIs you select
If you choose ‘Limited APIs’, check only the APIs the key needs in the ‘Select APIs’ list. You can type in the ‘Search by API name’ bar to find an API quickly. For details on what each API does, see the ID123 API documentation.
Step 5 (Optional): Whitelist IP Addresses for the API Key
This step is optional. Whitelist IP addresses if you want to restrict which servers can use this key.
- In the ‘Whitelisted IP Addresses’ field, enter the IP addresses that are allowed to use this key
- Separate multiple IP addresses with commas
If you add IP addresses, any IP address that is not on the list will not be allowed to call the API with this key.
Step 6: Activate and Generate the API Key
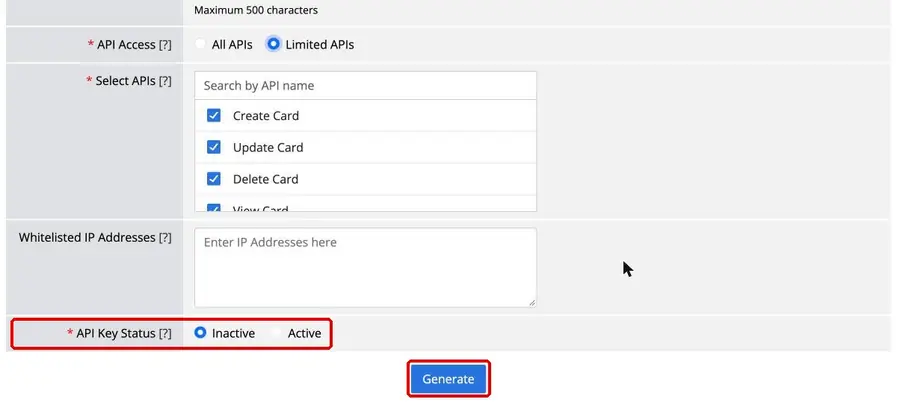
Only API keys with an ‘Active’ status can be used.
- Under ‘API Key Status’, select ‘Active’
- Click ‘Generate’ to create your API key
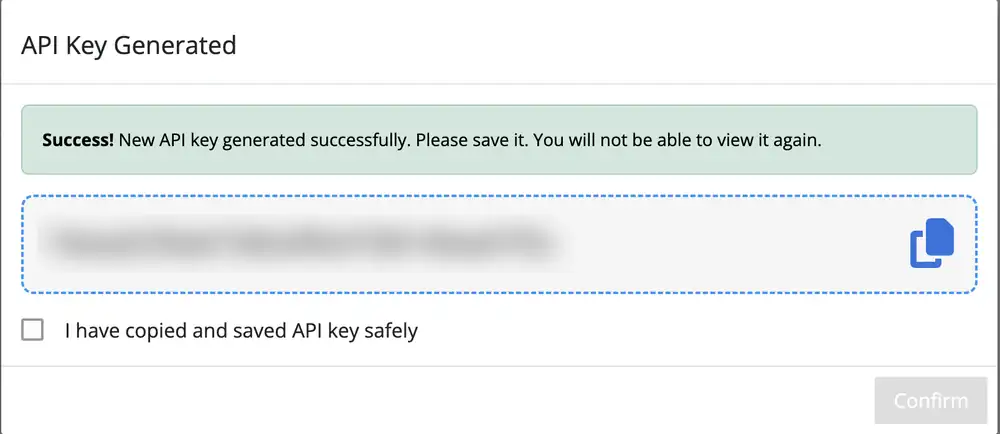
- Copy your API key and store it somewhere secure. It will not be visible again after you close the window
Note: You can also activate or deactivate an existing key at any time from the API Keys page. Click the toggle in the key’s ‘Status’ column to switch it between ‘Inactive’ and ‘Active’.
You’re now ready to connect your systems to ID123! If you have any questions or need help, feel free to contact our support team.